Transcription
Easy Setup Guide1&1 CLOUD SERVERCreating BackupsforLinux
Legal notice1&1 Internet Inc.701 Lee Road, Suite 300Chesterbrook, PA 19087USAwww.1and1.cominfo@1and1.comJanuary 2017Copyright2017 1&1 Internet Inc.All rights reserved.
Table of Contents3Table of Contents1Introduction. 52Important Information About the Easy Setup Guide . 63What Is the Backup Function of the 1&1 Cloud Server? . 74System Requirements . 85Login and First Steps . 85.1Logging In . 85.2Opening the 1&1 Cloud Panel. 95.3Creating a Server . 105.4Setting Up a Backup Account. 145.5Accessing Login Data . 155.6Connecting to 1&1 Cloud Server Linux via SSH . 165.6.1Computer with Windows Operating Systems . 165.6.2Computer with Linux Operating Systems . 175.76Installing 1&1 Backup Manager . 18Creating Backups . 216.1Creating Manual Backups . 216.1.1Backing Up Files and Folders . 216.1.2Backing Up MySQL Database Servers . 226.2Creating Planned, Automatic Backups with the Scheduler . 236.2.1Backing Up Files and Folders Automatically . 236.2.2Backing Up MySQL Database Servers Automatically . 246.3Creating Planned, Automatic Backups with Cron . 256.3.1Installing Cron in CentOS 7. 256.3.2Installing Cron in CentOS 6. 256.3.3Installing Cron in Ubuntu / Debian . 266.3.4Creating a Complete, Automatic Backup . 266.3.5Backing Up Files and Folders Automatically . 276.3.6Backing Up MySQL Database Servers Automatically . 286.3.7Listing and Editing Planned, Automatic Backups with Cron . 296.3.8Deleting Planned, Automatic Backups with Cron . 306.4Changing the Backup Selection . 316.5Calling Reports. 321&1 Cloud Server Backup Easy Setup Guide
Table of Contents74Recovering Data . 337.1Recovering Files and Folders . 337.2Recovering MySQL Database Servers . 347.3Recovering MySQL Database Servers in a specific location . 347.4Selecting Creation Time and Restoring Backup . 357.5Saving a Backup on a NAS Server . 368Configuring Standard Options . 368.19Configuring Filters. 368.1.1Adding Filters . 368.1.2Deleting Filters. 37Open the 1&1 Backup Manager Help . 3710 1&1 Service and Support . 3811 Glossary . 391&1 Cloud Server Backup Easy Setup Guide
Introduction51 IntroductionThe backup function of the 1&1 Cloud Server offers all important functions to easily manage the backups ofyour servers.This user manual helps you to get started and offers a step-by-step introduction to all important features.This user manual explains how to: Create a server Log in to the server Set up a backup account Install the 1&1 Backup Manager Create backups Recover your data Configure the standard options of the 1&1 Backup Manager1&1 Cloud Server Backup Easy Setup Guide
Important Information About the Easy Setup Guide2 Important Information About the Easy Setup GuideThe following formattings and icons are used to help you find your way around this user manual.PlaceholderReplace the PLACEHOLDER with the actual value. Reference to a specific chapter.Attention! A warning that you should read very carefully.Explanation. In-depth knowledge on a certain topic or term.Tip, advice. Tips and advice on a certain topic.1&1 Cloud Server Backup Easy Setup Guide6
What Is the Backup Function of the 1&1 Cloud Server?73 What Is the Backup Function of the 1&1Cloud Server?The backup function of the 1&1 Cloud Server offers all important functions to easily manage the backups ofyour servers by means of separate backup accounts. The number of systems that can be backed up is unlimited. In addition, there is no storage limit.To use the backup function of the 1&1 Cloud Server, you must set up a backup account in the 1&1 CloudPanel. The login data will be shown in the details of the backup account. Afterwards, you need to install the1&1 Backup Manager on your server. Enter the login data of the backup account during installation. Tomanage additional backups, you need to set up a separate backup account for each server in your 1&1Cloud Panel.1&1 Backup Manager is a software to easily and comfortably manage all your backups. You can start thebackups manually or automatically, and have the possibility to make individual configurations according toyour needs.The following backups are supported:1&1 Backup Manager for Windows Files and folders System states MSSQL databases (MSSQL 2005, 2008, 2012) MySQL databases (MySQL 5.x)1&1 Backup Manager for Linux Files and folders MySQL databases (MySQL 5.x)The software especially distinguishes itself by its reporting functions. All backup activities are listed in the1&1 Backup Manager in chronological order and additionally presented in graphic form. You can also receive information on all backup activities by e-mail.Your backups are optimally protected. Your data will be transferred to the server in encrypted form andstored in the 1&1 high-performance data center. By means of the compression method used during transfer,the compression rate can be up to 90% depending on the file type.1&1 Backup Manager uses AES-256 as the standard encryption method. In addition, the following encryption methods are supported: AES-128 Blowfish-448Decrypting your data is only possible with an encryption password that is only known byyou.1&1 Cloud Server Backup Easy Setup Guide
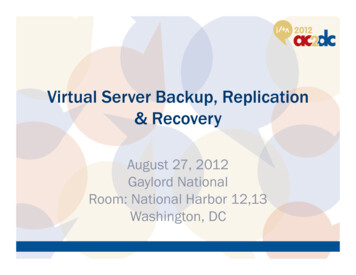
System Requirements4 System Requirements1&1 Backup Manager for Linux supports the following operating systems: Cent OS 6 Cent OS 7 Ubuntu 12.04 LTS Ubuntu 14.04 LTS Debian 6 Debian 75 Login and First StepsContent of this chapter: Logging InOpening the 1&1 Cloud PanelCreating a ServerSetting Up a Backup AccountAccessing Login DataConnecting to 1&1 Cloud Server Linux via SSHInstalling 1&1 Backup Manager5.1 Logging InLog in to your 1&1 Control Panel as follows:1.Enter www.1and1.com/login in the address bar of your Internet browser.2.Enter your customer ID and your password.Figure: Logging in to 1&1 Control Panel3.Click Login.If you have ordered several 1&1 packages, you need to select your 1&1 Cloud Server contract.1&1 Cloud Server Backup Easy Setup Guide8
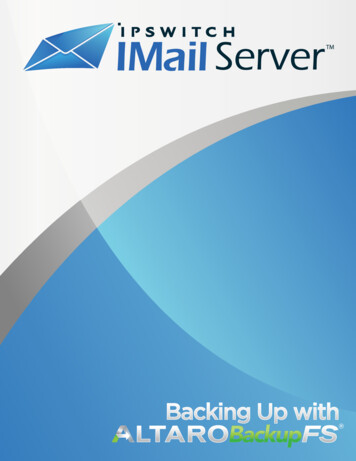
Login and First Steps5.2 Opening the 1&1 Cloud PanelTo open the 1&1 Cloud Panel, click Cloud Panel in the 1&1 Server section.Figure: 1&1 Server sectionThe 1&1 Cloud Panel will appear.Figure: 1&1 Cloud Panel1&1 Cloud Server Backup Easy Setup Guide9
Login and First Steps105.3 Creating a ServerThis chapter explains how to create a server in your 1&1 Cloud Panel. If you have already created a server inyour 1&1 Cloud Panel, you may skip this step.Prerequisites:You have logged in to your 1&1 Control Panel.You are in the section 1&1 Server 1&1 Cloud Panel.1.In the left menu, click Infrastructure Servers.Figure: Section Infrastructure Servers2.Click Create.Figure: Creating a server3.Enter a server name.1&1 Cloud Server Backup Easy Setup Guide
Login and First Steps4.11Select the desired configuration for the server: Recommended configurations: Select the desired package.Figure: Recommended configurations Customized configuration: Select the package and configure then the server using the slider or thebuttons.Figure: Individual server configurationOnce the server is created, the size of the hard disk can no longer be reduced.1&1 Cloud Server Backup Easy Setup Guide
Login and First Steps5.12In the Images section, select the server operating system.ImageDescription1&1 ImagesThese images that have been validated by 1&1contain the full operating system.ApplicationsThese images contain a specific, preinstalledsoftware. You can use this software as soon asthe server has been created.ISOThese images correspond to the original installation DVDs of Windows and Linux. As soon asthe server is ready for operation, you have tostart the KVM console and install the operatingsystem on the server. If the operating systemhas more than one installation DVD, you haveto start with the first DVD. You can change theDVDs under the DVD Drive menu item.ISO images include no license key. Depending on the selected operatingsystem, a license key can be necessary. In this case, you have to provide thekey.Check whether the software you have installed is licensed per-user or percore before specifying the distribution of processors and cores.6.In the Advanced Options section, click Show.7.Enter the desired password in the Password field.8.Optional: Select the desired distribution of processors and cores.1&1 Cloud Server Backup Easy Setup Guide
Login and First Steps9.13In the Firewall Policy list, select a firewall policy.Figure: Selecting a firewall policyA firewall policy that enables you to access the server, web server and Parallels Plesk isselected by default.10. In the Load Balancers list, specify whether a load balancer has to be used.11. In the Public IP list, specify whether an existing or a new public IP should be assigned to the server.12. In the Monitoring Policy list, select a monitoring policy.13. Click Create.The server will be created.1&1 Cloud Server Backup Easy Setup Guide
Login and First Steps5.4 Setting Up a Backup AccountTo install 1&1 Backup Manager, you need the login data of a backup account. With a backup account youcan manage the backups of the respective server.Managing backups of multiple serversTo manage your backups, you need to set up a separate backup account for each server.To create a backup account for managing the backups of your server, proceed as follows:Prerequisites:You have logged in to your 1&1 Control Panel.You are in the section 1&1 Server 1&1 Cloud Panel.1.Click Security Backup Accounts.Figure: Backup Accounts section2.Click Create.Figure: Creating a backup account1&1 Cloud Server Backup Easy Setup Guide14
Login and First Steps3.Enter the desired name.Figure: Entering the account name of the backup account4.Click Create.The backup account will be set up.5.5 Accessing Login DataTo access the login data of a backup account, proceed as follows:Prerequisites:You are in the 1&1 Cloud Panel, section Security Backup Accounts.1.Activate the desired backup account.2.Memorize the name of the backup account.The name of the backup account must be entered as user name when installing the 1&1Backup Manager.3.In the Password section, click Show Password.Figure: Showing the password of the backup account4.Memorize the password.1&1 Cloud Server Backup Easy Setup Guide15
Login and First Steps165.6 Connecting to 1&1 Cloud Server Linux via SSHUsing Secure Shell (SSH), you can establish an encrypted network connection to your server.To establish the connection, you need the following data:User namerootPasswordPassword for the user. The password has been displayed during thecreation of the server.Host name / TargetIP address of your server. The IP address of your server will be displayed in the 1&1 Cloud Panel, in the section Infrastructure Servers.Port22Note: The port must usually not be specified5.6.1 Computer with Windows Operating SystemsSSH is not installed by default on computers with Windows operating system.To establish an encrypted network connection using Secure Shell, you need an additional program such asPuTTY. PuTTY is a free software. You can download it on the following page:http://www.chiark.greenend.org.uk/ sgtatham/putty/To establish with PuTTY a SSH connection to your server, proceed as follows:1.Start PuTTY.2.Enter your server's IP address in the Hostname (or IP address) field.Figure: Entering the server's IP address3.Activate the SSH connection type in the Connection type section.1&1 Cloud Server Backup Easy Setup Guide
Login and First Steps4.17Click Open.Figure: Clicking OpenUpon the first login, a warning message appears. Because the SSH server has previously been unknown, no key is available to PuTTY.5.To allow the connection and to store the key for future sessions, click Yes.6.Enter the user name.7.Enter the password.You will be connected to the server.5.6.2 Computer with Linux Operating Systems1.Open a terminal (e.g. xterm)2.Enter the following command in the terminal:ssh root@ SERVER'S IP ADDRESS Upon the first login, the following message appears: Are you sure you want to continue connecting?3.Optional: Enter the command yes.4.Enter your password.You will be connected to the server.1&1 Cloud Server Backup Easy Setup Guide
Login and First Steps185.7 Installing 1&1 Backup ManagerThis chapter explains how to install 1&1 Backup Manager on your server.Firewall settingsThe 1&1 Backup Manager uses TCP port 443 for local installations and for communicating withthe backup server. Please make sure prior to installing 1&1 Backup Manager that TCP port 443 inyour firewall is open for incoming and outgoing requests.Prerequisites:You are in the 1&1 Cloud Panel, section Infrastructure Servers.You have already created a backup account to manage the backups of your server.You have memorised the name and the password for the backup account.The desired server is switched on.1.Select the desired server.2.Click DVD Drive.Figure: Clicking DVD Drive3.In the Applications tab, select the 1&1 Backup Manager.1&1 Cloud Server Backup Easy Setup Guide
Login and First Steps4.19Click Load DVD.Figure: Loading DVD5.Connect via SSH to the desired server ( see 5.6 Connecting to 1&1 Cloud Server Linux via SSH). Login with the following data:Localhost login: rootPassword: Your selected passwordTo install the Backup Manager, you must integrate the DVD as a drive on the server. Thisprocess will be described in the next steps.6.To create the directory/media/cdrom, enter the following command:mkdir /media/cdrom7.To mount the DVD, enter the following command:mount -t auto /dev/cdrom /media/cdromThe DVD drive will be mounted.8.To open the directory/media/cdrom, enter the following command:cd /media/cdrom1&1 Cloud Server Backup Easy Setup Guide
Login and First Steps9.20To view the content of the DVD, enter the following command:lsThe content of the DVD will be displayed.10. Optional: To identify the operating system architecture of your server, enter the following command:uname -a11. To install the 1&1 Backup Manager, enter the following command:Command for installing the 32-bit versionsh unCommand for installing the 64-bit versionsh ./1and1-backup-manager-PROGRAMVERSION-linux-x86 64.run12. Enter the user name of the respective backup account( see 5.5 Accessing Login Data).13. Enter the password of the respective backup account( see 5.5 Accessing Login Data).14. Enter the desired encryption method.15. Enter an encryption password.Backups can only be restored with the encryption password!All backups will be encrypted with this password. Without this encryption password, yourbackups cannot be restored. Therefore, keep the encryption password in a safe place!16. If you wish to use a proxy server, enter the value true when the value Use proxy server: appears.If you do not wish to use a proxy server, enter the value false.1&1 Backup Manager is installed.1&1 Cloud Server Backup Easy Setup Guide
Creating Backups216 Creating BackupsContent of this chapter: Creating Manual BackupsCreating Planned, Automatic Backups with the SchedulerCreating Planned, Automatic Backups with CronChanging the Backup SelectionCalling ReportsThe following placeholders are used when specifying Linux cation of the priority of the backup processDATABASEPASSWORDPassword of the MySQL database serverDATABASEPORTPort of the MySQL database serverDATABASESERVERNAMEFreely selectable name for the database backupDATABASEUSERUser name of the MySQL database serverMYSCRIPTFile name of the backup scriptPATHPath to a folder or a fileTIMETime when the backup is createdTEMPORARYPATHTemporary directory6.1 Creating Manual BackupsThis chapter will explain how to manually back up files, folders, and MySQL database servers.6.1.1 Backing Up Files and FoldersThis chapter will explain how to manually back up individual files and folders with 1&1 Backup Manager.1.Go to the directory of 1&1 Backup Manager:cd /opt/1UND1US/bin2.With the following command, specify the directory path to the folder that is to be backed up./
1&1 Cloud Server Backup Easy Setup Guide 5.3 Creating a Server This chapter explains how to create a server in your 1&1 Cloud Panel. If you have already created a server in your 1&am