Transcription
Backing up IMail Server using Altaro Backup FSPurposeThe purpose of this document is to provide guidelines and procedures for backing up IMail serversystem data and user data in case of a hardware or system failure. This will cover steps on preparing theIMail system settings for backup, installing and configuring Altaro Backup FS to back up IMail files to anexternal source.System RequirementsThese are the minimum requirements to run IMail server and Altaro Backup FS: Minimum Software Requirementso Microsoft Windows 2003 or 2008 Servero Microsoft .NET Framework 4o Microsoft Internet Information Services (IIS) 6.0 or latero Microsoft Data Access Component (MDAC) 2.8 SP1 or laterMinimum Hardware Requirementso TCP/IP enabled NIC with a static IP addresso A broadband or dial-up connection to the Interneto An Intel Pentium 4 1 GHz or higher or an equivalent processoro 512 MB RAM minimumAltaro Backup FS requires a minimum of 128 MB of free hard drive space on the IMail server machine toinstall.You will need an external storage device to store your backup files on. You may utilize another fileserver or some type Network Attached Storage (NAS) drive. The size of the external storage will dependon how many users and/or mail traffic your IMail server processes in a day. The minimum would be 500GB and would need to be adjusted up from there to fit individual needs. An additional consideration ifplanning on using a NAS drive is to have a second network interface card (NIC) so not to interfere withmail traffic.Preparing IMail for backupNow is a good time to do some house cleaning. You might want to remove no longer used accounts,and their accompanied user files. Clean up the spool of old files and no longer needed log files. Theeasiest way to clean the spool and logs is to use the isplcln.exe utility.The first step is to configure an automatic back up of the IMail system settings. This will involve settingup a scheduled task to launch the IMail Configuration Export utility (IMailConfigExport.exe) to save theconfigurations as a file to be backed up. If your version of IMail does not contain the configurationexport utility, you can down load it from http://www.imailserver.com/support/utilities/ and save it in
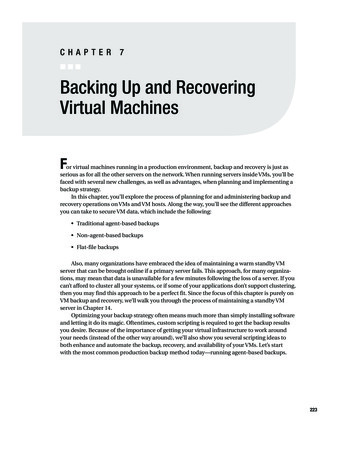
the IMail install directory. In Windows 2003, you will create this in Scheduled Tasks, in Windows 2008;you will use the Task Scheduler as shown below.Click Start: Administrative Tools: Task Scheduler. When the Task Scheduler window opens, right mouseclick on Task Scheduler Library and select New Folder.Name the new folder IMail and click ok. Select the IMail folder and then click Create Basic TaskEnter a Name and description then click next.A minimum export sequence would be once a week, unless you wish to do it daily, then click next.Then select a day and time to launch the configuration export, then next.
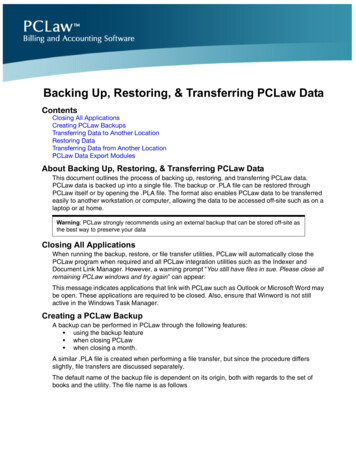
Select the Action of “Start a program” and click next. Click browse, then browse to the directory whereIMail is installed to and select the IMailConfigExport.exe. In the example, the IMail install directory isC:\IMail.There is an option for adding arguments. The ImailConfigExport.exe has one argument that can beadded, which is the path where you want the export file to be created if it will be different from theIMail install directory. This path must exist because the utility will not create this directory. Click next toproceed to the next page.
Review the entries, check “Open the Properties dialog for this task when I click Finish”, then click finish.On the properties page, select “Run whether user is logged in or not” and click Ok.Type in the user’s password and click ok in the password dialog box that opens up.Test your set up by clicking run, then open up windows explorer and browse to the IMail install directoryto see that the ImailConfigExport.reg file was created.
Installing Altaro Backup FSBefore continuing ensure your external hard drive or whatever device you will use for your externalstorage is set up and running.Install the program1. Launch the downloaded file: altarobackupfssetup.exe.2.Next you will be presented with the welcome screen of the installer. Simply click [Next].
3. You will now see the End User License Agreement into which you will enter with Altaro Ltd.Please read through the agreement and check the “I Accept.” checkbox. Once you have agreedto the terms and conditions in the EULA you can press [NEXT].4. At this point you will be prompted for the Destination Folder of the installation. In most normalcases you should leave the installation path as default. Backup FS will be installed within yourprogram files folder.
5. Next you will see a screen asking you for confirmation to install. Please press [Install].6. At this point the installation will begin. You will be presented with a progress bar updating youwith the progress of the installation. Installation should only take a few seconds. Please notethat if you have UAC enabled on the Server then a UAC prompt may be displayed. Please clickallow for the installation to complete. UAC is required for the following reasons:a. Files are being copied to the Program Files Folder.b. Entries are being made in the registry.c. A Windows Service is being installed.
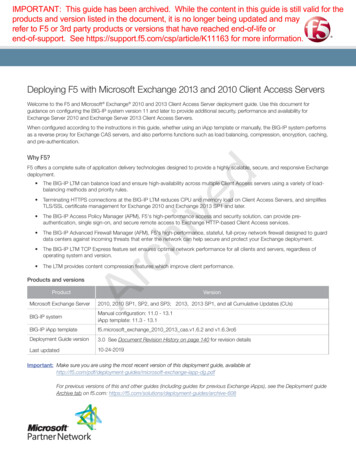
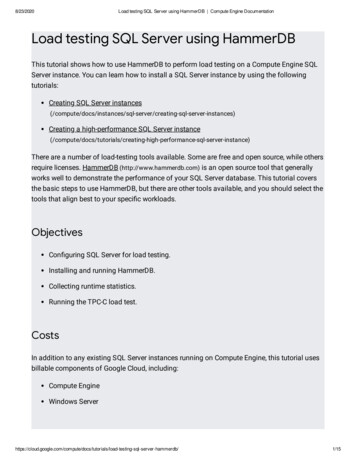
7. Once the installation is done you will be presented with the successful installationscreen. A checkbox is also present to and checked by default indicating whether theBackup FS Setup Wizard should be launched automatically.8. After the installation process completes, Altaro Backup FS will launch automatically ifyou click the “Launch” checkbox in the last screen of the Installation Wizard. Otherwiseclick “Start” and launch Altaro Backup FS from the Program Menu shortcut.9. Altaro Backup FS will then launch the Setup Wizard to help you through theconfiguration of your backup plan. The Wizard may take a few seconds to launch, duringwhich you will see this window:This will be a fresh backup plan so select the first option, “Backup a File Server for the firsttime” as shown above.
10. The next screen in the wizard shows you a summary of the three steps that need to beperformed. These three steps involve choosing the data to back up, choosing a backupdestination and finally reviewing and firing up the backup plan:Choosing what data you want to back up.1. The next screen of the wizard shows you a split view. To the left is a tree view showing you thefolder hierarchy on the server. To the right is a panel showing the summary of your selections,which will initially be blank:2. The tree view to the left is a standard “My Computer” view from which you can expand thedifferent drives and drill down to the folders you want to back up and select the correspondingcheck boxes.
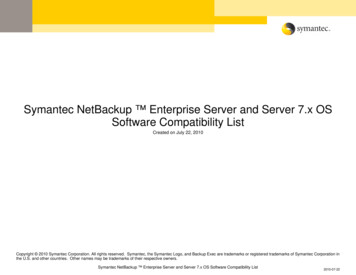
3. Navigate to the folder where the IMail Server is installed, check ‘IMail’ folder and uncheck thespool folder as in the screenshot below.4. Click on the Custom Exclude link.a. In the Exclude File(s) box add the path to your Users folderb. Check the “Also apply to subfolders”c. In the File Name filter box type *. bxd. Then click Excludee. Repeat to exclude *.l and *.nbx
5. Click on the “Next” button at the bottom right when you are done.Selecting a backup destination1. When you click next, Altaro Backup FS will begin scanning your server for all connected drives.This may take a few seconds until all drives are checked. If you have mapped network drives,this step may take a while.2. Once the detection process is done, a list of all your drives categorized by type will be shown inthe wizard window:
In this example, the E: drive is a NAS drive.3. Choose the drive where you want to store the backups and press “Next”.Reviewing your selections and starting the backup plan1. The next screen in the wizard shows a summary of the selections you made in Step 1 and Step 2.Press “Done”.2. The following window will then appear while your backup plan is being set up. That should onlytake a few seconds.3. Once you see the message “Your Backup Plan has been created” as shown above, you may clickthe “Start” button, which will immediately start your very first backup.
User InterfacesThe Quick Launch window, which is a simple window containing shortcuts to the most basic functions inAltaro Backup FS, will appear above the Windows task bar. For details about how to use the QuickLaunch window, please see the section entitled "The Quick Launch" in the manual. However you canclose the Quick Launch window by clicking the red “X” at the top right and your backup will continueprogressing in the background. You may bring up the Quick Launch window at any time by simplyclicking once on the “Altaro Backup FS” icon in the system tray.At this point you should see the progress of the backup at the top of the Quick Launch window:It is important to let the backup finish before changing any more settings or shutting down or rebootingthe server.Once the backup is successful, you will see the following status at the top of the Quick Launch window:Now open the Manager Window. This can be achieved by right-clicking on the Backup FS systemtray icon and choosing [Manage.]. Below is a screenshot of the Manager immediately after thefirst backup.
To view (or restore) your backups click on the ‘Go BackInTime and Restore’ option – as in the red arrowin the screenshot above. Once that is done the Altaro Backup FS BackInTime browser will open up.The BackInTime browser will list the main folders that are being backed up. In the screenshot below youcan see the IMail ‘Users’ folder that is currently being backed up.Double click on the ‘Users’ folder to see the list of mailboxes being backed up.Use the BackInTime browser in a similar fashion to Windows Explorer.
Click a folder to view the files and sub folders that are being backed up. Find the file / folder that youwould like to restore.Using the Timeline on the right of the BackInTime browser find the version required by expanding a dategroup and then selecting the actual time. Find the version that you would like to restore and click it.To restore the file / folder click the Restore File or Restore Folder button on the left of the screen or byright-clicking on a thumbnail and choosing ‘Restore ’. You will be presented with a Restore dialog whichwill allow you to choose where to restore to.Please note, more configuration options can be found in the Altaro Backup FS manual.
9. Altaro Backup FS will then launch the Setup Wizard to help you through the configuration of your backup plan. The Wizard may take a few seconds to launch, during which you will see this window: This will be a fresh backup plan so select the first option, “Backup