Transcription
WebEx One-ClickUser Guide072310
Copyright 1997–2010 Cisco and/or its affiliates. All rights reserved. WEBEX, CISCO, Cisco WebEx, the CISCO logo, and the Cisco WebExlogo are trademarks or registered trademarks of Cisco and/or its affiliated entities in the United States and other countries. Third-partytrademarks are the property of their respective owners.U.S. Government End User Purchasers. The Documentation and related Services qualify as "commercial items," as that term isdefined at Federal Acquisition Regulation ("FAR") (48 C.F.R.) 2.101. Consistent with FAR 12.212 and DoD FAR Supp. 227.7202-1through 227.7202-4, and notwithstanding any other FAR or other contractual clause to the contrary in any agreement into which theAgreement may be incorporated, Customer may provide to Government end user or, if the Agreement is direct, Government end userwill acquire, the Services and Documentation with only those rights set forth in the Agreement. Use of either the Services orDocumentation or both constitutes agreement by the Government that the Services and Documentation are commercial items andconstitutes acceptance of the rights and restrictions herein.Last updated: 072310www.webex.comIC Last updated: 112310
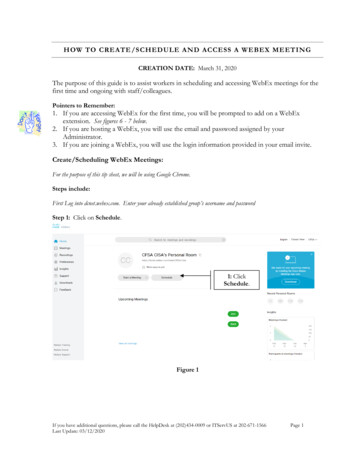
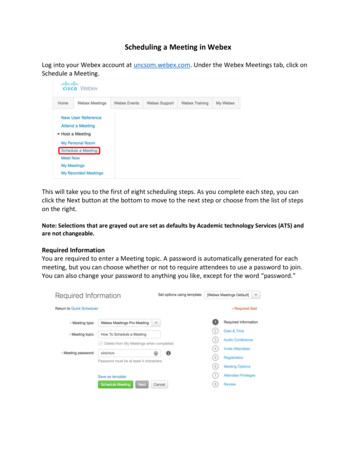
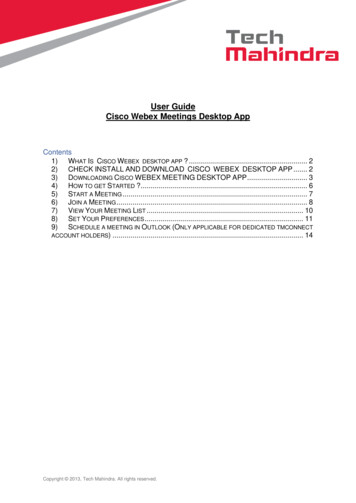
Table of ContentsChapter 1 Introducing WebEx One-Click . 3Understanding the desktop version . 4Understanding the Web version . 4Installing and Setting Up WebEx Productivity Tools. 5Opening the WebEx Settings dialog box . 5Installing WebEx Productivity Tools . 7Setting Up WebEx Productivity Tools . 8About the WebEx Settings dialog box . 11About the Account tab . 12About the Instant Meetings tab . 13About the Scheduled Meetings tab . 15About the One-Click tab . 17About the Tools tab. 18Uninstalling WebEx Productivity Tools . 19Using WebEx One-Click Panel and Productivity Tool Shortcuts . 21Starting and joining a meeting from the One-Click panel . 22Opening the WebEx One-Click panel . 23Starting a meeting from the WebEx One-Click panel. 23Inviting attendees to a meeting in progress . 25i
Joining an in-progress meeting from the WebEx One-Click panel . 25Closing the WebEx One-Click panel . 26Starting and joining a meeting from the WebEx One-Click taskbar menu . 27Starting an instant meeting from the WebEx One-Click taskbar menu . 27Starting a scheduled meeting from the WebEx One-Click taskbar . 28Starting a Personal Conference meeting from the WebEx One-Click taskbarmenu . 29Scheduling a meeting from the WebEx One-Click taskbar menu . 30Joining a meeting from the WebEx One-Click taskbar menu . 31Obtaining email addresses or mobile phone numbers when starting or joining ameeting . 33Obtaining email addresses or mobile phone numbers from a Microsoft Outlookor Lotus Notes address book . 33Obtaining email addresses from meeting history . 35Starting a One-Click Meeting using a Productivity Tool shortcut . 35Starting a One-Click Meeting on the Web. 39Setting up your One-Click Meeting on the Web . 39About the One-Click Settings page . 40Starting a One-Click Meeting on the Web . 42Starting a One-Click Meeting from Meeting Center . 43ii
1Introducing WebEx One-ClickChapter 1WebEx One-Click allows you to start a meeting instantly from your desktop (desktopversion) and from your WebEx service Web site (Web version). You can set up one orboth versions, depending on your needs.The following table shows examples of the desktop version and the Web version ofOne-Click. For detailed instructions on a particular task, click "More" by a taskdescription.WebEx One-ClickWhat you can do Understand the desktop version Understand the Web versionImportant: To use WebEx One-Click, you must have a host account on your WebEx servicesite.3
Chapter 1: Introducing WebEx One-ClickUnderstanding the desktop versionThe desktop version of WebEx One-Click is a simple way to start and join meetingsand send meeting invitations without logging in to your WebEx service site ornavigating Web pages. WebEx One-Click lets you start meetings instantly from theOne-Click panel or from other applications on your desktop, such as Microsoft Office,Web browsers, Microsoft Outlook, IBM Lotus Notes, and instant messengers.One-Click also allows you to schedule meetings using Microsoft Outlook or IBMLotus Notes, without going to your WebEx service site. One-Click integrates withyour Microsoft Outlook or IBM Lotus Notes address books, making it easy for yousend meeting invitations to those with whom you communicate regularly.Using this version requires that you download WebEx Productivity Tools, which letyou start meetings instantly from your desktop, Microsoft Outlook, IBM Lotus Notes,Microsoft Office applications, Microsoft Internet Explorer, Firefox, and your instantmessengers. If your site administrator has allowed the options for WebEx ProductivityTools, it is usually installed automatically, but you can also install it manually.Understanding the Web versionThe Web version of WebEx One-Click allows you to start a One-Click Meeting fromyour WebEx service Web site. Doing so does not require you to download anyapplication.Unlike using the desktop version, you cannot join other hosts' meetings and sendmeeting invitations from the One-Click Meeting area on your WebEx service Website.4
2Installing and Setting UpWebEx Productivity ToolsChapter 2You can install WebEx Productivity Tools to start or join meetings instantly usingOne-Click, Microsoft Office, Web browsers, Microsoft Outlook, IBM Lotus Notes,and instant messengers; or to schedule meetings using Microsoft Outlook or IBMLotus Notes, without going to your WebEx service site.After you install WebEx Productivity Tools, you can log in and set options for yourWebEx account, set meeting options for instant meetings and scheduled meetings, setpreferences for the One-Click panel, and select which Productivity Tools you will usewith WebEx.The following list describes features for installing and setting up options for WebExProductivity Tools: Install WebEx Productivity Tools Open the WebEx Settings dialog box Set options for WebEx Productivity Tools Uninstall WebEx Productivity ToolsOpening the WebEx Settings dialog boxTo open the WebEx Settings dialog box from the Start menu:Click Start Programs WebEx Productivity Tools WebEx Settings.The WebEx Settings dialog box appears.To open the WebEx Settings dialog box from the One-Click Panel:1If the One-Click Panel is not already open, do one of the following:5
Chapter 2: Installing and Setting Up WebEx Productivity Tools2 Double-click the WebEx One-Click icon on your desktop. Go to Start Programs WebEx Productivity Tools WebEx OneClick.In the One-Click Panel, click Edit WebEx Settings.The WebEx Settings dialog box appears.To open the WebEx Settings dialog box from the One-Click taskbar icon:1Right-click the One-Click taskbar icon.2Choose WebEx Settings from the menu.The WebEx Settings dialog box appears.To open the WebEx Settings dialog box from Microsoft Outlook or IBM Lotus Notes:In the WebEx menu, click Account Settings.The WebEx Settings dialog box appears.To open the WebEx Settings dialog box from Microsoft Office:In Microsoft Word, Microsoft Excel, or Microsoft PowerPoint, click WebExSettings.The WebEx Settings dialog box appears.To open the WebEx Settings dialog box from instant messengers:Click WebEx WebEx Settings.The WebEx Settings dialog box appears.6
Chapter 2: Installing and Setting Up WebEx Productivity ToolsInstalling WebEx Productivity ToolsIf your site administrator has turned on WebEx Productivity Tools options for yourWebEx service site, all WebEx Productivity Tools are installed automatically on yoursite. In addition, whenever newer versions are available, WebEx Productivity Toolsare updated automatically.The installation process installs all available WebEx Productivity Tools; however, atany time, you can change your preferences about which applications to use withWebEx Productivity Tools, and you can also change other WebEx account andmeeting preferences by setting options in the WebEx Settings dialog box.If necessary, you can also download and install WebEx Productivity Tools manually.Before installing WebEx Productivity Tools, ensure that your computer meets thefollowing minimum system requirements: Microsoft Windows 2000, XP, 2003, Vista Microsoft Internet Explorer 6.0 SP1 or 7.0, or Firefox 3.0 or later Intel x86 (Pentium 400MHZ ) or compatible processor JavaScript and cookies enabled in the browserNote: The WebEx integration for IBM Lotus Notes is included in the WebEx Productivity Toolsinstallation or download only if your site administrator has turned on the Lotus Notes option forthe site.To install WebEx Productivity Tools from the Productivity Tools Setup page:1Log in to your WebEx service Web site.2Click My WebEx Productivity Tools Setup (on the left navigation bar).The Productivity Tools Setup page appears.3Under On Your Desktop, click Download Productivity Tools.The File Download dialog box appears.4Save the installation program to your computer.The name of the installation file has an .msi extension.5Run the installation file and follow the instructions.Once you complete installation, log in using your WebEx account information andthen verify your settings in the WebEx Settings dialog box.7
Chapter 2: Installing and Setting Up WebEx Productivity ToolsTo install WebEx Productivity Tools from the Downloads page:1Log in to your WebEx service Web site.2In the left navigation bar, under Support, click Downloads.3In the Downloads page, next to the WebEx Productivity Tools heading, clickDownload Now.The File Download dialog box appears.4Save the installation program to your computer.The name of the installation file has an .msi extension.5Run the installation file and follow the instructions.Once you complete installation, you can log in with your WebEx accountinformation and then verify your settings in the WebEx Settings dialog box.Note: System administrators can also perform a mass installation for computers at their site.Setting Up WebEx Productivity ToolsTo set WebEx Productivity Tool options:18Open the WebEx Settings dialog box.
Chapter 2: Installing and Setting Up WebEx Productivity Tools2In the Account tab, log in to your account by specifying the URL for your WebExservice site and entering your username and password.3Click Apply.4Click the Instant Meetings tab.5Specify options for meetings started instantly from the One-Click panel,Microsoft Office, browsers, instant messengers, right-click menus, and fromMicrosoft Outlook or IBM Lotus Notes.6Click the Scheduled Meetings tab.7Specify options for meetings scheduled from Microsoft Outlook or IBM LotusNotes.8Click the One-Click tab.9
Chapter 2: Installing and Setting Up WebEx Productivity Tools9Specify options for the One-Click panel.10Click the Tools tab.Select which applications to use WebEx integrations with.10
Chapter 2: Installing and Setting Up WebEx Productivity ToolsAbout the WebEx Settings dialog boxHow to access this dialog boxTo access the WebEx Settings dialog box from the Start menu:Click Start Programs WebEx Productivity Tools WebEx Settings.The WebEx Settings dialog box appears.To access the WebEx Settings dialog box from the One-Click Panel:12If the One-Click Panel is not already open, do one of the following: Double-click the WebEx One-Click icon on your desktop. Go to Start Programs WebEx Productivity Tools WebEx OneClick.In the One-Click Panel, click Edit WebEx Settings.The WebEx Settings dialog box appears.To access the WebEx Settings dialog box from the One-Click taskbar icon:1Right-click the One-Click taskbar icon.2Choose WebEx Settings from the menu.The WebEx Settings dialog box appears.To access the WebEx Settings dialog box from Microsoft Outlook or IBM LotusNotes:In the WebEx menu, click Account Settings.The WebEx Settings dialog box appears.To access the WebEx Settings dialog box from Microsoft Office:In Microsoft Word, Microsoft Excel, or Microsoft PowerPoint, click WebExSettings.11
Chapter 2: Installing and Setting Up WebEx Productivity ToolsThe WebEx Settings dialog box appears.To access the WebEx Settings dialog box from Instant Messengers:Click WebEx WebEx Settings.The WebEx Settings dialog box appears.Tabs in this dialog boxThe WebEx Settings dialog box contains the following tabs: Account Instant Meeting Scheduled Meeting One-Click ToolsAbout the Account tabAccount options allow you to log in to your WebEx service site with your user nameand password.12Use this option.To.Site URLEnter the URL to the WebEx service site from which the ProductivityTools were installed.User nameEnter the user name for a host account on your WebEx service site.PasswordEnter the password for the host account on your WebEx service site.Remember mypasswordStore the user name and password you entered so that you do notneed to enter your user name and site URL next time you log in.Forgot your passwordOpen the Login Assistance page on the WebEx service site, whichsends you a reminder of your password.Change passwordOpen a dialog box that allows you to specify a new password.LanguageVerify the language that is currently selected for your WebEx servicesite.
Chapter 2: Installing and Setting Up WebEx Productivity ToolsUse this option.To.LocaleVerify the country or locale that is currently selected for your WebExservice site.Time zoneVerify the time zone that is currently selected for your WebEx servicesite.Change settings forWebEx service siteOpen the My WebEx My Profile page on your WebEx service site,and make changes to your profile.RefreshRefresh the WebEx Settings dialog box with the most recent settingsfrom the WebEx service site.About the Instant Meetings tabInstant meeting options s affect meetings started instantly from the One-Click panel,Microsoft Office, browsers, instant messengers, right-click menus, and fromMicrosoft Outlook or IBM Lotus Notes.Use this option To Service typeSelect the type of WebEx session for which you want to start ameeting.This option lists only the session types available for your site anduser account.Meeting topicEnter the topic or name for the meeting.Meeting passwordRequire participants to enter the password you set to join yourmeeting.Your site may require that all passwords comply with security criteria,such as a minimum length and a minimum number of letters,numbers or special characters.List this meeting on theWebEx siteInclude this meeting on the meeting calendars on the WebEx servicesite.Available for meetings, sales meetings, and training sessions only.List Support Session on Includes this support session in your meetings list on your PersonalPersonal Meeting Room Meeting Room on the WebEx service site.Available for support sessions only.Ask for my approvalwhen someone joinsSpecify that the Request to Join dialog box appears on your screenwhen someone tries to join your meeting.Available for support sessions only.13
Chapter 2: Installing and Setting Up WebEx Productivity Tools14Use this option To Conference typeSelect the type of teleconference you would like to use: None Reservationless-Plus Other teleconference
Chapter 2: Installing and Setting Up WebEx Productivity ToolsUse this option To Tracking codeIdentify your department, project, or other information that yourorganization wants to associate with your meetings. Tracking codescan be optional or required, depending on how your site administratorset them up.If your site administrator requires you to select a code from apredefined list, select a code from the appropriate drop-down list.CUVC Meeting ID(CUVC Integration to Meeting Center only) Enter a custom URL tocreate a virtual meeting room in which you can use Cisco UnifiedVideo (CUVC) in your meeting.If you leave this box empty, the WebEx Meeting ID is used by default.When you start your WebEx meeting, the CUVC Video panel displaysautomatically.About the Scheduled Meetings tabScheduled meeting options affect meetings scheduled from Microsoft Office or IBMLotus Notes.Use this option To.Service typeSelect the type of WebEx meeting you would like to schedule.The list includes the meeting types that are available for your servicewebsite.The Other Teleconference option allows you to schedule yourmeeting with another teleconference service.Meeting topicEnter the topic or name for the meeting.Meeting passwordRequire participants to enter the password you set to join yourmeeting.Your site may require that all passwords comply with security criteria,such as a minimum length and a minimum number of letters, numbersor special characters.Exclude password from Exclude the meeting password from the email message that is sent toemail invitationeveryone who is invited to your meeting.List this meeting on the Include this meeting in the meeting calendars on the WebEx serviceWebEx sitesite.Available for meetings, sales meetings, events, and training sessionsonly.Attendees can join theAllow attendees to join the meeting within a set number of minutes15
Chapter 2: Installing and Setting Up WebEx Productivity ToolsUse this option meeting [x] minutesbefore starting timeTo.before the meeting's starting time.CUVC Meeting ID(CUVC Integration to Meeting Center only) Enter a custom URL tocreate a virtual meeting room in which you can use Cisco UnifiedVideo (CUVC) in your meeting.Note If you clear this check box or set this option to 0 minutes, youmust start the meeting before attendees can join it.If you leave this box empty, the WebEx Meeting ID is used by default.When you start your WebEx meeting, the CUVC Video panel displaysautomatically.Audio & Tracking tabOptions that affect audio conferences and tracking.Use this option To Conference typeSelect the type of teleconference you would like to use:Tracking code None Reservationless-Plus Other teleconferenceIdentify your department, project, or other information that yourorganization wants to associate with your meetings. Tracking codes canbe optional or required, depending on how your site administrator setthem up.If your site administrator requires you to select a code from apredefined list, select a code from the appropriate drop-down list.Registration tabOptions that affect how attendee registrations are approved.Use this option To Require attendeeregistrationSpecify that all attendees must register to attend the meeting so youcan accept or deny entry into your meeting. An attendee cannot attendthe meeting until you accept his or her registration request.This option is available only if the Attendees can join the meeting [x]16
Chapter 2: Installing and Setting Up WebEx Productivity ToolsUse this option To minutes before starting time option is cleared.Automatically acceptall registrationAccept all registration requests automatically. If this option is notselected, you must accept registration requests manually by using theoptions on the Registered Attendees page on the WebEx service site.This option is available only if the Attendees can join the meeting [x]minutes before starting time option is cleared and the Requireattendee registration option is selected.Resources tabOptions that control how resources are used in meetings.Use this option To Info tab templatesChoose a template for the Info tab, which appears in the contentviewer during the meeting. The Info tab contains information aboutthe meeting, including the meeting host, teleconference phonenumbers, and host key (for the host only).Note: You can choose another template only if one or morecustomized Info tab templates are available for your meeting service.Your site administrator can add templates for your service.Automatically play thepresentation before thehost joinsAutomatically play a presentation that attendees can view before thehost actually joins the meeting.About the One-Click tabOne-Click options affect the features of the One-Click panel.Use this option To Always stay on top ofdesktopHave the WebEx One-Click panel appear on top of every applicationor program that is open on your computer.Show One-Click icon ontaskbarShow the One-Click icon in the taskbar.Show schedulingfunction in One-ClickShow the links Start Scheduled Meeting and Schedule Meeting onthe panel. Clicking either of the links takes you to the appropriate17
Chapter 2: Installing and Setting Up WebEx Productivity ToolsUse this option windowTo pages on your WebEx service site.Microsoft Outlook orIBM Lotus NotesSelect an email and scheduling program for a default address book.WebEx One-Click integrates with the email program you select,making it easy for you to obtain your contacts' email addresses.Clicking on the WebEx One-Click panel opens an address book fromthe email program you select here.About the Tools tabTools options determine which programs include WebEx integrations and shortcuts.18Use this option.To.Microsoft OutlookShow WebEx buttons and commands for scheduling meetings orstarting One-Click meetings with Microsoft Outlook using the contactsand calendar from Microsoft Outlook.IBM Lotus NotesShow WebEx buttons and commands for scheduling meetings orstarting One-Click meetings with IBM Lotus Notes using the contactsand calendar from Outlook.Use WebEx withMicrosoft OfficeShow WebEx buttons for starting a One-Click meeting andautomatically sharing a selected file or document from the followingMicrosoft Office applications: Excel PowerPoint WordShow button in InternetExplorerShow a WebEx button that allows you to start One-Click meetingsfrom the Microsoft Internet Explorer toolbar.Show in Windows rightclick menus (requiresreboot)Show a WebEx command that allows you to start a One-Clickmeeting and automatically share a selected file or document from theright-click shortcut windows available in Windows Explorer.Use WebEx with instantmessengerShows WebEx buttons and commands that allow you to start a OneClick meeting from an instant messenger. You can select one ormore of the following instant messengers: AOL Google Talk Lotus Sametime Skype
Chapter 2: Installing and Setting Up WebEx Productivity ToolsUse this option.To. Windows Messenger Show button in FirefoxYahoo MessengerShows a WebEx button that allows you to start instant meetings fromthe Firefox toolbar.Uninstalling WebEx Productivity ToolsYou can uninstall WebEx Productivity Tools at any time.To uninstall WebEx Productivity Tools by using Start menu commands:1Click Start Programs WebEx Productivity Tools Uninstall2Click Yes to confirm that you want to uninstall WebEx Productivity Tools.To uninstall WebEx Productivity Tools by using the Control Panel:1Click Start Settings Control Panel.2Double-click Add/Remove Programs.3Click WebEx Productivity Tools.4Click Remove.5Click Yes to confirm that you want to uninstall WebEx Productivity Tools.Note: Uninstalling Productivity Tools removes all Productivity Tools and shortcuts from yourcomputer.19
3Using WebEx One-Click Paneland Productivity Tool ShortcutsChapter 3Desktop version onlyOnce WebEx Productivity Tools have been downloaded, the WebEx One-Click paneland Productivity Tool shortcuts are installed on your computer.The WebEx One-Click panel allows you to do the following: Start a One-Click Meeting and invite attendees to the meeting at the same time. Join an in-progress meeting hosted on your WebEx service Web site. Edit the settings for your One-Click Meeting. Quickly obtain your attendees' or hosts' email addresses from the integration withMicrosoft Outlook or IBM Lotus Notes. Quickly go to your WebEx service Web site to start a scheduled meeting orschedule a meeting.The Productivity shortcuts allow you to start a One-Click Meeting from the following: The shortcut (right-click) menu for the One-Click taskbar icon Microsoft Outlook and IBM Lotus Notes Instant messengers such as AOL Instant Messenger (AIM), Google Talk, LotusNotes SameTime, Skype, Windows Messenger, and Yahoo Messenger Your Web browser (Microsoft Internet Explorer and Firefox only) Microsoft Office applications (available for meetings, sales meetings, and trainingsessions only) The shortcut (right-click) menu for applications or document files (available formeetings, sales meetings, and training sessions only)21
Chapter 3: Using WebEx One-Click Panel and Productivity Tool ShortcutsThe following table describes features for the One-Click panel and shortcuts. Fordetailed instructions on a particular task, click "More" by a task description.One-Click panel and shortcutsWhat you can do here. manage the One-Click panel start and join a meeting from the One-Click panel obtain email addresses or mobile phone numberswhen inviting attendees to a meeting starting a One-Click meeting using a shortcutStarting and joining a meeting from the OneClick panelThe following table describes Productivity Tools features for starting an instantmeeting and inviting contacts to the meeting using the One-Click panel. For detailedinstructions on a particular task, click "More" by a task description.22
Chapter 3: Using WebEx One-Click Panel and Productivity Tool ShortcutsWebEx One-Click panelWhat you can do open the WebEx OneClick panel More start a meeting from theWebEx One-Click panel invite attendees to ameeting in progress join an in-progressmeeting from the WebExOne-Click panel close the WebEx OneClick panelOpening the WebEx One-Click panelTo open the One-Click panel:If you closed the WebEx One-Click panel for any reason, you can open it by doingone of the following: Double-click the WebEx One-Click icon on your desktop. Go to Start Programs WebEx WebEx One-Click WebEx One-Click. Right-click the WebEx One-Click icon in taskbar, and then click Open OneClick.If you did not specify the option to remember your username and password, enter therequired WebEx account information in the Account tab of the WebEx Settings dialogbox, and then click OK.Starting a meeting from the WebEx One-Click panelYou can use the WebEx One-Click panel to start a One-Click Meeting and to sendinvitation email messages to those whom you want to invite to the meeting.23
Chapter 3: Using WebEx One-Click Panel and Productivity Tool ShortcutsBefore you start a meeting, you can review or modify your meeting options in theWebEx Settings dialog box. For details, see About the WebEx Settings dialog box.To start a meeting from the WebEx One-Click panel:1Open your WebEx One-Click panel.2Optional. Invite attendees to the meeting by entering contacts from your MicrosoftOutlook or IBM Lotus Notes address book or mobile number book or by typingtheir email addresses or mobile phone numbers in the text box.Tip: You can invite up to 16 attendees at one time. Use semicolons to separate emailaddresses and mobile numbers. You can invite additional attendees after you start themeeting.3Click Start Meeting.After a brief setup, you are in the meeting; and invited attendees receive theirinvitation email messages.If you invited an attendee using the attendee's email address, the attendee mustenter his or her name on the Join Meeting page before joining the meeting.If you invited an attendee using the attendee's name from your Microsoft Outlookor IBM Lotus Notes address book, WebEx One-Click identifies the attendee, andthe attendee can then join the meeting immediately.4Depending on your settings, the Request to Join dialog box may appear, askingfor your approval for the joining requests. The following figure shows anexample.Select one of the three approval options, and then click Accept or Reject, asappropriate.Note: If your site administrator specifies that your approval is required for each of your OneClick meetings, the Request to Join dialog box shows only the Accept and Reject options.24
Chapter 3: Using WebEx One-Click Panel and Productivity Tool ShortcutsInviting attendees to a meeting in progressAfter you start a One-Click Meeting, you can invite attendees
Chapter 2: Installing and Setting Up WebEx Productivity Tools 6 Double-click the WebEx One-Click icon on your desktop. Go to Start Programs WebEx Productivity Tools WebEx One- Click. 2 In the One-Click Panel, click Edit WebEx Settings. The WebEx Settings dialog box appears.
