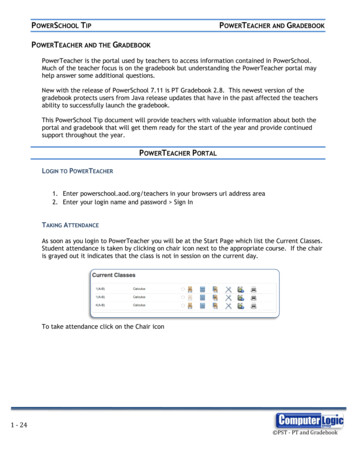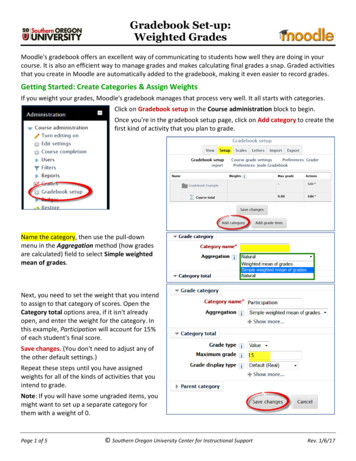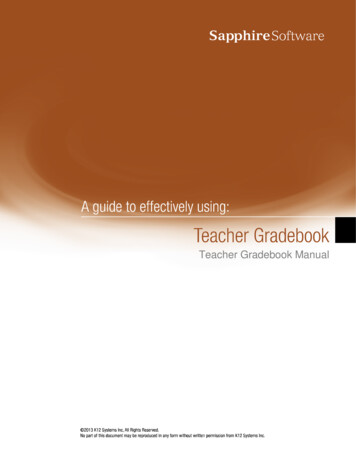
Transcription
PowerTeacher GradebookBasicsPowerTeacher Gradebook BasicsIn this course you will explore what teachers can do in the PowerTeachergradebook. You will learn to: Set up the gradebook Enter assignments Record scores Create student groups Use School ContentHello PowerTeacher!You can access the gradebook anywhere that has Internet. Its features andfunctions are tailored to duties and responsibilities teachers handle day to day. Thegradebook is launched from the main menu in PowerTeacher. The following tableprovides a brief explanation of the icons teachers see when they launch theirgradebook.IconDescriptionScoresheetDisplays the assignments and scores entered for studentsAssignmentsDisplays the details of the assignments you have createdStudentsDisplays demographic data for each student in the classGrade SetupDisplays the final grade setup for each termClass InfoDisplays the basic information about the selected courseReportsProvides an interface to designate and format reportsEach tab is used to access specific information, and three of the tabs containmodes. Modes divide the tab information into smaller sections.What makes the gradebook so easy to use is it’s ready to go the first day of school.There is no lengthy setup to complete because it contains default settings. Ofcourse there will be items you want to format, but the defaults are fully functional.You may be asking, “Can I really take off running?” Of course! Let’s start off withan activity.Copyright 2009 PearsonPage 1
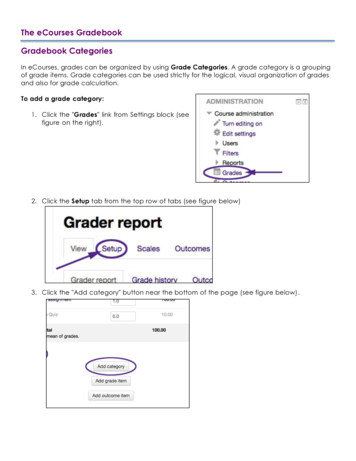
PowerTeacher GradebookBasicsActivity 1 – Creating an AssignmentTo experience firsthand the ready-to-use gradebook, launch the gradebook andcreate a homework assignment1. On the PowerTeacher Start Page, click Gradebook Launch Gradebook Trust (Mac users only)2. Click the plus ( ) sign next to the Assignment header to open the NewAssignment pane3. Enter a name for the homework assignment and press Tab4. Edit the abbreviation if needed5. Choose Homework as the category and choose Points as the score type6. Enter 30 points possible7. Use the default values for the Extra Points, Weight, Date Due, and Includefields8. Enter a description if needed9. Click Save in the lower right corner to save the assignmentActivity 2 – Recording ScoresRecord scores for the assignment you just created.1. Click in the cell that is the intersection of the row containing the student’sname and the column of the assignment you want to score2. Enter the score, such as 253. Press Enter to advance to the next student4. When you have finished entering scores, click SaveSetting Up the GradebookEven though many areas are pre-formatted, you can still personalize the gradebookto fit your teaching needs.Adding CategoriesCategories are broad classifications in which similar types of assignments aregrouped. Examples of categories are homework, tests, and quizzes. The gradebookcomes with four pre-defined category types, but you can add additional categoriesand/or modify the default categories.It is very important to remember when setting up categories to include assignmentsin the category in the calculation of the final grade. If “Include in Final Grade” is notCopyright 2009 PearsonPage 2
PowerTeacher GradebookBasicschecked, the scores will not count, which would be appropriate for an assignmentlike "turn in permission slip.”Score TypesScore types explain the value entered for assignment scores; you just have tochoose which type you want to use. Specific score types may be assigned to eachcategory or assignment. Choose from the following options: Mixed – a combination of scores throughout the assignments Points – all scores are recorded as points (default format) Percentage – all scores are recorded as percentage values Letter Grades - all scores are recorded as letters according to the grade scaleActivity 3 – Adding CategoriesAdd two new categories to your gradebook.1. From the Tools menu, choose Categories2. Click the plus ( ) in the lower left-hand corner of the Categories window toadd a new category3. Enter information into the appropriate fields4. Click the plus ( ) to add the second category5. Click Close to save and close the Categories windowSetting Up Final Grade CalculationsAfter you create assignment categories, you need to determine how the students’final grades will be calculated for each term by total points, term weights, orcategory weights. The Grade Setup tab contains two modes: Calculations andGrade Scales. Use the Calculations mode to set up calculations for your finalgrades. The Grade Scales mode will be discussed in the next section.Total PointsThis method calculates the student’s final grade by dividing the points the studenthas accumulated by the total number of points possible. Total Points is the defaultsetting for all terms. If you need to use a calculation method other than totalpoints, you will need to set up final grade calculations for each class individually.Term WeightsThis method multiplies a term grade by the value (or weight) to calculate a grade inanother term. For example, Quarter 1 (Q1) might be worth 90% of the final Y1 gradeand the Final Exam (F1) worth 10%. Percents can also be entered with decimal points,such as 33.33%. Note: MCVSD Term weight setups may vary by building.Copyright 2009 PearsonPage 3
PowerTeacher GradebookBasicsCategory WeightsThis method multiplies the total number of points by the value (or weight) of eachcategory. It allows you to set up the weights for each category according to yourpersonal plan or school requirements.Activity 4 – Setting up Final Grade CalculationsSet up final grade weighting for 1st and 2nd quarters, and 1st semester. SinceTotal Points is the default method, use another calculation method.1. Click the Grade Setup tab Calculations2. Select a term3. Select the final grade setup method, such as Category Weights4. If category weights are selected, click add category5. Check the categories and click OK6. Enter the weight for each category7. If term weights are selected, enter the weight for each8. Click Save and repeat for the remaining terms.Grade ScalesTeachers can use the Grade Scale mode to copy and edit the course grade scale. Tocopy a grade scale, select the grade scale and click the plus ( ) sign. To makechanges, select the copy. Teachers have the ability to rename the scale, change thedescription, and alter the grade values. Grades can’t be removed, but they can beignored. Click Save to store the changes.Gradebook PreferencesUse the Preferences window to indicate how you want grades to be calculated,stored, and displayed. Also, choose how to distinguish your different sections,format your spell check, and hide standard informaton. Preferences can be found inthe PowerTeacher Gradebook menu (Mac) or the Tools menu (Windows) at thetop of the screen.1RWH 7KH 0&96' XVHV WKH *UDGHERRN SUHIHUHQFH RI HUR GHFLPDO SODFHV This preference is found in Preferences -- Grading -- "Store calculated grades."Please verify that your PowerTeacher Gradebook is set to "Store calculated gradeswith up to Zero decimal places" before proceeding.Copyright 2009 PearsonPage 4
PowerTeacher GradebookBasicsUsing the GradebookSo, you’ve learned how easy it is to use the gradebook and create assignments, butthere’s much more. The gradebook contains many tools to accomplish your jobefficiently. Also, you have access to information for each student in your class. Toview alerts, phone numbers, and even email addresses, click the Students tab.AssignmentsSet up assignments at the beginning of a school term or at any time during theterm. Assignments are displayed on the Scoresheet and Assignments tabs. Thename, point value, and date due for each assignment appear above the column inwhich student scores are entered. Double-clicking an assignment heading (orclicking the arrow at the top) opens the assignment definition window where youcan modify the assignment or publish criteria.As you enter assignments, you will notice a demarcation line that separates futureassignments from past assignments. Posting assignments before entering scoresdoes not skew how grades appear. The Final Grade that appears next to thestudent’s name on the Scoresheet reflects an average grade for only theassignments that have already been scored.Copying AssignmentsYou can copy assignments from one class to another, from current or previousterms, by using Copy Assignment in the Tools menu at the top of the screen. Thegradebook window contains a menu to change classes, and to select previousclasses, allowing you to access any assignment no matter the date. You may selectto copy one assignment, several assignments, or all assignments.Copyright 2009 PearsonPage 5
PowerTeacher GradebookBasicsWeighting AssignmentsWhen creating an assignment, the Weight field can be used to help keep gradingpractices flexible, yet consistent. For most assignments, keeping the Weight at thedefault value of 1.00 and using Points Possible to adjust how the assignmentcontributes to the overall term grade will be appropriate.When scoring letter grade assignments, you do not need to be concerned withpoints. Simply enter the letter grade for each assignment, and weighting willautomatically take care of the relative value for each assignment.Activity – Weighting AssignmentsUse weighting to make a set of three quizzes worth 50 points, regardless of thenumber of questions each contains.1. Create three or more quiz-type assignments. Use information in the gridbelow to fill in the number of points and weight fields.2. Based on the information in the grid, fill in the last column.Number ofQuestions102025Number of PointsWeighting10202552.52Calculated GradeValue in PointsRecording ScoresWhen entering scores, match the type of score to what you set up when youcreated the assignment; numbers for points and percentage, letters for lettergrades. Scores can be entered individually or entered using the following quickentry methods: EX - marks an assignment Exempt ( ) - assigns the maximum points possible MI or (/) - marks an assignment missing LT or (*) - marks an assignment late COL or (.) - marks an assignment collected Choose Fill Scores to mass fill a specific scoreCopyright 2009 PearsonPage 6
PowerTeacher GradebookBasicsOccasionally, after creating an assignment, you determine a different number ofpoints possible is needed. After saving the corrected points possible, a warning willappear. You may choose to keep the scores or have the computer adjust thembased on the new points possible. Additionally, the maximum points possible valuewill keep you from entering a score with too many digits. For example, you havecreated a test worth 100 points and allowed 10 extra points. When you entered oneof the student’s scores, you typed an extra zero, making the score 1000. An alertwill notify you of the error and that the maximum points you may enter is 110.Using the Score InspectorJust like the quick-entry methods, the Score Inspector also makes it possible toindicate if an assignment was received late, a student is exempt from completingthe assignment, an assignment is missing, or you have collected the assignmentwithout entering a point value. You can also use this tool to enter a score comment.The following table provides a brief explanation of the assignment indicatorsavailable in the teacher’s gradebook.Indicator DescriptionIndicator MeaningSmall “C” in blue dot next to scoreComment is attached to assignmentSmall “L” in red dot next to scoreAssignment turned in lateSmall “M” in orange dot next to scoreAssignment is missingGreen check in a cellAssignment collected but not gradedItalicized faint scoreAssignment does not count towardfinal grade OR was marked asexempt after scoring.Small hourglass in assignment headingAssignment published on certaindateCircle with line through it in assignmentheadingAssignment is never to be publishedSmall red exclamation mark next toitalicized final gradeFinal grade changed by manualoverrideYellow exclamation mark in theassignment headingScores are not publishedSmall “G” in gray dot next to studentnameStudent is assigned a grade scaleother than defaultCopyright 2009 PearsonPage 7
PowerTeacher GradebookBasicsManually Override a Final GradeOccasionally, teachers need to modify a student’s final grade in a course based oneffort, participation, or other classroom factors. The Score Inspector allows you tochange a final grade with the Manual Override tool.Activity – Recording Scores and Using the Score InspectorIt is time to record some scores for these assignments. Try using all the methodsavailable. Use the Mass Fill Scores for an assignment, use the quick-entry methodsfor several scores, and use the Score Inspector to add score notes, and to markassignments collected, late, and exempt.1. On the Scoresheet, click an assignment header of an assignment with noscores2. Choose Fill Scores from the Tools menu3. Verify “Items with No Score” is selected4. Check Score and enter the score that everyone will receive5. Click OK6. Click an empty score cell, use one of the quick-entry keys to enter a score,and press Enter7. Repeat step 6 for several scores using different quick-entry keys8. Click an empty score cell, and choose Score Inspector from the Tools menu9. In the Score Inspector, check Collected instead of entering a score10.Click the down arrow to move to the next student and check Late11.Click the down arrow to move to the next student and check Missing12.Click the down arrow to move to the next student and check Exempt Score13.Click the right arrow to move to another assignment and click the Commenttab14.Select a comment and click Insert Selected15.Continue to use the Score Inspector to enter more comments and scores16.Click Close and then click Save to retain the changesActivity – Manually Overriding a Final GradeManually override a student’s final grade that should be higher than the grade thatwas calculated.Copyright 2009 PearsonPage 8
PowerTeacher GradebookBasics1. Double-click a final grade to open the Score Inspector2. If the Score Inspector is already open, click the final grade once3. Check Manual Override4. Change the percent and grade and add a comment5. Click Close and then click Save to retain the changesWorking OfflineWhen you want to work offline, PowerTeacher now allows assignments to beexported and scores imported. It is recommended to create the assignment first.Then, click the assignment and select Export Scores Template from the Toolsmenu. Save the file in the desired location and open it with Excel.The file will be in CSV format and will contain a column for entering scores.Depending on the score type you choose for the assignment, the column will betitled Points, Percentage, or Letter Grade. Enter the scores when ready and savethe changes.The final step is to import the scores. Select the assignment and click ImportScores from the Tools menu. Select the format of your import file. There are twotabs to the import window: Basic and Advanced. The two tabs are similar, but theAdvanced tab contains the data being imported and a preview of the Scoresheet.The file does not have to be the Scores Template. Depending on the file type, theimport process will automatically select the import settings. Click Import and theScoresheet will be populated with the new scores.Activity – Recording Scores OfflineYour students have completed a big project and you would like to work onrecording their scores over the weekend. However, your Internet provider hasscheduled an outage. So, create the assignment and record the two assignmentsyou have graded. Then, export the Scores Template, enter a few scores, and importthe template.1. Click the Assignment tab and click the plus ( ) sign2. Enter the Project information and click Save3. Record scores for two of your students and enter a comment for both abouttheir excellent work4. Click Save5. Choose Export Scores Template from the Tools menu and save the file toyour desktop.6. Open the file with Excel, record a few scores and saveCopyright 2009 PearsonPage 9
PowerTeacher GradebookBasics7. Verify that the assignment is selected and choose Import Scores from theTools menu8. Select the file and click Open9. Click the Advanced tab10.You will see a warning that scores already exist in gradebook, so verify thatKeep Existing Scores is selected11.Click ImportSome Helpful ToolsSetting up Student GroupsPowerTeacher gradebook provides tools for creating sets and groups and choosingstudents to include in the groups so that teachers can adapt instruction to theneeds of subgroups of students. Student group assignments are flexible; they canbe modified any time.The Student Groups filter contains two default groups: Active and Dropped. Thestudents will be populated into the appropriate group automatically. This filterworks by providing an option to highlight or filter students selected from a group.The highlight option will highlight the student with yellow in the Scoresheet andStudents tabs. The filter option will hide all students except those chosen.Activity – Making Student GroupsYou need to add student groups to your class. The groups will outline whether theparents want to receive emails or phone calls.1. Click the Students tab2. Click the Plus ( ) in the Student Groups filter and choose Add Group Set3. Enter the name Contact and click OK4. Control-click Group 1 and choose Edit5. Enter the name Email and click OK6. Click the Plus ( ) again and choose Add Group7. Enter the name Phone and click OK8. Click on a student's name and drag it to a group. Use command-click (Mac)or Ctrl-click (Windows) to add multiple students.The Grade Scale IconEach student is automatically assigned to the MCVSD grade scale. In the future, youmay be able to add/edit grade scales as follows: To change a student’s grade scale, goCopyright 2009 PearsonPage 10
PowerTeacher GradebookBasicsto the Students tab and select your student. The Student pane in the lower half ofthe gradebook window contains a new grade scale menu. After changing the gradescale, a window will appear notifying you that the grade scale will change finalgrades and assignment scores. Click Yes to confirm the change.To view the students in each of your sections assigned to a specific grade scale,click the Grade Setup tab, select a grade scale, then click the Sections tab in theGrade Scale pane in the lower half of the gradebook window. Click the plus (PC) orthe triangle (Mac) to the left of the book to view the list of student names.You can use the Student Group filters to divide students into groups according towhich grade scale you will use for them. Then filter or highlight one of the groupsand change the grade scale of each student to match.will appear next to the student’s name on theThe Custom Grade Scale iconScoresheet and Students tabs. This icon is also displayed when viewing final grades.Typically, MCVSD courses/sections are limited to using the MCVSD grade scale.Personalizing Class InformationThe Class Info mode contains basic information about the course you selected inthe Classes pane. You can enter text in the Custom Display Name field topersonalize your class list and enter text in the Description field to communicatewith parents about class rules and your expectations of students, or give anoverview of the course and any other information that would be of interest toparents.The School Content mode contains links to websites and information on the web.This information is compiled by your PowerTeacher Administrator. Content isavailable to be placed in the Class Info description and the assignment description.The link will be listed in the Description text box along with any other informationentered.PowerTeacher also contains Spell Check. The Tools menu contains an option tocheck spelling, and the settings are found in Preferences. Check the spelling of aword by clicking the word and pressing the Ctrl key. A list of possible replacementswill appear as well as dictionary options. The Dictionary is also managed fromPreferences. Add words specific to the class subject or remove unnecessary words.However, the dictionary is specific to each teacher’s gradebook and is not sharedwith other teachers.Activity 1 – Adding Content to the Class DescriptionYour School Content contains a website that students can visit to obtain studyguides. You would like to make this available in Parent Access. Add the website linkto your class description.1. Click the Class Content tab2. Click the Class Info mode and enter a description referring to the websiteCopyright 2009 PearsonPage 11
PowerTeacher GradebookBasics3. Click Link School Content4. Select your website and click OK5. Verify the website is in the correct place6. From the Tools menu, select Check Spelling7. When you are finished, click SaveCommunicating ProgressFinal grades are calculated throughout the term, but at the end of the term youhave the ability to tell your PowerTeacher Administrator that your grades arecomplete. The Scoresheet contains a progress dialog located above the studentnames. The dialog will state In Progress until you select that your grades arecomplete. If your grades aren’t finished, you can enter a comment and let thePowerTeacher Administrator know when your grades will be ready.A helpful tool to use during parent/teacher conferences is the Student Groups filter.The filter will allow you to hide all students except for the one whose parents youare meeting. To use this tool, expand the Active group and click the first student’sname. Then, choose Filter Selected from the menu. The only student visible onthe Scoresheet is the first student, and you can continue to choose every studentone at a time.Activity 1 – Marking your Grades Complete1. Click the Scoresheet tab and verify S2 is the Reporting Term chosen2. Click S2 In Progress3. Check Final Grades Complete4. Enter a comment, such as I may have one final grade change, but Iam unsure at this point5. Click OKSummaryBy following the instructions and activities in this course, you’ve learned about the: Areas most useful in PowerTeacher Setup steps to format the gradebook to your unique needs Tools contained in the gradebookCopyright 2009 PearsonPage 12
PowerTeacher Gradebook Basics Activity 1 - Creating an Assignment To experience firsthand the ready-to-use gradebook, launch the gradebook and create a homework assignment 1. On the PowerTeacher Start Page, click Gradebook Launch Gradebook Trust (Mac users only) 2. Click the plus ( ) sign next to the Assignment header to open the New
