Transcription
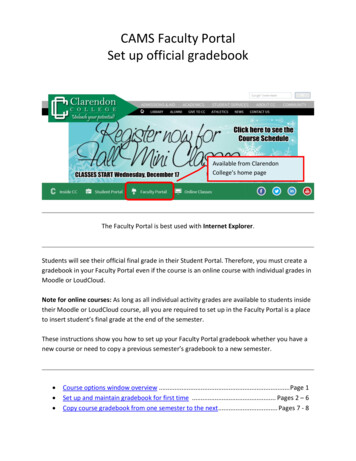
CAMS Faculty PortalSet up official gradebookAvailable from ClarendonCollege’s home pageThe Faculty Portal is best used with Internet Explorer.Students will see their official final grade in their Student Portal. Therefore, you must create agradebook in your Faculty Portal even if the course is an online course with individual grades inMoodle or LoudCloud.Note for online courses: As long as all individual activity grades are available to students insidetheir Moodle or LoudCloud course, all you are required to set up in the Faculty Portal is a placeto insert student’s final grade at the end of the semester.These instructions show you how to set up your Faculty Portal gradebook whether you have anew course or need to copy a previous semester’s gradebook to a new semester. Course options window overview . Page 1Set up and maintain gradebook for first time . Pages 2 – 6Copy course gradebook from one semester to the next . Pages 7 - 8
Page 1Course OptionsAfter clicking My Courses, choose a specific course you teach in order to find the course options so youcan set up the gradebook, keep student attendance (face-to-face and hybrid courses only), and submityour final grades to the registrar.Log into the Faculty Portal from CC’swebsite. Make sure you have the currentsemester chosen.My Courses: Takes you to courseoptions for each course you teach.After clicking My Courses, click thecourse you wish to work with.The Course Options windowappears for the course chosen.The next page in these instructionsexplains how to set up a gradebookfor the first time.
Page 2Set up Course Gradebook for the first timeFor an online course you may choose to post only the final grade in the CAMS (faculty portal) gradebookas long as all of the individual assignment/quiz grades are posted in the Moodle or LoudCloudgradebook for students to view. These instructions explain how to set up the CAMS gradebook to postonly the final grade. (For help setting it up to show all individual assignment/quiz grades, refer to theHelp link in the Faculty Portal.)Follow the instructions on pages 2-6 if you are setting up the CAMS gradebook for the first time. Use theinstructions on pages 7-8 if you want to copy the gradebook from a course already set up in a previoussemester or current semester to the new course.Step 1: Setup Grade Standards (numericgrade cutoff for each letter grade)Instructions on Page 3.Step 2: Setup Categories (This is whereyou will create a category called“Assignments” where you will eventuallyplace the student’s final grade.)Instructions on Page 4.Step 3: Setup Assignments (This is whereyou will place an “assignment” called“Final Grade.)Instructions on Page 5.Step 4: Set Student Access (identifyfeatures you want students to see intheir Student Portal, such as being ableto see their final grade.)Instructions on Page 6
Page 3Step 1: Set up Grade StandardsIn Course Options under the Course Gradebook heading, follow these 6 steps to set up the cutoffnumeric grade for each letter grade.Step 1: Click Setup Grade StandardsStep 2: Click Add StandardFYI:If you have previously set gradestandards for a different class, you canuse Copy Scale from a DifferentCourse to save time.Step 3: Type first Letter Grade (i.e. A) in LetterGrade box.Step 4: Type Percent Cutoff (Refer to commonstandard below for recommended cutoff numbers)Step 5: Type same number in the Letter Percentageas placed in the Percent Cutoff box.Step 6: Click Add Grade Standardafter creating first standard andrepeat Steps 2-6 until you haveset up each standard (A – F).The college’s common standard is:90 A80 B70 C60 D0 FSpecial Note: If you choose to round cutoff grades, then type it withsingle decimal place. (Example: type 89.5 for an A.)
Page 4Step 2: Set up CategoriesSet up a broad grade category with its percentage weight being 100% by following these steps.Step 1: Click Setup CategoriesStep 2: Click Add CategoryStep 3: Select a category from the drop downlist. (Since there is no “category” calledFinal Grade to select from, choosing“Assignments” is a good choice.(Students will not see the name youchoose.) Apply the percentage weight for thecategory. (100%) Leave “Number of Drops” at 0.Step 4: Click Add GradebookCategory
Page 5Step 3: Set up AssignmentsIn order to insert grades in the Faculty Portal, you must first set up assignment names and indicatewhich grade category each assignment is part of. In these instructions for online courses, you will onlyset up one assignment called “Final Grade” and apply it to the single grade category you set up.Step 1: Click Setup AssignmentsStep 2: Click Add AssignmentStep 3: Fill in the appropriateinformation. (Refer to notes inboxes below.)In Description type Final Grade.In Due Date type date final gradesmust be submitted to the registrar.In Total Points, type highest gradepossible. (usually 100)Step 4: Click Add CourseAssignment when all informationhas been filled in.
Page 6Step 4: Set Student AccessIf you want students to see the final grade in their Student Portal, you still need to activate their accessto it. There are also other features available, such as email, course information, course announcements,textbooks, etc. You will probably not activate them since you use Moodle for communicating thisinformation.Step 1: Click Course OptionsAlthough this says students can viewtheir grade, they can’t unless you setstudent access.Step 2: Click Set Student Access.(Located on the Course Options pagein your Faculty Portal.)Step 3: Place checkmark besideCourse Assignments sostudents can see their finalgrade once you post it at theend of the semester.Step 4: Click Save
Page 7Copy Course ContentIf you have several sections of the same course, you can set up the gradebook in one course and copy itto the other courses. Or you can use a gradebook from a previous semester to copy to the currentsemester’s course(s). This is a big time saver!Before starting, make sure you are in the correct semester that has the course containing thecontent you want to copy from. That means you may need to log in to the Faculty Portal for aprevious semester.Step 1: Click on the course that contains thecontent you want to copy from.(Example here is from Fall 2019.)Step 2: From Course Options click Copy Content.Doing this makes a copy of the gradebook setupfrom the previous (or other current) course (i.e.categories, weight distributions, recordingassignment grades, etc.)
Page 8FA-21Step 3: In this dropdown menu, select thesemester that contains the course(s) you wantto copy the course content to.(Example here is for Fall 2021.)Click a button to move quickly to yourcourse(s) you want to copy content to.Step 4: Select the specificcourse(s) you want to copythe content to.FA-21Step 5: Click Continue to copycontent step 2Shows the course(s) you selected to copy thecourse content from and to.Step 6: Click Process copy content
Page 9Step 7: Click Return to Course SelectionStep 8: Switch to the current semester and go to the newcourse(s) to see if they are set up correctly.Set up Student AccessOne piece of content that does not copy from another course is Student Access settings.Use instructions on Page 6 in these instructions to set that up IN EACH NEW COURSE so students can seethe grades you place in their student portal.
CAMS Faculty Portal Set up official gradebook The Faculty Portal is best used with Internet Explorer. Students will see their official final grade in their Student Portal. Therefore, you must create a gradebook in your Faculty Portal even if the course is an online course with individual grades in Moodle or LoudCloud.