Transcription
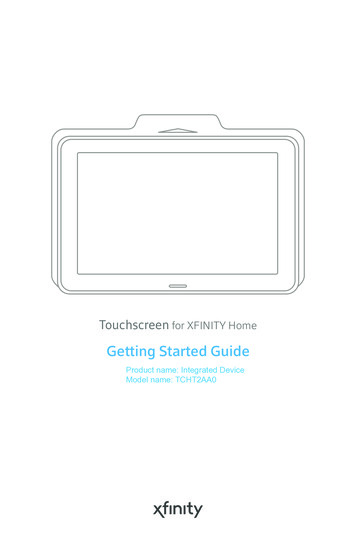
Touchscreen for XFINITY HomeGetting Started GuideProductname:TCA400IntegratedInstall DeviceModel name: TCHT2AA0
CompliancesFCCThis device complies with part 15 of the FCC Rules. Operation is subject to the following twoconditions:1. This device may not cause harmful interference.2. This device must accept any interference received, including interferencethat may cause undesired operation.CAUTION:for compliance could void the user’s authority to operate the equipment.This equipment has been tested and found to comply with the limits for a Class B digital device,pursuant to part 15 of the FCC Rules. These limits are designed to provide reasonable protectionagainst harmful interference in a residential installation. This equipment generates, uses and canradiate radio frequency energy and, if not installed and used in accordance with the instructions,may cause harmful interference to radio communications. However, there is no guarantee thatinterference will not occur in a particular installation. If this equipment does cause harmfulinterference to radio or television reception, which can be determined by turning the equipmentmeasures:Reorient or relocate the receiving antenna.Increase the separation between the equipment and receiver.which the receiver is connected.Consult the dealer or an experienced radio/TV technician for help.This transmitter must not be co-located or operating in conjunction with any other antenna or transmitter.RF Exposureinformation:At least(8 inches)of separationdistance between TouchscreenOperationsin the5.15-5.25GHzband20cmare restrictedto indoorusage only.Thismeetsall theotherspecifiedPart 15E, Section15.407the FCC Rules.and devicethe user’sbodyshouldberequirementsmaintained toensureincompliancewith FCCRF ofExposureRequirements.RF Exposure information: At least 20cm (8 inches) of separation distance between Touchscreenand the user's body should be maintained to ensure compliance with FCC RF Exposure Requirements.Device PurposeHousehold Fire/Alarm Central PanelResponsible Party - U.S. Contact InformationTechnicolor Connected Home LLC, 5030Sugarloaf Parkway, Building 6Lawrenceville, GA30044 USA, 317-587-54662TouchScreen TCA 400 Getting Started Guide – InstallationFCC Part 15B Supplier’s Declaration of ConformityThe FCC Part 15B Supplier’s Declaration ofConformity (SDoC) for your product is availableat the following internet address:www.technicolor.com/ch regulatory
This transmitter must not be co-located or operating in conjunction with any other antenna or transmitter.Operations in the 5.15-5.25GHz band are restricted to indoor usage only.This device meets all the other requirements specified in Part 15E, Section 15.407 of the FCC Rules.SafetyThis device complies with UL 985, UL1023, UL1635.WARNING: The rechargeable battery is only available through your service operator. If yourbattery needs to be replaced, contact your service operator to arrange for replacement.Evacuation PlanDevelop an emergency evacuation plan for use in the event of fire.Here are some recommendations from the National Fire Protection Association.Make an evacuation plan for how to leave your home in the case of fireor other emergency. Sketch a map of your home that shows all the doorsand windows. Discuss the plan with everyone in your home so thateveryone will know what to do.Have at least two ways to exit each room. Make sure that windows anddoors open easily.Discuss with your family and agree on a single meeting location outsideyour home.In the event of fire, get out and stay out. Don’t go back inside for people,pets or possessions.Do not open a door if the handle is hot.If there is smoke stay low to the ground and go under the smoke.Escape your home before calling the fire department. Call the firedepartment and police from the outside meeting place using your cellphone or call from a neighbor’s phone.Practice your home evacuation plan.TouchScreen TCA 400 Getting Started Guide – Installation3
Using TouchscreenTouchscreen is the center of your home security system. This device allows you to perform actionssuch as arming and disarming your security system, monitoring the status of your security sensors,and sending emergency alarms.NOTE: This guide provides an overview of Touchscreen and its basic operation.This guide assumes Touchscreen has been activated and you have assigned a Keypad Code.For more information, see Touchscreen User’s Guide and the Home System Installation Guide.The follow diagram shows the major components of Touchscreen:Home button:Press this button to go to Homescreen of the user interface.LED light4TouchScreen TCA 400 Getting Started Guide – Installation
Understanding TouchscreenTouchscreen communicates with your security system. It combines security and home connectivityinto a graphical interface that provides a real time view of your security devices and tools to manageyour security system.The first screen displayed is Home screen. Through interaction with this screen you can access thefunctions you desire, including:Arming and Disarming your Security SystemAccessing and Managing System Alerts, Recent Activity, and SettingsAccessing the Dashboard ScreenInitiating a Panic AlarmThe screen is divided into the following operational sections:System Header for Navigation and ReferenceSecurity Status Content AreaFooter AreaTouchScreen TCA 400 Getting Started Guide – Installation5
System Navigation and Reference HeaderThe System Navigation and Reference header displays at the top of Touchscreen. On the left side,it provides a navigation icon allowing you to access the Dashboard screen. Centrally it provides thecurrent time and basic weather information. The right side provides a trouble indicator, when systemtroubles are present, access to recent System Activity, and access to System Settings.DashboardIconAlerts IconCurrent TimeBasic WeatherMore Menu IconTapping More Menu iconwill open a window providingaccess to additional featuresincluding: Activity, Settings,Display & Volume, SleepMode, Take a Guided Tour,and Accessibility.Tapping Activity icon willallow you to review recentzone activity for your securitysystem.Tapping the Setting icon willallow you to manage yourdevices and security.Tapping Dashboard icon will allow you to access your home devices andadditional zone information.Blue dot will appear when your system has an alert. The system will also soundan audible alert regularly to ensure that you are aware of the problem. Tappingthe icon will open a list of all the current alerts.NOTE: Settings access is disabled when the Security System is armed.6TouchScreen TCA 400 Getting Started Guide – Installation
Security Status Content AreaThe centrally displayed Security Status Content area contains the current status of your TouchscreenSecurity System. The various statuses displayed will tell you if your system is:Disarmed – (Green) Disarmed and ready to be armedDisarmed – (Grey) Disarmed and not ready to be armed due toarm-blocking zones (Open Zones or Alerts)Armed – (Red) Armed in Away, Stay, or Night modeFooter AreaThe Footer section contains Emergency icon, located in the bottom left of the screen. Tappingthis icon will provide you the ability to sound an immediate audible alarm and send an alert to theCentral Monitoring Station that an Emergency Alarm has been initiated.Emergency IconTouchScreen TCA 400 Getting Started Guide – Installation7
Understanding Arming ModesYou can arm the system for multiple scenarios:Arm Away – Best for leaving your home unattendedArm Stay – Ideal for hanging out at homeArm Night—Best for when everyone is in bedDifferent arming modes use different rules for when sensors are tripped and for Entry/Exit delays.An Exit delay is a short period of time after the system is armed for you to leave the premises. Entrydelay gives you time to disarm the system when you reenter the premises. You must enter a validkeypad code within the Entry delay period to avoid sounding an alarm.Arm Away ModeArm Away mode is used when everyone is leaving the house. The following rules apply:Alarm trips immediately if a monitored Perimeter zone (non-entry/exitdoor or window) is opened.Interior motion detectors are armed.Entry/Exit zones start an Entry Delay.Exit Delay starts when the system is armed.Arm Stay ModeArm Stay mode is used to arm the system when there are people in the premises. The followingrules apply:Alarm trips immediately if a monitored Perimeter zone (non-entry/exitdoor or window) is opened.Interior motion detectors are armed.Entry/Exit zones start an Entry Delay.Exit Delay starts when the system is armed.Exit Delay does not beep and is twice the length of Alarm Away mode.Arm Night ModeArm Night mode, is used when everyone is going to bed.This mode works the same as Arm Stay except that there is no Entry Delay period. If an entry/exitzone is opened, an alarm sounds immediately.NOTE: There is still an Exit Delay period that works the same as in Arm Stay mode.8TouchScreen TCA 400 Getting Started Guide – Installation
Arming and Disarming the SystemThe Security status of your security system is displayed in the Security Status content area.Disarmed - ReadyWhen your security system is disarmed and ready to bearmed, the security status will be shown as “Disarmed” witha green shield. Tap the big green circle to arm your system.Disarmed - Not ReadyA grey shield is displayed, when your security system isdisarmed, but unable to be armed due to an open zone oran alert that prevents arming. The status below “Disarmed”will advise how many zones are preventing you from armingyour system and whether the status is caused by an openzone, an alert, or both!ArmedWhen your security system is armed, the security status willbe shown as “Armed Away”, “Armed Stay”, or “Armed Night”based on the arm mode selected when the system wasarmed. The status will also show you the date and time thatthe security system was armed.TouchScreen TCA 400 Getting Started Guide – Installation9
Tapping the grey Security Shield will open a Bypass Options screen which will allow you to seethe current status of all of your security zones, and give you the option to bypass all Arm-BlockingZones, or bypass any zone individually. If the affected zones are closed or alerts are resolved thestatus will automatically update to Disarmed - Ready.Zones that are currently preventing you from arming the system are easily distinguished by thedifferent row color.Tapping thebutton will temporarily turn off, or “bypass” the affected zonesso you can arm your security system.IMPORTANT NOTE: Bypassed Zones are NOT armed and will not trigger an alarm iftripped while the system is armed.10TouchScreen TCA 400 Getting Started Guide – Installation
Arming the System from TouchscreenTo arm the system from Touchscreen:1Tap the Security Status shield when it is inDisarmed - Ready state.2The Arm Modes screen is displayed with akeypad and “Away” selected as the defaultarm mode.Select the desired arm mode (not requiredfor Away) and enter your keypad code.3The Touchscreen will begin the Exit Delayperiod and the screen changesto display a countdown timer.4The LED turns red when the system isarmed. The text of the message will vary,depending on which arm mode youselected.Special RulesIf you selected Arm Away mode, you have until the Exit Delay is over to exit the premises.Otherwise, the system is automatically armed in Arm Stay mode. There is still an Exit Delayperiod for the other Arm modes, but they do not require that the door open and close duringthe period.If you open and shut an Entry/Exit door during the Exit Delay and then re-enter the premise, theExit delay restarts at 120 seconds for Arm Stay and Arm Night or 60 seconds for Arm Away. It willonly do this one time.If an Entry/Exit door is left open at the end of Exit Delay, the Entry Delay immediately starts and,if the system is not disarmed, an alarm will sound.TouchScreen TCA 400 Getting Started Guide – Installation11
Arming the System from TouchscreenWhen you arm the system, the screen displays a countdown of the number of seconds until the ExitDelay is over. You can choose to cancel the arming process.To cancel the arming process:1Tap thebutton located belowthe countdown timer and Arm Mode.2Touchscreen displays the countdown timeralong with a keypad.Enter your Keypad Code to stop thearming process.Disarming the SystemWhen you enter an armed premises, an Entry Delay period starts:12During the Entry Delay, Touchscreendisplay changes to announce the numberof seconds before the alarm goes off.Touchscreen beeps audibly once everysecond, until the last 10 seconds when itbeeps twice a second.If a valid keypad code is not entered by the end of the Entry Delay period, an alarm sounds. Fromthe time an alarm sounds, for most reasons, you have 30 seconds to enter a valid keypad code todisarm the system and prevent an alarm being sent to the central monitoring station. This is calledthe Alarm Transmission delay or the Abort Window.The Alarm Transmission Delay is a required period that prevents a report to the central monitoringstation if an alarm was triggered innocently.12TouchScreen TCA 400 Getting Started Guide – Installation
IMPORTANT NOTE: Emergency alarms and smoke alarms are reported without an AlarmTransmission delay or an Entry Delay. Consult Customer Care to understand the number ofseconds configured for the Alarm Transmission Delay on your system.To disarm the system from Touchscreen:1Tap the Security Status shield when it is anArmed State.*If an alarm was triggered prior to enteringyour Keypad Code, an alarm SummaryReport will be displayed after disarmingyour Security System.2Enter your Keypad Code.TouchScreen TCA 400 Getting Started Guide – Installation13
Sending An Emergency AlarmYou can manually trip an alarm in the event of an emergency by tapping the Emergency button.Emergency alarms are reported without an Entry delay or Alarm Transmission delay.To manually trip an alarm:12Press theEmergency button locatedin the lower left corner of many screens.The Emergency Confirmation screenappears.Press and hold the redEmergencybutton for 2 seconds to sound an alarmand call the police.314TouchScreen TCA 400 Getting Started Guide – InstallationTouchscreen will immediately issue acontinuous audible alarm and display anAlarm in Progress screen which includes akeypad for disarming the system if desired.
Touchscreen Installation and MaintenanceInstalling Technicolor Touchscreen123Remove Touchscreen fromits packaging.Remove the back plate from the backof Touchscreen by sliding it downward,then pulling it out.Feed the AC power cable throughthe bottom channel and connectto the power port on the back ofTouchscreen.TouchScreen TCA 400 Getting Started Guide – Installation15
WARNING: The rechargeable battery that came with your Touchscreen is only availablethrough your service operator. If your battery needs to be replaced, contact your service operatorto arrange for replacement.16TouchScreen TCA 400 Getting Started Guide – Installation4Unwrap the 4 volt battery from itspackaging and insert the end withthe /– contacts first. Snap theopposite end down in the batterycompartment to complete batteryinstallation.5Place down the back plate then slideup to snap the back plate in. Tuck theAC power cable into the channel atthe bottom of the back plate.6Connect the stand to the back plateof Touchscreen by sliding in bothends.7Position Touchscreen near an unswitched wall outlet (not controlledby a light switch).
89[ COMCASTCONFIDENTIAL]HOME HUB DESIGN INTENTRatingV 00108.14.15Input100 120VAC 50/60HzOutput12VDC/1.5ARemove the center screw from the walloutlet.Plug Touchscreen’s AC adapter intothe wall outlet, and replace the centerscrew through the bracket hole.10 of 1110After a few seconds, the InstallationWelcome screen is displayed onTouchscreen.NOTE: If Touchscreen does not display the Installation Welcome screen, you must reset it tofactory default.IMPORTANT NOTE: The maximum distance for the sensors to communicate withTouchscreen is 50 feet. However, the distance can be limited occasionally by the materialsfor the walls, electrical interference, and other conditions. Installation is in accordance withNational Electrical Code, ANSI/NFPA 70-1996, and National Fire Alarm Code, NFPA 72-1993,Chapter 29.TouchScreen TCA 400 Getting Started Guide – Installation17
Replacing the BatteryWARNING: The rechargeable battery that came with your Touchscreen is only availablethrough your service operator. If your battery needs to be replaced, contact your service operatorto arrange for replacement.123418TouchScreen TCA 400 Getting Started Guide – InstallationRemove the back plate from the back ofTouchscreen by sliding it downward, thenpulling it out.Disconnect the battery from Touchscreenby lifting it out of the compartment usingthe battery pull tab.Unwrap the 4 volt battery from itspackaging and insert the end with the /– contacts first. Snap the oppositeend down in the battery compartmentto complete battery installation.Snap the back plate to the back ofTouchscreen by placing down the backplate then slide up to snap the backplate in.
Evacuation PlanDevelop an emergency evacuation plan for use in the event of fire. Here are somerecommendations from the National Fire Protection Association.Make an evacuation plan for how to leave your home in the case of fire or other emergency.Sketch a map of your home that shows all the doors and windows. Discuss the plan witheveryone in your home so that everyone will know what to do.Have at least two ways to exit each room. Make sure that windows and doors open easily.Discuss with your family and agree on a single meeting location outside your home.In the event of fire, get out and stay out. Don’t go back inside for people, pets or possessions.Do not open a door if the handle is hot.If there is smoke stay low to the ground and go under the smoke.Escape your home before calling the fire department. Call the fire department and policefrom the outside meeting place using your cell phone or call from a neighbor’s phone.Practice your home evacuation plan.Additional Emergency PreparationsDo not wait until an emergency occurs to make a plan. Talk to each other about what eachperson should do in different types of emergency.Learn your security system. Get to know how to arm and disarm it and what to do when theauthorities or central monitoring calls.Make sure everyone (who should know) knows the Secret Word, when to use it, and that itshould not be shared.Understand the difference between your keypad code and the duress code.Understand that you should never enter the premises if you hear an alarm. Call police from acell phone or a neighbor’s phone.TouchScreen TCA 400 Getting Started Guide – Installation19
Recommendations for Sensor Installation and PlacementDoor/Window SensorsInstall door/window sensors at every possible location of entry, both upstairs and down.Motion DetectorsWhen placing motion detectors, anticipate traffic patterns:The lanes of traffic most used by people in your home are also those most likely to be used byintruders.Foyers, stairways, hallways, and entrance-ways are excellent locations for a motion detector.Do not place motion detectors at the end of hallways where an intruder will be walkingdirectly toward or away from the detector. For best coverage, mount the motion so that thelikely direction of intruder motion is across the motion detector’s pattern.A motion detector facing the following can cause false-alarms or failures in detection:Direct sunlightCold draftsWindowsUninsulated wallsHeat sources such as fireplaces and heating ventsMoving objects such as fansAir conditioning ventsGlass furnitureObstructions such as curtains, plants, large furniture, doorsNOTE: Free roaming pets pose special problems for motion detectors. Your installer hasbeen trained to help you configure your installation to address your specific pet needs.20TouchScreen TCA 400 Getting Started Guide – Installation
Smoke Detector Installation RecommendationsThe National Fire Protection Association (NFPA) recommends the following for the number andplacement of smoke detectors.Place smoke alarms as follows:In every bedroom, in hallways, and on every level of the premises, including the attic andbasement.High on a wall or on a ceiling (because smoke rises).If a smoke detector is placed on a ceiling, position at least 4 inches (10.2 cm) from the wall.Be careful about placing smoke detectors within 20 feet of a cooking appliance.Smoke alarms are an important part of a home fire escape plan.For maintaining your smoke detector:Test alarms at least monthly by pushing the test button.Replace batteries in all smoke alarms at least once a year. If an alarm “chirps,” warning thebattery is low, replace battery right away.Replace all smoke alarms when they are ten years old or sooner if they do not respondproperly when tested.Additionally we recommend:Maintain a 3 foot (about 1 meter) distance from air supply and return vents.DO NOT install smoke detectors in a garage or near furnaces.Install at least 6 m (20 ft) away from kitchens or other areas where combustion particles arepresent.Install smoke detectors at least 2.5 m (8 ft) away from bathrooms.DO NOT install in dirty, dusty, or insect infested areas.DO NOT install near areas fresh air inlets or returns or excessively drafty areas. Heating andair conditioning vents, fans, and fresh air intakes can drive smoke away from smoke detectors.Remember that dead air spaces may prevent smoke from reaching a smoke detector.Camera Installation RecommendationsCamera views are accessible to Touchscreen users and family members who log into the SubscriberPortal. When placing cameras, consider whether what they are monitoring poses any privacy issues.TouchScreen TCA 400 Getting Started Guide – Installation21
Installer Quick ReferenceFeatureExit DelayDescriptionThe time allotted for the subscriber to exit the premiseswhen the security system is armed. The time is doubledautomatically for Arm Stay and Arm Night modes up to 120seconds.Ranges & DefaultsDefault: 60 secondsRange: 30 seconds to240 secondsNote: For UL 1023 installation the maximum Exit Delayshould be programmed to maximum to 120 seconds andfor SIA CP-01 installation the maximum Exit delay should beprogrammable between 45 seconds to 4 minutes.Exit DelayProgressAnnunciationTouchscreen beeps once per second and then twice persecond during the last ten seconds.Disabled for ArmStay and Arm Away.This feature is notconfigurable.Exit DelayRestartIf Entry/Exit zone is faulted, restored and then faulted againprior to the end of the Exit Delay, then Exit Delay restarts.One time only.This feature is notconfigurable.Exit ErrorIf an Entry/Exit door is left open at the end of Exit Delay,the Entry Delay starts and, if the system is not disarmed, analarm sounds.This feature is notconfigurable.UnvacatedPremisesIf no Entry/Exit zone opens and closes during the ExitDelay, the Arming mode reverts to Armed Stay.This feature is notconfigurable.RecentClosingIf alarm is tripped within two minutes from end of Exitdelay, a Recent Closing transmission is sent to the centralmonitoring station with the arming keypad code.A Recent Closingtransmission is notfor alarms trippedby a smoke detector.This feature is notconfigurable.Entry DelayThe time allotted for the subscriber to disarm the systemafter tripping an Entry/Exit security zone.Default: 30 secondsRange: 30 seconds to240 secondsNote: For UL 1023 installation the maximum Entry Delayshould be programmed to maximum to 45 seconds and forSIA CP-01 installation the maximum Entry delay should beprogrammable between 30 seconds to4 minutes.22Entry DelayProgressAnnunciationTouchscreen beeps once per second and then twice persecond during the last 10 seconds.This feature is notconfigurable.SystemAcknowledgementWhen armed, Touchscreen beeps three times. If armedby key fob, the key fob’s LED flashes red once and theholds red for two seconds. When dis- armed from thetouchscreen, beeps once. If disarmed key fob, the keyfob’s LED flash green once and then hold green for twoseconds.This feature is notconfigurable.TouchScreen TCA 400 Getting Started Guide – Installation
Remote ArmingUsing key fob, system can be armed in Arm Awaymode and Arm Stay mode. Exit Delay period worksthe same way as non-remote arming.This feature is notconfigurable.Abort WindowLength of time after an alarm sounds for thesubscriber to enter a valid keypad code to preventalarm from being sent to the central monitoringstation.Default: 30 seconds Range:Minimum is 15 seconds andthe maximum is 45 secondsDisarmingDuring theAbort WindowSystem is disarmed by entering a valid keypadcode on the touchscreen or a key pad. If an invalidkeypad code is entered, the alarm restarts.This feature is notconfigurable.AbortingIf system is disarmed with within the Abort Window,no alarm transmission occurs. Contacts can opt notto receive SMS and/or email messages notifyingthem when an alarm was aborted and that thecentral monitoring station was not notified.By default, Verify contactsare notified by SMS andemail when an alarm isdisarmed during the AlarmTransmission Delay period.Cancel WindowFor five minutes after the end of the Abort Windowthe subscriber can disarm the system to send anAlarm Cancel tothe central monitoring station.This feature is notconfigurable.Use of DuressFeatureA four-digit code that immediately sends a silentalarm when used to arm/disarm the system oraccess security settings. Otherwise, this works thesame as the Master keypad code. Alarms sent fromuse of the Duress Feature are not recorded in thetouchscreen history, however, they do appear in thehistory on the Management Portal.Default: Duress Code isdisabled.Duress CodeMust be unique and created by the user.Default Duress Code: NullCross ZoningTwo security zones that only trip alarm if they areboth faulted within configured period of time. Canonly be created after the security zones have beenadded in a separate step.Default: 10 secondsRange: 1 second to 999secondsSwingerShutdownAfter Touchscreen has sent an alarm the setnumber of times (trips) to the central monitoringstation, no more alarms are sent to the centralmonitoring station for 48 hours or until the securitysystem is disarmed.Default: 2 tripRange: 1 to 6 tripsFire AlarmVerificationWhen enabled, the central monitoring station onlycontacts the authorities when multiple smokedetectors are faulted OR one detector is in analarm for 60 seconds.Default: DisabledCall WaitingTouchscreen connects to the central monitoring station over broadband and cellular,no call waiting alert is required.System TestPerform the system test as described in the XFINITY Home – Secure System InstallationGuide.CommunicationsTest the security system to ensure that it is in proper communication with the centralmonitoring station as described in the XFINITY Home – Secure System InstallationGuide.TouchScreen TCA 400 Getting Started Guide – Installation23
Issued Date: 09 / 08 / 2018
When your security system is armed, the security status will be shown as "Armed Away", "Armed Stay", or "Armed Night" based on the arm mode selected when the system was armed. The status will also show you the date and time that the security system was armed. Disarmed - Not Ready. A grey shield is displayed, when your security .