Transcription
Version 9.4Administrative Utilities Guidev. 1.0October 29, 2008
RightFax 9.4 Administrative Utilities GuideEditionInformation in this document applies to version 9.4 of the Administrative Utilities Guide. This guide was last updated on October 29, 2008.Copyright Notice 2008 Captaris. All rights reserved.Captaris301 116th Ave SESuite 400Bellevue, WA 98004(425) 455-6000http://www.captaris.comInformation in this document is subject to change without notice. Companies, names, and data used in examples herein are fictitious unless otherwise noted.Portions of this product Copyright 2002-2006 Glyph & Cog, LLC. Portions Copyright 2001 artofcode LLC. This software is based in part on the work of the Independent JPEG Group. This software is based in part on thework of the Freetype Team. Portions Copyright 1998 Soft Horizons. Portions Copyright 2001 URW . All Rights Reserved. Includes Adobe PDF Library technology. Adobe, Acrobat and the Acrobat logo are trademarksof Adobe Systems Incorporated. Portions Copyright TMS, Inc. 1994-2001. All rights reserved.For More InformationCaptaris, Inc. is a leading provider of software products that automate document-centric business processes. Captaris specializes in document capture, recognition, routing, workflow and delivery. Captaris integrated solutionsprovide interoperability with leading line of business applications and technology platforms. Captaris products include RightFax, Captaris Workflow, Alchemy, FaxPress, DOKuStar, RecoStar, Single Click Entry and IDStar whichare distributed through a global network of leading technology partners. Captaris customers include the entire Fortune 100 and the majority of Global 2000 companies. Headquartered in Bellevue, Washington, Captaris wasfounded in 1982 and is publicly traded on the NASDAQ Global Market under the symbol CAPA. www.Captaris.com.ii
ContentsChapter 1Administrative Utilities Requirements and Installation.13Chapter 2Working with the RightFax Database andAdministrative Utilities . 17Changing the Connection to the SQL Server. 17Backing up the Database. 18Purging Deleted Fax Records from the Database. 18Database Consistency Checking. 18Running Server Diagnostics. 19Purging Faxes from Users’ Fax Mailboxes. 19Retrieving Data from the Audits Table. 19Using the RightFax Administrative Utilities. 20Chapter 3Enterprise Fax Reporter. 35Running RightFax Enterprise Fax Reporter . 35Printing a Fax Report. 37Exporting Fax Information to Another File Format. 48Exporting Fax Data to a Text File. 49Running Fax Reporter from a Command Line . 49Appendix AFaxDump.exe Data Fields . 53Index . 65iii
RightFax 9.4 Administrative Utilities Guideiv
Chapter 1Administrative Utilities Requirements and InstallationIn RightFax 9.4, the installation of the Administrative Utilities hasbeen simplified. The Administrative Utilities are now installed aspart of the regular Setup on the RightFax Product Suite DVD,rather than on a separate CD.For information on requirements and installation of a standard orcustom version of RightFax, including components above andbeyond the Administrative Utilities, refer to the RightFax 9.4Installation Guide.For information on the requirements for installing the AdministrativeUtilities by themselves, see below:RightFax Administrative Utilities ComputerRequirementsRightFax Administrative Utilities for RightFax 9.4 can be installedonly on machines running the following Microsoft operatingsystems:Vista 32-bit versionsXP Professional 32-bit edition, SP2 or laterServer 2003 Standard x86Server 2003 R2 Standard x86Server 2003 Enterprise x86Additional Client Computer RequirementsThe following required components are installed during RightFax9.4 setup when you choose Administrative Utilities.Crystal Reports 10.2Microsoft .NET Framework 2.0 or laterMicrosoft Data Access Components 2.8Microsoft Visual C 2005 runtime componentsInstalling the Administrative Utilities13
RightFax 9.4 Administrative Utilities GuideFollow these steps to install the RightFax Administrative Utilitiesapplications directly from the RightFax software DVD:1. Log on to the computer using a Windows account that is amember of the domain and local Administrators group.2. Insert the RightFax Product Suite DVD. If AutoRun is enabled, amenu of install options appears. If AutoRun is not enabled,browse the DVD and run Setup.exe. The RightFax ProductSuite Setup wizard opens.3. RightFax 9.4 Administrative Utilities require Microsoft .NETFramework 2.0 or later. If this software is not installed on yoursystem, Setup will prompt you to install it. To install, click OK. Tocancel Setup and install .NET Framework 2.0 yourself, clickCancel.4. Review the Install screen and click Next.5. Carefully read and accept the license agreement, and clickNext.6. Setup can check for RightFax updates and other late-breakinginformation. To check for updates, verify that you have an activeHTTP connection and click Check for Updates. If updates arefound, follow the instructions in the Result section. To skip theupdate check and continue with Setup, check the box next toDo not check for updates, and click Next.7. Click Custom, and then Next.8. Select the Administrative Utilities feature located at the bottomof the features list and click Next.9. The Preview Requirements step lists third-party softwarerequired by your chosen features, and also lists the status ofsetup operations. Software that must be installed will have astatus of Must Install. To continue, click Next.10. On the Choose a SQL server screen, select either:Use an existing SQL ServerorInstall SQL Server Express Edition on this computerWhen you make a choice, the Next button will be enabled. ClickNext.Important If you chose Use an existing SQL Server in this step, skipstep 11 and go straight to step 12.11. On the Select a SQL Server Express Installation screen,choose one of the following:Typical to install a new instance of SQL Server Expressconfigured specifically for RightFaxCustom to install SQL Server Express using interactivemode. Interactive mode allows you to change the defaultinstallation folder, SA password, and the Instance Name.Click Next.12. On the Reserve TCP/IP Ports screen, choose whether or notto have Setup reserve network ports to prevent conflicts withother applications. Click Next.13. Click Apply on the Apply Settings screen.14. Click Next on the Ready to install screen.15. Accept the default, or choose your own location for theInstallation Folder, and click Next.16. You are now in stage 2: Install. Click Apply to complete thisstage, and move on to stage 3: Configuration.14
In the configuration stage of the install, you will go on to set uplicensing, activate RightFax, and perform final configuration tasks.For more information on this process, refer to the RightFax 9.4Installation Guide.Chapter 1Administrative Utilities Requirements and Installation15
RightFax 9.4 Administrative Utilities Guide16
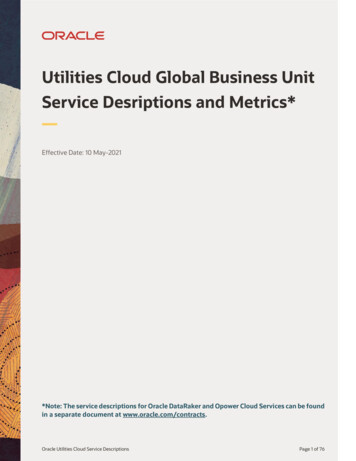
Chapter 2Working with the RightFax Database and Administrative UtilitiesRightFax stores all of its data, including information on faxes, users,and dialing rules in a SQL database (although fax images arestored separately as graphic files in the RightFax\Image folder).This database may be installed directly on the RightFax server, orcan be installed on an existing SQL server. You select where theSQL database is to be installed when you install the RightFaxserver software.To view your current SQL connection information, run the RightFaxServer Configuration program from Windows Control Panel andclick the Advanced tab. The SQL connection string is displayed inthe SQL Connection box.Figure 2.1 The Server Configuration Advanced tabThe Microsoft SQL Server that is provided with RightFax includesall of the SQL functionality required by the RightFax software.However, this version of SQL does not include all of the tools andadministrative capabilities that the full version does.It is strongly recommended that you do not make any changesdirectly to the RightFax SQL database. A complete schema of theRightFax database can be viewed using SQL Administrator. Animage of the schema is also available in the Docs folder on theRightFax installation DVD in the file RightFax DatabaseSchema.pdf.Changing the Connection to the SQL ServerRightFax creates and links to a SQL database during installation.However, the SQL database connection can be modified if at anytime you need to make changes to your existing SQL installation.17
RightFax 9.4 Administrative Utilities Guide1. To edit the SQL connection, click the [.] button to the right ofthe SQL Connection field. This opens the RightFax ServiceDatabase Connection String Editor dialog box.2. Click on the Modify button to open the General SQLConnection String window.3. From here, you can do the following: You can also click Lookupnext to the Database field to search for the database you wishto use.Click the [.] button next to the Server name field to browsefor a Local Server or a Network Server.Choose between Windows Authentication and SQLAuthentication.Click Lookup next to the Database field to search for thedatabase you wish to use.Backing up the DatabaseThe RightFax server does not include any SQL utilities designed toback up or restore the RightFax database. Several SQL backupand maintenance utilities are available commercially and it isstrongly recommended that you use one of these utilities forcreating frequent and regular backup copies of the RightFaxdatabase.Removing deleted fax records from the database is called“purging.” To keep the fax database to a manageable size, RightFaxpurges deleted fax records after a set length of time. The length oftime fax records of deleted faxes are saved before being purgedcan be customized for each RightFax group.To change the length of time RightFax keeps deleted faxrecords1. Run Enterprise Fax Manager and click Groups.2. Select the group ID to modify.3. Click the Basic Information tab.4. In the Days to Keep Deleted Fax Records box, enter thenumber of days to keep deleted fax records.Database Consistency CheckingCaptaris recommends that you periodically examine the faxdatabase for errors. Several administrative tools are available thatlet you perform periodic database maintenance tasks. All of theutilities described in this section are installed with the RightFaxAdministrative Utilities. For information on installing the RightFaxAdministrative Utilities, refer to the RightFax Installation Guide.Warning You must shut down all of the RightFax services beforeexecuting any of these database diagnostic tools.Purging Deleted Fax Records from the DatabaseRightFax stores records of all faxes, even if users have deleted thefaxes from their fax mailboxes. When a user deletes a fax, the faximage is deleted, but the fax record is saved and marked asbelonging to a deleted fax. This is how the fax server is able to runreports on fax activity even when the fax images have been deleted.Running Orphan.exeOrphan.exe searches the RightFax server for fax image files that donot have any references in the RightFax database. The image filesare called “orphans” because RightFax has no record of theirexistence and cannot access them. Using Orphan.exe, orphanimage files can be deleted from the server, or their records can berestored in the RightFax database.18
Orphan.exe is located in the RightFax\Database folder on theRightFax server. The fax server must not be running when executingthis utility.Syntaxorphan -fcomputer -ipath -uuserID [-a] [-n] [-z]Table 2a Orphan.exe Command Line OptionsOptionFunction-nDo not prompt.-ipathSpecifies the path to the IMAGE files. (e.g.-iC:\RIGHTFAX\IMAGE).-fThe fax server to connect to.-zActually erase files.-aRecovers files to the -u option.-lLogin UserID for logging in to the fax server. You willbe prompted for a password.-dDebug output (show all files being processed).-u (only usedwith the -aoption)The UserID to recover the files into.Purging Faxes from Users’ Fax MailboxesRightFax includes a feature called automatic fax aging that you canuse to delete fax images from users’ fax mailboxes after a certainlength of time. This can prevent older fax images from occupyingtoo much hard drive space on your server. Automatic fax aging isonly available if you have a RightFax Enterprise or Satellite server.This feature is configured separately for each group . Individualusers can be excluded from automatic fax aging by checking theExcluded from Group Fax Aging permission in their RightFax userprofiles.RightFax also includes a command line utility, FaxAge.exe, thatpurges fax records from users’ mailboxes. For information onrunning FaxAge.exe, see “Running FaxAge.exe” on page 25.Retrieving Data from the Audits TableWhen a user or group is added, modified, or deleted fromEnterprise Fax Manager, a record appears in the Audits Table.To retrieve data from the Audits Table, do the following:1. Access the program you normally use to perform a SELECTquery (for example, Microsoft Excel).Example orphan -fjanescomputer -ic:\program files\rightfax\image-ujanedoe -aRunning Server DiagnosticsRightFax includes a command line diagnostic utility, RFDiag.exe,that displays information about the RightFax server on whichRFDiag.exe is run. For information on running RFDiag.exe, see“Running RFDiag.exe” on page 33.2. Using that program, establish a connection to the SQL Serverthat contains your RightFax database (whatever you named itwhen RightFax was installed. The default name is RightFax).3. Using SQL query language:USE RightFax (or whatever you named your database)4. Retrieve all of the rows and columns from the table by executingthe following command:SELECT * FROM dbo.AuditsChapter 2Working with the RightFax Database and Administrative Utilities19
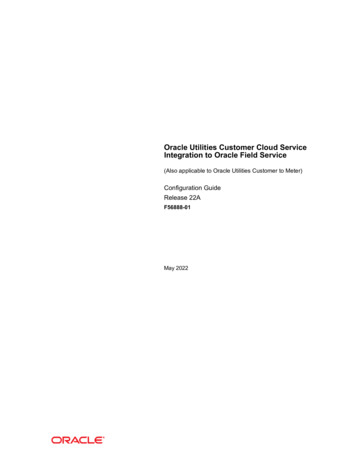
RightFax 9.4 Administrative Utilities GuideStructure of the Audits TableSee the screen shot below for the structure of the Audits Table asviewed in SQL Server Management Studio:Table 2b Columns in the Audit Table and their DescriptionsColumnDescriptionCreationTimeThe date and time when the action wasperformed.CreatorThe RightFax UserID of the user performingthe action.AuditedValueThe ID of the RightFax object upon which theaction was performed.ServerGUIDThe unique identifier of the RightFax serverupon which the action was performed.Figure 2.2 The Structure of the Audits TableUsing the RightFax Administrative UtilitiesAudit Table ColumnsHere is a list of the Audit Table columns and their descriptions.Table 2b Columns in the Audit Table and their DescriptionsColumnDescriptionIDUnique identifier for each row, whichincrements sequentiallyActionThe action performed on the user or group.Valid values are “Added”, “Modified”, or“Deleted”.AuditedTypeThe RightFax object on which the action wasperformed: “User” or “Group”.RightFax includes several administrative utilities that are installedseparately from the RightFax server installation. It is stronglyrecommended that you install the administrative utilities on theRightFax server immediately after installing the server software. Forinformation and instructions on installing the RightFaxAdministrative utilities, see the RightFax Installation Guide. All ofthe RightFax administrative utilities are installed in theRightFax\AdmUtils folder or one of its subfolders on the RightFaxserver.20
The following table lists each of the RightFax administrative utilities,and includes links to more complete documentation on each utility.Table 2c The RightFax Administrative UtilitiesUtilityDescriptionChgUser.exeChanges RightFax privileges and options for allusers or groups of users at once (see “RunningChgUser.exe” on page 21).DSender.exeUploads RightFax user IDs to the HP 9100CDigital Sender so that RightFax can apply users’specific fax transmission and notification options(see “Running DSender.exe” on page 24).FaxAge.exeFaxDump.exeDeletes faxes from RightFax users’ mailboxes aftera fixed interval (see “Running FaxAge.exe” onpage 25).Outputs fax data in text format for import intoother databases (see “Running FaxDump.exe” onpage 26).Table 2c The RightFax Administrative Utilities (Continued)UtilityDescriptionRFDiag.exeDisplays diagnostic information about theRightFax server (see “Running RFDiag.exe” onpage 33).ServSync.exeCompares database objects on two RightFaxservers. (see “Running ServSync.exe” onpage 34).Running ChgUser.exeChgUser.exe is a command line utility that changes RightFaxpermissions and options for multiple users at once. ChgUser.exe islocated in the RightFax\AdmUtils folder on the RightFax server.chguser [options] [keywords]SyntaxTable 2d ChgUser.exe Command Line OptionsOptionFunctionEnterprise FaxReporterOrganizes and presents data from your RightFaxdatabase for reporting and billing purposes.-1numberSpecify default fax number for users-2numberSpecify default voice number for usersFaxStat.exeRemotely monitors any RightFax server on thenetwork (see “Running FaxStat.exe” on page 27).-3Display a user list with ID, name, and routingcodeImpUser.exeImports users from a comma-delimited ASCII file(see “Running ImpUser.exe” on page 27).-4Reset all user names to match user IDs-6ModUser.exeChanges user settings for multiple RightFax users(see “Running ModUser.exe” on page 30).Display a tab-delimited user list with ID, name,routing code, and group ID-7optionSet auto-print options for users using thefollowing:ODBCSync.exe Imports user, printer, and billing code informationfrom an ODBC source (see “RunningODBCSync.exe” on page 32).PhnPrint.exeb Print fax bodyc Print fax cover sheett Print transmission historyf Print for failed faxes onlys Print for successful faxes onlyPrints the published and private phonebookentries of one or more RightFax users (see“Running PhnPrint.exe” on page 32).Chapter 2Working with the RightFax Database and Administrative Utilities21
RightFax 9.4 Administrative Utilities GuideTable 2d ChgUser.exe Command Line Options (Continued)Table 2d ChgUser.exe Command Line Options Specify the printer ID to which received faxesshould be automatically printed-nsend,receive-bprinterIDSpecify the printer ID to which sent faxesshould be automatically printedSets sent and received fax notifications.Separate send and receive values with acomma (i.e., -n0x80,0x00)-cfileSpecify the cover sheet file (i.e. FCS.pcl) forusers-dTurn on Debug mode-fserverSpecify the name of RightFax server-ggroupIDName of group in which to place users. Thegroup ID must already exist-iDIDnumSpecify a routing code for the users-luserIDUser ID to log in to the RightFax server-mVMSIDSpecify a voice mail subscriber ID for theusersValues for send are:0x01 Send “Info incomplete” message once0x02 Send “Info incomplete” messageperiodically0x04 Send “Sending.” message once only0x08 Send “Sending.” messageperiodically0x10 Send “Error, will be retried” messages0x20 Send “Successful send” messages0x40 Send “Error, will be aborted”messages0x80 Do not notify about faxes held forpreviewValues for receive are:0x00 Do not send messages for receivedfaxes0x01 Send new fax message once only0x02 Send new fax message periodicallyTo enable multiple notifications, add the valuesof all desired notification options. For example,to enable send options 0x01, 0x10, and 0x40,use the value 0x51.-opasswordPassword for the user ID used to log in to theRightFax server. To use NT authentication,leave this blank-pprinterIDSpecify the ID of the default printer for users22
Table 2d ChgUser.exe Command Line Options (Continued)Table 2e ChgUser.exe KeywordsOptionFunctionKeywordFunction-rtypeSpecify routing types for users using thefollowing:admin/noadminEnables/disables administrative privilegesRF RightFax mailboxGW GroupWiseOCR Optical Character RecognitionCX Telephony ServerEXCH MS ExchangeNOTE NotesXRT RightFax InterconnectTRS TRS NetComm ServerSMTP SMTP mailFILE network folderallowocr/noallowocrEnables/disables the permission to OCRfaxesarchive/noarchiveEnables/disables archiving of all sent es the Stamp Pages ofReceived Faxes With Audit StamppermissionautoforwardfaxEnables the autoforward feature to a faxmachine. Use Noautoforward to disablethe autoforward featureAdd “ ” to the end of the routing type todelete the original file after routing (e.g.,“-rSMTP ”)-sformatFax file routing format using the following:PCX PCX formatDCX DCX formatG3 TIFF-G3 formatG4 TIFF-G4 formatPDF PDF formatGIF GIF format-tprotocolNote If this feature has never been enabledin the user configuration in Enterprise FaxManager, no fax machine information willexist and this feature will not workautoforwarduserNote If this feature has never been enabledin the user configuration in Enterprise FaxManager, no user ID information will existand this feature will not workForce protocol to specific type (rather thanassigning automatically) using the following:n Named Pipess SPXt TCP/IPx IPX-uuserIDsComma delimited list of users to change-vDisplay current values for users-xDelete the users specified with the -ucommand line option (required)Enables the autoforward feature to aRightFax user. Use Noautoforward todisable the autoforward featureautoprint/noautoprintEnables/disables automatic printing ofreceived faxes. Use -7 and -A options toset printer ID and autoprint optionsbillcodeedit/nobillcodeeditEnables/disables changing of defaultbilling code ables ability to select billingcodes by IDChapter 2Working with the RightFax Database and Administrative Utilities23
RightFax 9.4 Administrative Utilities GuideTable 2e ChgUser.exe Keywords (Continued)Table 2e ChgUser.exe Keywords bodynormalSets resolution of fax body to fine or normalsmartresume/nosmartresumeEnables/disables the llcodeverifyEnables/disables permission to bypassbilling code alSets resolution of fax cover sheet to fine ornormalEnables/disables the user’s option to usethe Trash folder when deleting faxes inFaxUtilcoverpage/nocoverpageEnables/disables sending a cover pagewith every fax. Use -C option to set coversheet filedefaultbc/nodefaultbcEnables/disables the Assign DefaultBilling Codes to Received neverSpecifies Autodelete setting for when todelete sent faxes from the FaxUtil mailboxemptytrash/noemptytrashEnables/disables the user’s option toautomatically empty the use the Trashfolder when exiting FaxUtilhighp/nohighpEnables/disables the availability of HighPriority for usernoautoforwardDisables the autoforward featurenontsecurityDisables the Use NT authentication featureprotected/unprotectedSets user mailbox to protected (requirespassword) or unprotected (does notrequire password)sautoprint/nosautoprintEnables/disables automatic printing of sentfaxes. Use -7 and -B options to set printerID and autoprint optionsNote Unless you use the -u option to specify individual RightFax userIDs, ChgUser commands will be applied to all RightFax user IDs.Example chguser -frfserver -vchguser -frfserver -ubob,fred noadminchguser -frfserver2 -v -alaser4 autoprintRunning DSender.exeDSender.exe is a command line utility that synchronizes user IDsbetween RightFax and an HP Digital Senders on your network. Youcan either import your RightFax user IDs to each Digital Sender orexport the User IDs on each Digital Sender to RightFax (up to amaximum of 1,024 user IDs). The method you choose depends on24
which system already contains the most comprehensive user IDlist. DSender.exe is located in the RightFax\AdmUtils folder on theRightFax server.Important User synchronization with DSender.exe is not dynamic. Ifnew users are added, you will need to re-run the DSender.exe utility tosynchronize the user lists.Syntaxdsender -idigsender [-aaccount] -ppassword-ffaxserver [-uuserID] [-t{n s t}] [-1] [-s] [-z]Table 2f DSender.exe Command Line OptionsOptionFunction-idigsenderSpecifies the IP address of the Digital Sender.-aaccountThe account name used to log on to the DigitalSender. Default account name is“ADMINISTRATOR”.-ppasswordThe password for the account name used to logon to the Digital Sender.-ffaxserverThe name of the RightFax server to synchronize.-uuserIDSpecifies the user ID to use as the model whencreating new users (usually set to “DEFAULT”).-tprotocolForce network protocol to specific type (ratherthan assigning automatically) using the following:n Named pipes (default)s SPXExample dsender -i38.2.54.156 -pmypassword -frfserver -tt -zThis example logs on to the Digital Sender at IP address38.2.54.156 using the user name “administrator” and thepassword “joshua.” It then copies the user IDs from the RightFaxserver “RFaxServ” to that Digital Sender using the TCP/IP protocoland leaves the “Administrator” user ID on the Digital Senderunchanged.Running FaxAge.exeFaxAge.exe is a command line utility that deletes faxes fromRightFax users’ mailboxes. FaxAge.exe is located in theRightFax\AdmUtils folder on the RightFax server.Important The fax server must be running when executing this utility.faxage -fserver -auserID -ofile [-dvalue][-emm/dd/yyyy] [-llevel] [-ppassword][-q][-smm/dd/yyyy] [-t{n s t x}] [-uuserIDs] [-wfolder] [-y][-z]SyntaxTable 2g FaxAge.exe Command Line OptionsOptionFunction-auserIDThe RightFax user ID to use when logging in to theRightFax server. A password can be required usingthe -p option.-dvalueSpecifies which faxes should be deleted:1 only received faxes2 only sent faxes3 all faxes (default)4 only viewed or printed faxes5 only printed faxes6 only non-approved faxes7 only approved faxest TCP/IP-1Copies user IDs from the HP Digital Sender toRightFax. The default setting is to copy user IDsfrom RightFax to the HP Digital Sender.-sDisallows synching of the ADMINISTRATORaccount.-zDeletes existing unmatched users from thedestination system.Chapter 2Working with the RightFax Database and Administrative Utilities25
RightFax 9.4 Administrative Utilities GuideTable 2g FaxAge.exe Command Line Options (Continued)OptionFunction-emm/dd/yyyy Specifies the ending date of the date range todelete. This can also be specified as a day offset, i.e,-e-30 (default is 12/31/2010).Note You must use the 4-digit year format or thedate may be read incorrectly.-fserverSpecifies the name of RightFax server.-llevelInformation level 0 or 1 (default is 0).-ofileOutput file listing all deleted faxes. If the file alreadyexists, the new file list will be appended to the end.-ppasswordThe RightFax password for the user ID specifiedwith the -a option. To use NT authentication, leavethis option blank.-qPrints a table containing field definitions forinformation levels. This options overrides all otheroptions and causes the program to do nothing else.-smm/dd/yyyy Specifies the starting date of the date range todelete. This can also be specified as a day offset, i.e,-s-30 (default is 01/01/1980).Note You must use the 4-digit year format or thedate may be read incorrectly.-tprotocolForces protocol to specific type (rather thanassigning automatically) using the following:n Named Pipes (default)s SPXt TCP/IPx IPX-uuserIDsComma delimited list of users (default is all users).-wfolderName of folder in which to restrict the deletions(default is all folders).Table 2g FaxAge.exe Command Line Options (Continued)OptionFunction-ySkips any verification questions.-zWithout this parameter, no deletions will occur.Example faxage -frfserver -aadministrator -odump.out -d2-s01/01/2004 -zRunning FaxDump.exeFaxDump.exe is a command line utility that outputs ASCII text filesof fax data that you can import into other databases to producereports. The text file prints one complete fax record per line. Quotessurround string data, and all fields are separated by commas (thiscan be customized using the -d option). FaxDump can report eightlevels of information. For definitions of the fields included in eachfax record for each of these information levels, see Appendix A,“FaxDump.exe Data Fields”. FaxDump.exe is located in theRightFax\AdmUtils folder on the RightFax server.Syntaxfaxdump -fserver -auserID -ofile {-ggroupID -uuserID}[-1] [-dascii] [-emm/dd/yyyy] [-h] [-i{s f a}] [-llevel][-ppassword] [-q] [-smm/dd/yyyy] [-t{n s t x}]Table 2h FaxDump.exe Command Line OptionsOptionFunction-1Fields that contain a delimiter (see the -d option) willnot include quotation marks.-auserIDThe RightFax user ID to use when logging in to theRightFax server. A password can be required usingthe -p option.-dASCIIThe ASCII value (in decimal) of the character to useas a delimiter for FaxDump output. By default, this isset to comma (ASCII 44).26
Table 2h FaxDump.exe Command Line Options (Continued)OptionFunction-emm/dd/yyyy The ending date of the date range to report on. Thiscan be specified as a day offset, i.e, -e-30 (default is12/31/2010).-fserverThe name of RightFax server that contains the faxinformation to output.-ggroupIDThe RightFax group ID for a group o
RightFax includes a command line diagnostic utility, RFDiag.exe, that displays information about the RightFax server on which RFDiag.exe is run. For information on running RFDiag.exe, see "Running RFDiag.exe" on page 33. Purging Faxes from Users' Fax Mailboxes RightFax includes a feature called automatic fax aging that you can 4.