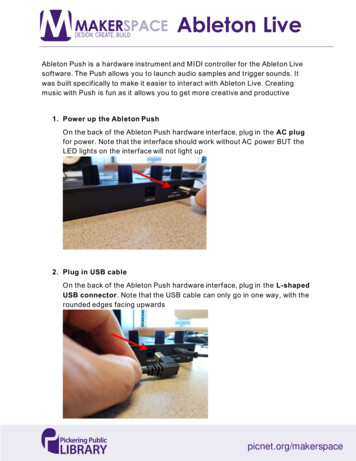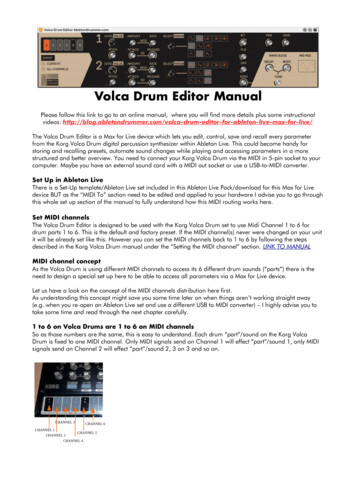
Transcription
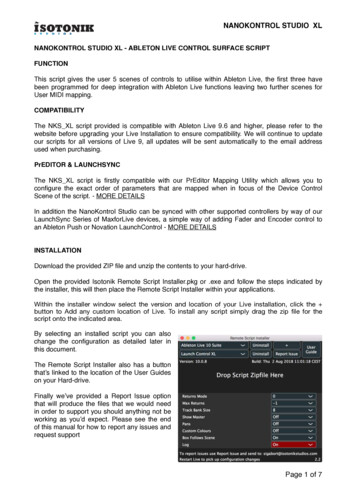
NANOKONTROL STUDIO XLNANOKONTROL STUDIO XL - ABLETON LIVE CONTROL SURFACE SCRIPTFUNCTIONThis script gives the user 5 scenes of controls to utilise within Ableton Live, the first three havebeen programmed for deep integration with Ableton Live functions leaving two further scenes forUser MIDI mapping.COMPATIBILITYThe NKS XL script provided is compatible with Ableton Live 9.6 and higher, please refer to thewebsite before upgrading your Live Installation to ensure compatibility. We will continue to updateour scripts for all versions of Live 9, all updates will be sent automatically to the email addressused when purchasing.PrEDITOR & LAUNCHSYNCThe NKS XL script is firstly compatible with our PrEditor Mapping Utility which allows you toconfigure the exact order of parameters that are mapped when in focus of the Device ControlScene of the script. - MORE DETAILSIn addition the NanoKontrol Studio can be synced with other supported controllers by way of ourLaunchSync Series of MaxforLive devices, a simple way of adding Fader and Encoder control toan Ableton Push or Novation LaunchControl - MORE DETAILSINSTALLATIONDownload the provided ZIP file and unzip the contents to your hard-drive.Open the provided Isotonik Remote Script Installer.pkg or .exe and follow the steps indicated bythe installer, this will then place the Remote Script Installer within your applications.Within the installer window select the version and location of your Live installation, click the button to Add any custom location of Live. To install any script simply drag the zip file for thescript onto the indicated area.By selecting an installed script you can alsochange the configuration as detailed later inthis document.The Remote Script Installer also has a buttonthat’s linked to the location of the User Guideson your Hard-drive.Finally we’ve provided a Report Issue optionthat will produce the files that we would needin order to support you should anything not beworking as you’d expect. Please see the endof this manual for how to report any issues andrequest supportPage 1 of 7
NANOKONTROL STUDIO XLNanoKontrol Studio ConfigurationTo work correctly the NanoKontrol Studio needs to have a template loaded into it. You’ll find theZIP file contains a nks xl nktrl st set file.- Install KorgKontrol Editor - CLICK HERE- Connect the NanoKontrol Studio via USBif you have not done so already- Select the NanoKontrol Studio in theEditor- Locate the nks xl nktrl st set file on yourHard-Drive from within the Editors browser- Use the Communication menu at the topof the screen and choose the Write SceneSet optionYour controller will now be configured tocommunicate on MIDI Channel 1 for the firstthree scenes.Page 2 of 7
NANOKONTROL STUDIO XLCONFIGURATION OPTIONSWithin the Isotonik Remote Script Installer are a number of configuration options, you can editthese with the details below to give different behaviours to your controller. Remember that changeswill not take place until you have saved the file and restarted Live.RETURNS MODEThe return tracks are right justified meaning that they will always appear on the right hand side ofthe controller. Two modes are provided which allow you to alter the behaviour of the display of thereturn tracks. This can be controlled by the Returns mode setting.Mode 0 – no return tracks are shownMode 1 – normal tracks have priority – return tracks will only be displayed if there are not enoughnormal tracks to fill the display – you can use the BANK LEFT/RIGHT buttons to scroll throughnormal tracks until the return tracks are displayed.Mode 2 – return tracks have priority – return tracks will always be displayed and will occupy theright hand portion of the controller – you can use the BANK LEFT/RIGHT buttons to scrollthrough the normal tracks that can be controlledMAX NUMBER OF RETURNSThe Max returns config setting can be used to limit the number of return tracks that can becontroller (if you have a large number in the set but don’t want all of them to appear on thecontroller). Setting this to -1 will disable this filterTRACK NAVIGATIONYou can configure how many tracks are moved left and right with the BANK LEFT / RIGHTbuttons by changing the Track bank value.SHOW MASTERWith this set to 1 the 8th track on the controller will always be dedicated to control the MasterTrack in Live regardless of the location of the Ring Focus BoxAUTO SCAN MULTIThe script is fully PrEditor compatible so this option will define how Multi-Map VST’s behave whenselected for editing are automatically scanned for parameter layout or whether the user does it viathe PrEditor UI LOGThis is used by our developers to debug any issues, you’ll receive instructions when reporting anyissues to our support team.Page 3 of 7
NANOKONTROL STUDIO XLSCENE ONE - MIXER CONTROLThis scene is dedicated to Mixer Control, please refer to the diagram below for the functionality ofeach of the controls. Within the Session View of Ableton Live you will see a Ring Focus Boxindicating which 8 tracks are being controlled.FOLD / UNFOLDWhen a particular track is selected the Fold / Unfold Button will light if a Group Track has beenselected. If flashing the Group Track has been folded.TRACK SELECTThe currently selected track button will flash to indicate it’s selection.TRACK MUTEThe Track Mute Buttons will flash to indicate which tracks are muted.Page 4 of 7
NANOKONTROL STUDIO XLSCENE TWO - DEVICE CONTROLWhilst retaining much of the Mixer Control functionality this scene switches some controls to giveDevice Control over the currently BlueHanded device in focus.The automatic parameter mappings defined by Ableton can be edited using our PrEditor MappingUtility - MORE DETAILSDEVICE ON / OFFThe Device On / Off buttons will only light when a device is present on the selected trackDEVICE SELECTThe Device Select buttons will only light when a device is present on the selected track. Thecurrently selected device will be indicted by a flashing button.Page 5 of 7
NANOKONTROL STUDIO XLSCENE THREE - SESSION CONTROLSwitch into Scene Three and the 8 x 4 set of buttons at the top of the controller are given over toclip launching focusing on the 8 x 4 grid of clips highlighted on the screen in Session Mode by theRing Focus Box.CLIP LAUNCH GRIDThe currently selected clip will be indicated by a fast flashing button, any playing clips will show byflashing slowly.CLIP STOPWhen the Forward button is pressed the fourth row of Clip Launch buttons become Clip Stopbuttons, where there are clips playing in a track they will be indicated by flashing buttons. Thesewill become solidly lit when a stop action has been sent and unlit when no clips are playing.SESSION OVERVIEWIn this mode each button of the Clip Launch Grid represents an 8 x 4 block of clip slots in Live. Thecurrent position of the Ring Focus Box is indicated with a fast flashing button, if there are any clipsplaying within an 8 x 4 block then a slow flashing button will indicate this.Page 6 of 7
NANOKONTROL STUDIO XLSUPPORTFor support issues please email sigabort@isotonikstudios.com or complete the support requestform by visiting the Orders section of your account on the website and choosing the order thatyou placed to order the product.In all cases please include the files produced when opening the Isotonik Remote ScriptInstaller and pressing the “Support Request” button. Without these files we will be unableto support your request.Page 7 of 7
This script gives the user 5 scenes of controls to utilise within Ableton Live, the first three have been programmed for deep integration with Ableton Live functions leaving two further scenes for User MIDI mapping. COMPATIBILITY The NKS_XL script provided is compatible with Ableton Live 9.6 and higher, please refer to the
