Transcription
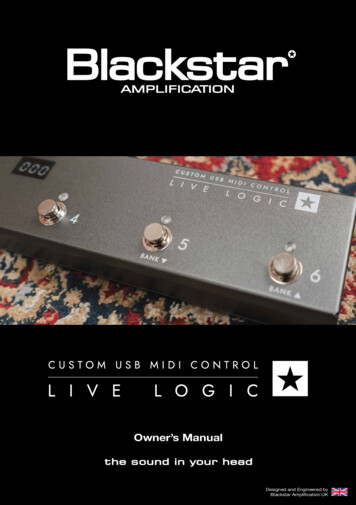
Owner’s ManualDesigned and Engineered byBlackstar Amplification UK
IMPORTANT SAFETY INSTRUCTIONS1. Read these instructions.3. Heed all warnings.4. Follow all instructions.5. Do not use this apparatus near water.6. Clean only with dry cloth.USA / Canada2. Keep these instructions.7. Do not block any ventilation openings.8. Install in accordance with the manufacturer’s instructions.9. Do not install near any heat sources such as radiators, heat registers, stoves, orother apparatus (including amplifiers) that produce heat.10. Do not defeat the safety purpose of the polarized or grounding-type plug. Apolarized plug has two blades with one wider than the other. A grounding typeplug has two blades and a third grounding prong. The wide blade or the thirdprong are provided for your safety. If the provided plug does not fit into youroutlet, consult an electrician for replacement of the obsolete outlet.11. Protect the power cord from being walked on or pinched particularly at plugs,convenience receptacles, and the point where they exit from the apparatus.12. Only use attachments/accessories specified by the manufacturer.13. Unplug this apparatus during lightning storms or when unused for long periodsof time.14. Refer all servicing to qualified service personnel. Servicing is required when theapparatus has been damaged in any way, such as power-supply cord or plug isdamaged, liquid has been spilled or objects have fallen into the apparatus, theapparatus has been exposed to rain or moisture, does not operate normally, orhas been dropped.“TO COMPLETELY DISCONNECT THIS APPARATUS FROM THE AC MAINS,DISCONNECT THE POWER-SUPPLY CORD PLUG FROM THE AC RECEPTACLE”.“WARNING: TO REDUCE THE RISK OF FIRE OR ELECTRIC SHOCK, DO NOTEXPOSE THIS APPARATUS TO RAIN OR MOISTURE. THE APPARATUS SHALLNOT BE EXPOSED TO DRIPPING OR SPLASHING AND THAT OBJECTS FILLEDWITH LIQUIDS, SUCH AS VASES, SHALL NOT BE PLACED ON APPARATUS".This symbol is intended to alert the user to the presence of importantoperation and maintenance (servicing) instructions in the literatureaccompanying the appliance.This symbol is intended to alert the user to the presence ofuninsulated “dangerous voltage” within the product’s enclosure thatmay be of sufficient magnitude to constitute a risk of electric shockto persons.3
Important safety information!READ THE FOLLOWING INFORMATION CAREFULLY. SAVE ALLINSTRUCTIONS FOR FUTURE REFERENCE!Follow all warnings and instructions marked on the product!Never disconnect the protective mains earth connection.High loudspeaker levels can cause permanent hearing damage. You shouldtherefore avoid the direct vicinity of loudspeakers operating at high levels. Wearhearing protection if continuously exposed to high levels.If the product does not operate normally when the operating instructions arefollowed, then refer the product to a qualified service engineer.EnglishEnglishWarning!Danger! High internal operating voltages.Do not open the equipment case. There are no user serviceable parts in thisequipment. Refer all servicing to qualified service personnel.The U.S. Government's Occupational Safety and Health Administration (OSHA) hasspecified the following permissible noise level exposures:Clean only with a dry cloth.Duration Per Day In HoursSound Level dBA, Slow Response89069249539721001½1021105½110¼ or less115Condensation can form on the inside of an amplifier if it is moved from a coldenvironment to a warmer location. Before switching the unit on, it is recommendedthat the unit be allowed to reach room temperature.Unauthorised modification of this equipment is expressly forbidden by BlackstarAmplification Ltd.Never push objects of any kind into ventilation slots on the equipment casing.Do not expose this apparatus to rain, liquids or moisture of any type.Do not place this product on an unstable trolley, stand or table. The product mayfall, causing serious damage to the product or to persons!Do not cover or block ventilation slots or openings. This unit must only be used ina well ventilated area and never switched on when it is within a poorly ventilatedspace, such as a bookcase.This product should not be placed near a source of heat such as a stove, radiator,or another heat producing amplifier.Use only the supplied power cord which is compatible with the mains voltage supplyin your area.According to OSHA, any exposure in excess of the above permissible limits couldresult in some hearing loss.Ear plug protectors in the ear canals or over the ears must be worn when operatingthis amplification system in order to prevent a permanent hearing loss if exposure isin excess of the limits as set forth above. To ensure against potentially dangerousexposure to high sound pressure levels, it is recommended that all personsexposed to equipment capable of producing high sound pressure levels such asthis amplification system be protected by hearing protectors while this unit is inoperation.Power supply cords should always be handled carefully and should be replaced ifdamaged in any way.Never break off the earth (ground) pin on the power supply cord.The power supply cord should be unplugged when the unit is to be unused for longperiods of time.An apparatus with Class I construction should be connected to a mains socketoutlet with a protective earthing connection.The mains plug of the power supply cord should remain readily accessible.Before the unit is switched on, the loudspeaker should be connected as describedin the handbook using the lead recommended by the manufacturer.Always replace damaged fuses with the correct rating and type.4All electrical and electronic products should be disposed of separatelyfrom the municipal waste stream via designated collection facilitiesappointed by the government or the local authorities.5
EnglishFeaturesThank you for purchasing this Blackstar Live Logic USB MIDI Footcontroller.Blackstar’s Live Logic USB MIDI footcontroller is the result of countless hours oftechnical research and benchmarking against market leading products. Designedfrom the ground up for musicians and producers, they are feature filled and compact.Like all our products, the Live Logic Footcontroller is the result of countless hours ofpainstaking Research and Development by our world-class design team. Based inNorthampton (UK), the Blackstar team are all experienced musicians themselves andthe sole aim of this development process was to provide musicians and producerswith products which are the ultimate tools for self-expression.All Blackstar products are subjected to extensive laboratory and road testing toensure that they are truly uncompromising in terms of reliability, quality and aboveall TONE.Please read through this handbook carefully to ensure you get the maximum benefitfrom your new Blackstar product.If you like what you hear and want to find out more about the Blackstar range ofproducts please visit our website at www.blackstaramps.com.Thanks!The Live Logic USB MIDI footcontroller gives you quick and easy performancecontrol of any MIDI hardware or software platforms and plugins. Seamlessly sendprogram change messages and map parameter controls to any of the switches,or assign continuous control of any MIDI parameter to an expression pedal usingthe two expression pedal inputs (expression pedal not included). MIDI over USB isalso included for use with DAWs, plugins and live sequencer/ sampling softwarelike Ableton Live .EnglishIntroductionThis product comes with a free downloadable copy of Ableton’s powerful Live Lite10 Lite software. Although an excellent software, you have total freedom to use andcontrol an array of Midi products with your own preferred software.Power your Live Logic USB Midi Footcontroller anywhere via USB, 9V battery orpower supply.The Blackstar TeamFree Ableton Live Lite licenceAbleton Live Lite 10 SoftwareBlackstar have teamed up with Ableton Live to create a customised control surfacescript and your Live Logic MIDI Footcontroller includes a free copy of Ableton’sexcellent Live Lite 10 Lite software. You can use all of Live 10 Lite’s essentialworkflows, instruments and effects to record songs, create hands-on with yourcontroller, take music made in your apps further and much more.Please read the ‘Ableton Mode’ section below for specific information on this feature.Click here to download your free Ableton Live Lite 7
P OW E RDC9VUSBMODEC U S TO M1EXPPATC HCUSTOM USB MIDI CONTROLMIDI21OUT2Switching to the Right/ ‘CUSTOM’ allows you to use the Blackstar Live Logic Midicontrol software via USB to customise the MIDI messages being sent via MID cableand USB. Map any of the following message types to the six footswitches:INL I V E34L O G I C56BANKBANK Program ChangeControl ChangeNoteClockEnglishEnglishLive Logic product buttons and features Note7 & 8. The Live Logic Footcontroller can be powered by either USB from your PC/Mac, a suitable 9V battery or Blackstar’s compact PSU-500 (sold separately) whichoperates from 100-240V AC and comes with 4 different plug fittings, making itusable in many countries around the world.9. Pushing the power button ‘in’ will turn the unit on, illuminating the front LED panel.Pressing the button again to the ‘out’ position will shut the Live Logic Footcontrolleroff immediately.Front Panel (In Patch Mode)1. 6 individual footswitches with independent corresponding LEDs that tell you thecurrent selected footswitch once pressed.Examples of correct setup with specific productsBlackstar Silverline Live Logic MIDI output Silverline MIDI input Patch mode - changing patch on your Silverline (Set patch mode display to offset) Custom mode Download the Silverline Template ogic/usb-midi-controller for anexample of MIDI Mapping.2. ‘Footswitch 5’ controls ‘Bank down’ and ‘Footswitch 6’ selects ‘Bank up’.3. Stage-visible front facing LED display. Once the unit is powered on the LEDdisplay will illuminate.Rear Panel4. 2 MIDI In/ Out sockets allow you to connect MIDI hardware using standard 5 pinDIN cables.5. Two individual expression pedal inputs allow you to connect up to two pedalsat a time. These can be programmed using the USB control software.P OW E RDC9VUSBMODEC U S TO MEXPPATC H2CUSTOM USB MIDI CONTROLMIDI1OUTINL I V EL O G I CP OW E RDC9VUSBMODEC U S TO M12345BANKEXPPATC H2CUSTOM USB MIDI CONTROLMIDI1OUTINL I V E6L O G I CBANK16. MODE select switches between ‘PATCH’ and ‘CUSTOM’ modes.2345BANK6BANKSwitching the MODE switch to the Left/ ‘PATCH’ will allow you to send ProgramChange (PC) messages to any connected MIDI device(s) via MIDI cable or USB. 8Program range (0-127/1 - 128) can be selected via the USB control softwareSwitches 1 - 4: Send corresponding Program Change message, in banks of 4Switch 5: Bank downSwitch 6: Bank up9
EnglishStrymon Nixie control Live Logic MIDI output Series One MIDI input Patch mode - changing channel on your Series One (Set patch mode displayto offset) Custom mode Download the Series One Template ogic/usb-midi-controller tochange patch with two switches left blank for other MIDI equipment. Live Logic USB PC/MAC Live Logic MIDI Out Strymon Midi In Strymon Midi Out Live Logic Midi inEnglishBlackstar Series OneLive Logic Midi Thru set to Off.USBPC/MAC& STRYMONNIXIE SOFTWAREP OW E RDC9VUSBMODEC U S TO MEXPPATC H2OUTINL I V EL O G I CP OW E RDC9VUSBMODEC U S TO M123MIDI INCUSTOM USB MIDI CONTROLMIDI1MIDI OUT45EXPPATC H2CUSTOM USB MIDI CONTROLMIDI1OUTINL I V EL O G I C6BANKBANK123456BANKBANKDAW plugin control Live Logic USB --- PC/MACSTRYMON TIMELINEMIDI InterfaceUSB Live Logic USB PC/MAC External Midi Hardware MIDI OUT MIDI IN External Midi Hardware MIDI IN MIDI OUT Live Logic Midi Thru set to Off Add Expression pedals to Live Logic to control DAW or external MIDI equipment.PC/MACP OW E RDC9VUSBMODEC U S TO M1EXPPATC H22OUTIN3USBCUSTOM USB MIDI CONTROLMIDI1L I V E4L O G I C5BANK6PC/MACBANKMIDI INP OW E RDC9VUSBMODEC U S TO MEXPPATC H2OUTMIDI OUTCUSTOM USB MIDI CONTROLMIDI1INL I V EL O G I CMIDI HARDWARE12345BANK106BANK11
English Open Ableton LiveUse your Live Logic MIDI footcontroller with a number of professionally developedsoftware programs: Go to the ‘Link MIDI’ tab.ABLETON LIVE LITE 10 SOFTWARE Blackstar have teamed up withAbleton Live to create a customisedcontrol surface script and your LiveLogic MIDI Footcontroller includes a freecopy of Ableton’s excellent Live Lite 10Lite software. You can use all of Live 10Lite’s essential workflows, instrumentsand effects to record songs, createhands-on with your controller, takemusic made in your apps further andmuch more. Please read the ‘Ableton Mode’section below for specific informationon this feature.BLACKSTAR LIVE LOGICMIDI CONTROL Blackstar Live Logic Midi Control isa specially designed and developedsoftware for your Live Logic MIDIfootcontroller software which works onboth PC & Mac. Navigate to the ‘Preferences’ window In the ‘Control Surface’ drop down list, select the ‘Blackstar Live Logic’.Your Live logic MIDI Footcontroller will automatically switch into Ableton Live mode,and show ‘0’ on the display.EnglishSoftwarePlease refer to the Ableton Live section below for full functionality. Set up and customise the functionsof each footswitch and expressionpedal, save and load your favouriteconfiguration pre-sets. For further information on the functionsand features of the software please readthe relevant sections below.Firmware UpdateTo obtain the latest firmware for your Live Logic Midi Footcontroller, please visitthe Blackstar Live Logic webpage usb-midi-controller and download/ install the firmware updater tool, along withthe latest firmware file available. To install the firmware file: Close any Live Logic Midi Control software. Open the Firmware updater tool. Plug in your Live logic via USB.PATCH MODE Load the firmware file. Select PATCH Mode, your Live Logic MIDI Footcontroller using the MODE switch(6) on the rear panel. Click the ‘update’ button. Note: Monitor and ensure that the progress bar completes to 100%. In the casethat the footswitch fails the firmware update operation, or progress bar stops,please repeat the upgrade process above.MODESABLETON MODE (For use with Ableton Live Software)Your Live Logic Midi Footcontroller benefits from official Ableton Live Integration. Inaddition to the standard MIDI mapping functionality, the Official integration unlocksunique looping functionality with up to 6 independent loops.To enable Ableton Mode on your Live Logic, first make sure that your Firmware isup-to-date and you have the latest version of Ableton Live installed. Select CUSTOM Mode on your Live Logic MIDI Footcontroller using the MODESWITCH (6) on the rear panel. Connect your Live Logic MIDI Footcontroller to your PC or Mac via USB.12 PATCH Mode automatically configures the footswitches to send Program Change(PC) messages. In patch mode, the Live logic will send Program Change (PC) messages from 0to 127. Switch 1-4 will select the PC number and Switches 5 and 6 will bank down andup in groups of 4. When in patch 1, pressing the Bank up (Switch 6) will change the patch to 5. When in patch 4, pressing the Bank up (Switch 6) will change the patch to 8.CUSTOM MODE Select CUSTOM MODE on your Live Logic MIDI Footcontroller using The MODEswitch (6) on the rear panel. In CUSTOM MODE, The Blackstar Live Logic MIDI Control software can be usedto customise the MIDI messages sent by each of the footswitches and expressionpedals. (See below)13
7. MIDI THRUSelects whether MIDI messages received via MIDI Input are forwarded to the MIDIOutput. This setting is used when connecting multiple MIDI devices in a chain. Forexample, MIDI keyboard output Live Logic input, Live Logic output SynthMIDI input.EnglishEnglishBlackstar Live Logic Midi Control Software Please note: When connecting any loop to the live logic, you should set theMIDI thru to OFF. Live Logic Midi out Pedal MIDI input Pedal MIDI output Live Logic MIDI in. MIDI THRU will default to off.8. PROFILE NAMEChoose a custom name for your MIDI profile. Each saved profile must have a uniquename.9. OPENUse the ‘Open’ button to load a Profile. Profiles are saved as a .bstarmidi file. andcan be shared and loaded on any Live Logic MIDI Footcontroller.10. SAVEButton Features & Functions1. FOOTSWITCHESThis displays the footswitch you are currently editing. Press any button on your livelogic while in CUSTOM MODE to select which switch is currently being edited.2. EXP 1 EXP 2Select to edit the Expression pedal settings3. GLOBAL SEND VALUESAfter making any change to the configuration of your Live Logic MIDI Footcontroller,press the ‘Send Values’ button to confirm and store these settings.4. GLOBAL READ VALUEOnce you have customised your profile, save it using this button. Ensure the fileextension is ‘.bstarmidi’.11. CUSTOM MIDI MAPLabel each individual Footswitch and Expression pedal functions here. These labelsare saved in a profile.12. MESSAGE TYPEThis section is where you customise the MIDI message for the currently selectedfootswitch/ expression pedal. See the section below for further details on eachmessage type. PC – Program ChangePress ‘Read Values’ when you want to update your App values to what is currentlystored in your Footcontroller. This is done automatically when connecting yourLive Logic. Press this to check that all your settings are stored in your Live Logicsuccessfully.5. PATCH MODE DISPLAYThis setting changes the range of the display for the currently active patch. STANDARD will show 0 for PC message 0, 1 for PC message 1 OFFSET will show 1 for PC message 0, 2 for PC message 1 This can be useful when working with different MIDI Hardware that havepatches or pre-sets starting at 1, rather than 0.6. PATCH MODE MIDI CHANNELSelect the MIDI channel on which your Live Logic MIDI Footcontroller send ProgramChange Messages.14 Midi Channel - Set the MIDI Channel on which the selected footswitch/expression pedal sends the Program Change message. This is very useful for rigs that include multiple other pedals or devices beingcontrolled in a loop by one Live logic MIDI Footcontroller. Program Number – Set the Program number that you wish to trigger whenpressing the selected footswitch.15
CC - CONTROL CHANGENOTEEnglishEnglish MIDI CHANNEL - Set the MIDI Channel on which the selected footswitch/expression pedal sends the Program Change message. CC MESSAGE NUMBER - Set the Control Change (CC) number that you wishto trigger when pressing the selected footswitch or expression pedal. Refer to theMIDI table in the user manual of the device(s) you wish to control to determine thefunction of each CC message. By default, in Custom Mode, the 6 footswitches areset to CC0 - CC5. OPERATION - This determines the operation of the 6 footswitches: Momentary - Sends the ‘On’ value when the footswitch is pressed and the ‘Off’Value when the footswitch is released. The corresponding LED will be lit whilstthe footswitch is pressed. Toggle - Sends the ‘On’ value when pressed once and will stay on until pressedagain. The corresponding LED above the switch will be lit whilst toggled on. OFF VALUE - Select the data value to send when in the off position. This shouldusually be set to 0 for normal use. ON VALUE - Select what value to be sent when in the off/minimum position. Thisshould usually be set to 127 for normal use. EXAMPLE If you want you to use a one button Gain Boost, set the CC numberto control Gain on your Amp/ Plugin, Set the off value to your normal gain level andthe on value to your boosted gain, then set the ‘Operation’ to toggle. This switchcan now be used like a boost pedal.16 MIDI CHANNEL - Set the MIDI Channel on which the selected footswitch/expression pedal sends the Program Change message. OPERATION - This determines the operation of the 6 footswitches: Momentary - Sends the ‘On’ value when the footswitch is pressed and the ‘Off’Value when the footswitch is released. The corresponding LED will be lit whilstthe footswitch is pressed. Toggle - Sends the ‘On’ value when pressed once and will stay on until pressedagain. The corresponding LED above the switch will be lit whilst toggled on. NOTE - Select which Note to send. OCTAVE - Select which ‘Octave’ to send the currently selected Note. OFF VALUE - Select the data value to send when in the off position. This shouldusually be set to 0 for normal use. ON VALUE - Select what value to be sent when in the off/minimum position. Thisshould usually be set to 127 for normal use.17
CLOCKTechnical SpecificationEnglishPowered via either: 9V BatteryEnglishLive Logic MIDI Footcontroller USB External 9V centre-negative PSU SELECT CLOCK INTERNAL CLOCK will use the footswitch selected as a Tap tempo. Blackstar PSU-500 (Sold Separately)Weight (kg): 1.2- The LED above the footswitch will flash in time with the tempo set.Dimensions (mm): 395 x 70 x 35- Tap the footswitch in time with your desired tempo to set the speed.Accessories:- The tempo will be shown on the Live Logic display PSU-500 Power Supply (Sold Separately) EXTERNAL CLOCK - This will display any incoming clock messages from either theUSB or the MIDI DIN input. Third party expression pedals (Sold Separately)- This is really useful when incorporating a DAW into your live music setupto act as a visual click track, or for synchronising clocks across all devices.REGISTERED TRADEMARKSStrymon is a Registered Trademark and division of Damage Control Engineering , LLC.NONE If you want to leave a footswitch with no mapping. Select the ‘None’message type.1819
DeutschDeutschBitte benutzen Sie das Gerät nur in gut belüfteten Räumen und schalten Sie es niein schlecht belüfteten Umgebungen, wie z.B. Schränken o.ä. an.All electrical and electronic products should be disposed of separatelyfrom the municipal waste stream via designated collection facilitiesappointed by the government or the local authorities.2021
EinleitungMerkmaleVielen Dank, dass Sie sich für diesen Blackstar Live Logic USB MIDI Footcontrollerentschieden haben.Der Live Logic USB MIDI Footcontroller ist das Ergebnis unzähliger Stundenintensiver Entwicklungsarbeit und des Vergleichens mit marktführenden Produkten.Er wurde von Grund auf neu für Musiker und Produzenten entwickelt und bietet trotzkompakter Abmessungen umfangreiche Funktionen.Alle Blackstar-Produkte wurden sowohl während der Entwicklung als auch imLive-Betrieb auf Herz und Nieren getestet, um sicherzustellen, dass sie in punctoZuverlässigkeit, Qualität und SOUND absolut kompromisslose Ergebnisse liefern.Bitte lesen Sie dieses Handbuch aufmerksam durch, um Ihr neues BlackstarProdukt optimal nutzen zu können.Wenn Sie mehr über die Blackstar-Produktreihe erfahren möchten, besuchen Sieunsere Webseite unter www.blackstaramps.com.Vielen Dank!Das Blackstar-Team22Der Live Logic MIDI USB Footcontroller ermöglicht eine schnelle und einfachePerformance-Steuerung jeder MIDI-Hardware oder auch von Software-Plattformenund -Plug-Ins. Neben der nahtlosen Ausgabe von Programmwechselbefehlenkönnen Sie den einzelnen Schaltelementen beliebige Parameter zur Steuerungzuordnen oder die zwei Expression-Pedal-Eingänge zur kontinuierlichen Steuerungbeliebiger MIDI-Parameter über (optionale) Expression-Pedale einrichten. Für denBetrieb mit DAWs, Plug-Ins und Software-Anwendungen für Live-Sequencing/Sampling wie Ableton Live wurde zudem MIDI over USB integriert.DeutschDeutschDer Live Logic Footcontroller ist wie alle unsere Produkte das Ergebnis unzähligerStunden akribischer Arbeit durch unser erstklassiges Entwickler-Team. Dieerfahrenen Musiker des Blackstar-Teams aus Northampton (UK) verfolgen eineinziges Ziel: Musikern und Produzenten das bestmögliche Equipment zur Verfügungzu stellen, damit diese sich optimal selbstverwirklichen können.Dieses Produkt wird mit einer kostenfreien Download-Lizenz der leistungsstarkenSoftware Ableton Live 10 Lite ausgeliefert. Obwohl es sich hierbei um eineausgezeichnete Software handelt, haben Sie die völlige Freiheit, beliebige MIDIProdukte mit einer anderen, von Ihnen bevorzugten Software zu verwenden undzu steuern.Als Stromversorgung für Ihren Live Logic USB MIDI Footcontroller können Siewahlweise USB, eine 9 V Batterie oder ein Netzteil verwenden.23
Schalter und funktionen des Live LogicP OW E RDC9VUSBMODEC U S TO MEXPPATC HCUSTOM USB MIDI CONTROLMIDI21OUT Der Programmbereich (0 bis 127/1 bis 128) kann über die USB-Steuersoftwareausgewählt werden. Schalter 1 – 4: Dienen zur Ausgabe von Programmwechselbefehlen in4-er Bänken. Schalter 5: Bank nach unten.INL I V EL O G I C Schalter 6: Bank nach oben.123456BANKWenn Sie den MODE-Schalter nach links auf „PATCH“ einstellen, werdenProgrammwechselbefehle (Program Change, PC) an alle über MIDI- oder USBKabel angeschlossenen MIDI-Geräte ausgegeben. ProgrammwechselControl ChangeNoteClockDeutschDeutschBANK None (keine Zuordnung)OBERSEITE (im Patch-Modus)1. 6 separate Fußschalter mit zugehörigen LEDs zur Darstellung, dass der aktuelleFußschalter gedrückt wurde.2. „Fußschalter 5“ schaltet die aktuelle Bank nach unten, „Fußschalter 6“ schaltetdie Bank nach oben.3. Auf der Bühne sichtbare, nach oben gerichtete LED-Anzeige. Nach demEinschalten leuchtet die LED-Anzeige.RÜCKSEITE4. Über die zwei Buchsen MIDI In/ Out können Sie MIDI-Hardware über herkömmliche5-polige DIN-Kabel anschließen.5. Zwei separate Eingänge für Expression-Pedale erlauben den gleichzeitigenAnschluss von zwei Pedalen. Diese können mit Hilfe der USB-Steuersoftwareprogrammiert werden.P OW E RDC9VUSBMODEC U S TO M1EXPPATC H22OUTIN39. Durch Drücken der Power-Taste (Position „In“) wird das Gerät eingeschaltet: DieLED-Anzeige auf der Oberseite leuchtet nun. Durch erneutes Drücken der Taste(Position „Out“) wird der Live Logic Footcontroller sofort ausgeschaltet.Beispiele für eine korrekte anbindung anausgewählte produkteBlackstar Silverline Live Logic MIDI-Ausgang Silverline MIDI-Eingang Patch Mode – Kanalumschaltung in Ihrem Series One (stellen Sie Sie dieSchaltfläche „Patch Mode“ in der Live Logic Software-Oberfläche auf „offset“) Custom-Modus Laden Sie das Series One Template von /usb-midi-controller herunter, um dasPatch über zwei Schalter umzuschalten, wobei dann zwei Schalter für weitereMIDI-Geräte zur Verfügung stehenCUSTOM USB MIDI CONTROLMIDI17 & 8. Der Live Logic Footcontroller kann wahlweise über USB von Ihrem PC/Mac,über eine 9 V Batterie oder über das kompakte (optionale) Netzteil PSU-500 vonBlackstar gespeist werden, das dank seines Arbeitsbereichs von 100 bis 240 VAC und vier mitgelieferten Steckeradaptern in vielen Ländern weltweit eingesetztwerden kann.L I V E4L O G I C5BANK6BANK6. Der Wahlschalter MODE dient zur Auswahl zwischen den Modi „PATCH“und „CUSTOM“.Wenn Sie den MODE-Schalter nach links auf „PATCH“ einstellen, werdenProgrammwechselbefehle (Program Change, PC) an alle über MIDI- oder USBKabel angeschlossenen MIDI-Geräte ausgegeben.24P OW E RDC9VUSBMODEC U S TO M1EXPPATC H22CUSTOM USB MIDI CONTROLMIDI1OUTIN3L I V E4L O G I C5BANK6BANK25
Blackstar Series OneStrymon Nixie-Steuerung Live Logic MIDI-Ausgang Series One MIDI-Eingang Patch Mode – Kanalumschaltung in Ihrem Series One (stellen Sie Sie dieSchaltfläche „Patch Mode“ in der Live Logic Software-Oberfläche auf „offset“) Custom-Modus Laden Sie das Series One Template von /usb-midi-controller herunter, um dasPatch über zwei Schalter umzuschalten, wobei dann zwei Schalter für weitereMIDI-Geräte zur Verfügung stehen Live Logic USB PC/MAC Live Logic MIDI-Ausgang Strymon MIDI-Eingang Strymon MIDI-Ausgang Live Logic MIDI-EingangLive Logic MIDI Thru wird auf „Off“ eingestelltUSBDeutschP OW E RDC9VUSBMODEC U S TO MEXPPATC H2OUTINL I V EL O G I CP OW E RDC9VUSBMODEC U S TO M12MIDI INCUSTOM USB MIDI CONTROLMIDI1MIDI OUTDeutschPC/MAC& STRYMONNIXIE SOFTWARE345EXPPATC H2CUSTOM USB MIDI CONTROLMIDI1OUTINL I V EL O G I C6BANKBANK123456BANKBANKDAW Plug-In-Steuerung Live Logic USB --- PC/MACSTRYMON TIMELINEMIDI InterfaceUSB Live Logic USB PC/MAC External Midi Hardware MIDI OUT MIDI IN External Midi Hardware MIDI IN MIDI OUT Live Logic MIDI Thru wird auf „Off“ eingestellt Erweitern Sie Ihren Live Logic um Expression-Pedale, um eine DAW oder externeMIDI-Geräte zu steuern.PC/MACP OW E RDC9VUSBMODEC U S TO M1EXPPATC H22OUTIN3USBCUSTOM USB MIDI CONTROLMIDI1L I V E4L O G I C5BANK6PC/MACBANKMIDI INP OW E RDC9VUSBMODEC U S TO MEXPPATC H2OUTMIDI OUTCUSTOM USB MIDI CONTROLMIDI1INL I V EL O G I CMIDI HARDWARE12345BANK266BANK27
SoftwareSie können Ihren Live Logic MIDI Footcontroller mit verschiedenen professionellenSoftware-Programmen verwenden:ABLETON LIVE LITE 10 SOFTWAREDeutsch Bitte lesen Sie den Abschnitt „AbletonMode“ weiter unten, um weitereInformationen zu dieser Funktionzu erhalten.BLACKSTAR LIVE LOGICMIDI CONTROL Blackstar Live Logic Midi Controlist eine speziell für Ihren Live LogicMIDI Footcontroller ausgelegte undentwickelte Software für PC und Mac. Hier richten Sie die Funktion für jedenFußschalter und die Expression-Pedaleein. Ihre bevorzugten Konfigurationenkönnen Sie dann als Presets speichernund später laden.Ihr Live Logic MIDI Footcontroller wechselt nun automatisch in den Ableton-LiveModus und in seinem Display wird „0“ dargestellt.Die gesamte Funktionalität ist im Abschnitt zu Ableton Live weiter unten beschrieben.Deutsch Blackstar hat gemeinsam mit AbletonLive ein individuelles Control-SurfaceSkript erstellt: Ihr Live Logic MIDIFootcontroller wird mit einer kostenlosenVersion der herausragenden SoftwareAbleton Live 10 Lite ausgeliefert. Siekönnen alle wesentlichen Arbeitsabläufe,Instrumente und Effekte v
Free Ableton Live Lite licence Ableton Live Lite 10 Software Blackstar have teamed up with Ableton Live to create a customised control surface script and your Live Logic MIDI Footcontroller includes a free copy of Ableton’s excellent Live Lite 10 Lite software. You

