Transcription
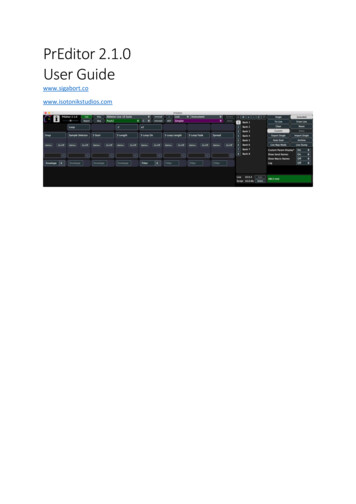
PrEditor 2.1.0User Guidewww.sigabort.cowww.isotonikstudios.com
Table of Contents1Overview .51.11.21.32Requirements . 5Supported Controllers . 5Limitations . 5Installation .62.12.22.3Install the License File. 6Install Main PrEditor Scripts . 6Install Additional Scripts . 73Upgrading from PrEditor 1 .84Selecting the Control Surface in Live .95Scanning Plugins .105.1Scan Types . 105.1.1Single Scan/Mapping .105.1.2Multi Scan/Mapping .105.2Map Types and Procedure . 125.2.1Type 1.125.2.2Type 1a .125.2.3Type 2.125.2.4Type 3.125.3Scanning a Device. 135.3.1Rescanning .136Workflow .147Main Panel .157.1Device Selection . 157.1.1Live Installation .157.1.2Controller .157.1.3Frame Size .167.1.4Device Type .167.1.5Category .167.1.6Device.177.2Support Functions . 177.2.1Zoom Slider .177.2.2Report .177.2.3Alias .177.2.4Skip .187.2.5Uninstall .197.2.6 (Add custom installation) .197.2.7AOT .197.2.8Rename .197.2.9Delete.198The Live Panel .208.1Live Version . 20
8.2Script Version . 208.3Currently Selected Device . 208.3.1Multi-Mapped Display .218.4Scan . 218.5Scan-Multi . 218.6Delete . 219Control Cells .229.1Mapped Parameter . 229.2Options (Push/Push 2 only) . 229.2.1Crossover Points .229.2.29.2.2 Determining Crossover Points .239.3On/Off (Push/Push 2 only). 239.4Custom name (Push/Push 2 only) . 239.5Colour (Launch Control XL only) . 239.6Cell Movement. 239.6.1 - Left, no wrap .239.6.2 - Right, no wrap .239.6.3 - Left, with wrap .239.6.4 - Right, with wrap .239.6.5S/Swap, D/Drop .241010.110.210.310.4Visualisations (Push2) .25Button Mappings (Push2) . 26Additional Parameters. 27Sends . 27Macros. 2711Options .2812Banks .2912.1 Default Bank Names . 2912.2 Operations . 2912.2.1 Up .2912.2.2 Down .2912.2.3 Add Bank .2912.2.4 Remove Bank .2912.2.5 Copy Bank .2912.2.6 Paste Bank.291313.113.213.313.413.513.613.713.813.9Main Options .30Single . 30Extended. 30To Live . 30From Live . 30Clear . 30Reset . 30Custom (Push/Push2 Only) . 30Horiz . 31Export Single . 31
13.1013.1113.1213.131414.1Import Single . 31Auto Scan . 31Archive. 31Live Map Mode. 31Live Map Mode .32Auto Mapping . 3215Extended Mappings .3316Push 1/2 Dynamic Parameter Layouts .3417Appendix I .35
1 OverviewPrEditor is a piece of companion software for Ableton Live that allows custom control layouts to beconfigured for Live’s instruments & effects, and VST, AU and Max for Live plugins.1.1 Requirements Windows 7 32/64-bitOSX 10.7 Ableton Live 9.7.5 , 10.0.1 1.2 Supported Controllers Ableton Push (with PrEditor)Ableton Push 2 (with PrEditor)Akai APC40 (with PrEditor)Akai APC40 II (with PrEditor)Novation Launch Control XL (with Launch Control XXL Script)Novation Launch Control (with Launch Control X Script)Akai MIDI Mix (with MIDI Mix XL Script)Behringer BCR 2000 (with BCR XL Script)Behringer BCF 2000 (with BCF XL Script)Korg NanoKontrol Studio (with NKS XL Script)To purchase additional control scripts please head to the Isotonik Studios website:www.isotonikstudios.com1.3 LimitationsThe following limitations currently exist. We hope to resolve these in future updates: Visual devices (Auto-filter, Compressor, Echo, EQ8, Operator, Simpler, Wavetable) can becustomised but visualisations can only be added to certain devices (see 10) (Push2).There are issues with behaviour of certain parameters when providing custom options (see9.2) (Push).Having a parameter on multiple banks with options specified can cause incorrect display – itis advised to currently only have one instance of these (Push).
2 InstallationUse the provider installer (PrEditor2.pkg for OSX, PrEditor2.msi for Windows) to install the baseapplication. Once installed launch the application2.1 Install the License FileUpon first activation, you will be asked to provide a license file – this will have been mailed to youseparately after your purchase.Simply drag the license file (preditor license.txt) onto the main window to install.If you have not received the license file please check your junk/spam folders – this mail will havebeen sent from noreply@isotonik.com.2.2 Install Main PrEditor ScriptsOnce the license has been successfully installed and PrEditor has been restarted you can install themain scripts.Each Live installation will require the scripts to be installed. You can see the available locations viathis dropdown. Entries shown in red do not currently have the PrEditor 2 scripts installed.Alternatively, if you have installed Live outside of the standard Windows/OSX locations you can youthe button to add a custom location and proceed from there.
Once you have selected your installation, drag the PrEditor.zip file onto the main window to install.As well as the core scripts this contains the scripts for APC 40, APC 40 II, Push, and Push 2 – you willbe asked which of these (if any) you wish to install.Once completed Live will need to be restarted if it is currently running.2.3 Install Additional ScriptsYou can install any other custom scripts you may have purchased by dropping the zip file onto themain PrEditor window – only Live 10 versions of the scripts will be recognised so please make sureyou download updated versions after upgrading PrEditor 2 (if you have upgraded from PrEditor 1 toPrEditor 2 upgraded versions of your existing scripts are provided free of charge – please check youraccount).
3 Upgrading from PrEditor 1The upgrade process from PrEditor 1 is automatic and will be triggered after installing PrEditor 2 andyour license file.PrEditor 2 will initially look for data in the migrated data store and will use this if it is found.If not found (i.e. you did not migrate PrEditor 1) then it will scan your Live installations for valid datastores and present you with a list of options to import the data from.Please note that PrEditor 2 data files are separate from those of PrEditor 1 and will not be touchedor updated in any way by the process, so even upon failure you will still have all your original settingsfrom which to raise an issue and get support.NOTE: If you wish for any reason to re-import your PrEditor 1 settings you can remove the .xml filesfrom /Documents/Isotonik/PrEditor and restart PrEditor – this will trigger the conversion process.
4 Selecting the ControlSurface in LiveTo use the PrEditor control scripts in Live, select the XL version of the script as the only controlsurface.Do not select the XL script at the same time as the stock script that comes with Live.Make sure that you assign the correct MIDI ports and do not leave blank (these are usually autoassigned for you).
5 Scanning PluginsBefore going into detail on the operation of PrEditor we will look at the process of scanning and howwe categorise different types of scan - these types will be referenced in subsequent sections.For a VST or AU to be mapped by PrEditor it needs to be “scanned” – this is the process of retrievingparameter information for the device so that it can be provided to you and then re-ordered at yourbehest.Scanning a plugin is done via the Live panel at the bottom of the screen (unless auto-scanning isenabled – see 0).Before you can scan a plugin, you need to make a couple of decisions – to simplify this process aflow-chart is provided for you to determine the correct type of scan for your plugin (see 16). Pleasetake a moment to read this – it may seem complex at first but is rather straightforward if you give ita few reads.Some points to note:1) Most of your plugins (95%?) will be type 1, single mapping.2) You can simplify the decision process by mapping everything as type 3 unless it is clearly atype 1.3) You can simply the decision process completely by mapping everything as type 3 – this willmake type 1 plugins slightly more complex to initially setup but gives you a consistent way ofhandling all your plugins.4) PrEditor must be running for a device to be scanned – no scanning will take place when Liveis running and PrEditor is not (NOTE: for existing PrEditor users, please note this is a changein behaviour).5.1 Scan TypesThere are two basic types of scans that can be performed: single and multi.5.1.1Single Scan/MappingA plugin can be single scanned if:1) It has fixed parameters that do not change2) It has less than 128 parameters or you can create a default configuration that is 128parameters or less that covers all instances that you wish to useThis will probably cover 95% of all your plugins.5.1.2Multi Scan/MappingMulti-mapping refers to the process and having multiple maps for a single plugin.5.1.2.1 Why do we need this?There are a few reasons that give rise to the multi-mapping need:1) Some plugins host other plugins (e.g. KompleteKontrol)2) Some plugins change their parameter layouts (e.g. Kontakt, Reaktor, Diva)
3) Some plugins allow the users to customise the exposed parameters (e.g. Falcon)4) Live has a limit of 128 parameters that can be exposed by a plugin, even if they havemany more5) We want to have a different parameter layout for different presets of a plugin (e.g. Diva)5.1.2.2 How this works in realityThere are two ways we can generally multi-map plugins, though for some plugins there is only asingle option.For most candidates, it is possible to create a unique ID for a parameter setup – e.g. the parameterlayout for Monark in Reaktor is different to that of Prism and we can use this to determine we havea Monark ensemble loaded into Reaktor.For these plugins, we can generally use a type 1 multi-mapping which relies solely on this parameterlayout and treat the plugin in the same way as a single mapped plugin.Other requirements for this type of mapping are that: All the parameters you want to map are exposed in the default 128 provided by Live (forexample, this is not always the case with some Reaktor ensembles)For those plugins that do not match these criteria we need a different approach. For example, whenyou load up a Falcon preset there are no external automation parameters defined – it is up to theuser to set these up as they wish.This leads to a situation where, potentially, we have a different control mapping for each “preset”that is used (in this case a “preset” might be a Reaktor ensemble, or a Kontakt instrument, or aFalcon automation configuration). In Live we can only save one default plugin configuration for usein all instances of that plugin - this is not available on a per plugin instance basis.Well, that’s not entirely true – there is a way of achieving this functionality, and that is to rack theplugin. Within a rack, we can have differing sets of (128) parameters and this configuration andlayout will be saved with the rack. This solves the issue for us with plugins such as Falcon, but alsowith other plugins where we need to change the default 128 parameters that Live has assigned (thisis quite common with Reaktor ensembles).When creating these racks, we name them in a specific way – that being the name we wish to useand then a trailing , e.g. MetaPhysical . In PrEditor we will see this as Reaktor MetaPhysical(Metaphysical is a Reaktor ensemble using type 2 multi-mapping). Every time we use an instance ofthis rack PrEditor will know how it needs to be mapped to the control surface.5.1.2.3 NamingA multi-mapped plugin has two parts to the name – a host name and an instance name. Host nameis fixed and comes from the actual plugin being used (e.g. Reaktor, Kontakt). For type 1 multi-maps the instance name is something you choose when scanning theplugin, or something that has been assigned from a set of well-known IDs.For type 2 multi-maps the instance name is the name of the rack that you’re using (excludingthe symbol)
5.2 Map Types and Procedure5.2.1Type 1This is a singly mapped plugin instance – it has one set of parameters that never change.5.2.1.1 Mapping Procedure1. Select the plugin in Live and scan the plugin in PrEditor using the SCAN button2. Map the plugin#5.2.2Type 1aThis is the same as a type 1 but we have defined the 128 parameters that will never change via Livedefault configuration of the plugin.5.2.2.11.2.3.4.Mapping ProcedureConfigure the parameters in the plugin as you wishSave the default configurationSelect the plugin in Live and scan the plugin in PrEditor using the SCAN buttonMap the plugin5.2.3Type 2This is a multi-mapped plugin that does not need to live in a Live rack5.2.3.1 Mapping Procedure1. Select the plugin in Live and scan the plugin in PrEditor using the SCAN MULTI button2. Name the instance3. Map the plugin5.2.4Type 3This is a multi-mapped plugin that live in a Live rack.5.2.4.11.2.3.4.5.6.7.8.9.10.Mapping ProcedureGroup the device into a rackName the rack with a name ending in Setup the plugin as you desireConfigure the available parameters as you wishSave the rackSelect the rack in Live and scan the plugin in PrEditor using the SCAN buttonMap the pluginUse this rack whenever you wish to use the deviceMake sure you’ve saved the rackUse this rack in future instead of adding the raw plugin to your set
5.3 Scanning a DeviceThe status of scan for a plugin can be seen in the Live panel – see section .If the scan status is un-scanned (red) then you can use the SCAN or SCAN-MULTI buttons to scan theplugin. If the scan status is scanned, but needs updating (orange), then you can use the RESCANbutton to update the PrEditor definition.5.3.1RescanningWhen rescanning a device if you’re in the situation when parameters have been renamed or addedthen you’re existing map will still be valid.If parameters have been moved or removed it is likely you may have to remap your device,depending on what changes have occurred.
6 WorkflowThe general workflow for PrEditor is as follows:1) Select a Live installation2) Select a controller to customise – as different controllers have different frame sizes (numberof encoders) and layouts, customised layouts are based on a specific controller.3) Select a frame size if appropriate (e.g. BCR2000 can be switched between 24 and 32controller mode)4) Select a type of device to customise:a. Liveb. VST Pluginc. AU Plugind. Max for Live device5) Select a category:a. Live: Instrument, Audio Effect, MIDI Effectb. VST/AU: Single, or multi mapped Host (see 7.1.5)c. Max for Live: User6) Select a device/plugin to customise.7) If mapping for Push1/Push2 click the CUSTOM button to turn off the default behaviour forthat device and create a default layout (see 13.7).8) Map the parameters either manually or with Live Map Mode (see 14).9) Send the updates to Live using the SEND TO LIVE button.
7 Main Panel7.1 Device SelectionSelecting the device to be customised is carried out via the 6 drop-down combo boxes in the mainpanel.7.1.1Live InstallationThis lists all Live installations found on your computer in the default location, plus any customlocations that you have specified.Entries shown in red do not have PrEditor core scripts installed and therefore cannot be mapped(see section 2.2).7.1.2ControllerThis lists all the controllers which have PrEditor scripts installed.Entries listed in green are currently selected and running in Live.
7.1.3Frame SizeThis lists any different controller number configurations available.7.1.4Device TypeThis lists the different device types support. These are Live, VST, AU (if running on OSX), Max forLive.7.1.5CategoryThis lists the different categories for the selected device type. For Live, this is Instrument, Audio Effect or MIDI Effect. For VST/AUs this is Single and the list of multi-map hosts (see 5). For Max for Live devices this is a placeholder entry and has no function.
7.1.6DeviceThis lists all the devices known to PrEditor that match the device type and category that has beenselected.Entries listed in purple have a custom mapping associated with them.7.2 Support Functions7.2.1Zoom SliderUse the slider to make the main display smaller or larger.7.2.2ReportGenerate a report file containing all information required to debug any issues that you might behaving. If more than one potential Log file location can be found you will be asked to verify thecorrect location for your Live instance. These are sorted by last update time so even if you have lotsof old folders hanging around this is likely to pick the correct log file as the default selection.Attach this to a ticket raised at Some plugins have several variants that are essentially the same device and have the sameparameter makeup (e.g. Reaktor, ReaktorFX). Also, some plugins may be named differently for
different versions but as they contain no structural changes parameter wise, they can be treated asthe same device (e.g. Absynth4, Absynth5).It is possible to configure these plugins as aliases of a common name. Whenever one of these pluginsis encountered it is treated as if it is the root plugin.Each entry consists of a root plugin name and a comma separated list of all plugins that should bealiased to that name.NOTE: The root plugin name does not have to physically exist as a plugin (e.g. Reaktor).7.2.4SkipIt is common for plugins that host other plugins, or have different parameter setups, or have userconfigurable host automation parameters to have parameter slots that are not used in someconfigurations. How these parameters are identified differs from plugin to plugin but the result forPrEditor is the same – these are not desired in the mappable parameters generated by a plugin scan.It is possible to set parameter that should be ignored for a plugin by the scan process.Each entry consists of a root plugin name (see 7.2.3) and a comma separated list of parameter namethat should be ignored.NOTE: The skip list ignores all parameters that start with the listed name, e.g. an entry that containsthe following:{unused,{reservedwill ignore all parameters that begin with {unused or {reserved.
7.2.5UninstallThe uninstall buttons remove either a script from an instance, or all scripts from an instance. Thisonly removes the scripts from the Live installation – all settings will remain in your documentsfolder.7.2.6 (Add custom installation)You can add additional Live installation directories that are outside of the default install locationsusing this button.7.2.7AOTActivate “Always on Top” mode.7.2.8RenameRename a multi-mapped instance.7.2.9DeletePlease refer to section 8.6. This performs the same operation but is for the currently selected pluginin PrEditor rather than the currently selected device in Live.
8 The Live PanelThis panel shows information about the running version of Live.8.1 Live VersionThe version number of the Live version that PrEditor is connected to.8.2 Script VersionThe version of the script that is running the currently selected controller in PrEditor8.3 Currently Selected DeviceThis shows the currently selected device in Live and its scan status.Double clicking on this description when the status is Green, or Amber will take you to the mappingassociated with that device. Status: Green – scanned and up to date Status: Amber – scanned but needs rescan. This will happen, for example, in the following circumstances:o You’ve updated a plugin and it has added/removed parameterso You had a default configuration for a plugin that you’ve changedo You’ve updated a Reaktor ensemble or a Kontakt instrument that has added/removeparameterso You changed the configured parameters for a multi-mapped type 2 plugin.Status: Red – not scanned
8.3.1Multi-Mapped DisplayType 3 Mappings are indicated with a “ ” in the live panel.8.4 ScanThis scans the currently selected plugin in Live as a single-mapped plugin. If successful, the devicestatus will t
PrEditor is a piece of companion software for Ableton Live that allows custom control layouts to be configured for Live’s instruments & effects, and VST, AU and Max for Live plugins. 1.1 Requirements Windows 7 32/64-bit OSX 10.7 Ableton Live 9.7.5 , 10.0.1 1.2 Supported Co