Transcription
Version 16Eaglesoft Digital IntegrationAir TechniquesScanX ScannerAccent SensorAttention Schick PanUsers:After upgrading toEaglesoft 16, pleasereinstall your SchickPan integration.InstrumentariumSigma SensorOrthopantomograph PanoramicPLANMECAProline and ProMax PanoramicDixi3 SensorProgenyVisionDX SensorSchickiPanPanX PanoramicPanX-C Pan/CephSensor (USB)Wireless SensorCDR Pan EliteCDR Sensor EliteSironaSidexis SensorOrthophos XG or XG PanoramicSoredexDigora Optime
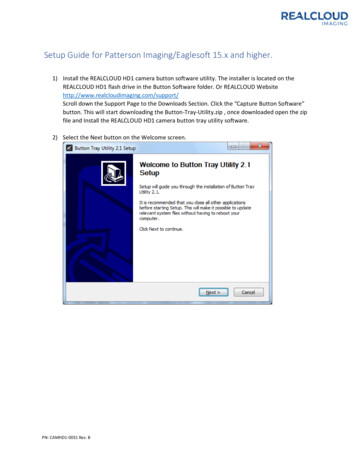
ScanX Scanner Integration1. Please review all installation instructions before beginning the installation. You should have acompact disc labeled Eaglesoft Digital Integration.2. Close all running programs.3. Make a backup (same as daily backup).4. Log on as the Administrator.5. Insert the compact disc into your CD-ROM drive. The following installation window shouldautomatically appear. If not, click Start and choose Run. Type D:\essetup.exe in the Open field (ifthe CD-ROM drive on your computer is represented by a letter other than D, substitute theappropriate letter) and click OK.Important: Install this integration only on the machine from which you will be using ScanX.6. Under Air Techniques, click ScanX.7. Click Next.2 Eaglesoft Digital Integration
8. Click Yes.9. Click Install.10. Click Finish.After the installation has finished, you will need toinstall the three ILE drivers: Air Techniques ScanXStandard (Loading 1), Air Techniques ScanXStandard (Loading 2) and Air Techniques ScanX.11. Please insert your ScanX ILE Drivers CD intoyour CD-ROM. Click Install the ScanXDrivers and Utilities.
12. Click Next.13. Select Typical. Click Next.14. Click Finish.After installing the integration, plug the device into your computer. The Detect New Hardware windowwill appear. Follow the prompts or call Patterson Support for assistance.4 Eaglesoft Digital Integration
15. Select No, not this time. Click Next.16. Select Install from a list or specificlocation (Advanced). Click Next.17. Select Search for the best driver in theselocations. Select the checkboxes Searchremovable media floppy, CD-ROM ) andInclude this location in the search.Browse to C:\\ProgramFiles\Eaglesoft\Shared Files.
18. Select Shared Files. Select OK.19. Select Next.20. Select Finish.Repeat steps 15-20 until all three drivershave been installed.6 Eaglesoft Digital Integration
Accent Sensor1. Please review all installation instructions before beginning the installation. You should have acompact disc labeled Eaglesoft Digital Integration.2. Close all running programs.3. Make a backup (same as daily backup).4. Log on as the Administrator.5. Insert the compact disc into your CD-ROM drive. The following installation window shouldautomatically appear. If not, click Start and choose Run. Type D:\essetup.exe in the Open field (Ifthe CD-ROM drive on your computer is represented by a letter other than D, substitute theappropriate letter) and click OK.Important: Install this integration only on the machine from which you will be using Accent.6. Under Air Techniques, click Accent Sensor.7. Click Next.
8. Click Install.9. Click Yes.10. Select Finish.After installing the integration, plug the device into your computer. The Detect New Hardware windowwill appear. Follow the prompts or call Patterson Support for assistance.Place the Accent Sensor CD in your CD-ROM drive.8 Eaglesoft Digital Integration
11. Select No, not this time. Click Next.12. Select Install from a list or specific location(Advanced). Select Next.13. Select Search for the best driver in theselocations. Select the checkboxes Searchremovable media (floppy, CD-ROM ) andInclude this location in the search:. SelectBrowse and locate D:\Accent\Drivers\DeviceDrivers. Select Next.
14. Select Finish.10 Eaglesoft Digital Integration
Progeny VisionDX Sensor1. Please review all installation instructions before beginning the installation. You should have acompact disc labeled Eaglesoft Digital Integration.2. Close all running programs.3. Make a backup (same as daily backup).4. Log on as the Administrator.5. Insert the compact disc into your CD-ROM drive. The following installation window shouldautomatically appear. If not, click Start and choose Run. Type D:\essetup.exe in the Open field (Ifthe CD-ROM drive on your computer is represented by a letter other than D, substitute theappropriate letter) and click OK.Important: Install this integration only on the machine from which you will be using Progeny.6. Under Progeny, click VisionDX.7. Click Next.
8. Click Install.9. Click Yes.10. Select Finish.After installing the integration, plug the device into your computer. The Detect New Hardware windowwill appear. Follow the prompts or call Patterson Support for assistance.Place the VisionDX Sensor CD in your CD-ROM drive.12 Eaglesoft Digital Integration
11. Select No, not this time. Click Next.12. Select Install from a list or specific location(Advanced). Select Next.13. Select Search for the best driver in theselocations. Select the checkboxes Searchremovable media (floppy, CD-ROM ) andInclude this location in the search:. SelectBrowse and locate D:\Accent\Drivers\DeviceDrivers. Select Next.
14. Select Finish.Instrumentarium Integration (All Devices)1. Please review all installation instructions before beginning the installation. You should have acompact disc labeled Eaglesoft Digital Integration.2. Close all running programs.3. Make a backup (same as daily backup).4. Log on as the Administrator.5. Insert the compact disc into your CD-ROM drive. The following installation window shouldautomatically appear. If not, click Start and choose Run. Type D:\pi.exe in the Open field (if the CDROM drive on your computer is represented by a letter other than D, substitute the appropriate letter)and click OK.Important: Install this integration only on the machine from which you will be usingInstrumentarium.6. Under Instrumentarium Imaging, select I/OPanoramic.14 Eaglesoft Digital Integration
7. Click Next.SENSOR USERS ONLYSelect the checkbox Sigma Sensor. Select theBrowse button to the correct location of the GainFiles for the sensor.8. Click Next.PANORAMIC USERS ONLYSelect the checkbox OrthopantomographPanoramic. Select the Browse button to thecorrect location of the Gain Files for thepanoramic unit.8. Click Next.SENSOR USERS ONLY9. Click Yes.
PANORAMIC USERS ONLY9. Click Yes.10. Click Install.11. Click Finish.After installing the integration, plug the device into your computer. The Detect New Hardware windowwill appear. Follow the prompts or call Patterson Support for assistance.12. Select No, not this time. Select Next.16 Eaglesoft Digital Integration
13. Select Continue Anyway.14. Select Search for the best driver in theselocations. Select the checkboxes Searchremovable media (floppy, CD-ROM ) andInclude this location in the search:. SelectBrowse and locate C:\ProgramFiles\Eaglesoft\Shared Files. Select Next.15. Select Install from a list or specific location(Advanced). Select Next.
16. Select Finish.18 Eaglesoft Digital Integration
PLANMECA Panoramic and Sensor1. Please review all installation instructions before beginning the installation. You should have acompact disc labeled Eaglesoft Digital Integration.2. Close all running programs.3. Make a backup (same as daily backup).4. Log on as the Administrator.5. Insert the compact disc into your CD-ROM drive. The following installation window shouldautomatically appear. If not, click Start and choose Run. Type D:\pi.exe in the Open field (If the CDROM drive on your computer is represented by a letter other than D, substitute the appropriate letter)and click OK.Important: Install this integration only on the machine from which you will be using PLANMECA.6. Under the PLANMECA Heading, choose I/OPanoramic.7. Click Next.
8. Insert the disk labeled Calibration, then clickNext.9. If you do not have any other calibration disks,click No to continue.10. Click Yes.11. Click Finish.20 Eaglesoft Digital Integration
12. Click Next.13. Click Next.14. Click Next.
15. Click Finish.16. Select from the available radio button optionsand click OK.After installing the integration, insert USB sensors into your computer. The Detect New Hardwarewindow will appear. Follow the prompts or call Patterson Support for assistance.PLANMECA Sensor Additional Hardware17. Select No, not this time. Select Next.22 Eaglesoft Digital Integration
18. Select Install the software automatically(Recommended). Select Next.19. Select Finish.
Schick Installation1. Please review all installation instructions before beginning the installation. You should have acompact disc labeled Eaglesoft Digital Integration.2. Close all running programs.3. Make a backup (same as daily backup).4. Log on as the Administrator.5. Insert the compact disc into your CD-ROM drive. The following installation window shouldautomatically appear. If not, click Start and choose Run. Type D:\essetup.exe in the Open field (ifthe CD-ROM drive on your computer is represented by a letter other than D, substitute theappropriate letter) and click OK.Important: Install this integration only on the machine from which you will be using Schick.6. Under Schick, select I/O-Panoramic.7. Ensure your device is unplugged and clickOK.8. Click Next.24 Eaglesoft Digital Integration
9. Select the checkbox of the appropriate option.(Multiple selections can be made and installedat this time.) Click Next.10. Click Install.SCHICK SENSOR USERS ONLYSkip ahead to step #2011. Click Yes.SCHICK PANORAMIC/CEPH USERS ONLYSkip ahead to step #2012. Click Yes.
13. Click Finish.SCHICK WIRELESS USERS ONLYSkip ahead to step #20.14. Select Yes. Select No for all other devices.SCHICK ELITE USERS ONLYContinue through step #19.15. Select OK.16. Select OK.SCHICK PAN ELITE ONLYSensor Elite users, proceed to step #1817. Select the desired device. Select Next.26 Eaglesoft Digital Integration
18. Select Install.19. Select Finish.After installing the integration, plug the device into your computer. The Detect New Hardware windowwill appear. Follow the prompts or call Patterson Support for assistance.Schick Remote HS Hardware Installation20. Insert the Remote HS drivers CD. Select Next.
21. Select Install.22. Select FinishThe driver is Microsoft Certified, so when the remote isplugged in, the driver will be auto-installed.Schick USB Sensor Hardware Installation20. Select No, not this time. Select Next.28 Eaglesoft Digital Integration
21. Select Install the software automatically(Recommended). Select Next.22. Select Finish.23. Select No.
Schick Wireless and SDX Hardware Installation20. Select No, not this time. Select Next.21. Select Install from automatically(Recommended). Select Next.22. Select Finish.30 Eaglesoft Digital Integration
23. Select Yes.Schick Panoramic Hardware Installation20. Select No, not this time. Select Next.21. Select Install the software automatically(Recommended). Select Next.
22. Select Finish.Sirona Integration (All Devices)NOTE: Sirona's Sidexis software MUST be installed and configured prior to installing EaglesoftSirona Digital Integration. Contact Sirona for more information.1. Please review all installation instructions before beginning the installation. You should have acompact disc labeled Eaglesoft Digital Integration.2. Close all running programs.3. Make a backup (same as daily backup).4. Log on as the Administrator.5. Insert the compact disc into your CD-ROM drive. The following installation window shouldautomatically appear. If not, click Start and choose Run. Type D:\pi.exe in the Open field (if the CDROM drive on your computer is represented by a letter other than D, substitute the appropriate letter)and click OK.Important: Install this integration only on the machine from which you will be using Sirona.6. Under Sirona, select I/O - Panoramic.32 Eaglesoft Digital Integration
7. Click Next.PANORAMIC USERS ONLY8. Click Yes. Note: This installation installs bothPanoramic and Sensor integration.SENSOR USERS ONLY8. Click Yes.9. Click Finish.After installing the integration, plug the device into your computer. The Detect New Hardware windowwill appear. Follow the prompts or call Patterson Support for assistance.
Soredex Optime Digital Integration1. Please review all installation instructions before beginning the installation. You should have acompact disc labeled Eaglesoft Digital Integration.2. Close all running programs.3. Make a backup (same as daily backup).4. Insert the compact disc into your CD-ROM drive. The following installation window shouldautomatically appear. If not, click Start and choose Run. Type D:\pi.exe in the Open field (if the CDROM drive on your computer is represented by a letter other than D, substitute the appropriate letter)and click OK.Important: Install this integration only on the machine from which you will be using Optime.5. Under Soredex, select I/O - Panoramic.6. Click Next.34 Eaglesoft Digital Integration
7. Click Yes.8. Click Install.9. Click Finish.
After completing the digital installation, log on toEaglesoft.Select File Preference X-ray. In the X-ray tab,select the Digora Optime button under DeviceProperties.In the Settings tab under Scanner Connection, selectfrom the following options:Direct Connection – Select this radio button if theOptime scanner is directly connected to this computer.Enter the Scanner serial number and select theComputer network connection from the dropdown list.IP based – Select this radio button if the scanner isbeing accessed over a network. Select the checkboxEnable changing IP address. Enter the IP address andselect Send to Scanner.Multi-Connect – Select the checkbox Use MultiConnect to allow multiple computers on the network toaccess the scanner. Enter the Workstation identifier.Enter a value for the Scanner Autorelease timeout,seconds.Select OK on the X-ray tab to save your preferences.Please review Eaglesoft Hardware Requirements prior to adding new hardware to your system.36 Eaglesoft Digital Integration
Eaglesoft Digital Integration Air Techniques ScanX Scanner Accent Sensor Instrumentarium . 6 Eaglesoft Digital Integration 18. Select Shared Files. Select OK. 19. Select Next. . Follow the prompts or call Patterson Support for assistanc