Transcription
Eaglesoft & Technology:Improving PracticeEfficienciesGiven By:Mary E. Horvath1
Improving Practice Efficiencies:The Virtual Patient FlowManage the patient’s experience in the dental office from the beginning to the end of theirvisit!The key to running any successful practice is managing patient flow. An office is efficientwhen it moves the patients in and out quickly and thoughtfully.General Preferences Delete Completed Tx Plan Items in WalkoutChecking Delete Completed TX Plan Items in Walkout and Eaglesoftwill remove the completed services from the treatment plan. If this is unchecked, itwill leave the completed items in the treatment plan, yet the user will be able toexclude them from the Treatment plan reports.2
The user may go back in time to review completed items for any time frame for anyprovider. Service Code List Default Sort – Select the default order in which the ServiceCode List will appear. Options are Service Code, Description, ADA Code andService Type. This is a workstation specific preference. Clinical Exam Preferences – This is defaulted to complete exam until new examtypes are added to the system. Established offices may find that they will use aPeriodic Exam more frequently. The exam that is entered in will be the default examthat shows upon opening the clinical exam for a patient. Insert Comments into Note History – Comments typed in each sub-exam withinthe clinical exam will automatically be saved into the patient’s note history. Use Quick Walkout Process – This preference, when checked, bypasses theinsurance processing screen/payment screen when doing a walkout. Thispreference is workstation specific. This box would be checked if the office wantedto check the patient out (walkout) Chairside. Auto-mark only “post to walkout” services in Walkout – This will automaticallyselect only the “post to walkout” services in the Planned Procedures window whenperforming a standard walkout. Any services that would appear on the appointmentthat were not marked “Post to Walkout” will not be selected at the time of walkout. Use SmartCodes in Walkout and Treatment Plan – This allows the computer toautomatically change the service code to the code that coincides with the number ofsurfaces added in association to the procedure. Or it will add the proper servicecode for an upper or lower arch procedure and the correct root canal code when theroot is the affected area.3
Patient Preferences Show Social Security Number on Patient List – This preference allows you tospecify whether or not to display patient Social Security numbers in the patient listbox. If unchecked, you will not have the ability to search the patient/person list bysocial security number, yet with ES18 and beyond, the SS# is masked, except for thelast 4 digits. You can search by ***** and the last 4 digits.4
SmartDoc PreferencesAdd, create and save documents in SmartDoc. With SmartDoc, attach a signature tocertain documents.SmartDoc is accessible from Person, Provider, Insurance, Practice Information, LabTracking, Referral Sources, Activities and Reports.SmartDoc can be added to all of your Toolbars; Practice Management, Clinical, thePatient Bar, Integrated Mode and is available from most of the right-click menusthroughout the program.5
OnSchedule Preferences Appointment Card – Can be printed from Eaglesoft. There are three differentstyles available and the sentence at the bottom of the Appointment Card iscustomizable. Always Use the Provider on the Appointment When the Provider on theAppointment Does Not Match the Provider on the Treatment Plan Services. Allow for Planned Services to be Permanently Deleted when Removed fromAppointments – Provides a prompt to delete planned services when deleting anappointment.1. With this preference checked you will receive the following prompt:6
* Notice the default answer is “No.”2. With this preference unchecked, no prompt appears. The appointment willbe deleted and the services will automatically remain in the patient’s chart. Font Size – Different font size is available within the Scheduler; this is a workstationspecific Preference.7
Additional Setup Items – Appointment Display ChangesCustomize the text and icon indicators on Appointments. Adding new icons toappointments will give a more in-depth at-a-glance summary of patients and theirappointments. Adding additional text customizes information pertaining to that patient.IndicatorIconDouble-Click ActionAccount AlertLaunches the Account Alert windowConfirmationLaunches the Confirmation submenu;select one of these to mark thatconfirmation status of the appointmentHIPAACustomLaunches the Edit patient window sothat the patient can fill out a HIPAAdocumentLaunches the action item of IntelliCarealertLaunches the Patient Note HistoryCustomLaunches the Patient Alerts windowIntelliCareNotesPatient Alerts (custom)PrescriptionSooner If PossibleLaunches the prescriptions that wereprescribed for that patientLaunches the SIP submenu that givesthe option to uncheck Sooner IfPossibleThere are a total of 12 icon indicators that can be used.The IntelliCare and Patient Alerts Indicators are customizable with the indicatorsassigned to the Patient Alerts and IntelliCare reminders. See the Alert Indicators andIntelliCare section of this document for further explanation.8
To add new appointment icons to the appointment, right-click on any open space, chooseCurrent Settings/Setup, select the Setup button on the OnSchedule toolbar, or use theMenu Bar and choose the Drop Down menu Tools/Setup Items. Once in the Setupwindow, select from the available icons in the Available box shown above. Select theAdd button to add them to the current icons in the Show and Order box. All 12 iconindicators can be used at one time. Use the Up and Down arrows to position the chosenindicators.When there are more Indicators than the chosen number of columns of Indicators inOnSchedule setup (the example below has a maximum of 6 columns chosen), a BlueArrow Icon appears in place of the last Indicator, showing that there are more Indicatorsavailable on that patient. When hovering over the arrow, a tool tip will appear stating“More,” when double-clicking on that Arrow Icon, a list of all Indicators with explanationsappears.9
Customize Appointment Text/MergeNow customize the information that appears on the appointment itself.Select the OnSchedule Setup by either option listed above. The Appointment DisplayInformation window allows text to input with merge fields.In the examples below, Chart ID and Age were added. This helps the user to know whatthe information is when looking at the appointment.Use the Insert button to add merge fields from the dropdown list into the appointmentlayout. The merge field will be inserted where the current cursor location is in the layout.Add text directly to the layout as well as the merge data. When manually adding text, toplace the text before or after a merge field, make sure the text is placed before or after thedouble brackets of the merge field.The Appointment Display Information window is limited to 1,024 characters, whichincludes the merge fields. Use the arrow buttons to expand the viewing area of thewindow.When creating custom views and to improve performance, use Apply PerformanceOptions to all OnSchedule Views.In OnSchedule, right-click on any open space, choose Current Settings/Setup, selectthe Setup button on the OnSchedule toolbar, or use the Menu Bar and chooseTools/Setup Items. On the upper left corner of the Setup Preferences screen is thePerformance Improvement Options.Select the Apply Performance Options to All Views checkbox to disable the threeseparate options listed on all views including hidden chairs for each view. The chosencheckboxes will now be for all views in OnSchedule. This option will be deselected bydefault.10
There are two tabs within the OnSchedule settings screen. The first tab is for Displaysettings and the second is for Print settings. Under Display, all display settingpreferences are viewed and able to be edited. Under Print, all setting preferencespertaining to printing the schedule are viewed and able to be edited.The Print Setup is found under this tab, as well as the choice of Appointment DisplayInformation and Indicator Setup. When unmarked to open for editing, this isindependent of OnSchedule and used only for items chosen to be printed on the Schedule.11
Creating Alert IndicatorsCreate customized icons for Alerts by going to Lists/General Setup/Patient Alerts.Edit an existing Alert or create a new Alert from the Patient Alerts window. There is anIndicator Setup box, select the Browse button to locate and assign an image to displaywhenever this alert is attached to a patient.There are two option checkboxes for displaying the alert icon indicator:Use Indicator on Appointments: When checked, this indicator is available to display onthe patient’s appointment when this alert is assigned to a patient and Patient Alerts ischosen in the OnSchedule Setup.Use Indicator on the Clinical Virtual Screen: When checked this indicator is displayedon the Clinical Virtual Screen in the lower left portion of the screen next to the operatorychair when this alert is assigned to the patient chosen on the Virtual Screen.There is a maximum of 12 indicators allowed on the Clinical Virtual Screen, in theIntelliCare Bin. Place the mouse over an indicator and a tool tip appears to show thepatient alert what the indicator represents. When there are more than 12 indicators for that12
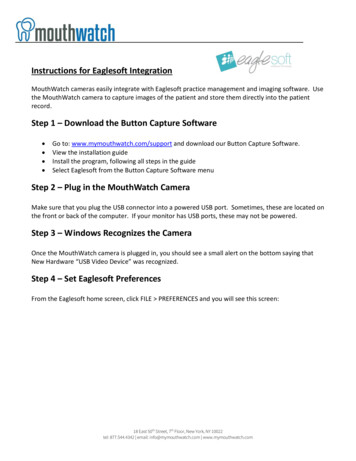
patient, the IntelliCare Bin shows a Green Icon with White Arrows in place of the 12thindicator, representing there are more than 12 indicators. When hovering over the icon, atool tip appears stating View All Indicators; then, with a single left-mouse-click, a listappears with all indicators and explanations listed.Side note: Conditions or Allergies that are marked in the Patient’s Medical History in ES17DO add icon indicators to the patient, as well as Patient Alerts assigned under the Alertswindow in the Edit Patient screen.Scheduling Tips for both Front Desk and Back OfficeStaff MembersSetting a few appointment details at the time of scheduling or any time before the visitreduces the amount of time needed to chart and walkout the visit. One of the best timesavers relates to the Preferred Provider for the patient. Set which provider(s) is going tosee the patient and unless considerations dictate otherwise, set the Preferred Providers inthe patient preference screen so any charted items will automatically default to the correctprovider, saving charting time.Within the Edit/Patient Preference are areas for the patient’s ID numbers, TimePreferences, whether or not the patient can come in on Short Notice and whether or notthe patient requires pre-med and what prescription template to default to when writing aprescription for that patient. Also choose if this patient is an Orthodontic patient, forcertain reporting options.13
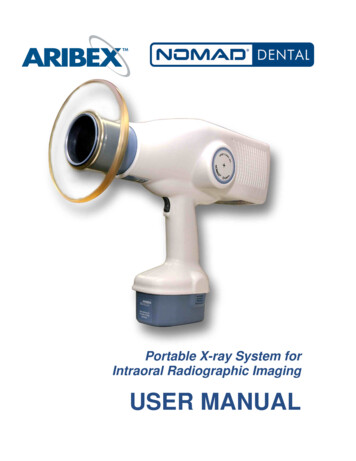
Another time-saver – Instead of taking the time to set up a new employer and/or policyholder while on the phone when making the appointment for a new patient, theessential information like name, SS#, group#, insurance contact # can be entered inthe patient memo field to be set up later when confirming coverage.The memo tab can beused to collectinformation that willlater be entered intothe system.14
Prior to the Patient’s Appointment Attach treatment plan items/service codes to the appointment. Attach the correct providers as well as the correct appointment type. Use the A/Ptoolbar button the day before to ensure that this has been done. The day before check to see if the lab cases have been returned by looking at thelab case icons within the appointment screen. The day before or day of, Check Real Time Patient Eligibility prior to the patientarriving at office for insurance eligibility. Side Note: When eligibility has beenchecked, in the prefix area of the edit appointment screen, enter E to show thateligibility has been checked or N, which stands for No Insurance Coverage.Eligibility has then been verified. The day before or two days before, call and confirm appointments or automate theappointment confirmation calls to patients with eReminders. eReminders willplace calls, send text messages and/or e-mails to patients (if the boxes are checkedin the Edit Patient screen and the required information is listed) reminding them oftheir appointments and also giving them a number to call in response to theeReminder for the appointment.Once the Patient Has Arrived Greet the patientFast CheckInThis kiosk-styled CheckIn center is designed to permit patients to enter registrationinformation directly into the system unassisted. The items an office can choose to includein the registration information will be found under Utilities Fast CheckIn Preferences.15
Patient Demographics. Insurance information cannot be edited by patientMedical History (with or without a signature.) The Medical History when a signatureis attached is saved in SmartDoc. Five screens will be brought up for the MedicalHistory, all needing to be completely filled out prior to the next screen populating.There are three HIPAA Forms. The HIPAA Authorization and Privacy forms havebeen predefined within Patterson Eaglesoft. To customize the message to thepatient, select the Edit button following the HIPAA item. These forms require asignature as well.Add custom documents and prompt to attach signatures to them in Fast CheckIn.An unlimited number of text documents, scanned documents and importeddocuments can be added. Custom Documents viewed in Fast CheckIn will beshown in the patient notes screen as a Practice Management note. Customdocuments always appear after HIPAA documents but before CAESYpresentations.16
Custom Document Setup To create a custom document, enter the title of the document that will appear in theFast CheckIn window along with a description/narrative to the patient explainingwhat the document contains and/or instructions about the document in theNarrative window (limited to 256 characters). Select the type of document, Text, Scanned or an Imported Image. Select theradio button next to your preference, other buttons will be enabled to the right of thischoice.To choose Text Document, select edit and type in the text of the document inthe following RTF editor window.To choose Scanned Document, preview and then scan in the documentselection.To choose Imported Image, import your choice of a .bmp or .jpg image (note:images cannot be resized). Select whether or not a signature is required. This option will require the patient tosign the document before continuing with Fast CheckIn and will save a copy of thedocument to the patient’s SmartDoc. Select Enable Drawing on this document to be able to draw on the document(scanned document or images only) using a tablet PC or pen and tablet type device.A mouse will work also, but not usually if a signature pad is attached. You may alsoselect a Pen Color for drawing. Selecting this option saves a copy of the documentto the patient’s SmartDoc. Select Always Show Document if you want this document to appear in the FastCheckIn window each time a patient is sent to Fast CheckIn. If this option isdeselected, the patient will only see this screen if they have not been to FastCheckIn since the last time this Custom Document was updated. Save thedocument into a specific SmartDoc document group.17
When finished, click OK to save the document. Then add other custom documentsas desired. View CAESY presentations associated with services attached to today’sappointments. Enter the number of minutes desired for Fast CheckIn to cancel out the session.The default is set up for five minutes. Set Arrival Indicator when patient is sent to Fast CheckIn. Leaving this optionunchecked will set the arrival indicator once the patient has completed FastCheckIn. Use last saved Medical History exam data when starting the application. Answersfrom the patient's last saved Medical History will appear to allow the patient to makemodifications. Generate an account note based on pages viewed. (This creates a general note inthis patient’s note history window, which contains a description of the Fast CheckInscreens that were displayed and answered by the patient.) Use a Password to exit Fast CheckIn. When a computer is operating in Kioskmode, it will not exit the program without this password. To stop the program, youmust hit Ctrl Shift P on the keyboard and it will prompt you for this password.The password is case sensitive.Using Fast CheckInThe following list shows different options for sending a patient to the Fast CheckInTerminal. Click on the patient name in OnSchedule, right-click and choose: Send patient toFast CheckIn Upper left of the edit patient window. (Note: This displays only if Kiosk is running.) Right-click on the Account Screen in the gray area next to the patient name, andchoose: Fast CheckIn Use the Patient Bar icon for Fast CheckIn within the Edit Appointment window orthe Account Screen Window Also, Fast CheckIn is available in many areas where there is a right-click such asWalkout, Treatment Plan, etc.18
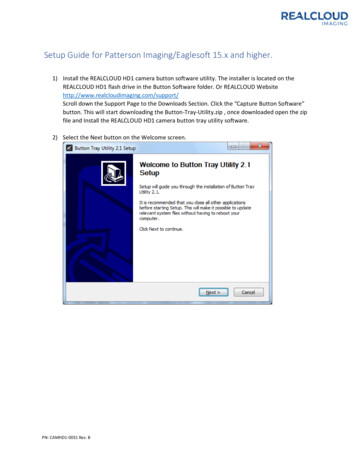
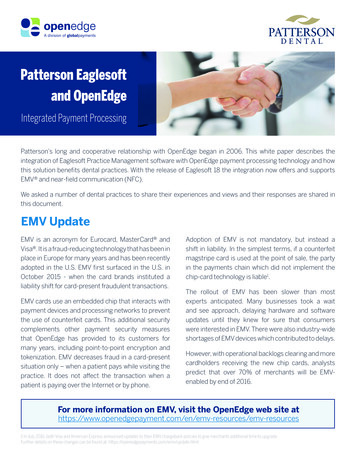
After the front desk has sent the patient to the Fast CheckIn terminal, your team can selectthe machine for the patient to use; click on OK and the patient can then click on the Beginbutton.The patient is not ableto change theEmployer/Insuranceinformation. This isview only; a messagestates to speak withthe front office team.19
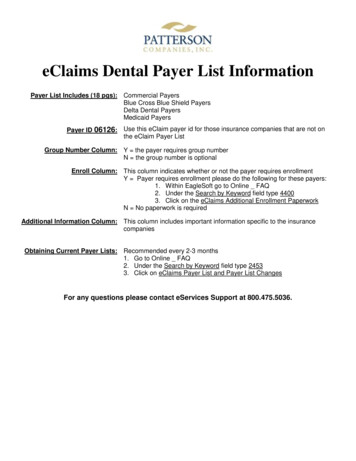
A prompt will appear when the patient does not fill out each window of the form in itsentirety. There can be up to 4 information windows for the Medical History, dependent onthe amount of questions, in order for the Medical History to be complete.20
With Eaglesoft 17 and the ability to create a customizable Medical History; if a signature isrequired, the patient will get a prompt to sign and accept the document before moving on.Any custom documents, as well as the HIPAA Office documents, will be available for thepatient to read and check the box to acknowledge the form.21
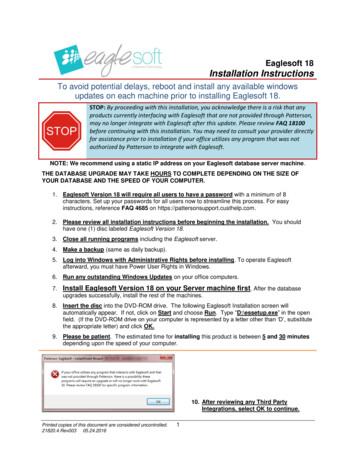
Greeting the PatientHint: Use Ctrl A to togglethe Arrival IndicatorSet Arrival indicator on the appointment.Track the amount of time that patients are late and/or spend waiting and in the chair basedon arrival indicators. This feature can help your practice determine if it is runningefficiently.Track Arrival ButtonA button called the Track Arrival has been added to the toolbar and will only be active inDay At a Glance views for the current day.Using the existing Arrival Indicators, right-click on an appointment and choose Set NextArrival Indicator, mark a patient as Late, Arrived or In Chair. Use the Track Arrival buttonto open a window displaying the status of today’s patients. Arrived time starts calculatingat the scheduled appointment time, not earlier. The times for the arrival tracking windoware based on the database time (not individual workstation times).Note: Use the Ctrl Hshortcut to temporarily hidethe patient names. The Patient Arrival Tracking window refreshes every minute and patients are colorcoded and sorted according to their status and appointment times. A dash in a column indicates the patient has not reached that status. A zero in a column indicates the patient has bypassed a status. If a patient’s appointment is cycled back through to a newer arrival indicator such asmoving from In Chair to Arrived, the tracked time for that appointment will be reset. Walked out appointments will not show in this window.22
Select the Report button in the Patient Arrival Tracking window or from the reports menu tocreate the Patient Arrival Tracking report: This report offers current statistics and Minutes Late for the patients currentlymarked as Arrived, In Chair or Walked Out. Patients who are late and are not yet marked as arrived (no shows) will not show onthis re
Manage the patient’s experience in the dental office from the beginning to the end of their . IntelliCare section of this document for further explanation. 9 . the patient memo field to be set up later when confirming coverage. The memo tab can be used to collect information that will later be entered into