Transcription
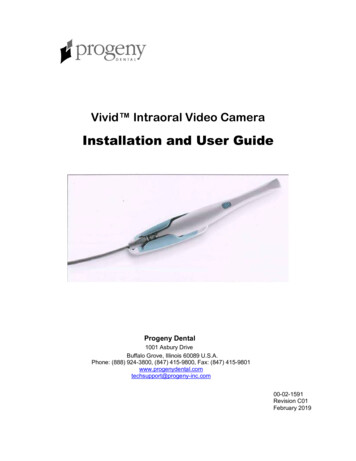
Vivid Intraoral Video CameraInstallation and User GuideProgeny Dental1001 Asbury DriveBuffalo Grove, Illinois 60089 U.S.A.Phone: (888) 924-3800, (847) 415-9800, Fax: (847) nc.com00-02-1591Revision C01February 2019
Vivid Intraoral Video CameraThe entire contents of this guide are Copyright 2019 Progeny Dental. The Progeny name, logo, and Vivid names and logos are registered trademarks or trademarks pending.Other trademarks are the property of their respective owners. No part of this guide may be reproduced by any method without the express written permission of ProgenyDental. Specifications subject to change without notice. Progeny Dental is not responsible for errors or omissions in this document.ii
Vivid Intraoral Video CameraTable of ContentsRegulatory Information . 1Safety Information . 1Product Description. 3Components of the Vivid Intraoral Video Camera . 3Installation Procedures . 6Installation Overview . 6System Requirements . 6System Configurations . 7Packing List . 7Installing the Vivid Camera with a USB Hub . 8Installing the Vivid Camera Directly to the Computer. 16Testing Vivid Camera Video and Image Capture . 24Installing the Vivid Camera with Progeny Imaging . 28Installing the Vivid Camera with Patterson Eagle Soft Imaging . 30Installing the Vivid Camera with the DENTRIX Clarity Imaging Module . 33Adjusting Color . 36Color Calibration with a Blue-only Switch . 40Infection Control . 44Cleaning and Disinfecting . 45Specifications . 47Vivid Intraoral USB Camera . 47Warranty and Service . 48Warranty and Service Information. 48Regulatory Compliance . 49EMC Statement . 49i
Regulatory and SafetyVivid Intraoral Video CameraRegulatory InformationIndications for UseThe Vivid Intraoral Video Camera is intended to provide a dentist with the ability to view the oralcavity prior to and subsequent to dental procedures.ContraIndications: NoneWarnings &PrecautionsDo not heat sterilize or autoclave any part of the Vivid camera as such cycles willdamage the optics and void the warranty.Do not submerge the handpiece in any liquids.Safety InformationSafe Use of the Vivid Intraoral Video CameraCAUTION!Service of a Vivid camera must be performed by ProgenyDental or an authorized service representative. Do notattempt to service this system unless you are qualified todo so.GeneralThe Vivid Intraoral Video Camera has been designed for safe operation withinthe guidelines of normal daily use. However, as with any electronic equipment,certain precautions must be observed. Use of the system outside of thespecifications detailed in this instruction guide may result in permanent damageto the system.Read the GuideUsers must employ every precaution to ensure personnel safety. Users shouldread the guide in its entirety before installing and using the camera. In addition,the user must be familiar with and follow the cautions presented in this guide. Ifyou have any difficulty following or understanding the instructions, contact yourdental equipment dealer or Progeny Dental.AccessoriesAll accessories or devices connected to the Vivid camera must meet equivalentsafety standards and requirements, specifically EN60601.CleaningUnplug the system before cleaning. Do not spray any aerosol or non-aerosolsprays into the Vivid camera. When necessary, wipe off exterior with soap andwater on a damp cloth. Sterilization or disinfecting should be done only asrecommended in Infection Control on page 44.1
Regulatory and SafetyDisinfectionVivid Intraoral Video CameraIt is essential that the handpiece be disinfected thoroughly to prevent crosscontamination between patients. For complete information, refer to InfectionControl on page 44.Do not heat sterilize or autoclave any part of the VIVID camera as such cycleswill damage the optics and void the warranty.DamageRequiringServiceIf any of the following conditions occur, disconnect the system and refer servicingto Progeny Dental: The power cord or handpiece cable is cut, frayed, or otherwise damaged. The Vivid camera is immersed into a liquid. The handpiece or USB video converter has been cracked or damaged. The system exhibits an unusual change in performance.LightningDuring a lightning storm or when it will be unattended and unused for longperiods of time, the computer system to which the Vivid camera is connectedshould be disconnected from the wall outlet.Cable ProtectionThe USB and handpiece cables should be routed so they are not likely to bestepped on, pinched, or kinked by items placed upon or against them. This maydamage the cords and prevent the system from working properly.CAUTION!The Vivid Intraoral Video Camera is not suitable for usewith flammable anesthetics.2
Regulatory and SafetyVivid Intraoral Video CameraProduct DescriptionComponents of the Vivid Intraoral Video CameraThe Vivid Intraoral Video Camera is a state-of-the-art dental video camera. Whenused with a compatible software application, the operator will be able to captureand store video images into a patient’s file. The Vivid camera consists of thecomponents shown on the following pages.Figure 1Vivid CameraHandpiece andCable3
Regulatory and SafetyFigure 2USB VideoConverterFigure 3USB Cables4Vivid Intraoral Video Camera
Regulatory and SafetyVivid Intraoral Video CameraFigure 4USB HubFigure 5Color ChartInstallationCD-ROMThe Vivid camera CD-ROM contains the installation program and userdocumentation.WarrantyThe Vivid Intraoral Video Camera is warranted against manufacturing defects andworkmanship from the date of installation for a period of 2 years. Please refer toyour warranty card for complete details.Installation andServiceThe Vivid Intraoral Video Camera should only be installed and serviced byapproved Progeny dealer personnel. For assistance, contact Progeny:North AmericaPROGENY DENTAL1001 Asbury DriveBuffalo Grove, IL 60089Phone: 888-924-3800Fax: 847-415-9801techsupport@progenydental.com5EuropeCE Partner 4UEsdoornlaah 133951DB MaarnThe NetherlandsPhone: 31.343.442.524Fax: 31.343.442.162
Installation ProceduresVivid Intraoral Video CameraInstallation ProceduresInstallation OverviewInstallationProcessThe Vivid camera is installed in the following steps:1. Installing Vivid camera drivers to the computer2. Installing Vivid camera hardware3. Verifying the Vivid camera video operation4. Integrating the Vivid camera with dental office systems5. Adjusting and/or calibrating colorInstallation TimeThe Vivid Intraoral Video Camera has been designed to be installed by oneperson in less than one hour, assuming that PC requirements have been met.System RequirementsThe Vivid Intraoral Video Camera is intended to be connected to a desktop orlaptop computer system via USB. Successful computer integration can only beaccomplished by ensuring that the system meets the following requirements.PersonalComputerCPUOperating SystemPC InterfaceRAMVideo ResolutionCD-ROMImageManagementSoftwareThe Vivid Intraoral Video Camera is designed to work with DirectX 9 compliantstreaming video software applications. The Vivid camera has been tested withthe following applications: Patterson EagleSoft Imaging Dentrix Clarity Imaging Module6Pentium 4, 2 GHz or higherWindows XP, VistaUSB 2.0 port (1 or 2)256 MB1024 x 768, 24-bit colorCD-ROM drive for installation
Installation ProceduresVivid Intraoral Video CameraSystem ConfigurationsThe Vivid Intraoral Video Camera is intended to be connected to a USB hub thatis connected to a computer’s USB port (Figure 6) or to be directly connected to acomputer’s USB ports (Figure 7).Connecting witha USB HubConnecting the Vivid camera using a USB hub requires that only one USB porton the computer be used for the Vivid camera. Installation instructions for thisconfiguration begin on page 8.Figure 6Connecting theVivid Camera with aUSB HubConnectingDirectly to theComputerConnecting the Vivid camera directly to a computer requires that two USB portson the computer be used for the Vivid camera. Installation instructions for thisconfiguration begin on page 16.Figure 7Connecting theVivid CameraDirectly to theComputerPacking ListPart riptionHandpiece, Vivid USB CameraUSB Video ConverterVivid Camera Cable and Handpiece Connector(standard 10 ft)Vivid Camera Cable and Handpiece Connector(long option 30 ft)USB CableUSB 4-port HubColor ChartInstallation and User ManualInstallation CD-ROMSheath packageWall Mount HolderMonitor/Delivery Unit HolderQuantity111121111111
Installation ProceduresVivid Intraoral Video CameraInstalling the Vivid Camera with a USB HubInstalling the Vivid camera with a USB hub requires one USB 2.0 port to whichthe Vivid camera will remain connected. USB technology requiresreinstallation of the Vivid camera if the camera is unplugged and thenplugged into a different USB port. Using a USB hub is useful if the computer’sUSB ports are needed for other devices.Plug and PowerUSB Hub1. Connect the USB cable to the computer and to the hub.2. Connect the hub power supply to the hub.3. Plug the power supply into a wall outlet.Insert theInstallationCD-ROMNote: Do not connect the Vivid camera or cables to the hub until told to do so bythe installation program.1. Place the Vivid camera installation CD in the computer’s CD-ROM drive. TheWelcome screen will appear.2. Click Next. The installation options will appear.8
Installation ProceduresVivid Intraoral Video CameraThe following options are available:9 Readme—This option opens the installation instructions, if the AdobeAcrobat Reader software is installed on the computer. An option to installthe Adobe Reader from the CD-ROM is available if it is not alreadyinstalled on the computer. Install Progeny Vivid Camera Driver—This option installs the Vividcamera drivers, test programs, and documentation to the computer Install Progeny Vivid Camera Hardware—This option installs the Vividcamera hardware on the computer Testing Video and Capture Button—This option permits verification of theVivid camera basic function prior to integration with a dental officeapplication
Installation ProceduresInstalling theVivid CameraDriver to theComputerVivid Intraoral Video Camera1. Click Install Progeny Vivid Camera Driver. The Vivid Camera Driverinstallation screen will appear.2. Click Install Drivers. The EULA (End User License Agreement) will appear.3. Click Accept. The InstallShield Wizard will appear.10
Installation ProceduresVivid Intraoral Video Camera4. Click Next. A software installation warning will appear.5. Click Continue Anyway. The InstallShield Wizard will complete.6. Click Finish. An option to restart Windows will appear.7. Select Yes and click OK. The computer will shutdown and restart.11
Installation ProceduresInstalling theVivid CameraHardwareVivid Intraoral Video Camera1. With the installation CD-ROM still in the computer’s CD-ROM drive, log backinto the computer. The Progeny Vivid Camera Driver Installation Welcomescreen will appear.2. Click Next. The list of installation options will appear.3. Click Install Progeny Vivid Camera Hardware. The Install Progeny VividCamera Hardware screen will appear.4. Connect the two USB cables to the USB ports on the USB hub and to theUSB ports on the USB video converter. Several messages will appearindicating that new hardware has been detected, and the Found NewHardware Wizard will appear.12
Installation ProceduresVivid Intraoral Video Camera5. Select No, not this time and click Next.6. Select Install the software automatically and click Next. A hardwareinstallation warning will appear.13
Installation ProceduresVivid Intraoral Video Camera7. Click Continue Anyway. It may take several minutes for the system to installthe driver files.Note: The screen above may vary depending on your system.8. Click Finish.9. In the Progeny Vivid Camera Setup screen, click Next.14
Installation ProceduresConnect theVivid CameraCablesVivid Intraoral Video Camera1. Connect the Vivid camera cable to the Vivid camera handpiece.2. Connect the other end of Vivid camera cable to the USB video converter. Thelight head on the Vivid camera handpiece should light up at this time.The installation is complete. Proceed to Verifying Video on page 24.15
Installation ProceduresVivid Intraoral Video CameraInstalling the Vivid Camera Directly to the ComputerInstall the Vivid camera directly to the computer if the computer has two USBports to which the Vivid camera will remain connected. USB technology willrequire reinstallation of the Vivid camera if the camera is unplugged and pluggedinto a different port*. If the computer’s USB ports are needed for other devices,install the Vivid camera using a USB hub as described on page 8.Insert theInstallationCD-ROMNote: Do not connect the Vivid camera or cables to the computer until told to doso by the installation program.1. Place the Vivid camera installation CD-ROM in the computer’s CD-ROMdrive. The Welcome screen will appear.2. Click Next. The installation options will appear.*NOTE: Color coding labels are provided to mark the cables and USB ports.16
Installation ProceduresVivid Intraoral Video CameraThe following options are available: Readme—This option opens the installation instructions, if the AdobeReader software is installed on the computer. An option to install theAdobe Reader from the CD-ROM is available if it is not already installedon the computer. Install Progeny Vivid Camera Driver—This option installs the Vividcamera drivers, test programs, and documentation to the computer Install Progeny Vivid Camera Hardware—This option installs the Vividcamera hardware on the computer Testing Video and Capture Button—This option permits verification ofthe Vivid camera basic function prior to integration with a dental officeapplication17
Installation ProceduresInstalling theVivid CameraDriver to theComputerVivid Intraoral Video Camera1. Click Install Progeny Vivid Camera Driver. The Vivid camera Driverinstallation screen will appear.2. Click Install Drivers. The EULA (End User License Agreement) will appear.3. Click Accept. The InstallShield Wizard will appear.18
Installation ProceduresVivid Intraoral Video Camera4. Click Next. A software installation warning will appear.5. Click Continue Anyway. The InstallShield Wizard will complete.6. Click Finish. An option to restart Windows will appear.7. Select Yes and click OK. The computer will shutdown and restart.19
Installation ProceduresInstalling theVivid CameraHardwareVivid Intraoral Video Camera1. With the installation CD-ROM still in the computer’s CD-ROM drive, log backinto the computer. The Progeny Vivid Camera Driver Installation Welcomescreen will appear.2. Click Next. The list of installation options will appear.3. Click Install Progeny Vivid Camera Hardware. The Install Progeny VividCamera Hardware screen will appear.4. Following the instructions on the screen, connect the two USB cables to theUSB ports on the computer and to the USB ports on the USB videoconverter. Several messages will appear indicating that new hardware hasbeen detected, and the Found New Hardware Wizard will appear.20
Installation ProceduresVivid Intraoral Video Camera5. Select No, not this time and click Next.6. Select Install the software automatically and click Next. A hardwareinstallation warning will appear.21
Installation ProceduresVivid Intraoral Video Camera7. Click Continue Anyway. It may take several minutes for the system to installthe hardware.Note: The screen above may vary depending on your system.8. Click Finish.9. In the Progeny Vivid Camera Setup screen, click Next.22
Installation ProceduresConnect theVivid CameraCablesVivid Intraoral Video Camera1. Connect the Vivid camera cable to the Vivid camera handpiece.2. Connect the other end of Vivid camera cable to the USB video converter.The light head on the Vivid camera handpiece should light up at this time.The installation is complete. Proceed to Verifying Video on page 24.23
Installation ProceduresVivid Intraoral Video CameraTesting Vivid Camera Video and Image CaptureVivid CameraTesting ScreenThe Progeny Vivid Camera Installation program contains the Testing Video andCapture button screen to verify Vivid camera video and image capture.If you are testing the Vivid camera immediately after installation, this screen willprobably be visible. If the screen is not visible, place the installation CD-ROM in thecomputer’s CD-ROM drive. At the Welcome screen, click Next. Then selectTesting Video and Capture Button.Alternatively, you can verify video and image capture from the computer’s Startmenu by selecting Progeny Vivid Test Video with AMCap or Progeny Vivid Test Capture Button.Verify VideoThe Vivid camera consists of a DirectShow compatible USB video device. To verifythat the video is working correctly, the Vivid camera uses the AMCap application, asmall video capture and preview application compatible with Microsoft DirectShow.1. Click Video in the Progeny Vivid Camera Driver Installation screen, or from theStart menu, select Progeny Vivid Test Video with AMCap. An AMCapwindow will appear.24
Installation ProceduresVivid Intraoral Video Camera2. From the Devices menu, select Progeny Vivid USB Camera.3. From the Options menu, select Preview. The image from the camera willappear in a window like the one above.4. After verifying that an image appears, close the AMCap windo
Patterson EagleSoft Imaging Dentrix Clarity Imaging Module 6 . Installation Procedures Vivid Intraoral Video Camera System Configurations . Installation and User Manual Installation CD-ROM Sheath package Wall Mount Holder Monitor/Delivery Unit Holder Quantity 1 1 1 40
