Transcription
Intuit Field Service ManagementQuickStart Setup GuideIntuit Field Service Management QuickStart Setup Guide1
This documentation and related computer software program (hereinafter referred to as the “Documentation”)is for the end user's informational purposes only and is subject to change or withdrawal by CorrigoIncorporated at any time.THIS DOCUMENTATION MAY NOT BE COPIED, TRANSFERRED, REPRODUCED, DISCLOSED ORDUPLICATED, IN WHOLE OR IN PART, WITHOUT THE PRIOR WRITTEN CONSENT OF CORRIGO.THIS DOCUMENTATION IS PROPRIETARY INFORMATION OF CORRIGO AND PROTECTED BY THECOPYRIGHT LAWS OF THE UNITED STATES AND INTERNATIONAL TREATIES.TO THE EXTENT PERMITTED BY APPLICABLE LAW, CORRIGO PROVIDES THIS DOCUMENTATION“AS IS” WITHOUT WARRANTY OF ANY KIND, INCLUDING WITHOUT LIMITATION, ANY IMPLIEDWARRANTIES OF MERCHANTABILITY, FITNESS FOR A PARTICULAR PURPOSE ORNONINFRINGEMENT. IN NO EVENT WILL CORRIGO BE LIABLE TO THE END USER OR ANY THIRDPARTY FOR ANY LOSS OR DAMAGE, DIRECT OR INDIRECT, FROM THE USE OF THISDOCUMENTATION, INCLUDING WITHOUT LIMITATION, LOST PROFITS, BUSINESS INTERRUPTION,GOODWILL OR LOST DATA, EVEN IF CORRIGO IS EXPRESSLY ADVISED OF SUCH LOSS ORDAMAGE.THE USE OF ANY PRODUCT REFERENCED IN THIS DOCUMENTATION AND THISDOCUMENTATION IS GOVERNED BY THE APPLICABLE END USER'S LICENSE AGREEMENT.The manufacturer of this documentation is Corrigo Incorporated.Provided with “Restricted Rights” as set forth in 48 C.F.R. Section 12.212, 48 C.F.R. Sections 52.22719(c)(1) and (2) or DFARS Section 252.227.7013(c)(1)(ii) or applicable successor provisions. 2019 Corrigo Incorporated. All rights reserved. Corrigo Incorporated, 1101 Central Expressway S,Suite 200, Allen, TX 75013. All rights reserved. All product names referenced herein belong to theirrespective companies.Updated Jan 2019 by CM and MSIntuit Field Service Management QuickStart Setup Guide2
ContentsContentsBefore You Begin . 4Using This Guide . 4Service Management Onscreen Conventions. 5Field Service Management Technical Support . 6Basic Settings . 6Terminology . 6Time Zone . 7Service Package. 8Upload Company Logo . 9Subscription Details . 10Basic Financial Configurations . 11Basic Invoice Settings . 11Posting Invoices . 12QuickBooks Integration . 12Set Up Users and Non-Login Licenses . 13Add Users (Technicians, Dispatchers, Managers). 13Configure Users . 14Non-login Employees or Vendors . 16Procure and Set Up Mobile Devices. 16Optional Set Up . 17Time Card Module (optional add-on) . 17Service Agreements (optional add-on) . 18QuickBooks Merchant Services Integration. 19Starting the Integration Process . Error! Bookmark not defined.Corrigo Technical Support . 21Intuit Field Service Management QuickStart Setup Guide3
Intuit Field Service ManagementQuickStart Setup GuideBefore You BeginUse this guide to setup your subscription to Intuit Field Service Management, powered by Corrigo.Purchase a subscription to Intuit Field Service Management (IFSM). To place an order, contact yourlocal QuickBooks Solution Provider or ProAdvisor, or call IFSM Sales at 844-832-2901, Option 1. Whenyour account has been activated, you will receive a confirmation email containing login instructions andcredentials. Once you have successfully logged in, please proceed with the following setup guide. Youwill use a PC and browser to log into IFSM, access the Settings tab, and configure your hours ofoperation, company logo, teams, equipment and attributes, people, and more.Using This GuideAppearance:Since your company can configure Field Service Management softwareby changing the screen appearance, words, and phrases used in theapplication, some images used in this guide may not exactly matchthose that appear on your screens.Path Reference:Path references will be used in this guide to direct you to the appropriatescreen within your application. For example, to configure GPS settingsfrom the web application, the path is Settings Mobile Settings DeviceSettings. This means that, within your web application, you select theSettings page, select the Mobile Settings tab on that page, then selectthe Device Settings option from the Mobile Settings menu.Conventions:The Field Service Management product you use will often be referred to asthe web application, or application, within this guide.Mobile Device:Within this guide, the term Mobile Device will refer to any Android or Appledevice supported by Field Service Management (see SystemRequirements in this section).SystemAdministrator:This is the person at your company who manages your Field ServiceManagement web application. The term System Administrator is used in thisguide.Dispatcher:Person who operates the Field Service Management Dispatch Board.Tech/Field TechPerson who uses Field Service Management on a mobile device and servicescustomers in the field.Intuit Field Service Management QuickStart Setup Guide4
Service Management Onscreen ConventionsHow Do I?Is an on-demand context-sensitive help system that can guide youthrough configuration and application use. To access the help system,click the ‘How Do I?’ link in the upper right corner of each Field ServiceManagement screen.There is also an icon of a question mark and a link to the Learning Centerin the top right corner. Click on either to bring up a Learning Center whereyou can find guides, videos, and information on how to get additionalsupport.Intuit Field Service Management QuickStart Setup Guide5
Field Service Management Technical Support Field Service Management technical support: 1-800-517-2871 (toll-free)Open a Support Ticket via Email: support@corrigo.comPersonalized setup assistance and FSM training is available for an additional feeTraining videos and more: -management-settingsand-configuration/Supported Operating Systems:Field Service Management office interface can be used with the following Microsoft Windows operating systemversions: Microsoft Internet Explorer 9 or higher, Firefox 12 or higher, Google Chrome.1024 by 768 Screen ResolutionAt least 2 GHZ processor1 GB RAM1 GB available hard-disk spaceMobile hardware requirements:Mobile Devices: Field Service Management can be used with Apple devices iOS 5.11 or later orAndroid devices 2.2 or later. Smartphones, tablets, and iPads are all compatible with Field ServiceManagement.Basic SettingsTo get started there are a few settings to adjust that will make Field Service Management specific to yourbusiness. This section will cover the items you need to configure to begin using the system.We’ll be starting in the settings activity center. Login into FSM and click on the ‘Settings’ tab.TerminologyThe first step is to set the terminology so that it is consistent with the way that you talk about yourbusiness. Navigate to Settings Company Terminology. Verify that the terminology is right for you orupdate as needed.Intuit Field Service Management QuickStart Setup Guide6
Time ZoneSince Field Service Management is a real time system, it is important that the application knows whattime zone you are in. Navigate to Settings Work Zone Work Zones.Click the edit link on the right. On the Edit Work Zone page scroll to step 6 and select your time zonefrom the drop down and click OK. Don’t worry about anything else on the screen for right now.Intuit Field Service Management QuickStart Setup Guide7
Service PackageThe service package provides you with the list of things that customers call about when requestingservice. Later you can extend this to include skill requirements, estimated durations and priorities. Forright now you just need a reasonable list to pick from.Navigate to Settings Model Your Business Service Packages and click in the Set Categories &Services link.There are two parts that are important for the service package. The categories and the services.Categories & ServicesThink of the categories as generic buckets of the services you provide. For example, you might have a‘Problem’ category and an ‘Installation’ category. Under each category you will need to add the type ofservice provided. For example, under the Problem category you might have a service you offer called‘Change Filter’ or under the Installation category a service offered called ‘A/C Installation.’ You can changethis later, so it does not have to be perfect now.Start small with two or three categories and five or six services per category. Do not add more than ninecategories or nine services per category.Intuit Field Service Management QuickStart Setup Guide8
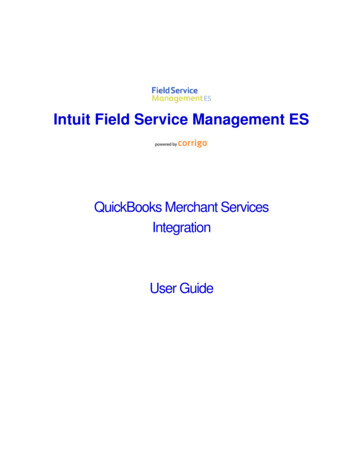
Upload Company LogoYou’ll want to upload your logo so that it appears on any print-outs you make from the application. Thisstep is optional.To upload your logo, you will need an image of your logo. If you don’t have one already you may be ableto pull it from your website by right-clicking on the part of the page with your logo on it and choosingSave from the menu on the screen. Here is an example from the Intuit site where I right-clicked on theIntuit logo.Then save it to a place where it will be easy for you to find, like your desktop:With that, you are ready to update your logo.Intuit Field Service Management QuickStart Setup Guide9
Navigate to Settings Company Upload Logo and click Edit.Then browse to the file you want to use and upload it and click the Save link. The update is immediate.Subscription DetailsLike your company logo, you’ll want to make sure that your company profile is correct. The address onyour company profile is the one that will appear on any printed files that you make from within theapplication. You can also verify the number of FSM licenses purchased.Navigate to Settings Company Subscription DetailsIntuit Field Service Management QuickStart Setup Guide10
Basic Financial ConfigurationsThese basic configurations will help ensure that your first synchronization between Field ServiceManagement and QuickBooks goes smoothly.Basic Invoice SettingsNavigate to Settings Financial Basic Invoice Settings.You have two important things to do on this page. First, if you offer discounts on invoices you will want toset this to yes. Otherwise there will be no place on the invoice to place the discount.Secondly, you’ll want to indicate whether you charge sales tax or not. If you do, indicate yes, but don’tworry about the sales tax items at this time. All your sales tax items and groups will come fromQuickBooks when the first synchronization with FSM is run. Mapping will be completed when you set upand install the QuickBooks integration client.Intuit Field Service Management QuickStart Setup Guide11
Posting InvoicesThe default setting is to post invoices on sites, which corresponds to customer jobs in QuickBooks. If youcurrently create invoices against jobs in QuickBooks you don’t need to do anything here.If you prefer, to post invoices against customers, even when they are done at a site (customer job) thenyou should change this setting. Navigate to Settings Financial Posting Invoices and update the setting toOn Customers.If you sometimes post to one and sometimes to another, simply pick the most common case here. Youwill be able to change where the invoice is posted in QuickBooks manually after running the sync. Youmay also adjust this setting later if you change your mind.QuickBooks IntegrationThis is the important step where you will enable integration. If integrating with QB desktop Pro, Premier,or Enterprise you will need to install a piece of software and set it up on your machine. The CorrigoQuickBooks Integration Setup Guide is a separate document available for your reference. Pleaseaccess it online here: http://quickbooks.corrigo.com/getting-started/ It is a good idea to go save it onyour computer for reference during the initial sync between QB and IFSM.There are two parts to the set-up. First you will configure Field Service Management to integrate toQuickBooks desktop software, then you will install, configure, and run the sync.Note: The desktop integration client is typically installed on only one machine in your office. If you desireto be able to perform the FSM Sync from more than one PC in the office, or if you want to move the FSMSync to a different computer, or if you wish change the “file path” referenced by the FSM Sync, pleasecontact FSM Technical Support prior to making these changes.The instructions for installing the integration client are included in the Corrigo QuickBooks IntegrationSetup Guide.Intuit Field Service Management QuickStart Setup Guide12
Set Up Users and Non-Login LicensesWithin Field Service Management you will need to configure your users and add any non-login licensesthat you will use to track employees or vendors that will not have access to the system.Add Users (Technicians, Dispatchers, Managers)In Field Service Management, click on the People tab. Click New Person and complete the profile.Under General Information, check Yes if the person being added will need access to login through theweb browser or mobile application.Select the Field Service Management ‘role’ of the person being added. See above for permissions byrole.Mobile User Yes or No - Choosing Yes will allow a user to login to the application via a mobile device and willuse up one FSM license.Login Information – You will need to create a user id and password for the person being added.Class – Select a class if you would like this user to be associated with a class other than the default class.Intuit Field Service Management QuickStart Setup Guide13
Configure UsersIn Field Service Management, click on the People tab. Go to ‘View’ and click the drop-down arrow box andselect All Users.Click on the tech’s name to open their details page.Click the edit link on the profile panel.On the profile page, complete any information that is missing.To log in on a mobile device a tech will need three pieces of information from this screen: Login name,Password (created here) and Company Name (at the bottom of the general information section). Besure to select Mobile User ‘Yes’ if the user will need to login through the mobile device application.Intuit Field Service Management QuickStart Setup Guide14
Click OK to return to the profile.The next thing you will want to do is set up alerts for this user.On the profile page, click the edit link on the Alerts panel.We recommend that all technicians using mobile devices or email receive alerts pertaining to the workorders that are assigned to them. Simply select where you’d like the alerts to go at the top of the page.There are two primary considerations in which alerts should be set up. Remember you can alwayschange this later as you become familiar with the system.1. If work orders are created and assigned as service requests are coming in, then all they need is theAssigned/Re-assigned alert. The alerts page should look like this:2. If you schedule work orders out into the future for your techs, it is usually a little simpler for them if youonly have them receive the Appointment Reminder/Changes alert. Otherwise they could get an alerttoday for a work order that is a couple of days out. For this scenario the alerts page should look like this:The last thing you will need to do is assign your people to Service Teams or Dispatch Centers.Service Teams: Every person that you will assign work orders to must be a member of a Service team.Your system should have one service team that came preconfigured. For each employee simply openthe Service Team panel by clicking the edit link, add the user to a Service Team, an
Intuit Field Service Management QuickStart Setup Guide 6 Field Service Management Technical Support Field Service Management technical support: 1-800-517-2871 (toll-free) Open a Support Ticket via Ema