Transcription
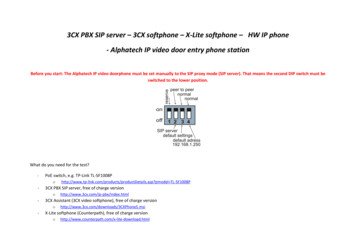
3CX PBX SIP server – 3CX softphone – X-Lite softphone – HW IP phone- Alphatech IP video door entry phone stationBefore you start: The Alphatech IP video doorphone must be set manually to the SIP proxy mode (SIP server). That means the second DIP switch must beswitched to the lower position.What do you need for the test?-PoE switch, e.g. TP-Link TL-SF1008P-3CX PBX SIP server, free of charge versionoo-http://www.3cx.com/ip-pbx/index.html3CX Assistant (3CX video softphone), free of charge tails.asp?pmodel siX-Lite softphone (Counterpath), free of charge .html
-Alphatech IP video door entry phone – e.g. IP Bell, IP Slim, IP modular, etc.-HW IP phone (optional, not necessary), e.g.o Vertical IP2007 .htmlo-Grandstream GVX3140 ideo-telephony/gxv3140Ethernet cablesYour smart brain, skillful hands and beautiful face ;-)Download the 3CX VoIP PBX, 3CX Assistant, X-Lite or Bria SW (Counterpath softphones). Install the SW on your PC. Change DHCP to the static IP address onyour computer (e.g. 192.168.1.128). Get ready the PoE switch, the HW IP phone (it must be in the same network segment, i.e. 192.168.1.xxx), Alphatech IPdoor phone (do not change its default IP address and the default factory settings, but make sure the 2nd DIP switch on the main board is set to the lowerposition). Get ready all the cabling and let s start playing.
1) Please set up the static IP address of your computer for the 3CX VoIP PBX. This static IP address on your PC will be used as the IP address of the 3CXVoIP PBX.a. E.g. 192.168.1.128
2) Extension settings on the 3CX VoIP PBX.a. 102 extension Alphatech IP video doorphone station
b. 101 extension 3CX softphone
c. 100 extension HW IP phone
3. Settings of the Alphatech IP video doorphone stationa) folder Network setting: IP address 192.168.1.250, network mask 255.255.0.0
b) folder SIP parameters: please fill out as per the screenshot below (you need to fill out the IP address of the 3CX VoIP PBX and extensionregistration)
c) folder Memory numbers – set extensions 100 (HW IP phone), 101 (3CX softphone)
4. 3CX softphone settings – you need set up a new account
Please use the same password as the extension number (both in the 3CX PBX and 3CX softphone), so you do not forget it. E.g. extension 100 password 100.5) Setting of the HW IP phone (in this case Vertical IP2007 HW IP phone)a) On the HW IP phone please set the correct IP address, so you are in the same network segment, e.g. 192.168.1.25b) Please open the web browser. Please type the IP address of the HW IP phone as per the screenshot below (e.g. 192.168.1.25). Log-in andgo to the SIP settings folder. Please fill it out as on the screenshot below.
6) Please check the extensions status on the 3CX PBX console. All extensions should be registered (green LED) and idle. As per the screenshot below.
7) Let s make some test calls :-)Please open the 3CX softphone and type the extension number 102 and press the green button. Now you are calling to the IP doorphone.If you see „no web cam set“ as on the screenshot above, then you need to set it. Please go to „hammer“ icon, click on it and set it up. Then you willsee your beautiful face:
Now when you see your wonderful face, so let s make the real video call.The call is connected. Unfortunately on the screenshot above you can see my ugly face only, I appologize ;-)
If you wish to add the Counterpath s X-Lite v4 to the extensions list, here is how you do it:Add extension 103 as shown below:
Go to the X-Lite account settings:
Please make the call to the extension number 102 Alphatech IP video doorphone station
Here is a description of set-up by 3CX enginners who approved one of our IP door stations:Linking a Door phone to your telephone system can be useful, and this AlphaTech device is an easy-to-configure option. Simply follow these step-bystep instructions. Ensure you have created an extension in the 3CX Management Console which will be used for the door phone. It is recommended that for securitypurposes, you should disable outbound (external) calls for this extension. Open the IPDP door phone and view the back as per the image below:
Connect the Network UTP cable to the Ethernet connection (Number 13 on the image above) . Ideally you should connect it to a POE NetworkSwitch. Alternatively, you would need to also connect a 12v power supply to the power block (Number 22 on the image above). For more details onhow to connect this and the specifications for the power supply please refer to the manual or contact AlphaTech support. Look for the DIP switch which is located in the middle of the circuit board (Number 14 in image above). The switch settings are as shown below: On the DIP switch, set all switches to ON except switch number 2, which must be set to OFF. Close the box and switch on the device. The Default IP address of door phone set by the manufacturer is 192.168.1.250. If you are installing with your PC in a different subnet, (i.e. Not using192.168.1.xxx/255.255.255.0), it will be necessary to set up a network card having an IP address in the same subnet range so you can connect to thedevice and make the necessary changes. Launch your web browser enter the IP address of the Door Phone (192.168.1.250). In the page that loads up, click on the link ‘Setup’ Enter user name and password (by default the name is ‘admin’ and the password is ’1234′) The Device config page will now load up.
Click on “Network Settings” and set up the settings as required for your Network . When done click on ‘Save and restart’ and then connect using thenew IP address. Click on “SIP parameters” and configure the settings as follows:
SIP proxy server1. Address: IP of 3CX server2. Port: the 3CX sip port (default 5060)SIP registrar server1. Address: IP of 3CX server2. Port: the 3CX sip port (default 5060)Account module1.2.3.4.Name: Extension Number configured in 3CX Phone System to be used for the door phonePassword: Authentication Password of the Door Phone Extension NumberAuth. Id: Authentication ID of the Door Phone Extension NumberExpiration [sec]: 600 Click on ‘Save changes’ Click on sip ‘Setting Audio’ and set priority 1 to G711u, priority 1 to G711a and priority 3 to G726. Click on ‘Save changes’. Click on Memory numbers and in Button 1 and Button 2 put in the numbers of the extensions you want to ring when the door bell is pressed. Formultiple extensions to ring, set up a Ring All ring group and insert the Ring Group number instead of an Extension Number. Click on ‘Save changes’. The doorbell can now be used with 3CX. When the doorbell is pressed, the configured extension (or ring group) will ring and can be answered byanswering the phone of the ringing extension. To open the door set up the door lock with the relay as specified in the manual and also set up the correct opening codes in AlphaTech config,Relays section.
Thanks for the kind support of my colleagues in CTI-PRO company, who are the Czech distributor of 3CX VoIP PBXs.Useful nload.htmlhttp://www.alphatechtechnologies.czAny problems?Please write to info@alphatechtechnologies.cz or call 420 602 211 010.
Download the 3CX VoIP PBX, 3CX Assistant, X-Lite or Bria SW (Counterpath softphones). Install the SW on your PC. Change DHCP to the static IP address on your File Size: 2MBPage Count: 28

