Transcription
QUICK STARTUSER GUIDEShadow TrackerTracker ExtractorTMAdvanced Tracking Technologies Inc. 2003 ATTI All rights ReservedTMVersion 2
Product Key:Copyright 2003, Advanced Tracking Technologies, Inc.All Rights Reserved. No part of this publication may be reproduced ortransmitted in any form or by any means without the prior writtenpermission of Advanced Tracking Technologies, Inc.ATTI, Advanced Tracking Technologies, Shadow Tracker, MobilEyesand Time Traveler are trademarks of Advanced Tracking Technologies,Inc.Microsoft, Windows and the Windows logo are registered trademarksof the Microsoft Corporation.Pentium is the registered trademark of Intel Corporation.Other brands and products are trademarks of their prospectiveholders.
Minimum System RequirementsWindows 95, 98, NT (Service Pack 6 or higher),2000 (Service Pack 3 or higher), ME486 Processor16 MB min. (32 MB recommended)10 MB min. free HD space (50 MB recommended)CD ROM or Floppy driveVGA Monitor(1) open 9 pin COM port
TABLE OF CONTENTSIntroductionGetting Started . 2Software InstallationBegin installation .4SoftLock .6Extractor UtilitiesSet Port .8Data Flow. 10Set Location .11Download. 12Move .12Performing a Download . 13TC
IINTRODUCTIONNTRODUCTIONTracker Extractor is a compact program that provides aconvenient way to download the GPS data collected by yourtracking units without having to remove them from the vehicle.It can be installed on any Notebook Computer which meets theminimum system requirements listed in the front of this manual.Tracker Extractor is designed to be used with either theShadow Tracker Professional or Shadow Tracker Litesoftware programs for downloading theShadow Tracker Jr, Pro and Performer tracking units.Once Tracker Extractor has been installed and configured, theNotebook can then be used to connect directly to each trackingunit to download GPS and other data. Tracker Extractorcreates and stores a GPS data file for each tracking unit that isdownloaded. These GPS data files can then be uploadeddirectly to the Base Computer or e-mailed to another locationfor final processing into the database.This manual will outline the steps necessary to properly install,setup and configure Tracker Extractor, as well as how toperform a download from the tracking unit to the Notebook andan upload from the Notebook to the Shadow Tracker softwareprogram you are using.Important: The Base Computer is where your ShadowTracker Professional or Shadow Tracker Lite softwareprogram has been installed. GPS data extracted from atracking unit with Tracker Extractor is not viewable asHistorical Tracks or Reports until it has been processed intothe database using your Shadow Tracker softwareprogram.Note: If you have Shadow Tracker Professionalconfigured as a Client/Server install type, the Base Computer1
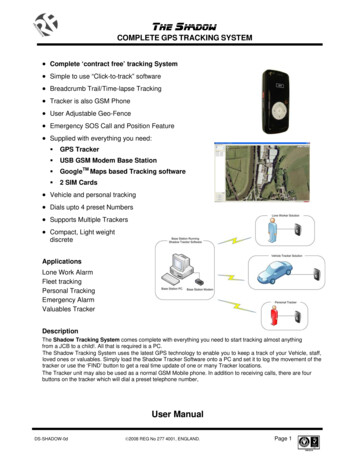
INTRODUCTIONGETTING STARTED1. On the Base Computer enable the Shadow Tracker program folder as a shared resource. (below)The default location for this folder is:Shadow Tracker ProfessionalShadow Tracker Lite“C:\Program Files\STRT”“C:\Program Files\STLight”2
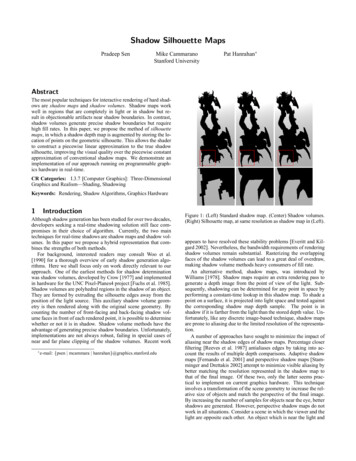
INTRODUCTION2. Turn on the Notebook Computer and connect it to the BaseComputer.3. Map a drive letter to the Shadow Tracker program folderenabled as a shared resource. (below)Note: If you are not sure how to do this, contact your3
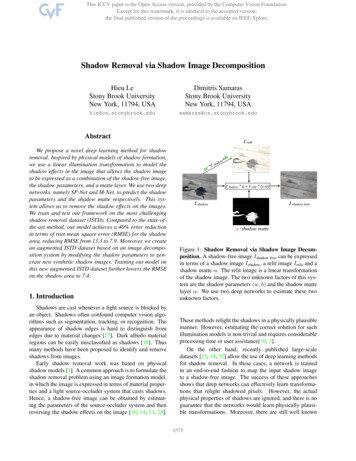
SOFTWARE INSTALLATIONNetwork Administrator.BEGIN INSTALLATIONInstallation is performed by using the (2) Tracker Extractordiskettes.Make sure you have closed all open programs, including thosethat run in the background, such as screen savers.1. Insert Disk 1 into the floppy disk drive of your NotebookComputer.2. Click Start, then click Run 3. In Open, type the drive letter of your floppy drive and":\Setup.exe”(i.e. A:\Setup.exe.). Or click Browse to locate Setup.exe.(below)4. Click OK and follow the screen prompts.5. At the Registration screen enter your Name, Company andin Prod. Key enter the Product Key located on the insidefront cover of this manual. Click Next.4
SOFTWARE INSTALLATION6. Choose a destination location for the Tracker Extractorprogram and click Next to begin the installation.7. When prompted, remove Disk 1 and insert Disk 2. ClickOK.8. Next, you will be prompted to “Specify the path to the5
SOFTWARE INSTALLATIONSOFTLOCKTo complete the installation, open the Tracker Extractorprogram.1. Click Start, point to Programs, point to Tracker Extractor,and then click Tracker Extractor.The first time Tracker Extractor is opened the SoftLock screenwill appear. (below) Here a unique Site Key will be displayed.To unlock the Tracker Extractor program you must contactAdvanced Tracking Technologies Technical Support by phone,fax or e-mail. The contact information is located in theSoftLock screen. When you provide Technical Support withyour Site Key you will be given a corresponding Serial Key toactivate this installation.6
SOFTWARE INSTALLATION2. Enter the Serial Key in the space provided. Click OK.The SoftLock will be removed and the Tracker Extractorinterface will open.(below)3. Disconnect the Notebook from the Base Computer.Note: Tracker Extractor includes one user license. Youmay only install the program on one computer. Each timethe program is installed a unique Site Key is generated.Whenever the program is loaded for the first time you will7
EXTRACTOR UTILITIESbe prompted for the corresponding Serial Key which mustbe obtained from Advanced Tracking Technologies Inc.,Technical Support.In order to download GPS data you must indicate which ComPort the Notebook Computer will be using to connect to thetracking units. This is done using the Set Port utility.SET PORTTo set the Com Port:If you know the Com Port # on the Notebook Computer you willbe using:1. Click the Set Port button.2. Click Edit, choose the correct Com Port # from the dropdown list and click Save. Click Close to exit the Set Portutility.If you DO NOT know the Com Port #:1. Connect a tracking unit to the Notebook using the trackingunits Download/Validation cable.-Connect the Download/Validation cable to the Com Porton the Notebook using the 9-pin serial connection.Tighten securely.8
EXTRACTOR UTILITIES-Connect the other end of the Download/Validationcable to the tracking unit at the connection marked“Data” or “Data Connector”.2. Click the Set Port button.3. Click Detect to allow Tracker Extractor to determine theCom Port #. (below)9
EXTRACTOR UTILITIES4. When the Com Port has been detected click Close to savethe changes and close the Set Port utility.Note: To use the Detect feature you must have a trackingunit powered up and connected to the Notebook Computer.At this point the Tracker Extractor installation andconfiguration is complete. The necessary settings have beenmade and all that remains is to become familiar with theprogram features.As explained in the introduction, before the GPS data from atracking unit can be viewed as a Historical Track or used tocreate Reports it must be processed using your ShadowTracker software program.DATA FLOWThe complete cycle of extracting the GPS data from the trackingunit thru to final processing is as follows:1. The Notebook Computer is connected to the tracking unitand the Tracker Extractor program is opened.2. GPS data is “Downloaded”from the tracking unit using theTracker Extractor Download utility.3. The Download utility extracts the GPS data from the trackingunit and creates a GPS data file. This GPS data file is placedin the Download To: location on the Notebook Computer.4. When all the tracking units have been downloaded theNotebook Computer is then connected to the BaseComputer.5. The Move utility is used to “Upload” the GPS data files from10
EXTRACTOR UTILITIESShadowTracker ProonattheaNotebookglance Computer to thethe DownloadTo: locationMove To: location on the Base Computer for final processing.6. The Shadow Tracker software program is then used toprocess the GPS data files into the database.7. When this is completed the GPS data may be accessed tocreate and view Historical Tracks and Reports.SET LOCATIONThe Set Location utility is used to control and modify whereTracker Extractor places your GPS data files at various stagesof processing. It is used to set the Destination Folder locationfor the following operations:Download To: The destination folder location where all GPS datafiles are placed on the Notebook Computer after beingdownloaded from the tracking units. These files will have a“.GPS” extension. The default destination folder location is“C:\Program Files\TrackExtract\InboundManual”.Move To: The destination folder location where yourdownloaded GPS data files will be moved to for final processing.Time-To-First-FixThe default destination folder location, depending of theShadow Tracker software program you are using, is theProcessing folder located inside the shared STRT or STLightprogram folder on the Base Computer.11
EXTRACTOR UTILITIESUnprocessed: Sets the folder location where files will be placedwhen a tracking unit download is attempted and it isdetermined that there was no data on the unit or there was aproblem with the file. These files will have a “.TEUPP”extension. The default destination folder location is“C:\Program Files\TrackExtract\Unprocessed” on the NotebookComputer.To change a Destination Folder Location:1) From the Tracker Extractor window click Set Location.2) Select the appropriate radio button at the top of theDestination Folder window. - Download To:, Move To:, orUnprocessed:.(above right)3) Select the appropriate drive letter from the drop-downmenu.4) In the navigation window navigate to the appropriate folderby double-clicking the folder icons to expand or shrink the12
TPECHNICALERFORMINGSAUPPORTDOWNLOADselection. Pay attention to the path displayed across thebottom of the navigation window. This is the path that willbe set when you save the setting.5) Click Save Setting.DOWNLOADThe Download utility begins GPS data extraction from thetracking unit.MOVEThe Move utility transfers downloaded GPS data files from theNotebook Computer’s Download To location to the Move Tolocation on the Base Computer for final processing.PERFORMING A DOWNLOAD1. Connect the Notebook Computer to the tracking unit usingthe Download/Validation cable supplied with the unit.Note: The tracking unit must be connected to a powersupply to be downloaded.13
PERFORMING AN UPLOAD2. Open the Tracker Extractor program. Click Start, point toPrograms, point to Tracker Extractor, and then clickTracker Extractor.3. Under Select a Program select the Shadow Tracker software program that will be used for final processing.4. Click Download.5. Tracker Assignment:Shadow Tracker ProfessionalEnter the appropriate Employee ID and Vehicle ID for thetracking unit you are connected to and click Start DataExtraction. (below)Shadow Tracker LiteClick Start Data Extraction. (below)A GPS data file will be created and placed in the Download Tolocation.6. Repeat steps 1-5 until all the tracking units have beendownloaded.14
TECHNICAL SUPPORTPERFORMING AN UPLOAD1. Connect the Notebook Computer to the Base Computer byeither a direct serial or network connection.2. Click Move to transfer all GPS data files in the Download Tolocation on the Notebook Computer to the Move To locationon the Base Computer.Once the GPS data files have been successfully Uploaded, theyare ready to be processed into the database with the ShadowMessage BoxTracker software program.For instructions on how to perform final processing of GPS datafiles please refer to the Help files located in the Shadow15
USER NOTES16
INTRODUCTIONUSER NOTES17
Tracker Extractor Version 2Quick Start User GuideManual Number: M-21609Revision: 4/28/2003
TMAdvanced Tracking Technologies Inc.P.O.Box 168Sugar Land, Texas 77487Tel: (713) 353-6065Fax: (713) 353-6050www.AdvanTrack.com
Shadow Tracker Professional or Shadow Tracker Lite software programs for downloading the Shadow Tracker Jr, Pro and Performer tracking units. Once Tracker Extractor has been installed and configured, the Notebook can then be used to connect directly to each tracking unit to download GPS and other data. Tracker Extractor