Transcription
Remote DVR ManagerUser’s Guidev 1.1
DVR ManagerTABLE OF CONTENTSOVERVIEW .51.PC system requirements .52.Installing Program. 6DVR Manager Monitor .83.Screen mode .83.1.Screens split. 83.2.Full S creen .83.3.Screen mode alteration . 83.4.Screen Repositioning.94.DVR list .94.1.Registering at My DVR .94.1.1.Registering remote DVR . 94.1.2.Registering from Local Area DVR list . 104.1.3.Registering from WRS list .104.2.Editing DVR information . 104.3.DVR status .114.4.Viewing image .114.5.Quick Recording . 124.6.PTZ .124.7.Changing frame rate .135.Group mode. 145.1.Registering group . 145.2.Editing group information . 155.3.Deleting group .155.4.Viewing images . 156.Auto sequence.167.Log. 1622003.08.13 (v 1.1)Rugged CCTV
TABLE OF CONTENTSDVR Manager7.1.Stopping log scroll . 167.2.Viewing log . 177.3.Viewing log image . 177.4.Viewing the recorded log image. 177.5.Text log . 188.Option configuration . 188.1.Caption . 188.2.REC . 188.3.Direct X. 199.AUDIO. 1910.Relay Out . 19DVR Manager Playback. 2011.Selecting and connecting DVR & Backup File. 2012.Search. 2112.1.Image Information .2112.2.Selecting channel .2112.3.Changing search period . 2212.4.Searching calendar . 2212.5.Searching log . 2212.6.Searching TEXT . 2312.7.Expanding/reducing screen . 2313.Play. 2413.1.Play control button. 2413.2.Playing Audio . 2414.Controlling Image . 2414.1.Controlling zoom/brightness/contrast .2414.2.Saving image . 25Rugged CCTV2003.08.13 (v 1.1)3
DVR Manager14.3.15.TABLE OF CONTENTSPrinting image . 25Backup function . 26DVR Manager ConfigStation. 2716.Registering at My DVR. 2716.1.Registering remote DVR . 2716.2.Registering from local area DVR list . 2816.3.Registering from WRS . 2817.Login & configure . 2817.1.Information tab .2917.2.System tab . 2917.3.Network tab .3017.4.User tab . 3017.5.Camera tab .3117.6.HDD tab. 3217.7.Schedule Zone tab . 3217.8.Schedule tab. 3317.9.Security tab .3317.10.Device tab. 3417.11.Relay tab .3417.12.Miscellaneous ta b .3542003.08.13 (v 1.1)Rugged CCTV
OVERVIEWDVR ManagerOVERVIEWDVR Manager is for managing ELX DVR series). Three separate programs: Monitor, Playback, andConfigStation comprise the DVR Manager.By installing the DVR Manager on a Windows 2000 Professional or XP PC, monitoring real-time andrecorded images is possible via Intranet or Internet.To manage multiple channels easily, DVR Manager supports camera list and group mode. Note Supportable DVR list & version - DS412 v1.0.21 or the higher version- ELX-08E v1.0.25 or the higher version1. PC system requirementsMinimumRecommendedCPUIntel Pentium III 600MhzIntel Pentium III 1GhzMemory128MB256MBVGA16MB32MBResolution1024 7681024 768HDD storage space5MB1GB or higherOSWindows 2000 ProfessionalWindows 2000 ProfessionalOthersDirectX 8.1 or higherBefore installing program, check the PC specifications. DVR Manager may not perform correctly if PCdoes not meet minimum requirements.DVR Manager is designed to be the only program running at any given time. If several programs runsimultaneously with DVR Manager, unpredictable errors may occur.Rugged CCTV2003.08.13 (v 1.1)5
DVR ManagerOVERVIEW2. Installing Program1) Click the “DVR Manager v1.x.x Setup.exe” file on DVR Manager Setup CD.2) Press the “I Agree” button.3) Press the “Next” button.4) Press the “Install” button. Default directory is C: \Program Files\Digital Image World\DVR Manager.To choose a different directory, click browse and choose different location.62003.08.13 (v 1.1)Rugged CCTV
OVERVIEWDVR Manager5) After installing, press the “Close” button.Rugged CCTV2003.08.13 (v 1.1)7
DVR ManagerDVR Manager MONITORDVR Manager Monitor3. Screen mode3.1. Screens splitSupports 1/4/9/13/16 split screens.Full Sc reenPressor “Alt Enter” button, for full screen mode. In order to go back to previous mode, press“Esc” or “Alt Enter” button.3.3. Screen mode alterationDouble-click one image within any split screen mode, one channel mode will result. In order to go backto previous mode, double-click again.82003.08.13 (v 1.1)Rugged CCTV
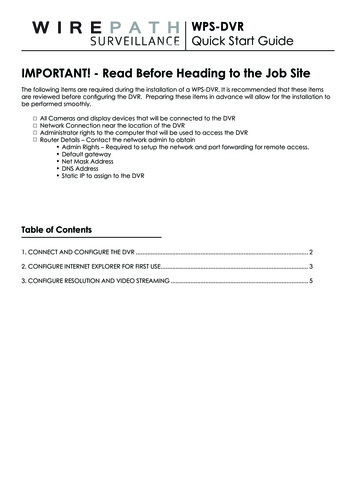
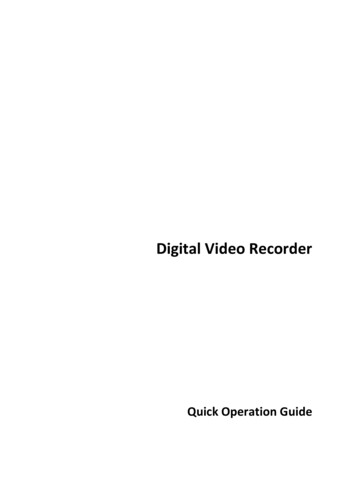
DVR Manager MONITORDVR Manager3.4. Screen RepositioningImage screen can be altered by drag and drop method. Image screen can be enlarged, reduced, andrepositioned to other parts of the computer screen.4. DVR listDVR list has three default folders: My DVR, Local Area DVR, and WRS. In order to access DVR andmonitor images, register DVR at My DVR folder.4.1. Registering at My DVR4.1.1. Registering remote DVR1) Clickicon or right click mouse and select“Add DVR.” The below screen entitled “Add newDVR” will appear.2) Enter DVR Name, User ID, Password, IP Address,and Port, and press “OK” button. Note - Enter User ID, Password, IP Address and Port- The default values of User ID/Password are admin/admin.- DVR can be assigned a name that can be up to 30 characters.Rugged CCTV2003.08.13 (v 1.1)9
DVR ManagerDVR Manager MONITOR4.1.2. Registering from Local Area DVR list1) Drag & drop a DVR among local area DVR list into “My DVR”. A pop up screen entitled “Add NewDVR” will open.2) Enter DVR Name, User ID, Password and Port, and press the “OK” button. Note - Local Area DVR automatically lists, detects and refreshes DVR on the local network.- The information on My DVR is applied to DVR Manager Monitor, Playback, and ConfigStationscreen.4.1.3. Registering from WRS list1) Click “Add WRS” among pop-up menus of WRS folder by right clicking the mouse, and enterRegistration Server(210.116.114.37 ).2) Click “Add Group ID” among pop-up menu, and enter Group ID.3) Drag & drop into “My DVR” folder. “Add New DVR” screen will open.4) Enter DVR Name, User ID, Password and Port, and then press “OK” button.4.2. Editing DVR informationClickor select “Edit DVR” from pop-upmenu. Note - DVR Name may be edited after selecting DVR icon.102003.08.13 (v 1.1)Rugged CCTV
DVR Manager MONITORDVR Manager4.3. DVR status: Connected normally (Orange color): Fail to connect (Gray color and X mark): Fail to login (Gray color)4.4. Viewing imageIn order to view images, select a channel from DVR list.If it is connected normally, image will appear. If not, error message will be indicated.If it takes more time to receive images after connecting, “Loading ” message will show. If connectionfails due to lack of network bandwidth, it will retry to connect.(Gray) means “before connecting”,(Blue) means “normal connection”, and(Red) means “fail to connect”.Rugged CCTV2003.08.13 (v 1.1)11
DVR ManagerDVR Manager MONITOR4.5. Quick RecordingPlace mouse cursor on live image, and right click the mouse. Click “Rec Start” for instant recording.“REC 00:03” will appear on the upper right of the image. In order to stop recording, click “REC Stop.” Ifuser doesn’t manually stop recording, it will automatically stop after ten minutes. Note - User can designate a recording drive. (Refer to “Option Configuration”)- QuickRecording folder is created at the recording drive, and data is stored- The recorded file name will be named using the following format “YYYYMMDD HH MM SS.re3”,and the file name will refer to the time of recording initialization.- The recorded file can be replayed with DVR Manager Playback program.4.6. PTZSelect an image to control PTZ, and click “PTZ” among pop -up menu after right clicking the mouse. Note - In order to control PTZ, PTZ camera should be connected to the relat ed DVR and its menu before setup.122003.08.13 (v 1.1)Rugged CCTV
DVR Manager MONITORDVR Manager4.7. Changing frame rateSelect an image, right click, and click “Frame Rate” Note - Default value of DVR Manager Monitor program is 5 ips(5frame/sec).Rugged CCTV2003.08.13 (v 1.1)13
DVR ManagerDVR Manager MONITOR5. Group modeClick on the “DVR” button on the upper right of the screen and select “Group” from the drop down menu.5.1. Registering group1) Clickor move mouse to group list andright click mouse and select “Add”.2) Enter Group Name, and select channel(s) toregister. Note - Group number is not limited, but a maximum of sixteen groups is recommended.- All group names should be different.- Each group is limited to sixteen channels.142003.08.13 (v 1.1)Rugged CCTV
DVR Manager MONITORDVR Manager5.2. Editing group information1) Edit group information by selecting group. Clickor select “Edit” by right clicking mouse.2) Edit group name, then click “OK”.5.3. Deleting group1) Select a group clickor select “Delete” by right clicking mouse.2) Press “OK” button to confirm. Note - If an image within the group is viewed currently, the group can’t be deleted.5.4. Viewing imagesClick the group icon to monitor images. Note - Screens are automatically split according to number of channels within the group.Rugged CCTV2003.08.13 (v 1.1)15
DVR ManagerDVR Manager MONITOR6. Auto sequence1) Click DVR list or.2) Set sequential duration by pressing3) In order to stop sequence mode, pressagain. Note - In DVR mode, images can be viewed within a split screen. 1, 4, 9, 12, or 16 channels can be viewedsimultaneously.- In group mode, the split screen will be set according to number of channels within that group.- In auto sequence mode, the time duration can be set between 5 and 60 seconds. Default value is 5seconds. Time duration cannot be altered while images are being viewed.7. LogThe log screen displays changes in status for each respective DVR registered on “My DVR.”. Note - A maximum of 1000 logs can be created within a 10 minute period.- If a DVR is deleted from My DVR, the corresponding log is also deleted.7.1. Stopping log scrollIf new log is received, it will be added at the bottom of log list and scrolled automatically. In order to stopscrolling, press. Scrolling will stop. Note -16(Red) means new scroll receiving.2003.08.13 (v 1.1)Rugged CCTV
DVR Manager MONITORDVR Manager7.2. Viewing log1) In order to view log for a specific DVR, select DVR at DVR combo box.2) In order to view the specific type of log, select the related category in the category combo box. Note - Logs can be viewed as ALL LOG, EVENT LOG, ERROR LOG, STATUS LOG, and TEXT LOG.7.3. Viewing log imageDouble click log on the log list to view images. Note - If a log is associated with a video, the corresponding video will appear when the log is selected. Forexample, if motion detection is detected, video showing motion detection will appear when that log isselected.- However, if no video is associated with a log, all video from that log will appear. For example, arelay is transmitted. There will be no corresponding image for this log. In this case, images fromall channels will appear if this log is selected.7.4. Viewing the recorded log imageSelect a log from log list and press.The DVR Manager Playback program runs and images are viewed. Note - If DVR Manager Playback is currently running, the following message will appear.Rugged CCTV2003.08.13 (v 1.1)17
DVR ManagerDVR Manager MONITOR7.5. Text logText log contains text entered within DVR. Note - Up to 3 lines of text are displayed per log.8. Option configurationPress.By pressingagain, option configuration page will be closed.8.1. CaptionInformation will appear on the image.8.2. RECThe drive directory for quick recording can be selected.182003.08.13 (v 1.1)Rugged CCTV
DVR Manager MONITORDVR Manager8.3. Direct XSet whether DirectX is to be used for viewing images. Note - For this function, DirectX drive should be installed on PC.- This function enables to advance performance by 30%.- If screen flickers when using DirectX, disable use of this function.9. AUDIOThe iconwill be blue and change intowhen red and it will change intoUse(Red) when it receives audio. Re-click on the icon. Audio reception will stop.to control volume.10. Relay OutRelay Out can be turned on or off by clicking onRugged CCTV.2003.08.13 (v 1.1)19
DVR ManagerDVR Manager PLAYBACKDVR Manager Playback11. Selecting and connecting DVR & Backup File1) Click. on the lower right hand side of the screen. DVR Explorer screen will appear.2) To select recorded backup files, click on “Open Backup File” button202003.08.13 (v 1.1)Rugged CCTV
DVR Manager PLAYBACKDVR Manager Note - When User ID and Password are stored, login into playback is accomplished automat ically. Ifautomatic login process has failed or User ID and password is not stored, a screen requiring User IDand password will open.- If password for backup file is required, a window requiring password will appear.- By double clicking backup file, DVR Manager Playback program will run automatically. However ifit is already open, the following window will appear.- If backup file is currently accessed, user only has to press the “Connect” button in order to regainaccess.12. Search12.1. Image InformationThe bottom of the playback screen provides information on the playback video. The depth of colorindicates recording speed. The contrast in color indicates recording speed of video. Darker colors indicatefaster recording speed. Red indicates Event (Motion detection, Sensor, etc) recording. Magentaindicates Pre/Post alarm.12.2. Selecting channelSelect a channel with pressing theRugged CCTVbuttons.2003.08.13 (v 1.1)21
DVR ManagerDVR Manager PLAYBACK Note - A maximum of four channels can be selected for simultaneous playback.12.3. Changing search periodUse. Note - Click on icon to change search period from 10 minutes, 30 minutes, 1 hour, 3 hours, or 6 hours.12.4. Searching calendarClick on, and icon will appear. Select date and time to quickly view video. Click “GO” andimages from that time and date will appear.12.5. Searching logPress22.2003.08.13 (v 1.1)Rugged CCTV
DVR Manager PLAYBACKDVR Manager Note - Log list shows the related channel’s log, and user can search by category.- Double click on a log, the log moves to the related time and corresponding video.12.6. Searching TEXTPress. Note - Double click on a log, and text moves to the related time and corresponding video.- Press the save button; text and video will be saved to the user’s designated drive.12.7. Expanding/reducing screenDouble click on an image for expanded view or, click on corresponding iconforexpanded view.Rugged CCTV2003.08.13 (v 1.1)23
DVR ManagerDVR Manager PLAYBACK13. Play13.1. Play control buttonAll / EventToggled. Playback of all images. Event indicates playback for only event imagesBackward StepBackwards replay of images frame by frameBackward PlayBackwards replayStopStop movement of replayPlayPlay forwardForward StepReplay frame by frameSpeed (1x)Click on “1X” Designate playback speed (0.5x, 1x, 2x, 4x, ALL) 0.5 replays at halfthe speed, 1x is normal speed, 4x is for four times the playback speed, “ALL” playsback every image one by one regardless of time duration. For example, a four minutevideo will be played back in 4 minutes if 1X is selected. The same four minutevideo can be played in 1 minute if 4X is selected. “All” means every single imagewill be played back one by one.Time duration for playback would depend onnumber of frames and bandwidth. Note - Playback speed may be affected by network bandwidth.13.2. Playing AudioAudio can be played back only at “1X” speed and “All” mode. If audio is received,flicker. Usefor controlling volume. Click audio button andbutton willappears, audio status will bemute.14. Controlling Image14.1. Controlling zoom/brightness/contrast242003.08.13 (v 1.1)Rugged CCTV
DVR Manager PLAYBACKDVR ManagerSelect an image, and the image will appear in the upper right portion of the playback screen.Click on the image on the upper right of the playback screen and drag the mouse. Digital zoom of theimage will appear on the screen.To control image expansion, you may utilize (expansion) and -(reduction) button of keyboard. Ifdragging zoomed area below 20 pixels or clicking another position except the area, expansion function iscancelled.is for controlling brightness.is for controlling contrast.Default value is 1000 / 0.14.2. Saving imageis for saving a single, selected image as a ‘bitmap’ file.14.3. Printing imageis for printing the selected image; a memo can be attached to the image . Note - Default printing is for A4 size paper.- Memo can be for a maximum of 5 lines, and each line is limited to 45 characters.- All text two seconds before and after the corresponding image will appear on the print out with theimage.Rugged CCTV2003.08.13 (v 1.1)25
DVR ManagerDVR Manager PLAYBACK15. Backup functionis for back up of data from the DVR to another drive.Enter backup period (date & time), channel, file split, file name and password. Press “Start” button.File split is to divide up data for easy storage of data.For example if the user wants to burn the imagesonto a CD, the file can be split to fit onto two or more CDs.262003.08.13 (v 1.1)Rugged CCTV
DVR Manager CONFIGSTATIONDVR ManagerDVR Manager ConfigStation16. Registering at My DVRMy DVR folder is for registering user’s DVR, changing name, and saving ID & password. It is alsopossible to make sub-folders for organizing DVRs.The information on My DVR will appear on the DVR Manager Monitor, Playback, and ConfigStationscreens.16.1. Registering remote DVR1) Move mouse point to “My DVR” and right click mouse. Select “Add DVR”2) Enter DVR’s IP address, and press the “Start Probe” button.3) Press the “Add” button to confirm registration.Rugged CCTV2003.08.13 (v 1.1)27
DVR ManagerDVR Manager CONFIGSTATION16.2. Registering from local area DVR listDrag & drop local DVR into “My DVR” folder.16.3. Registering from WRS1) Click “Add WRS” among pop-up menus of WRS folder after pressing the right button of mouse, andenter Registration Server2) Click “Add Group ID” among pop-up menu, and enter Group ID. Group ID is needed for reference.3) Drag & drop theGroup ID into “My DVR”. A window will appear “Add New DVR”.17. Login & configureSelect a DVR in My DVR or Local Area DVR folder.Click the “Login” button after entering password. Note - Monitor and Playback programs can be accessed with general user’s ID, but ConfigStation programrequires admin ID.- The default password of admin ID is ‘admin’.- If a DVR’s configuration menu is activated or remote setup is configured as “Disable”, login isimpossible.- In ConfigStation program, DVR under Local Area DVR can be accessed, but password can’t besaved.- To confirm changing a value on each tab, press the “Apply” button.282003.08.13 (v 1.1)Rugged CCTV
DVR Manager CONFIGSTATIONDVR Manager17.1. Information tabInformation tab shows DVR’s basic information. Note - By double clicking the blue item, the related tab will appear.17.2. System tab Note - DVR’s DATE/TIME can’t be changed at remote site.- For setting “Date/Time” and “Network(NTP setting)”, please refer to the related ELX User’s Guide.Rugged CCTV2003.08.13 (v 1.1)29
DVR ManagerDVR Manager CONFIGSTATION17.3. Network tabTo set DVR’s network information; Ethernet IP address, xDSL, WRS registration, and port settings. Note - For detailed information, please refer to “Network” setting menu of the related ELX User’s Guide.17.4. User tabUser tab is for managing user name, password, and access rights to the DVR. Administrator’s username is “admin” and can’t be altered.General user’s access rights can be divided into three parts; PTZ control, DO(Digital Out) control, andmonitoring channel control.302003.08.13 (v 1.1)Rugged CCTV
DVR Manager CONFIGSTATIONDVR Manager Note There are six different sets of user names and passwords. Administrator has full access rights toMonitoring, Playback, and ConfigStation screens. Five different sets of user’s names and passwordscan be set with different access rights.17.5. Camera tabTo set DVR’s channel status: PTZ port, video gain, brightness, and contrast. Note - For detailed information, please refer to “Camera” section of the related ELX User’s Guide.Rugged CCTV2003.08.13 (v 1.1)31
DVR ManagerDVR Manager CONFIGSTATION17.6. HDD tabIndicates status of recording HDD. Auto deletion and backup reminder can also be set. Note - Please refer to “Disk Setup” part of the related ELX User’s Guide for detailed info.17.7. Schedule Zone tabTo set WeekDay/WeekEnd, Day/Night and special time zones. Note - For detailed information, please refer to “Time Schedule’ and “Special Time” sections of the relatedELX User’s Guide.322003.08.13 (v 1.1)Rugged CCTV
DVR Manager CONFIGSTATIONDVR Manager17.8. Schedule tabTo set Nor
DVR list has three default folders: My DVR, Local Area DVR, and WRS. In order to access DVR and monitor images, register DVR at My DVR folder. 4.1. Registering at My DVR 4.1.1. Registering remote DVR 1) Click icon or right click mouse and select "Add DVR." The below screen entitled "Add new DVR" will appear.