Transcription
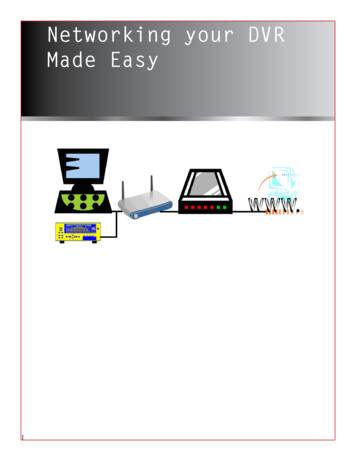
Networking your DVRMade Easy1
Contents1:2:3:4:2DVR Networking.3Setting up your PC and router.3Setting up your DVR with a static IP address .4Remote DVR Software.3
DVR NETWORKING1. SETTING UP YOUR PC AND ROUTER1. When setting up your DVR for networking, you will have one of two scenarios to choose from:A. You already have a PC inhouse or you don’t.1. If you don’t you will have to get a ISP provider to come to your location to setup a Static IP broadband connection for your new DVR. We recommend a static because of the reliability andperformance.Try to get a separate modem and router option. Try not to go with the modem/router combo. Youdo not need a permanent PC at the location but, you will need one for the network configuration.Make sure the PC and the DVR are using the same router.2. If you do have a PC inhouse, you will have two scenarios. One your running a modem/routercombo or two you have a separate modem and router.A. If you have a modem/router combo (One box), you will have to purchase another router, so youcan setup the router to do port forwarding. See your router manufacturer on how to setup yourrouter to do port forwarding. The port you will want to forward to is port 8000.Modem/ Router ComboRouterB. If you have the separate modem/ router setup already, set the router to do port forwarding. Seeyour router manufacturer on how to setup your router to do port forwarding. The port you will wantto forward to is port 8000.ModemRouterNOTE: SuperCircuits does not support or do port forwarding support. You can get router port forwardingsupport at http://portforward.com/default.htm.3
2. SETTING UP YOUR DVR WITH A STATIC IP ADDRESS.1. Start by connecting the DVR to the router for the final installation, using ethernet straight cables.DVR2. At this point you should have internet access. The router is set to do port forwarding at port 8000. Make sureyou have DirectX version 9.0c or later on your computer. If not go to www.microsoft.com/directx. and download. Most PC’s today will have DirectX 9c or better. How do you make sure you have DX9c or better, Go tothe PC and click on the “Start” button and select the “Run” option, like below. Type “cmd” in the Openwindow and select OK.3. A black box will pop up with a “C” prompt. After the “C” prompt type “dxdiag” at the dos prompt and clickon the “ENTER” button. If you get a another window asking you to update or test your lastest DirectX, selectNO at this time.4
You will see the “DirectXDiagnostic tool window, check therevision. If the revision is 9 or betteryour fine. Press the exit button4. Get back into the dos window again by pressing on the “start” button and selecting the “Run” option.Type “cmd” in the Open window option and you should see your black box with the “C:\ ” again. This timelets type in “ipconfig” and press the Enter button.5. You will see your IP (internet protocol) settings, get a piece of paper and make note of YOUR IP Address,Subnet Mask and Default Gateway address numbers.5
6. Go back to your DVR, find your DVR user manual and follow instructions on how to setup your DVR fornetworking with the static IP address option. Enter YOUR IP, Subnet Mask, and Default Gateway numbersthat you wrote down when you did your ipconfig into the DVR TCP IP settings. Do not use my numbers, this isfor demonstration only. For this example only, my IP address is 192.168.5.262, Subnet Mask is 256.256.255.0,and Default Gateway 199.168.9.1. Most DVR networking settings menus will look like below.DVR TCP/IP Settings MenuDVR Menu Window(NETWORK)SERVER IP 192.168.5.262GATEWAY 199.168.9.1NET MASK 256.256.255.000DNS 168.095.001.001WEB PORT 08000RESET DEFAULT NO7. Go back to the DVR IP address settings and change the last 3 numbers to something other than 262, use 30or use any number between 001 to 245. For example, in my example the DVR IP address will be192.168.5.30. Your DVR settings should look exactly like your IPCONFIG numbers you wrote down ‘earlier, except for the last three numbers of your IP address, that we will change. So my DVR network settingsshould look like the example below. Your numbers will be different. Use the number 30 to replace your last 3digits of your IP address. Your IP address number should look like xxx. xxx. xxx.30, every thing else should beidentical to your ipconfig settings.DVR TCP/IP Settings Menu(NETWORK)SERVER IP 192.168.5.30GATEWAY 199.168.9.1NET MASK 256.256.255.000DNS 168.095.001.001WEB PORT 08000RESET DEFAULT NOPC IP settingsDVR IP settings8. Back out of the DVR menu settings and we are ready to start our testing. Go back to your PC and click onthe START button. Click on the Run option.6
9. Type “cmd” and click “OK”.10. A black box will pop up with a “C” prompt. After the “C” prompt type “ping” at the dos prompt, press thespace bar and enter the IP address of the DVR and then click “ ENTER. For my example, I will enter192.168.5.30. You will enter a different number because your on a different network. Type ping, hit thespace bar and enter your IP address xxx.xxx.xxx.30 and press the the Enter button.10. A box will pop up and display “reply from” the IP address 3 to 4 times. You will also see “Packets sent X, Received X and Lost X. This will tell you that, you’ve successfully connected to your DVR and we canproceed to step 23 on page 12.7
If howerver you’re seeing “Request timed out” and “Packets: Sent X, Received X, Lost X” like below, thenyou have not established a LAN connection between the DVR and the computer. You will need to goback and recheck all DVR network settings.DVR TCP/IP Settings Menu(NETWORK)SERVER IP 192.168.5.30GATEWAY 199.168.9.1NET MASK 256.256.255.000DNS 168.095.001.001WEB PORT 08000RESET DEFAULT NODVR IP settingsThis could also be due to bad ethernet cables or bad DVR Network Interface Controller (NIC). Check theEthernet cable connection on the back of the DVR and check for the green lights and that they blink whenyou “ping” the DVR. If it is not blinking, this could indicate that the DVR’s network interface card is bad. Ifthe green light is blinking, as a final check, check your network IP, Gateway, port,and Net Mask numbers onthe DVR.11. If after checking everything and we are still not connecting or pinging proceed to step 12 on this page. Ifall is fine and your connecting or pinging the DVR, proceed to step 23 on page 12.12. Connect your PC straight to the DVR using a ethernet crossover cable. A ethernet crossover cable isdifferent from your regular ethernet cables and should never be used for final installation. Use ethernetcrossover cables for testing only. You can purchase ethernet crossover cables from Radio Shack or otherelectronic stores and are very common. This will help isolate the DVR from the router and the WAN (WorldWide Network) and help troubleshoot what is actually causing the problem.NOTE: The difference between a Ethernet Crossover and Straight Through cable. Never use a EthernetCrossover cables for final installation or connecting a router to your modem. Use Ethernet straight cablesfor final installations from your DVR to the router and from the router to the modem.CrossoverCableRJ-45RJ-45PINPIN1 Rx 3 Tx 2 Rc6 Tx3 Tx 1 Rc 6 Tx-82 Rc-Straight ThroughCableRJ-45RJ-45PINPIN1 Tx 1 Rc 2 Tx2 Rc3 Rc 3 Tx 6 Rc-6 Tx-
13. Connect your PC straight to your DVR using a Ethernet crossover cable.TestPCDVREthernet crossover cable14. Go to your PC and press the “Start” button andselect “Control Panel”.15. In the “Control Panel”select“ Network Connections”.9
16. Right click on the “Local Area Connection” andselect properties.17. Select Internet Protocol [TCP/IP] by double clicking.18. Select “Use the following IP address” and enter “192.168.1.100”for the IP address. Enter “255.255.255.0” for the Subnet mask.Press the “OK” button and exit.19. Go to the DVR TCP/IP settings and enter the following IP address192.168.1.30. Enter a Subnet mask of 255.255.255.0 and a portnumber of 8000. This time you will use the numbers above, unlikeour previous steps. This is for test purposes only and will helptrouble shoot.10
20. Try pinging the DVR, by going to the PC DOS window21. If your getting a “Reply” at this time, this means ourequipment is working fine and you have to look at therouter or your original IP settings at the beginning of ourIP configuration to fix the problem. Talk with your IPprovider and make sure the IP address, Subnet, andGateway numbers are correct. Check your cables andmake sure they are good. Disconnect the crossovercable and put it away for future troubleshooting. Reconnect your computer and DVR to the router andmodem and successfully ping the DVR from your PC.22. If your getting “Request timedout”, recheck your steps 13 to 21.Check your crossover cable,making sure it is good. If your stillhaving problems call ourTechnical Support at800-335-9777 and ask for Support.23. At this point we are successfully pinging the DVR from the computer. Go to your DVR users manual andinstall your DVR Remote software and move on to viewing your DVR video using your PC.11
4. REMOTE DVR SOFTWARE.24. Install the remote DVR software CD that comes with your DVR. Remember to use the IP address of yourmodem to view your DVR remotely. The DVR remote software requires you to enter the modem IP addresswhen trying to access the DVR. Do not use the DVR IP address to connect to your DVR remotely. To findout what your modem IP address is, go to “http://www.whatismyip.com/”.Note: Don’t use my modem IP numbers to connect to your DVR, go to “whatismyip.com” and get your modemIP address.Note: Your DVR remote login software might look like the example below, and you should start seeing videofrom your DVR.12
5. Final installation.1. Your final installation should look like below:PC IP Address settingsRemote PCModem IP Address is68.269.38.66DVR TCP/IP Settings Menu(NETWORK)SERVER IP 192.168.5.30GATEWAY 199.168.9.1NET MASK 256.256.255.000DNS 168.095.001.001WEB PORT 08000RESET DEFAULT NORouter is set to doport forwarding atport 8000DVR IP settingsNOTE: Your IP numbers will bedifferent from the numbers onthis page. Do not use mynumbers. Use your IP config,and modem IP numbers toconnect successfully.13
I hope this user guide has made your DVR experience a great one and that your viewing your DVR from aremote site. If not, please feel free to give us feed back on how we can make this document better for futurecustomers or how great this user guide was. Call us at 800-335-9777 or send email to our Tech Support at http://www.supercircuits.com/index.asp?PageAction CONTACTUS SUPER/CIRCUITS11000 NORTH MOPAC EXPRESSWAYSUITE 300Austin, TX 78759Phone 800-335-9777 Fax 866-2567-977714
install your DVR Remote software and move on to viewing your DVR video using your PC. 11. 24. Install the remote DVR software CD that comes with your DVR. Remember to us