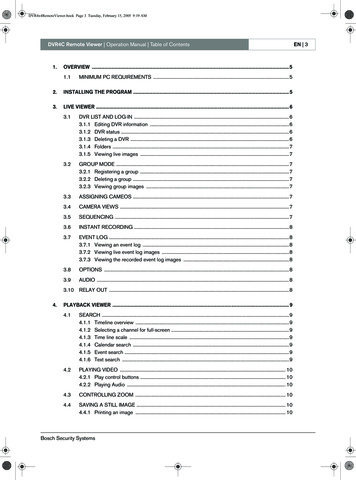
Transcription
DVR4x4RemoteViewer.book Page 3 Tuesday, February 15, 2005 9:19 AMDVR4C Remote Viewer Operation Manual Table of Contents1.OVERVIEW . 51.1MINIMUM PC REQUIREMENTS .52.INSTALLING THE PROGRAM . 53.LIVE VIEWER .63.1DVR LIST AND LOG-IN .63.1.1 Editing DVR information .63.1.2 DVR status .63.1.3 Deleting a DVR .63.1.4 Folders .73.1.5 Viewing live images .73.2GROUP MODE .73.2.1 Registering a group .73.2.2 Deleting a group .73.2.3 Viewing group images .73.3ASSIGNING CAMEOS .73.4CAMERA VIEWS .73.5SEQUENCING .73.6INSTANT RECORDING .83.7EVENT LOG .83.7.1 Viewing an event log .83.7.2 Viewing live event log images .83.7.3 Viewing the recorded event log images .83.8OPTIONS .83.9AUDIO .83.10 RELAY OUT .84.PLAYBACK VIEWER . 94.1SEARCH .94.1.1 Timeline overview .94.1.2 Selecting a channel for full-screen .94.1.3 Time line scale .94.1.4 Calendar search .94.1.5 Event search .94.1.6 Text search .94.2PLAYING VIDEO . 104.2.1 Play control buttons . 104.2.2 Playing Audio . 104.3CONTROLLING ZOOM . 104.4SAVING A STILL IMAGE . 104.4.1 Printing an image . 10Bosch Security SystemsEN 3
DVR4x4RemoteViewer.book Page 4 Tuesday, February 15, 2005 9:19 AMDVR4C Remote Viewer Operation Manual Table of Contents5.6.4.5ARCHIVING VIDEO . 104.6AUTHENTICATION FUNCTION . 104.7HARD DISK INFORMATION . 10CONFIGURATION TOOL . 115.1REGISTERING A DVR . 115.2LOGIN AND CONFIGURATION . 115.2.1 Information tab . 125.2.2 Camera . 125.2.3 Recording . 125.2.4 Event setup . 125.2.5 Profiles . 125.2.6 System Settings . 125.2.7 Connectivity . 125.2.8 Disk manager . 125.2.9 Security tab . 12ARCHIVE PLAYER . 13Bosch Security SystemsEN 4
DVR4x4RemoteViewer.book Page 5 Tuesday, February 15, 2005 9:19 AMDVR4C Remote Viewer Operation Manual Overview1Overview2The remote software gives you full control of multipleBosch Security Systems DVR4C digital video recordersvia a PC. Remote live viewing, search, playback andsystem configuration are available. The software consistsof three programs: Live Viewer, Playback Viewer, andConfiguration Tool. By installing the DVR4C remotesoftware on a Windows PC you can monitor real-timeand recorded images via a LAN, a WAN, a telephoneline (with limited functionality*) or the Internet. Tomanage multiple DVR4Cs easily, the DVR4C remotesoftware supports camera lists and group modes. AnArchive Player is also provided so that archived videorecordings can be viewed without requiring the remotesoftware to be installed.1.1EN 5Installing the program1. Click the Setup.exe file on the remote software setupCD.2. Choose a language and click I Agree to accept thelicense.3. Click Next and then select the program modules youwish to install.Minimum PC requirementsCPUMemoryVGAResolutionDisk spaceOSNetworkOthersMinimumRecommendedIntel Pentium III600Mhz128MB16MB1024x76810MBWindows 2000Professional, XP10/100 BaseTIntel Pentium IV2Ghz256MB64MB1024x76810MBWindows 2000Professional, XP10/100 BaseTDirectX 8.1 orhigherBefore installing the programs, check the PCspecifications. The DVR4C remote software may notperform correctly if the PC does not meet the minimumrequirements. Other programs running on the PC mayaffect the performance of the remote software.* PSTN telephone lines have limited bandwidth, so to improveoverall performance the following features are changed: Only one DVR4C can be connected Only one channel can be viewed at a time Image update rate is very low Audio streaming is not availableBosch Security Systems4. Click Install. The default directory is:C:\Program Files\BoschSecuritySystems\DVR4CTo choose a different directory, click browse andchoose a different location.5. When installation is complete, click Close.
DVR4x4RemoteViewer.book Page 6 Tuesday, February 15, 2005 9:19 AMDVR4C Remote Viewer Operation Manual Live Viewer3Live ViewerWhen installation is complete, double-click the LiveViewer icon on your desktop to start the program.Alternatively, select the Live Viewer program via theStart button on the Task bar and the Programs menuitem.3.1DVR list and log-inThe DVR list is shown on the right side of the window.To register a DVR:1. ClickEN 64. Enter an IP Address and a Port number or clickAuto-detect and select an IP address from the list.5. Click OK.You can log in to multiple DVRs if you wish.3.1.1ClickPlayback Viewer, and the Configuration Tool screens.3.1.2 The Add New DVR screen appears. To have the system remember the password for subsquentlog-ins, place a check mark in the Save Password box.3. Select either a Ethernet or dial-in connection for theDVR you want to register.Bosch Security SystemsDVR statusConnected normallyNew DVR. The name can be up to 30 characters long.or right click the mouse and select Edit DVR. DVR information is applicable for the Live Viewer, theor right click the mouse and select Add2. Enter a DVR name for local use, a User name and aPassword.Editing DVR informationFail to connect3.1.3Deleting a DVR1. Select a DVR, then clickclicking the mouse.2. Click Yes to confirm.or select Delete by right
DVR4x4RemoteViewer.book Page 7 Tuesday, February 15, 2005 9:19 AMDVR4C Remote Viewer Operation Manual Live Viewer3.1.4EN 73.3 Assigning cameosFoldersYou can use folders and subfolders to organize your listof DVRs. To create a folder:A cameo is a single camera picture in a multiscreendisplay. To assign a camera to a cameo:1. Right click the mouse in the DVR list window andselect New Folder.1. Click one of the camera view icons The New Folder screen appears. To create a subfolder right click on an existing folder in thelist.to select a multiscreen view.2. Click on a DVR.3. Click on the beside the DVR name. A list of connected cameras appears.2. Enter a name for the folder and click OK.3. Drag and drop DVRs from the list into the foldersand subfolders you have created.4. Click on the cameo where you want that camerapicture to be shown.3.1.55. Click on a camera.Viewing live images A border appears around the cameo. The camera picture appears in the cameo.To see a live image, click a DVR to open it. If required,fill-in a user name and password. If not shown, click ona camera to view.You can change the position of a cameo by draggingand dropping it around the viewing area.3.2 Group mode3.4 Camera viewsClick the arrow next to the DVR box on the upper rightof the screen and select Group from the drop-downmenu.To switch the display mode, click one of the cameraview iconsdisplay configuration.to change the cameo Single, Quad, 3x3, 12 1 and 4x4 multi-image displaymodes are available. 3x3, 12 1 and 4x4 multi-image display modes are usedfor viewing images from multiple DVR4Cs.3.2.1Registering a group1. Clickor move the mouse to the group list, rightclick and select Add Group.2. Enter a group name and select the cameras toinclude in the group.Clickor press Alt Enter for full-screen viewing. Togo back to the previous mode, press Esc or Alt Enter. Double-click an image within any multi-image display tosee it in full-screen mode. To go back to the previousmode, double-click again. The selected cameras are grouped and shown in the group3.5 Sequencinglist. Each group is limited to sixteen cameras.Edit group information by selecting a group. Clickor select Edit by right clicking the mouse.1. Set dwell time by clicking2. Click the sequence icon.3. To stop the sequence mode, click3.2.2Deleting a group1. Select a group, then clickright clicking the mouse.2. Click OK to confirm.3.2.3or select Delete byViewing group imagesClick the group icon to monitor images. The cameodisplay mode is automatically selected according to thenumber of cameras within the group.Bosch Security Systemsagain. In sequence mode, the time duration can be set between 5and 60 seconds. Default value is 5 seconds. In full-screen mode, cameras are sequenced; in Quadmode, DVRs are sequenced.
DVR4x4RemoteViewer.book Page 8 Tuesday, February 15, 2005 9:19 AMDVR4C Remote Viewer Operation Manual Live ViewerEN 83.6 Instant Recording3.8 OptionsTo quickly record a live image to a local or networkdisk, place the mouse cursor on the image and rightclick. Click Rec Start for instant recording. REC 00:03appears in the upper right of the image. To stoprecording, click REC Stop. If you do not stop recordingmanually, it stops automatically after ten minutes. Therecording is stored on the disk and in the directory set inthe options menu.Click3.7 Event LogThe log screen displays changes in status for each DVRregistered in the list of DVRs. If a DVR is deleted fromthe list, the corresponding log will no longer bedisplayed.to open the option window withDisplay and Instant Recording menu tabs.In the Display tab, set whether DirectX is to be used forviewing images and set the caption information for theimages. Select the time and date format to be used forthe caption display. DirectX must already be installed on your PC before youcan select it for use. Using DirectX improves performance by 30%. If the screen flickers when using DirectX, disable it.In the Instant Recording tab, select the drive anddirectory for storing quick recordings. Select the formattype for the recording file.3.9 AUDIOUse the drop-down list to select the audio input channel.The iconis normally blue but flashes when audio isreceived. Click the icon to mute the audio. Use theIf a new event is received, it is added at the bottom ofthe list which scrolls down automatically. To stopvolume controlscrolling, click3.10 Relay Out.3.7.1 Viewing an event log1. To view an event log for a specific DVR, select theDVR in the DVR drop-down list.2. To view a specific type of event, select theappropriate filter in the Filter drop-down list. Logs can be viewed as ALL, MOTION, INPUT ALARM,ERROR, STATUS and TEXT.3.7.2Viewing live event log imagesDouble-click an event on the event log list to view liveimages associated with that event.3.7.3Viewing the recorded event log imagesSelect an event from the event log list and click.The Playback Viewer program opens and the imagesare played back.Bosch Security Systemsto set the audio level.Use the drop-down list to select a DVR.An output relay can be turned on or off by clicking.
DVR4x4RemoteViewer.book Page 9 Tuesday, February 15, 2005 9:19 AMDVR4C Remote Viewer Operation Manual Playback Viewer4Playback ViewerEN 94.1.3Time line scaleAdjust the time line scale by clicking one of theTo open the Playback Viewer program, double-click thePlayback Viewer icon on your desktop. Alternatively,click theicon in the Live Viewer program. ThePlayback Viewer program can only work with oneDVR at a time. Clickto log into the DVR.To open the Live Viewer program from the PlaybackViewer program click the Live Viewer program iconat the bottom of the screen.following iconstime-line overview.4.1.4Calendar searchClickto open the calandar pop-upwindow. Select a date and time. Click GO to displayrecorded video from that date and time.4.1.5To guarantee performance, Playback Viewer access islimited to two remote users. This sets the scale of theEvent search1. Click. The event list shows all events.4.1Search2. To see specific types of event, select the type in thedrop-down list.4.1.1Timeline overview3. Double-click an event. Event types are ALL, MOTION, INPUT ALARM and TEXT.The bottom of the screen shows a timeline withinformation on the playback video. Blue indicates thatthere are recordings. Red indicates Input Alarmrecording and yellow indicates Motion Alarmrecording. Light blue indicates no recordings.4.1.2Selecting a channel for full-screenSelect a channel for full-screen viewing by clicking oneof the following iconsclicking the image itself.Bosch Security Systems, or double- Playback of the event starts.4.1.6Text search1. Click the text buttonto open a window whichdisplays the text from a text device.2. Click the Save button. Text is saved to the designated directory as a .txt file.
DVR4x4RemoteViewer.book Page 10 Tuesday, February 15, 2005 9:19 AMDVR4C Remote Viewer Operation Manual Playback ViewerEN 104.2 Playing video4.4.14.2.1Clickto print the selected image; a note can beattached to the image.Play control buttonsBackward StepBackwards replay of images frameby frame.Backward PlayBackwards replay.PauseFreezes playback.PlayPlay forward.Forward StepSpeed4.2.2Replay frame by frame.Select playback speed (0.5x, 1x, 2x, 4x,8x, 16x, 32x, ALL). ALL plays backevery image one-by-one regardless ofactual time duration. Playback speedcan be affected by network bandwidth.Playing AudioAudio can be played back only at 1X speed. If audio isbeing received,flashes. Useto control thevolume. Click the audio button to mute the audio.4.3 Controlling zoom1. Select a cameo. The image appears in the upper right portion of theplayback screen.2. Click on the image in the upper right of the playbackscreen and drag the mouse. Digital zoom of the image appears on the screen.3. To control image zoom, use the (expansion) or (reduction) button on the keyboard.4.4 Saving a still imageYou can capture a still image from the full-screen orcameo display of a camera and save it to the PC harddisk in a bitmap format. To save an image from theactive cameo to the PC hard disk:1. Select the images from one camera.2. Click the pause button to freeze the image.3. Clickto save the selected image as a bitmap file.4. If required, you can add additional comments to theimage being stored.Bosch Security SystemsPrinting an image Default printing is for A4 size paper. The note can be a maximum of 5 lines; each line limited to45 characters. All text two seconds before and after the image appearson the print-out with the image.4.5 Archiving video1. Clickto archive video from the DVR to a PCdrive.2. Enter the archive period (date and time), channel,file split and file name.3. If required, select a different directory.4. Select the copy file format either .DV4 or .AVI. The .DV4 format is the proprietary file format of Bosch andcan only be played back with the supplied viewer software(Archive Player). To play the Bosch .AVI format you canuse a normal Windows compatible MPEG-4 player such asMedia Player with anXVID codec.5. Click Start. The file split divides up data for easy storage. For example,if you want to burn the images onto a CD, the file can besplit to fit onto two or more CDs.4.6 Authentication function1. Clickto authenticate recorded video.2. Enter a period to check (date and time) and select achannel.3. Click Start. A bar indicates the progress of the authentication process. If corrupt images are found, they are shown in the resultbox.4.7 Hard disk informationThe disk usage bar shows the percentage of the harddisk that has been used for recordings on the DVR. Thewindow below shows the disk size and the remainingfree space. The date and time of the earliest (From) andlatest (To) recordings on the disk are also shown in thiswindow.
DVR4x4RemoteViewer.book Page 11 Tuesday, February 15, 2005 9:19 AMDVR4C Remote Viewer Operation Manual Configuration Tool5Configuration ToolEN 11password is set in the Connectivity menu of theDVR4C.The Configuration Tool allows an administrator toconfigure the DVRs connected to the network and theirassociated cameras.5.1Registering a DVR1. Click the Add button in the left bottom corner.2. Enter a DVR Name for local use, a User name, and aPassword. The name can be up to 30 characters long. The default values of User name/Password are admin/admin .3. Select either a Ethernet or dial-in connection for theDVR you want to register. If a DVR's configuration menu is activated or remote setupis configured as Disable , login is blocked.When you log in, nine tabs are shown: InformationCameraRecordingEvent setupProfilesSystem settingsConnectivityDisk managerSecurity4. Enter an IP Address and a Port number or clickAuto-detect and select an IP address from the list.5. Click OK.Each of these tab pages allows you to configure differentfunctions of the selected DVR. When you change thevalue of an item in any of the tabs, click the Apply buttonto confirm the change. Click the Cancel button todiscard changes.5.2 Login and configurationFor more information on the settings that can bechanged, refer to the DVR4C Installation Manual. A phone number is required for a dial-in connection.1. Select a DVR in the list of DVRs.2. Enter the password and click Login. The Configuration Tool requires administrator rights to logon to a DVR. The administrator ID is always admin. TheBosch Security Systems
DVR4x4RemoteViewer.book Page 12 Tuesday, February 15, 2005 9:19 AMDVR4C Remote Viewer Operation Manual Configuration Tool5.2.1Information tab5.2.8EN 12Disk managerDisk setup When the Recording mode is set to Continuous(default), the DVR overwrites older images when thehard disk is full. When set to Linear, the DVR stopsrecording when the hard disk is full and theadministrator has to delete video manually. Set a disk full warning percentage from 1 to 100%(default 95%). A warning message is generated whenthe used disk space exceeds the percentage set.The Information tab shows basic information about theDVR.5.2.2CameraUse this tab to set the video gain, brightness, andcontrast for the cameras connected to the DVR.5.2.3RecordingUse this tab to set the Normal Recording and EventRecording parameters.5.2.4Event setupSet the configuration of alarm inputs and the motiondetection in this tab.5.2.5ProfilesUse this tab to set the applicable periods for Weekday /Weekend and day / night. Up to 30 exception days canbe configured.5.2.6System SettingsUse this tab to configure the various system settings.5.2.7ConnectivityUse this tab to set the DVR's network information;Ethernet IP address, xDSL, PSTN and port settings. For more information, refer to the Network settings menuof the DVR4C manual.Bosch Security SystemsBlock playback To block the playback of video that is older than acertain time, select a period from the drop-down list.This function is disabled by default.5.2.9Security tabUse this tab to control access to the DVR. If you selectIP filtering, you can set up to ten IP address ranges thatare allowed or denied access to the DVR. The valuesyou set will normally depend on your network setup.The IP address can be within a range from000.000.000.000 to 255.255.255.255.
DVR4x4RemoteViewer.book Page 13 Tuesday, February 15, 2005 9:19 AMDVR4C Remote Viewer Operation Manual Archive Player6EN 13Archive PlayerWhen you archive stored data from the DVR, theArchive Player software program is copied togetherwith the data. This program allows you to playback thecopied images without having to install the remotesoftware.The Archive Player does not need to be installed on thePC. Just run the program and retrieve the copied datafor playback. To enhance the image quality, you can useDirectX. To enable or disable DirectX, right click theimage and select DirectX.To run the Archive Player, double-click the icon fromthe location where the data was stored. Click the Openfile buttonof the Archive Player, select a file forplayback and click OK. The start and end time of the fileare shown on the status bar at the bottom of thewindow.If the archived file is in .dv4 format, there can be uptofour video streams in the file. The first channel isdisplayed by default. To select a different channel, rightclick the image and move the cursor onto Channel. Youcan now choose one of the available channels from thelist.Click the audio iconto turn the sound on and off.Adjust the volumeas required.Bosch Security SystemsThe remaining function buttons are Play, Reverse Play,Pause, Backward Step, Forward Step, Save, Print,Athentication check. Play:Replay the copied file. Reverse Play: Pause: Backward Step:Play ReversePause the playbackBackwards replay of imagesframe by frame Forward Step: Save: Print: Authentication check:Replay frame by frameStore the currently displayed image as astill image. Before the capture, you can add acomment to the image.Print the currently displayed image as astill image. Before printing, you can add a commentto the image.Click to authenticate therecorded video. If corrupt images are found, they areshown in the result box.
DVR4x4RemoteViewer.book Page 14 Tuesday, February 15, 2005 9:19 AMDVR4C Remote Viewer Operation Manual Archive PlayerBosch Security SystemsEN 14
Viewer icon on your desktop to start the program. Alternatively, select the Live Viewer program via the Start button on the Task bar and the Programs menu item. 3.1 DVR list and log-in The DVR list is shown on the right side of the window. To register a DVR: 1. Click or right click the mouse and select Add New DVR. The Add New DVR screen .



![Radiant Dicom Viewer Cracked Rib [REPACK]](/img/39/evemelt.jpg)
