Transcription
HP L300 SeriesPre Installation ChecklistThank you for your equipment purchase! Please fill this out in its entirety. Once everything is completed, you willreceive a phone call from our technicians to review. Once our technician has approved it, we will be more thanhappy to get you scheduled for your install!If you have any questions please email install@grimco.com or call us at 877-283-5579.
CUSTOMER INFORMATIONCompany name:Contact name:Company address:City State Zip:Phone:Email:Customer number:SOFTWARE INFORMATIONWhat RIP software will you be using?If using existing software, please add key number:What design software will you be using?TRAINING INFORMATIONHow many users will operate this equipment?How many users have past printing experience?Do you have digital media to print on?If you purchased a laminator, do you have laminate to work with?If you purchased a flatbed, do you have substrates to print on?NOTE – We limit training groups to six persons or less.NOTE – Flatbeds require foam core to perform calibrationsGRIMCO.COMDo you know how to access Grimco’s online Web Store?Do you have a user’s account set up?If so, what is your user’s name?NOTE – If not, a Grimco technician will train you on accessing the site, getting an account set up, and provide a brief tutorial.
COMPUTER AND SOFTWARE COMPATIBILITYModelBundledSAi Flexi Subscription (1 year)SAi FlexiPrint HP EditionSAi HP FlexiPrint and CutN/AN/AN/AN/AHP L365HP L315/L335HP L315/L335PrintCutHP L560/L570HP FB550/FB750HP R SeriesHP 1500 SeriesModelEpson F6200/F7200/F9200Epson S40600/S60600/S80600Epson F2100Epson P10000/P20000BundledWasatchOnyx Gama PrintEpson Garment CreatorN/AOnyx 12.0 Onyx 12.0 Onyx 12.0 Onyx 12.5 Onyx 11.1.2 Onyx 12.1 Onyx 12.1 Onyx 11.1 Onyx 11.1.2 Onyx 12.0 Onyx 12.0 -Intel Core i7 or equivalentSupported 64-bit Operating Systems:o Windows 7 Professional,Enterprise, Ultimateo Windows 8.1 Professional andEnterpriseo Windows 10 Professional andEnterprise250 GB drive or higher for OperatingSystemMinimum 4 GB RAMUSB and Network connectionsNOTE – Windows Home Edition is NOT supportedWill WorkSAi CloudSAi CloudSAi CloudSAi CloudCaldera 11.0 Caldera 11.0 Caldera 11.0 Caldera 10.2 Caldera 10.0 Caldera 12.0 Caldera 12.0 Caldera 10.2 Caldera 10.2 N/ACaldera 10.2 SAi FLEXI COMPUTER SPECIFICATIONSONYX COMPUTER SPECIFICATIONS-Will WorkSAi CloudSAi CloudSAi CloudSAi CloudSAi CloudN/AN/A--Intel Core i7 or equivalentSupported 64-bit Operating Systems:o Windows Vistao Windows 7 Professional,Enterprise, Ultimateo Windows 8.1 Professional andEnterpriseo Windows 10 Professional andEnterprise250 GB drive or higher for OperatingSystemMinimum 4 GB RAMUSB and Network connectionsNOTE – Windows Home Edition is NOT supportedNOTE – Internet access is required for this installCALDERA COMPUTER SPECIFICATIONS-Intel Core i3, i5, i7 based Mac mini, iMac or Mac ProOperating System 10.9 or higherMinimum 4 GB RAM250 GB drive or higher or Operating SystemUSB and Network connectionsNOTE – MacBook Air, MacBook and MacBook Pro are NOT supported
POWER OUTLETS HP L30O/500/PRINTCUT SERIESThe HP L300/500/PrintCut Series printers requires TWO of the following outlets below.NEMA 6-20R, NON-LOCKING
HP Latex 115, 3X5, and 5X0 Printer SeriesTECHNICAL NEWSLETTERS FROM CUSTOMER ASSURANCEDate: March 2020Impact/Severity: MediumRegion: AMSCategory/Area: SetupAudience: SupportConfidentiality: Restricted (Service) – HP Workforce Channel PartnersSingle phase power line specificationsThis document provides information on the single phase power line specifications for the HP Latex 115, 3X5and 5X0 Printer Series.IMPORTANT: Please refer to the current documentation of your product for the full list of electricalinstallation requirements.Affected productsProduct nameHP Latex 115 PrinterHP Latex 315 PrinterHP Latex 335 PrinterHP Latex 365 PrinterHP Latex 375 PrinterHP Latex 560 PrinterHP Latex 570 PrinterHP Latex 115 Printer Series: Single phase line specificationsHP Latex 115PrinterCuringNumber of power cords2Nominal voltage range 200-240 V (two wires and protective earth)Input frequency50 / 60 HzMaximum load current (per power cord)Power consumption per power cord in printing modePower consumption in ready mode3D/LFP Customer Assurance3A13 A200 W2.0 kW70 W1HP Restricted
HP Latex 300 Printer Series: Single phase line specificationsHP Latex 365/375PrinterNumber of power cordsCuringHP Latex 335Printer2HP Latex 315CuringPrinter2Curing2 200-240 V (two wires and protective earth)Nominal voltage rangeInput frequency50 / 60 HzMaximum load current(per power cord)16 A16 A3A16 A3A13 APower consumption perpower cord in printingmode2.5 kW2.1 kW200 W2.4 kW200 W2.0 kWPower consumption inready mode85 W72 W70 WHP Latex 500 Printer Series: Single phase line specificationsHP Latex 560/570PrinterCuringNumber of power cords2Nominal voltage range 200-240 V (two wires and protective earth)Input frequency50 / 60 HzMaximum load current (per power cord)13 APower consumption per power cord in printing modePower consumption in ready mode2.0 kW1.7 kW85 WFor any additional help or clarification, please contact the next level of your technical support team.3D/LFP Customer Assurance2HP Restricted
Table of contents1 Overview . 1Introduction . 1Documentation . 1Customer responsibility . 1Installation time schedule . 22 Site preparation requirements . 3Physical space requirements . 3Unloading route . 3Environmental specifications . 4Ventilation . 4Air conditioning . 4Designing the optimal print production area . 5RIP workstation characteristics . 5Networking . 5Printing supplies . 6Return the site preparation checklist . 6Electrical configuration . 6Single phase power . 7Circuit breakers . 7Wall receptacles and power cords . 8Powerline disturbances . 11Grounding . 113 Site preparation checklist . 12ENWWiii
1OverviewIntroductionYour printer is supplied ready to use after a few simple installation procedures described in detail in the Assemblyinstructions. It is important to read the information provided in this guide thoroughly and to ensure completecompliance with all installation and operation requirements, safety procedures, warnings, cautions and localregulations. A well prepared site helps to provide a smooth and easy installation.DocumentationThe following manuals are provided with your printer, and can also be downloaded from http://www.hp.com/go/Latex300/manuals/: Introductory information Limited warranty Legal information Site preparation guide (this guide) Assembly instructions User's guideCustomer responsibilityYou are responsible for preparing the physical site for the installation of the printer. Prepare the building's electrical system to meet the printer's requirements and the Electrical Coderequirements according to the local jurisdiction of the country where the equipment is installed. SeeElectrical configuration on page 6.NOTE: Make sure that a certified electrician reviews the setup and configuration of the electrical systemused to power the printer. See Electrical configuration on page 6.ENWW Meet temperature and humidity requirements and ensure proper ventilation for the printer. SeeEnvironmental specifications on page 4. Meet all requirements for RIP, networking and printing supplies. See RIP workstation characteristicson page 5, Networking on page 5 and Printing supplies on page 6. Prepare the unloading route so the printer can be unloaded and maneuvered into place. See Unloadingroute on page 3.Introduction1
2Site preparation requirementsPhysical space requirementsUnloading routeThe route between the unloading area of the printer and the installation site, including any corridors anddoorways through which the printer must be transported, is important to proper site preparation and must bechecked before the arrival of the printer. This pathway must be clear when the printer arrives.Printer physical specifications315 Printer335 Printer365 Printer375 PrinterWidth2307 mm (90.8 in)2561 mm (101 in)2561 mm (101 in)2561 mm (101 in)Depth840 mm (33.07 in)840 mm (33.07 in)840 mm (33.07 in)840 mm (33.07 in)Height1380 mm (54.3 in)1380 mm (54.3 in)1380 mm (54.3 in)1380 mm (54.3 in)Weight174 kg (383.6 lb)188 kg (414.5 lb)207 kg (456.4 lb)231 kg (510 lb)Width with packaging2541 mm (100 in)2795 mm (110 in)2795 mm (110 in)2795 mm (110 in)Depth with packaging765 mm (30.1 in)765 mm (30.1 in)765 mm (30.1 in)765 mm (30.1 in)Height with packaging1239 mm (48.8 in)1239 mm (48.8 in)1239 mm (48.8 in)1705 mm (67.2 in)Weight with packaging290 kg (639.3 lb)304 kg (670.2 lb)323 kg (712.1 lb)330 kg (728 lb)Doorways: minimum width 1.01 m (40 in) minimum height 1.67 m (66 in) required.The space required for assembly is 3 m (10 ft) in front and 1 m (3.5 ft) at the sides and rear.Most of the installation process requires one person, but four people are required to perform certain tasks.ENWWPhysical space requirements3
Environmental specificationsThese environmental conditions must be kept within the specified ranges to ensure the correct operation of theprinter. Failure to do so may cause print-quality problems or damage sensitive electronic components.Printer environmental specificationsRelative humidity range for best print quality40–60%, depending on substrate typeRelative humidity range for printing20–80%, depending on substrate typeTemperature range for best print quality20 to 25 C (68 to 77 F), depending on substrate typeTemperature range for printing15 to 30 C (59 to 86 F)Temperature range when not in operation 25 to 55 C ( 13 to 131 F)Temperature gradientno more than 10 C/h (18 F/h)Maximum altitude when printing3000 m (10000 ft)NOTE: The printer must be kept indoors.NOTE: If the printer or ink cartridges are moved from a cold location to a warm and humid location, water fromthe atmosphere can condensate on the printer parts and cartridges and can result in ink leaks and printer errors.In this case, HP recommends that you wait at least 3 hours before turning on the printer or installing the inkcartridges, to allow the condensate to evaporate.In addition to controlling the temperature, humidity, and temperature gradient, there are other environmentalconditions that must be met during site preparation. Do not install the printer where it will be exposed to direct sunlight or a strong light source. Do not install the printer in a dusty environment. Remove any accumulated dust before moving the printerinto the area.VentilationEnsure that the room in which the system is installed meets local environmental, health, and safety (EHS)guidelines and regulations.Adequate ventilation needs to be provided to ensure that potential exposure is adequately controlled. Consultthe Safety Data Sheets available at http://www.hp.com/go/msds to identify chemical ingredients of your inkconsumables.Levels of certain substances in their facilities are dependent on workspace variables they control such as roomsize, ventilation performance and duration of equipment use. Consult your EHS specialist for advice on theappropriate measures for your location.Air conditioningIn addition to fresh air ventilation, to avoid health hazards, also consider maintaining workplace ambient levelsby assuring the climatic operating conditions specified in this document (see Environmental specificationson page 4) to avoid operator's discomfort and equipment malfunction. Air conditioning in the work area shouldtake into account that the equipment produces heat. Typically, the printer's power dissipation is: 2.2 kW (7.5 kBTU/h) for HP Latex 315 Printers 2.6 kW (8.9 kBTU/h) for HP Latex 335 Printer 4.6 kW (15.7 kBTU/h) for HP Latex 365/375 PrintersAir conditioning should meet local environmental, health, and safety (EHS) guidelines and regulations.4Chapter 2 Site preparation requirementsENWW
NOTE:The air-conditioning units should not blow air onto the equipment.Designing the optimal print production areaYour printer requires enough space to perform the following tasks: Print Replace a substrate roll Service the printer or replace printer components Ensure the printer is well ventilatedYour printer has the following dimensions:Printer physical specifications315 Printer335, 365, 375 PrinterWidth2307 mm (90.8 in)2561 mm (101 in)Depth840 mm (33.07 in)840 mm (33.07 in)Height1380 mm (54.3 in)1380 mm (54.3 in)The space required is illustrated in the following diagram:RIP workstation characteristicsEach RIP has specific requirements. Check with your RIP vendor to find out the requirements for the PC that you'llbe using for the RIP station. See http://www.hp.com/go/latexrips for a complete list of certified RIP stationsavailable for this printer. Make sure that the RIP station is fully functional and ready for installation.NetworkingYou are responsible for all networking requirements, and you must complete the following tasks:NOTE: In order to perform remote support, the printer must have access to the Internet using the LANconnection. Have a Gigabit Ethernet network ready for the day of installation. Provide a CAT-6 LAN cable to connect the printer to your LAN and RIP workstation. Provide a Gigabit Ethernet switch.To get the full features for your printer, it should be connected to the Internet. Most unmanaged networks aredirectly connected to the Internet. However, some networks require a web proxy. A proxy is a server that acts asENWWDesigning the optimal print production area5
an intermediary between computers on your local network and servers on the internet. Before setting up theprinter, please check if your network requires a web proxy.To check this open Internet Explorer or Safari on any computer within your network, and browse to the http://hp.com site. If you cannot connect to hp.com, your network does not have internet access and you need toconsult with your IT provider on how to configure internet access. If you can connect to hp.com, you can checkthe browser settings for proxy configuration as follows: For Internet Explorer, click Tools Internet options Connections LAN settings. In the "Proxy server" partof the window, if the Use a proxy server box is unchecked, you do not need a web proxy. If it is checked,make a note of the address and port settings in the main window, or in the HTTP part of the Advancedsettings window. For Safari, click Preferences Advanced Proxies Change settings. If the Web proxy (HTTP) box isunchecked, you do not need a web proxy. If it is checked, make a note of the Web Proxy Server name(before the ":") and port (after the ":"). Proxy server names typically look like "proxy.mycompany.com", and the proxy port is typically 80, butdetails are network dependent.If you are unable to determine whether you need a web proxy or how to configure it, please consult with yournetwork administrator or Internet Service Provider. When in doubt, you probably do not need a web proxy.Printing suppliesThe following supplies should be purchased in addition to the printer and should be available on the day ofinstallation: Six HP 831 ink cartridges, one for each color: black, cyan, magenta, yellow, light cyan and light magenta,and one HP 831 optimizer cartridge. At least one roll of substrate to perform calibrations and printhead alignment during printer setup.Return the site preparation checklistThe checklist must be completed and returned to your reseller or service representative a minimum of twoweeks before the day of installation.NOTE: Any delays during installation that are caused by an unprepared site will be charged to the customer.Take care that your site is properly prepared to ensure a smooth and easy installation.Electrical configurationNOTE: If configuration of the building electrical system used to power the printer needs to be modified to meetprinter requirements, an electrician is required. Make sure that your electrician is appropriately certified accordingto local regulations and supplied with all the information regarding the electrical configuration.Your printer requires the following electrical components to be supplied and installed by the customer, accordingto the Electrical Code requirements of the local jurisdiction of the country where the equipment is installed.6Chapter 2 Site preparation requirementsENWW
Single phase powerSingle phase line specificationsHP Latex 365/375PrinterCuringHP Latex 335PrinterCuring2 200–240 V (two wires and protective earth)Input frequencyPowerconsumption perpower cord inprinting modePrinter2Input voltageMaximum loadcurrent (perpower cord)Curing2Number of powercordsHP Latex 31550 / 60 Hz16 A16 A3A16 A3A13 A2.5 kW2.1 kW200 W2.4 kW200 W2.0 kWPowerconsumption inready mode85 W72 W70 WCircuit breakersNOTE: The circuit breakers must meet the requirements of the printer and should be in accordance with theElectrical Code requirements of the local jurisdiction of the country where the equipment is installed.The printer requires two power cords that meet the following requirements.Dedicated lines per SKUHP Latex 365/375Dedicated lineBranch circuitbreakerResidual currentcircuit breaker(Also know asGround FaultCircuit Interrupter“GFCI”)ENWWHP Latex 335HP Latex t required. Donot overloadlines. See Singlephase poweron page 7.YesNot required. Donot overloadlines. See Singlephase poweron page 7.Not required. Donot overloadlines. See Singlephase poweron page 7.2 poles, 16 A/20 A according to local laws and printer maximum load currentRequiredRecommendedRecommended2 poles, 30 mA residual, at least 20 A capacityElectrical configuration7
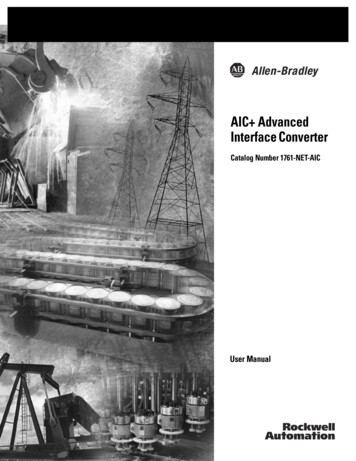
Electrical configuration diagram (for reference only)NOTE: The Power Distribution Unit (PDU) must be rated to meet the power requirements of the printer, andshould be in accordance with the Electrical Code requirements of the local jurisdiction of the country where theequipment is installed.WARNING!Do not use a power strip (relocatable power tap) to connect both power cords.Wall receptacles and power cordsTwo power cords are provided with your printer, according to the printer's electrical specifications. If those cordsdo not reach your PDU and/or UPS, a certified electrician must install suitable extension cables on the day ofinstallation.To make sure you have the right wall socket outlets (wall receptacles) ready for installation, check the following:1.The wall socket outlets must be suitable for printer input ratings. See Single phase power on page 7.2.The wall socket outlets must be suitable for the power cord plug type used in the country of installation.The tables below list examples of the power cords and the plugs provided with the printer according to thecountry. To make sure you have the right wall receptacle, find your country in the appropriate table andcheck the plug type.WARNING! Use only use the power cord supplied by HP with the printer. Do not use a power strip(relocatable power tap) to connect both power cords. Do not damage, cut, or repair the power cord. With adamaged power cord, there is risk of fire and electric shock. Always replace a damaged power cord with anHP-approved power cord.NOTE: You need two power cords from the tables below.HP Latex 335/365/375 Printers—Power cord specifications8CountryHP part numberLengthPlug typeArgentina8121-09252.5 mIRAM 2073Brazil8121-11012.5 mNBR 14136Chapter 2 Site preparation requirementsPlugENWW
HP Latex 335/365/375 Printers—Power cord specifications (continued)CountryHP part numberLengthPlug typeChile, Uruguay8121-09232.5 mCEI 23-50USA, Canada, Mexico, Japan,Philippines, Thailand8120-63602.5 mNEMA 6-20P, 240 V, 20 A,non-lockingInternational8121-12872.5 mIEC 60309, 240 V, 16 A, 2L PEPlugHP Latex 315 Printer—Power cord specifications per regionCountryHP part numberLengthPlug typeArgentina8121-09252.5 mIRAM 2073Brazil8121-11012.5 mNBR 14136Chile, Uruguay8121-09232.5 mCEI 23-50USA, Canada, Mexico8120-63602.5 mNEMA 6-20P, 240 V, 20 A,non-lockingAustralia/New Zealand8120-63512.5 mAS/NZS 3112-3 (15A)China8121-09242.5 mGB 1002 (16A)PlugAmerica RegionAsia Pacific and Japan RegionENWWElectrical configuration9
HP Latex 315 Printer—Power cord specifications per region (continued)CountryHP part numberLengthPlug typeKorea, Indonesia8120-63522.5 mCEE 7-VIIIndia8121-10742.5 mIS 1293Taiwan8121-10334.5 mCNS 690Hong Kong, Singapore8121-09072.5 mBS 1363/A (13A fused)Japan, Philippines, Thailand8120-63602.5 mNEMA 6-20P, 240 V, 20 A,non-lockingPlugEurope, Middle East and Africa Region10Europe Russia8120-63522.5 mCEE 7-VIIDenmark8121-10772.5 mDK 2-5AIsrael8121-10102.5 mSI 32South Africa8121-09152.5 mSABS 164Switzerland, Liechtenstein8121-12872.5 mIEC 60309, 240 V, 16 A, 2L PEChapter 2 Site preparation requirementsENWW
HP Latex 315 Printer—Power cord specifications per region (continued)CountryHP part numberLengthPlug typeU.K.8121–09072.5 mBS 1363/A (13A fused)Middle East8120-63602.5 mNEMA 6-20P, 240 V, 20 A,non-lockingPlugAppliance coupler (printer connection)CountryAppliance coupler (power cable)Appliance coupler inlet (printer)AllDetachable terminal as per IEC60320-1 C19 (squaredtype)Detachable inlet as per IEC60320-1 C20 (squared type)NOTE:Place the wall receptacle close enough to the printer so the plug can be plugged and unplugged easily.Powerline disturbancesAs with all computer and electronic equipment, reliable operation of your printer depends on the availability ofrelatively noise-free AC power. In order to ensure optimum performance and reliability, your printer should be protected from variations inline voltage. Lightning, line faults or the switching of lighting or machinery can generate line transients thatfar exceed the peak value of the applied voltage. If not reduced, these microsecond pulses can disruptsystem operation and damage the printer. It is recommended to include overvoltage (OVP) and transient protection in the power supply to the printer. All electrical noise-generating equipment, such as fans, fluorescent lighting and air-conditioning systems,should be kept separate from the power source used for your printer.GroundingThe printer must be connected to a good-quality ground line in order to avoid electrical risk. Please note yourobligation to comply with the Electrical Code requirements of the local jurisdiction of the country where theequipment is installed.The following grounding tasks must be fulfilled to meet the site preparation requirements:ENWW Grounding wires must be insulated and at least equal in size to the phase conductors. Ground impedance must be less than 0.5 Ω or comply with the Electrical Code requirements of the localjurisdiction of the country where the equipment is installed.Powerline disturbances11
3Site preparation checklistSafety requirementsYesNoDo those who will operate the printer have the technical training and experiencenecessary to be aware of hazards to which they may be exposed in performing atask, and to take appropriate measures to minimize the risks?Comments(Required)Is there an emergency exit in the print production area, with easy access and freefrom any obstruction?Electrical installation requirementsYesNoIs the electrician aware of all requirements and specifications highlighted in thisguide?Comments(Required)(Required)Is the single-phase line voltage inside the specified voltage range 200–240 V?Specify nominal mains voltage:Are there the dedicated lines to connect printer's power cords, if required?NOTE:cords.(Required)Do not use a power strip (relocatable power tap) to connect both powerHave branch circuit breakers (2 poles, 16 A/20 A general) been correctly installedfor each dedicated line?(Required)Have the Residual Current Circuit Breaker (also known as Ground Fault CircuitInterrupter) (2 poles, 30 mA residual, at least 20A capacity) been correctly installedif required or recommended?(Required)Is the Power Distribution Unit (PDU) correctly installed?(Required)Are the grounding conductors properly installed for each wall receptacle (wallsocket)?(Required)Are the wall receptacles (wall sockets) suitable for the power cord plug typeprovided by HP?(Required)Are the wall receptacles (wall sockets) and electrical installation suitable for theprinter's rated current ?NOTE:(Required)See Single phase power on page 7 for specific information.Are the wall receptacles (wall sockets) placed close enough to the printer that theplugs can be plugged and unplugged easily?NOTE:(Required)See Wall receptacles and power cords on page 8 for specific information.Electrical configuration requirementsYesNoCommentsDo you need an Uninterrupted Power Supply (UPS) or step-up transformer? If so, isit correctly installed?12Chapter 3 Site preparation checklistENWW
Networking and computer sIs the RIP computer and software ready for installation?Have network connections been supplied?Do you need a web proxy? If so, write down proxy server name and port.Do you have a color sensor that is compatible with your RIP?Do you have a LAN cable long enough to connect the printer to the network?Environmental requirementsHave the temperature and humidity requirements been satisfactorily met in theprint production area?Have the temperature and humidity requirements been satisfactorily met in thestorage area?Is the print production area free from dirt and dust?Does the print production area have sufficient lighting?Have you checked the required ventilation and air conditioning specifications withan expert?Other requirementsHave you arranged for supplies such as substrate and ink cartridges to be availableon the day of installation?Have you met the requirements specified in this guide?(Required)Date of site preparation completionSite preparation guide edition number or copyright dateCustomer signatureENWW13
I hereby declare that the details above are true and correct to the best of my knowledge and belief, and I will informyou of any changes therein, immediately. In case any of the above information is found to be false or untrue, I amaware it will result in delays of my installation.Signature:Date:
Epson F2100 Epson Garment Creator Onyx 12.0 SAi Cloud N/A Epson P10000/P20000 N/A Onyx 12.0 SAi Cloud Caldera 10.2 POWER OUTLETS HP L30O/500/PRINTCUT SERIES