Transcription
Getting startedwith GovTEAMSUser guide
ContentsGetting started with GovTEAMS . 1User guide. 1GovTEAMS . 3The basics. 3Why GovTEAMS? . 3 Your online workspace. 3 Trusted and secure . 3 Tools to make your job easier . 3 Personal profile . 3GovTEAMS Registration . 4Who can register? . 44-step registration process . 41) Confirm your email address . 42) Set-up your account . 43) Activate your account . 44) Complete two-factor authentication (secure your account) . 4Get familiar with your dashboard . 6Personalise profile . 7Account . 7Profile (Delve) . 7Profile Photo . 7Communities . 8Create your own community . 8Get familiar with your community card . 8Search and join communities . 8Set-up community permissions . 8Add a favourite . 8Add people to your community. 8Interact with others . 9Pick a community and channel . 9Create a channel . 10To create a channel you'll need to: . 10Start a chat. 10@mention someone . 10Share a file . 11Co-author files. 11Work with files . 11See recent activity . 11Search for messages, people and files . 11Set up notifications . 11Whats next? . 12SharePoint . 12Planner. 12Checklist . 13We’re here to help . 13UNCLASSIFIED2
GovTEAMSConnecting all tiers of government, industry and partners to deliver for Australians. Meet online with videoor audio, instantly connect through chat and collaborate on documents together, from anywhere.The basicsWhen you login to GovTEAMS you’ll land on your personalised dashboard. You can access tools,communities, members and files from here.The main apps you’ll use in your workspace are Microsoft Teams and SharePoint. You’ll also haveaccess to all the available Office 365 apps in one place.Why GovTEAMS?There is nothing else like it in government.GovTEAMS has the features you need to work better from wherever you are across boundaries: Your online workspaceoooAccess all the tools you need in one placeCreate communities and bring teams togetherPromote activities, build a network or start a project Trusted and secureoooYour privacy and data is our priorityIt’s secure and compliant with government standardsClassified to OFFICIAL: Sensitive Tools to make your job easieroooMicrosoft Teams – Meet, chat and co-author files in real-timeSharePoint – Share, structure and find informationOffice 365 apps – Work on the go with the tools you know Personal profileoooDiscover communities based on your informationPromote your skills and help employers find youConnect with likeminded people and grow your networkUNCLASSIFIED3
GovTEAMS RegistrationBefore you start – make sure you have access to your work email and a phone.Who can register?oooCommonwealth Government employees can register as a member. As a member, you canaccess all available features. You can also be a community owner and invite other members andguests to your community.State government employees can register as a guest. You'll be added to the demonstrationcommunity to try out GovTEAMS, at no cost. Community owners can invite you to theircommunities. As a guest, you can only access features in the community you're invited to.State government employees can buy a state owner account for 350 per user per annum (atleast two owners are needed to create a community). As an owner, you can access all availablefeatures. You'll be able to create communities and invite other members or guests for free. Feesand invoicing processes are still being finalised.If you're a local government, private sector or Government Business Enterprise employee, you canonly be invited to access a community as a guest. As a guest, you'll be able to take part in the commuityyou have been invited to join. But you can't create communities or invite/remove members.*If you’re a contractor with an Australian Public Service email address you can register as a membe4-step registration process1) Confirm your email address1. To start the process, open a Chrome or Microsoft Edge browser on a computer or laptop andtype www.govteams.gov.au/register. In the top right hand corner click, register.2. Enter your work email address, tick the box I’m not a robot and click submit – a confirmationemail will be sent to you. If you don’t receive the email, check your junk or spam folders.3. In the confirmation email, click confirm email address OR copy and paste the link into the webbrowser2) Set-up your account1. Read and accept the terms and conditions.a) Make sure you read all the terms and conditions as they are important and you can’t pressnext until you’ve scrolled to the bottom.2. Enter your details in the form, click review and if the information is correct tick the box Iacknowledge the details are correct and click create account3. Copy and save your GovTEAMS username ending in @govteams.gov.au and then click go3) Log in1. Choose an option:a) Sign in – first time creating an accountb) Multiple accounts – you have multiple accounts2. Sign in using your new username –firstname.surname@govteams.gov.au and enter the passwordyou used to create your accountForgot password - Contact the Service Desk.3. A more information required screen shows, click next4. Click next to set-up the Microsoft Authenticator (you need your mobile) and then click next4) Complete the Microsoft’s multi-factor authentication processTo complete your multi-factor authentication process, you’ll need a mobile/landine phone or theMicrosoft Authenticator app on your device. You will be asked to download the Microsoft Authenticatorapp. If you don't want to download the app click I want to use a different method.UNCLASSIFIED4
Mobile App1. Install the Microsoft Authentication appfor Android or iOS fromthe app store2. Open the app and click the (plus) icon and select work or schoolaccount (make sure you allow the app to send notifications andaccess your camera)3. Use the app to scan the QR code on your laptop or computer screen(this will connect the app to your GovTEAMS account). Once you’vescanned the QR code, click next4. Approve the notification on your phone and click next on your laptopor computer screen5. Select your area code from the drop down, enter your phone number andselect text me a code or call me and then click next6. Enter the code sent to your phone, click next, then next again and then click done7. A more information screen will show, click next, then done. When the stay signed in screenshows shows, click yesORAuthentication PhoneTo use this verification method, you must have access to a mobile phone that can receive messages. Afterstep 4 – complete two-factor authentication complete the following:1. Select your country or region e.g. Australia ( 61) and enter your phone number.2. Select the method:o Send me a code by text messageo Call me - An automated service will call you and ask you to press the hash (#) key.3. Click next4. Enter the code supplied5. Click verify6. Click doneVerify your accountTo make sure you can reset your password, Microsoft needs to get you to complete the multi-factorauthentication process you just set up.You will then be taken to the security info screen where you can set an additional authentication method.We recommend you do this in case you lose access to the phone you used to setup the preferredauthentication method.1.2.3.4.5.Click add method.Select your preferred alternative optionComplete the required details and click next.Using the alternative option you selected complete the verification.Click done.UNCLASSIFIED5
Get familiar with your dashboardYour personalised dashboard lets you access tools, communities, members and files in oneplace!From the dashboard, you can: Build your profileView and create your communitiesDiscover communities, membersand filesInvite membersRespond to requests to join acommunity you ownAccess the two main apps MicrosotTeams and SharPoint at the top ofthe pageAccess other Office 365 appsby clicking on the waffle icon, topleft hand corner of the pageChange your dashboard viewSet up your GovTEAMS dashboard for howyou need it!Grid viewTo view your dashboard as a grid, click on the grid icon next to the create community button.List viewTo view your dashboard as a list, click on the list icon next to the create community buttonExpand viewTo view your dashboard in expland view, click on the expand icon next to the create community button.Sort optionsYour dashboard is automatically set to be in alphabetical order A-Z. To change this setting, click on thesort icon it will change to Z-A.Add you favourite communitiesYou can favourite communities on your dashboard: Click the star icon on a community cardIt will appears under the favourites heading at the topUNCLASSIFIED6
Personalise profileThe more you put in, the more you'll get from GovTEAMS!AccountInformation that goes into your account is your: Name Organisation you work for Job title Level Email addressUpdate your account details from the dashboard:1.2.3.4.5.Click on the pen iconnext to contactMake changes to the member details fieldClick saveChange your email address if requiredClick updateProfile (Delve)Information that goes into your profile: About me – Tell your story to helps others get to know youProjects - List of projects you’ve worked onSkills and expertiseSchoolsInterests and hobbiesFill out your skills, expertise and interestsThink about how you want your profile to be seen by future employers. Do you want a professional andinformative profile or do you want one that doesn't tell them anything about you? Remember the more youput in, the more you'll get from GovTEAMS.To update your profile:1. From the dashboard click update delve profile2.3.4.5.6.7.Click update profileComplete the about me section textboxClick saveEnter the name of a project you’ve worked on in the textbox under the project headingClick add projectRepeat steps to add more projects and for other sectionsProfile PhotoMake it easier for people to connect with you and put a face to a name!To update your profile photo:1.2.3.4.5.6.From the dashboard click update Delve ProfileClick on the camera button next to your existing profile photoClick upload a new photoSelect the photo you wish to upload and click openUse the plus and minus scale to adjust the photoClick set as profile photoUNCLASSIFIED7
CommunitiesWork how you want, with the people you need.Create your own communityStart exploring GovTEAMS! Create your own open, private or hidden communities. How do you createyour community?1.2.3.4.Click create community on your dashboardRead and accept the terms and conditionsComplete the community details formYou'll need to make sure you nominate a second owner of your community. Your second ownerneeds to already be a registered GovTEAMS member5. You’ll receive an email when your community is ready, this can take a few minutesGet familiar with your community cardYou can create different types of communities! Select a community type based on your needs. You cancreate the following community types: Open – your community is discoverable and any member can joinPrivate – your community is discoverable but members will need to request to join. Don't forget,you'll need to approve these requests!Hidden – your community won't be discoverable and you'll need to invite people to joinYou can invite members to any of the community typesSearch and join communitiesTry finding the GovTEAMS community!1.2.3.4.From the dashboard, search for the GovTEAMS community in the search bar and click the arrowIn the search results, click GovTEAMS community (a side panel will show)Click join this communityYou’ll receive an email letting you know you’ve been added to the communitySet-up community permissionsTo set-up your community permissions:1. From the dashboard, search for the GovTEAMS community in the search bar and click the arrow2. In the search results, click GovTEAMS community (a side panel will show)3. Click join this communityYou’ll receive an email letting you know you’ve been added to the communityAdd a favouriteYou can favourite communities to your dashboard:1. Click the star iconon a community card and it will appear under the favourites heading at the topAdd people to your communityTry adding a friend to your community!1. From the dashboard, click on the people iconon your community card.2. Enter the work email addresses of the people you want to invite and select from the drop down orselect add bulk invites - you can only have one email address on each line. You can invite anyoneto your community, even if they're not already registered. Click send inviteUNCLASSIFIED8
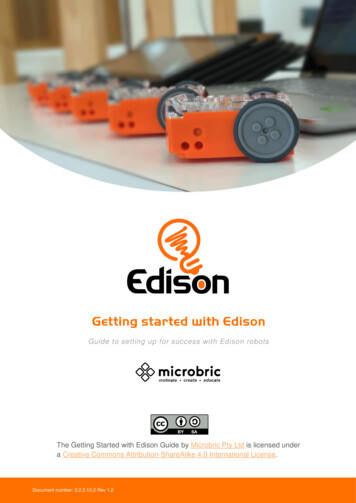
Interact with othersChat, meet and co-author files in real-time with Microsoft Teams.Get familiar with Microsoft Teams:To access Teams from your dashboard:1. Click the waffle icon or click the Teams icon2. Click Teams3. Teams will launch in a new tab in your browseron your community cardPick a community and channelA community, in Teams, is a collection of people,conversations, files and tools—all in one place.A channel is a discussion in a team, dedicated to adepartment, project or topic.1. Open Teams2. Select a community from the Teams tab on the left3. Click a channel beneath the community name toexplore the conversations, files and other tabsUNCLASSIFIED9
Create a channelYou can create a channel in your community.Having multiple channels can be useful to help you separate different types of work. On the left side of yourscreen is a list of communities you're a member of.To create a channel you'll need to:1. Click on the 3 dots next to the community name2. Click add channel3. Enter the channel name and description4. Click add5. The channel you created will now appear under the communityname and is ready for you to useStart a chatYou can start a chat with individuals and groups in Teams.1. At the top left click the pen iconto start a new chat2. Start typing the name of the person you want to chatwith. This will show a list of suggested people3. Click on the name of the person you’re after4. Start typing your message in the textbox at the bottomof the screen and click the send icon5. If you want to start a group conversation, repeat steps 3and 4 before continuing with step 5.Have fun with your messages!Teams lets you have a little fun with your messages. Trysending an emoji, GIF or sticker!1. Click sticker under the textbox where you type yourmessage2. Pick a meme or sticker from one of the categories3. You can also add an emoji or GIF using the buttons@mention someoneTo get someone’s attention, type @, then theirname (or pick them from the list that appears).Type @team to message everyone in a team or@channel to notify everyone who favorited thatchannel.UNCLASSIFIED10
Share a fileWork together in your new online workspace!1. Click attach under the textbox2. Select the file location and the file you want3. Depending on the location of the file, you’ll get options foruploading a copy, sharing a link, or other ways to shareCo-author filesWork together in real-time!1.2.3.4.Find the file in the channel (or upload it)Click on the fileClick editStart working in the documentYou’ll be able to see a coloured icon that indicates where your colleague is working so you don’t duplicateeffort!Work with filesCheck out all the files that are in communities!1. Click the files icon on the left to see all files shared across all of your communities or click files atthe top of a channel to see all files shared in that channel2. Click more options dots icon. next to a file to see what you can do with it. In a channel, you caninstantly turn a file into a tab at the top!See recent activityStay on top of things!Click activity on the left. The Feed shows you all your notifications andeverything that's happened lately in the channels you follow.You can even apply filtersto your activity feed!Search for messages, people and filesYou can search for messages, people or files!1. Start typing a name, keyword or phrase into the textbox at thetop of your screen2. Click the messages, people or files tabSet up notificationsIn Teams, you get to decide what notifications you receive!To update your notification settings:1. Click on your profile photo in the top right corner2. Click settings3. Click notifications4. Change the settings to from the dropdown optionsUNCLASSIFIED11
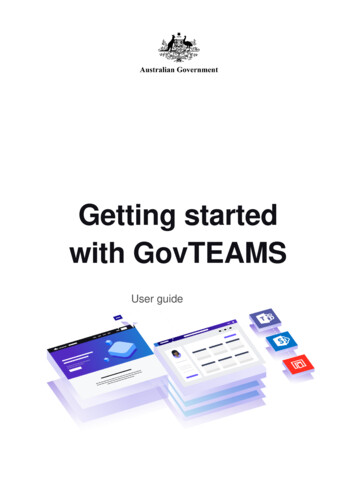
Whats next?SharePointCreate pages, document libraries and lists !Structure, store and find information in a meaningful way that is easy to use, manage and find!PlannerOrganise and track your team’s tasks in one place!UNCLASSIFIED12
ChecklistSTART AN ACCOUNT Register and loginDASHBOARD Get familiar with your dashboardPERSONAL PROFILE Update your Personal ProfileAdd a profile photoCommunities Create your own communityGet familiar with your community cardSearch and join communitiesAdd a favouriteAdd people to your communityTEAMS Launch TeamsPick a community and channelCreate a channelStart a chat@mention someoneShare a fileCo-author filesWork with filesSee recent activitySearch message, people and filesSet up notificationsWhat’s coming next Get familiar with SharePoint and PlannerWe’re here to helpVisit our support site www.GovTEAMS.gov.au for more information.UNCLASSIFIED13
UNCLASSIFIED 5 Mobile App 1. Install the Microsoft Authentication app for Android or iOS from the app store 2. Open the app and click the (plus) icon and select work or school account (make sure you allow the app to send notifications and access your camera) 3. Use the app to scan the QR code on your laptop or computer screen (this will connect the app to your GovTEAMS account).