Transcription
EM L02 Using Workflow and Connector Solution toImport Data into Asset Management SuiteHands-On LabDescriptionIn this session, you will experience Workflow on complex datapoints and prepare the data to be imported into custom dataclasses within Asset Management Suite, learn how ConnectorSolution can be controlled programmatically through Workflow;and look at leveraging Workflow to manage the entire importprocess.The lab is built around the following scenario:You have an external third party procurement system that is usedfor all purchasing. Due to data integrity and security issues, theAltiris Asset Management System is not allowed to directly accessthe data in the procurement database. The DB administratorshave created a process that places procurement data into flat filesthat in turn can be used to import data in Altiris AssetManagement Suite.At the end of this lab,you should be able to Identify processes that can assist with integration of datainto Asset Management Suite Understand how to work with Files within workflow to pulldata into a database Understand how to create workflows that manipulate dataelements within the database Understand how to schedule and control connector importprocesses Use connector solution to Import data into AM via aworkflow
Notes A brief presentation will introduce this lab session anddiscuss key concepts. The lab will be directed and provide you with step-by-stepwalkthroughs of key features. Feel free to follow the lab using the instructions on thefollowing pages. You can optionally perform this lab atyour own pace. Be sure to ask your instructor any questions you mayhave. Thank you for coming to our lab session.Using Workflow for the Import ProcessThe following outlines the objectives that we want to achieve through this particular LABsession: Identify the processes that need to be developed Understand the high level programmatic pieces that need to be created Identify and create a Staging database Determine tables to be created and T-SQL scripts to be run against the tables Understand how to automate the process using Symantec Workflow SolutionIt is assumed that you will be running Asset Management Suite 7.1 within theenvironment on a Windows 2008 R2 Server with MS SQL 2008 R2 installed. Thefollowing CSV files should have been supplied and should be located in the C:\LabResources\Integration with Connector Solution\Data directory. The file names are: Purchaseorder.csv Invoices.csv Purchasereqs.csvFor purposes of this lab It is assumed that these files arrive on a daily bases from a thirdparty procurement system and need to be processed into our Asset Management Suite.The objective is to process the data in these files and place them into a stagingdatabase for the connector to bring the information into the AMS environment.2 of 45
The Pieces Created for YouThe following database (Staging CMDB) was created for the use with this project:The following Tables were created within this database: ComputerStubRecord Invoices Purchaseorder PurchasereqsThe following Stored Procedures were created to use with this database: sp Delete CSVdata sp InsertCompStubRecords sp InsertINV CSVdata sp InsertPO CSVdata sp InsertPR CSVdataYou can view more details on these items by running SQL Server Manafgement Studioon NS71; navigate Start All Programs Microsoft SQL Server 2008 R2 SQLServer Management Studio3 of 45
Click Connect to continue.Drill down on Databases Staging CMDB Tables to view the tables andDatabases Staging CMDB Programmability Stored Procedure to view the storedprocedures.Securtity Note: for simplicity we have used the following sa credentials for accessingthe system, these will be used later in the workflow we build: ms sql login: sa password: passwordFollowing are the steps we will following:1. Create the DataClasses required in Asset Management Suite2. Create the Connector Import Rule to map the data from the Staging CMDBdatabase table ComputerStubRecord into the Asset Computer3. Create a workflow that automates the import of the CSV files into the TableComputerStubRecord and then starts the Connector Import Rule*** We will run this automation rule very frequently in this lab for purposes ofdemonstration, if implementing in your environment it is recommended a much morelaxed schedule such as once per day be applied.4 of 45
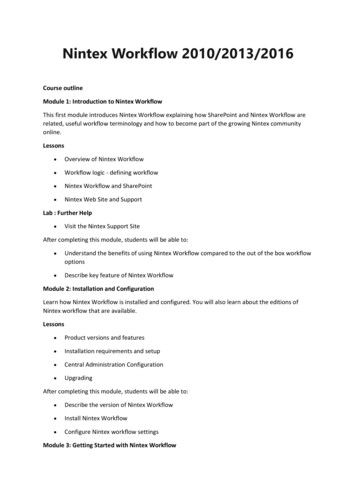
Setting up the DataClasses in AMS1. On the NS71 box, open the Symantec Management Console2. Navigate to Settings All Settings3. Expand Notification Server Resource and Data Settings4. Right Click on Data Classes and from the right click menu select New Editiable Data Class5. Change name to Purchase Order6. Click the Add new attribute button5 of 45
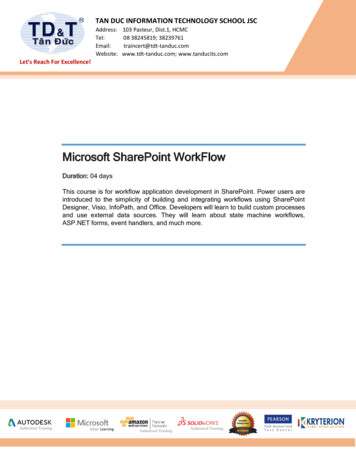
7. Give it a name of Purchase Order Number and make it a String Variable Type8. Click OK button9. Click Save Changes button10. Right Click on Data Classes and from the right click menu select New Editiable Data Class11. Change name to Invoice Number12. Click the Add new attribute button6 of 45
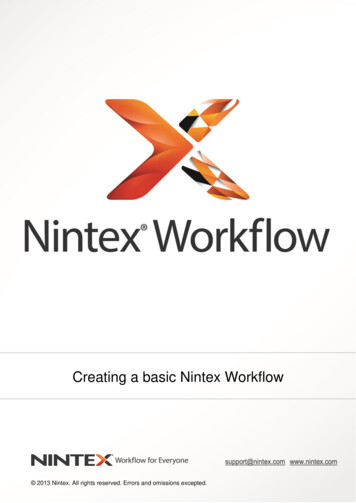
13. Give it a name of Invoice Number and make it a String Variable Type14. Click OK button15. Click Save Changes16. Collapse Data Classes folder17. Expand Resource Types Asset Types IT18. Select Computer19. Scroll to the bottom of the screen and click Add data classes7 of 45
20. Select Invoice Number and Purchase Order21. Click Save Changes8 of 45
22. Scroll down and click Save Changes button again23. Collapse Resource and Data Class Settings9 of 45
Create a Customized view in Asset Management Suite1. Navigate to the menu top left Manage Assets2. Expand Manage Configuration Items Computer and Peripherals3. Select Computer4. Double Click on Any Computer5. Select Manage Views from the Drop down in upper right hand Corner6. Click New7. Enter Name Remote Import View8. Click OK10 of 45
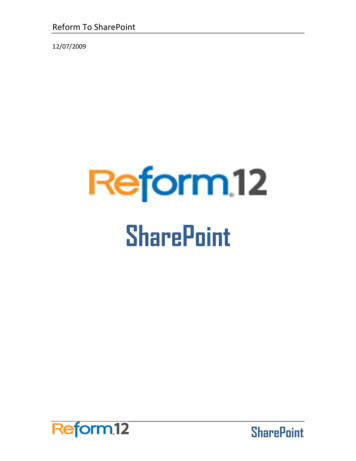
9. Locate the Data Classes through the search field10. Select the following Data Classes and Add each by clicking theoManufactureroSerial NumberoInvoice NumberoPurchase OrderoOwnership Detailsbutton11. Locate the Associations through the seach field12. Select the following from AssociationsoAsset’s Status11 of 45
13. Move Selected Items to the order as shown by clicking14. Click Save Changes15. Your default view will now be16. Opening any computer will show this view12 of 45
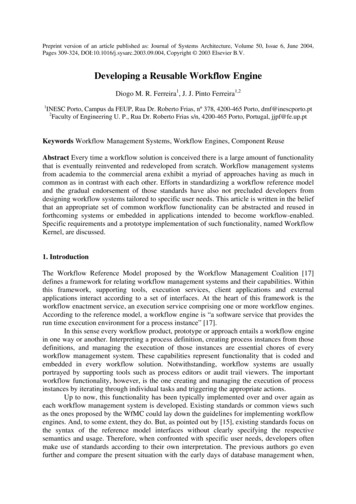
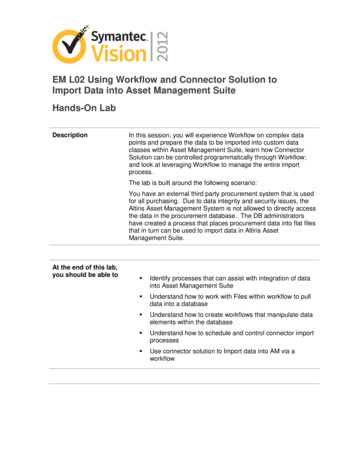
Create Connector Data Source to Staging CMDB1. Expand Settings Notification Server Connector2. Right click Data Sources select New OLEDB Datasource3. Configure as outlined below4. Click Save Changes5. Right click Import/Exports Rules and select New Resource Import ExportRule6. Name import rule Remote Import7. Select Remote DataSource for the Data source field8. Leave the Replication direction set to Import9. Under Column mappings select a resource type of Computer, search underAsset Network Resource to locate the resource10. Set the Resource lookup key to Serial Number and the Serial Number toResourceName13 of 45
11. Leave the following settings as they are12. Set the following13. Locate and update the following items (NOTE: Field Order may Vary)14. Click Save Changes15. Under Run schedule select At date/time and choose a date in the past (this isto allow us to autostart the schedule through the scheduler later in workflow).16. Select Run NowNOTE: you’ll get no resources yet as we have not processed any data into thedatabase.17. Right click on the Remote Import rule you just created and select Properties18. Highligh the GUID and copy the GUID into a file and place it on your Desktop**We will use this GUID later in our automation process so remember were youplace it.19. Once you have copied the GUID to the file and saved the file swap back to theconsole and Close the properties page.14 of 45
Createing the AutoStart Workflow in Symantec WorkflowManager1. On the NS71, Navigate Start All Programs Symantec Workflow Designer Workflow Manager2. Click on File Create New Project15 of 45
3. When the New Project window opens, select Workflow and type the nameStageConnectData.Process. Click OK.4. You’ll open to the Workflow Designer with the following screen16 of 45
5. First configure the project to be an auto start project, go to the project settings tab byclicking on the object StageConnectData.Process and then selecting Project: Rightclick in the bottom Connections Managers area and select Publishing as shown.6. Set the workflow type tp Auto Start7. Scroll down the page and locate Auto Start Settings and click on the elipse( ) tothe right of Schedule.17 of 45
8. In the Schedule Editor dialog locate the heading Schedule and select Every DayPattern next to the Day Patters field. Now click on the Edit button.9. Click the Edit button, ensure that you have highlighted the Time Patterns field likebelow before you click Edit.18 of 45
10. In the Interval field below Time Pattern, modify the interval to the following00:05:00 and click OK11. The Edit Object dialiog will display the following, click OK.12. The Schedule Editor screen will be displayed again, click OK.19 of 45
13. Now click on Model: Primary to return to the process model14. To start our Auto Start workflow the Start componentreplaced with a Configurable Auto Start componentwill be deleted andlike the following.20 of 45
15. Double click on the Configurable Auto Start component and click on the elipse inthe Embedded Model field.16. Within the Edit Embedded Decision Model dialog drag and drop three File Existscomponents onto the flow and configure the True output to connect as follows.21 of 45
17. Drag and drop another End component onto the page and configure the falseoutputs from the file exist rules to point to the new End component created.18. Configure each File Exists component to point to the following .csv3)C:\Data\Purchasereqs.csvTo do this bouble click on the component and select the elipse( ) in the File Pathfield, then select Constant Value and browse to the file location as indicated aboveand click OK to exit each screen.22 of 45
19. Once each File Exists component is configured rename each combonent to thename of the file it points to, this is done just to simplify finding and working with datawithin components.To do this just click once on the component name and type in thedetails like the following.Create a meaningful name such as this for each File Exists component.20. Your Edit Embedded Decision Model dialog should look like the following.23 of 45
21. Now configure the End component for all True statements, double click on theappropriate End component, click on the elipse( ) next to the Mapping field withStartWorkflowFlag.22. Click on the Create Value then check theValue field like the below and click the OKbutton.23. You’ll be returned to the following screen, click OK again and then rename thiscomponent to Found All File(s) Start Processrename the component24 of 45
24. The Edit Embedded Decision Model flow should look like the following25. Now configure the other End component for all False statements, double click on theappropriate End component, click on the elipse( ) next to the Mapping field withStartWorkflowFlag.25 of 45
26. Click on the Create Value and this time DO NOT check theValue field like the belowand click the OK button.27. You’ll be returned to the following screen, click OK again and then rename thiscomponent to All File(s) Not Found Look Againrename the component26 of 45
28. The completed model should look like the following27 of 45
29. Click OK button to leave and save the Edit Embedded Decision Model dialog30. You will be returned to the Configurable Auto Start Editor dialog, click OK tocontinue.28 of 45
31. You should be back at the Model: Primary screen.32. NOTE: Good development practice would be to test your new functionality you justcreated, since we have little time today we will skip component testing, however ifyou are comfortable with running the test by yourself and you have time go aheadand click on the debug button found at the top of yoru screenand wait for theauto start to fire, it could take a few minutes before you see it run on your system.33. Now we need to create a New Integration Library that will connect to our SQLdatabase. For this environment we have already created the Stored Procedures youwill need, simply click on New Integration Library found within your model.34. Prvide the New Library name as StageConnectData.Lib and click OK29 of 45
35. In Create Generator, type the name StageConnectData and select theQuery/Script Generator under Generator Types.36. Fill in the StageConnectData connection information as followsProvider: SQL Server providerConnection string: data source NS71;initial catalog Staging CMDB;userid sa;password password;connection timeout 30SQL Query:execute sp InsertINV CSVdataexecute sp InsertPO CSVdataexecute sp InsertPR CSVdataexecute sp InsertCompStubRecordsEnsure you check the box Execute queries seperaed, splitting by this character ;37. Click the Next button.38. Select Use and populate project property and fill in the Project property namewith Staging CMDB ConnectionString and click Next.39. Click Next again40. Clcik Next again41. Give the Component name as StageConnectData and then click in theNamespace area. Click Finish to continue.30 of 45
42. Please Wait until the Generators Management dialog appears showing thefollowing43. Click OK to continue.44. Click Compile and Close45. Select File Exit on the Help Editor dialog46. You will be prompted to Save this file before closing it? Click Yes button tocontinue.47. You will be taken back to the Model: Primary screen with your flow.31 of 45
48. Locate the new component you just created, it is called Stage Connect Data, also ifyou scroll down the list of components you’ll see it highlighted like the following.49. Drag and drop the Stage Connect Data component onto the model (note you mayhave to drill down on StageConnectData to find this) just after the ConfigurableAuto Start component.50. Because we are pulling the connection string directly from the project properties wewill need to go and configure this, click on StagConnectData.Process top left aboveModel: Primary. This will give you access to the Project:StageConnectdata.Process properties. Click on the Properties tab then and verifythat the property Staging CMDB ConnectionString has the following value: datasource NS71;initial catalog Staging CMDB;userid sa;password password;connection timeout 3051. Click back on the Model: Primary and double click Stage Connect Data52. Verify that the Connection String is set to[[ProjectProperties].Staging CMDB ConnectionString]53. Click OK to exist the component.54. We have now inserted the data into the database, next we need to pick up the filesand place them into the process directory, but we want to ensure we create adirectory with the date that we processed the files, so the next few elements get thecurrent date and time and strips the characters that we cannot use in a directoryname and then creates the directory. Locate the component Get Current Date anddrag the component to the model and place it after the Stage Connect Datacomponent.32 of 45
55. Double click the component and enter the variable name vDate56. Click the OK button57. Locate the component Replace String In Text and drag the component to the modeland place it after the Get Current Date component.58. Double click on the Replace String In Text component and fill in the followingdetailsInput Variable vDateReplace Text (Select a Constant Variable and type / (forward slash))Replace With (Select a Constant Variable and type (underscore))Output Variable Name vDateSlashRemoved59. Locate the component Replace String In Text and drag the component to the modeland place it after the previous Replace String In Text component.33 of 45
60. Double click on the Replace String In Text component and fill in the followingdetailsInput Variable vDateSlashRemovedReplace Text (Select a Constant Variable and type a space ‘ ‘ (space) )Replace With (Select a Constant Variable and type (underscore) )Output Variable Name vDateSpaceRemoved61. Locate the component Replace String In Text and drag the component to the modeland place it after the previous Replace String In Text component.62. Double click on the Replace String In Text component and fill in the followingdetailsInput Variable vDateSlashRemovedReplace Text (Select a Constant Variable and type a : (full colon))Replace With (Select a Constant Variable and type (underscore))Output Variable Name vDateSpaceRemoved63. With the vFinalDate now formatted correctly we need to merge this variable andcreate a new variable with the full location were we want to place the files. Locateand place the Merge Text component after the previous Replace String Textcomponent. Double click on the Merge Text component.34 of 45
64. Double click on the Merge Text component65. On the Merge Data field locate the elipses( ) and click on it66. In the space provided type C:\Data\Processed\ then drag the vFinalDate on the leftin the Data fields to make the line C:\Data\Processed\vFinalDate67. Click OK68. Under Variable Name type a new variable vDirectory69. Locate the component Create Directory and drag the component to the model andplace it after the Merge Text component.35 of 45
70. Double click Create Directory component71. For the Directory Name enter the variable vDirectory [HINT: this is a processvariable]72. The model should look like this now73. Next copy the files using the Copy Files component. Drag and drop the componentafter the Create Directory component.74. Double click Copy Files and fill in the details as outlinedAsk if you are unsure on how to do this!36 of 45
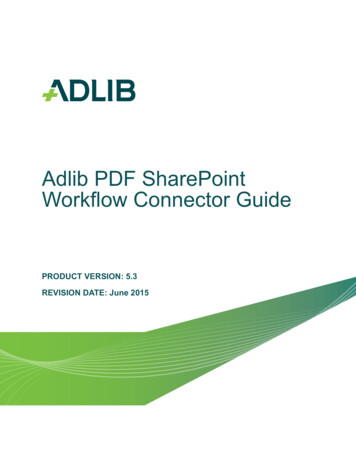
75. We simply need to delete the three files located in the C:\Data directory.76. Repeat the steps 4-8 for each file you have in the C:\Lab Resources\Integration withConnector Solution\Data directory. Drag and Drop three Delete File componentsonto the model after the Copy Files component and link them up. Configure eachone to delete a specific file, as outlined:1) C:\Data\Invoices.csv2) C:\Data\Purchaseorder.csv3) C:\Data\Purchasereqs.csvFollowing is an example of what this component would look like after you browse tothe file and add this constant value. Do this for each of the three components77. Locate and delete the component Setup Processand link all thecomponents78. Locate the component Execute Process (Run) and drag the component to themodel and place it after the last Delete File component. Connect both outputs to theEnd component.79. Double click on Execute Process (Run) and fill in the component tabs as shown (allvalues are constants)NOTE: The GUID is the one we saved originally when we created the Connectorunder the heading Create Connector Data Source to Staging CMDB – please reviewthat section again to obtain the GUID for this.37 of 45
80. Your environment should look like the following81. Finally we need to test this process; go to the C:\Data directory and renameinvoices.csv to invoices.csv.off82. Run the workflow in Debug by clickinglocated at the top of the screen83. Wait until the Auto Start begins, this could be a few moments depening on thespeed of your system84. You will note that the Auto Start component will continue to flow back every fewminutes to All Fil(s) not Found Look Again. Once you see that this works go backto C:\Data and rename the file invoices.csv.off back to invoices.csv38 of 45
39 of 45
85. When the process finishes it will jump out of the autostart and complete the processlike the following86. The scheduler will be running your Connector importYou can validate this by looking at the run history under All Settings NotificationServer Connector Import/Export Rules and clicking on Remote Import. At thebottom of the page look at the run history, you can click the View Log to get details ofwhat was imported.40 of 45
87. Click on Manage Computers and then right click a Computer called 63741L6 andselect Edit. Note that data has been imported with associations within the CMDB.88. Also now note that in the directory structure you would have seen the files move fromC:\Data to the following location below location. Note that the format of the directoryis Month/Day/Year/Hour/Minute/Second/PMorAM as we designed in the workflow41 of 45
Optional – Publishing The Project1. Now that we have tested the project we can publish it. To do this the project firstmust be checked in. Once checked in it can be published to the workflow server, inthis case that server is called NS71. Click on File Check InDrill down on localhost and select Projects then Click Create42 of 45
2. Wait for the project to open again, once it is open you are now ready to publish, ClickFile Publish Project3. In this case we will select our local environment, the Local SMP as shownClick next to continue43 of 45
4. For the project properties ensure that you have the correct properties set forStaging CMDB ConnectionString else it will not work.5. Click Next6. You’ll see a summary, click Next44 of 45
7. Once the publishing finishes you’ll see the following screen.Click Finish to complete the processConclusionThis Lab provided you with three key pieces to automate imports into your AssetManagement Suite. Creating custom data classes for import based on a Staging database Create Connector Rules to import into the custom dataclasses based on theStaging database Build a workflow that processes incoming files into the Staging Database thenautomatically runs the Job Schedule of the Connector rule to import the data intothe CMDB.45 of 45
Create Connector Data Source to Staging_CMDB 1. Expand Settings Notification Server Connector 2. Right click Data Sources select New OLEDB Datasource 3. Configure as outlined below 4. Click Save Changes 5. Right click Import/Exports Rules and select New Resource Import Export Rule 6. Name import rule Remote Import 7.