Transcription
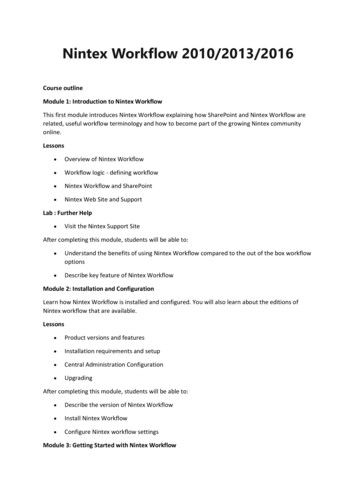
Nintex Workflow 2010/2013/2016Course outlineModule 1: Introduction to Nintex WorkflowThis first module introduces Nintex Workflow explaining how SharePoint and Nintex Workflow arerelated, useful workflow terminology and how to become part of the growing Nintex communityonline.Lessons Overview of Nintex Workflow Workflow logic - defining workflow Nintex Workflow and SharePoint Nintex Web Site and SupportLab : Further Help Visit the Nintex Support SiteAfter completing this module, students will be able to: Understand the benefits of using Nintex Workflow compared to the out of the box workflowoptions Describe key feature of Nintex WorkflowModule 2: Installation and ConfigurationLearn how Nintex Workflow is installed and configured. You will also learn about the editions ofNintex workflow that are available.Lessons Product versions and features Installation requirements and setup Central Administration Configuration UpgradingAfter completing this module, students will be able to: Describe the version of Nintex Workflow Install Nintex Workflow Configure Nintex workflow settingsModule 3: Getting Started with Nintex Workflow
Now that you understand what Nintex Workflow is for and how to install it the next step is to startbuilding workflows. This module teaches you the basic techniques that will be required to build asimple workflow.Lessons Activating Nintex Workflow Site Features Introducing the Nintex Workflow designer Create a workflow Managing the Workflows Working with Templates Managing Site level SettingsLab : Nintex Feature Activation, Simple Workflow and Nintex Web Parts Activate Nintex Features Create Simple Workflows Use the "My Workflow Tasks" web partAfter completing this module, students will be able to: Enable Nintex workflow features Create simple Nintex workflows with multiple workflow actions Save, Publish and test workflows Use Nintex web parts to track workflow progressModule 4: Creating Rich WorkflowsThis module shows you important building blocks that will be needed to create more sophisticatedworkflows. These include variables, error handling and decision making. The workflows get larger,more realistic and more useful in the real world.Lessons Conditions and Action Sets Working with Snippets Using Workflow Variables Rich Workflow Actions Error HandlingLab : Rich Workflows Use Simple Logic in Workflows Configure Workflow Start up Options
Use Workflows to Create Sites Use the Set a Condition Action Configure Error Handling Use Variables in a WorkflowAfter completing this module, students will be able to: Create workflows that include decision making logic similar to if Set workflow to trigger automatically and manually Add error handling to workflows to suppress standard error behaviors Use variables to pass data between workflow actionsModule 5: Advanced WorkflowsThis module explains how to create workflows.Lessons Working with Publishing Actions Provisioning Active Directory Object Managing Audiences and Profiles Enterprise Integration Enterprise ReportingLab : Advanced Workflows Price Check in SQL - a workflow that validates data entry against a SQL database and flagsany mista Management Approval - Hierarchical approval process that dynamically seeks approval fromeach manage New Starters - the workflow will create a user in AD and add them to appropriate securitygroupsAfter completing this module, students will be able to: Interact with SQL Databases Use 'Run if' actions Perform calculations in workflows Query LDAP databases such as Active Directory Create AD Users Add AD Users to Security Group Use Branch structures
Module 6: State Machine WorkflowsThis module explains how to create workflows that can move backwards as well as forwards. Thisallows you to revisit earlier parts of a workflow multiple times and jump to later sections of aprocess without following the entire process.Lessons The State Machine Action Building a simple State Machine workflowLab : State Machine Workflow Import a Workflow Review the State Machine settings Test the Workflow Update the Workflow to include an additional StateAfter completing this module, students will be able to: Know when to use State Machine workflows Import Workflow Templates Create State Machine WorkflowsModule 7: User InterfaceThis module identifies many of the updates that have been added to Nintex Workflow as it hasdeveloped over several years. Some updates are minor while others are major improvements. Theseinclude improvements to the users interface and options to allow site owners to control when newchanges to workflows can go live.Lessons Click less and do more The Ribbon Zoom and Print Association Columns Workflow ApprovalLab : User Interface Enable and Configure Workflow ApprovalAfter completing this module, students will be able to: Print hard copies of a workflow Help make workflows easier to reuse thanks to association columns Control when updates to workflows go live with workflow approval
Module 8: User Defined Actions, Site Workflows and Reusable WorkflowsThis module explains how to bring together combinations of workflow actions to reuse in the future.This will help you to standardize and centrally manage some of the most complex workflow actionssaving you time and making your workflows easier to create and maintain.You will also learn about site workflows - these enable you to create scheduled workflows that canrun independently from any documents or apps.Lessons User Defined actions overview Creating User Defined actions without programming Create and Manage Site Workflows Schedule Workflows Create Reusable Workflows Assign a workflow to a SharePoint Content TypeLab : UDAs and Site Workflows Create User Defined actions Test User Defined actions Promote User Defined actions Create Site Workflows Schedule Site WorkflowsAfter completing this module, students will be able to: Create every type of Nintex workflow including list, site and reusable Know when to use each type of workflow Schedule workflows to run multiple times Create workflow components to share with other usersModule 9: Further Workflow ActionsThis module introduces more important workflow actions to help you create an even wider range ofworkflows. You will also learn how to create a workflow that can run other workflows, this can beuseful when create large business processes.Lessons Store data and Retrieve data actions Capture document set version Delete previous versions Delete drafts
Delete multiple items Convert document Create item in another site Update CRM record Delete/Disable CRM record Query CRM Read document Send document set to repository Submit record Declare as record Undeclare as record Update document Wait for check out status change Get meeting suggestionLab : Store and Retrieve Data Create two workflows that share information between one another to process holidayrequestAfter completing this module, students will be able to: Create workflows that can start other workflows and pass data to them Use workflows to work with in place records Use all workflow actions
Overview of Nintex Workflow Workflow logic - defining workflow Nintex Workflow and SharePoint Nintex Web Site and Support Lab : Further Help Visit the Nintex Support Site After completing this module, students will be able to: Understand the benefits of using Nintex Workflow compared to the out of the box workflow options
