Transcription
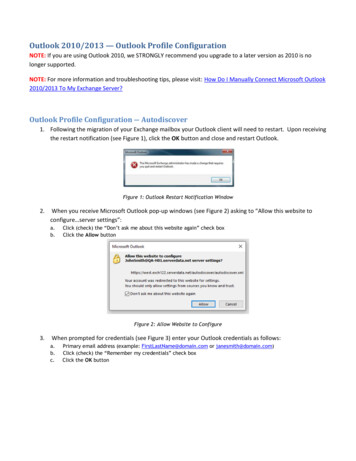
Outlook 2010/2013 — Outlook Profile ConfigurationNOTE: If you are using Outlook 2010, we STRONGLY recommend you upgrade to a later version as 2010 is nolonger supported.NOTE: For more information and troubleshooting tips, please visit: How Do I Manually Connect Microsoft Outlook2010/2013 To My Exchange Server?Outlook Profile Configuration ― Autodiscover1. Following the migration of your Exchange mailbox your Outlook client will need to restart. Upon receivingthe restart notification (see Figure 1), click the OK button and close and restart Outlook.Figure 1: Outlook Restart Notification Window2.When you receive Microsoft Outlook pop-up windows (see Figure 2) asking to “Allow this website toconfigure server settings”:a.b.Click (check) the “Don’t ask me about this website again” check boxClick the Allow buttonFigure 2: Allow Website to Configure3.When prompted for credentials (see Figure 3) enter your Outlook credentials as follows:a.b.c.Primary email address (example: FirstLastName@domain.com or janesmith@domain.com)Click (check) the “Remember my credentials” check boxClick the OK button
Figure 3: Microsoft Outlook ConnectingIf prompted by Outlook to restart (see Figure 1) click the OK button5. Close (exit) the Microsoft Outlook application4.a. It is recommended that you close all open applications and restart your laptop6. When starting Outlook, you may be prompted for credentials (see Figure 3 above), please use thefollowing:a.b.c.d.User ID Primary email address (example janesmith@domain.com)Password your current Hosted Exchange passwordClick (check) the “Remember my credentials” check boxClick the OK button7. Your Outlook email has now been migrated to the hosted cloud environmenta.Note: you must also re-configure your mobile devices (iPhone, Android, BlackBerry) to receive email andcalendar information. Follow the appropriate link(s) to setup your mobile device(s). iPhone users – iPhone GuideAndroid users – Android GuideBlackBerry OS 10 users –BlackBerry Guide8. If you want to open your email using Outlook Web App, go to Outlook Web App and enter yourprimary email address as the login.
Outlook Manual Profile ConfigurationTo manually configure your Outlook profile, you need to manually configure multiple profiles and/or add email accountsto an existing profile. Perform the following steps:2. Click the [Show Profiles] button, then [Add] to create a new profile for your account.3. Enter any name for the profile to help you identify the account (for example, “Outlook2010”) and click [OK].The Auto Account Setup dialog displays.
5. Select the Microsoft Exchange radio button option and click the [Next] button.The Microsoft Exchange Settings dialog displays, on which you can enter server settings to begin setup.
6. Make sure to keep the Use Cached Exchange Mode checkbox checked (that’s the default) and enter theinformation as requested.Microsoft Exchange server: MBX122-W1-CO-1.exch122.serverpod.net8. Click [OK] on each warning dialog until the Microsoft Exchange dialog displays.9. Click the Connection tab to access the additional connection settings.
10. Click the Connect to Microsoft Exchange using HTTP checkbox.This activates the [Exchange Proxy Settings] button.12. Enter all of the following settings: Use this URL proxy server for Exchange: west.EXCH122.serverdata.net Only connect certificate: msstd:west.EXCH122.serverdata.net Check the checkbox for On fast networks using TCP/IP. Check the checkbox for On slow networks using TCP/IP (default). Select NTLM from the Proxy authentication settings drop-down14. Click [Apply], and then click [OK].The Microsoft Exchange Settings dialog displays.
15. Click the [Check Name] button.You are prompted to login.16. Enter your User name and Password and click [OK].Outlook attempts to communicate with the Exchange server with the settings you have entered.It may take a few seconds (up to two minutes on slow Internet connections) before the Outlook profile resolvesyour mailbox settings.The setup is successful when the Microsoft Exchange Settings dialog is updated – the Microsoft Exchangeserver and the mailbox User Name inputs display as underlined.NOTE: The Microsoft Exchange server name of the resolved location (which is underlined) may be differentthan what was entered in Step 6 above.The User Name displays what was entered for the Display Name for the Exchange mailbox.17. Click the [Next] button.A Congratulations dialog displays, indicating that the setup was successful.
18. Click the [Finish] button.The Mail dialog displays again.19. Make sure Prompt for a profile to be used option is selected20. Click OK in the Mail dialog box to close.21. Start Outlook, and when prompted for your Profile, select the new profile you just created.You have now successfully connected the Outlook profile to your Exchange mailbox using the manual serverconfiguration settings.POP/IMAP/SMTP ConfigurationNOTE: If you're using Outlook 2010/2013, we recommend that you connect to your email account with an Exchangeaccount instead of through POP3 or IMAP4. Using an Exchange account lets you use calendaring and othercollaboration features that you can't get if you connect through IMAP4 or POP3.If you have trouble connecting, please visit Connecting Outlook 2010/2013 to a POP/IMAP Mailbox1. From your PC:Windows 7 (in Category view): Start Control Panel Mail.
The Mail Setup wizard starts.2. Click the [Show Profiles] button, then [Add] to create a new profile for your account.NOTE: If this is the first profile created, then the second dialog (Mail General) displays; the first dialog doesnot display.The New Profile dialog displays.3. Enter any name for the profile to help you identify the account (for example, “Exchange2016”) and click [OK].The Add Account Setup dialog displays.4. Click the checkbox at the bottom of the screen to Manually configure server settings or additional server typesand click the [Next] button.The Choose E-mail Service dialog displays.5. In the Choose Service page of the wizard, select Internet E-mail, and then click [Next].6. Provide the following information on the Internet E-mail Settings page.Under User Information:a. In the Your Name box, enter the name you want users to see when you send e-mail from this account.b. In the E-mail Address box, enter your e-mail address.Under Server Information:a. Under Account Type, select IMAP or POP3.b. In the Incoming mail server box, enter the IMAP or POP server name. IMAP Incoming Mail Server: west.EXCH122.serverdata.net POP3 Incoming Mail Server: west.EXCH122.serverdata.netc. In the Outgoing mail server (SMTP) box, enter the SMTP server name: west.EXCH122.serverdata.netUnder Logon Information:a. In the User Name box, enter your email address.b. In the Password box, enter your password.If you want Outlook to remember your password, make sure the check box next to Remember password isselected.
7. At the lower-right side of the page, click [More Settings], and then fill in the Internet E-Mail Settings dialog boxas follows:On the Outgoing Server tab, select My outgoing server (SMTP) requires authentication.On the Advanced tab:a. Under Incoming server (IMAP), or Incoming server (POP3), next to Use the following type of encryptedconnection, select SSL in the drop-down box.IMAP Incoming Port: 993POP Incoming Port: 995b. Under Outgoing server (SMTP), next to Use the following type of encrypted connection, select TLS, andthen click [OK].Outgoing Port: 587c. If you're using POP3 and you want to keep a copy of your messages on the server, under Delivery, clickLeave a copy of messages on the server.If you don't select this option, all messages will be removed from the server and stored locally on yourcomputer.8. On the Add New Account page, click [Next].9. After Outlook 2010 tests your account, click [Close] to close the Test Account Settings dialog box.10. On the Congratulations page, click [Finish].11. On the Account Settings page, click [Close].If you're using IMAP4, a message may display asking you if you want to download folders for the mail serverthat you added.12. Click [Yes].Use the Outlook user interface to select which folders to synchronize between the server and your localcomputer, and then click [OK].
Figure 3: Microsoft Outlook Connecting. 4. If prompted by Outlook to restart (see Figure 1) click the OK button 5. Close (exit) the Microsoft Outlook application a. It is recommended that you close all open applications and restart your laptop . 6. When starting Outlook, you may be prompted for credentials (see Figure 3 above), please use the .