Transcription
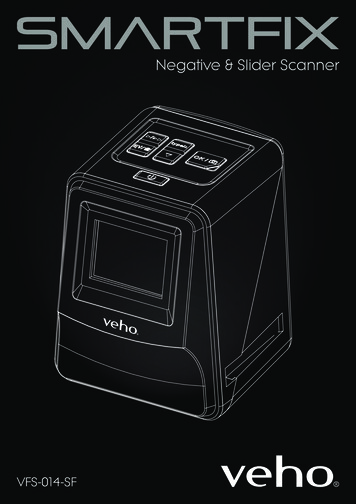
Negative & Slider ScannerVFS-014-SF
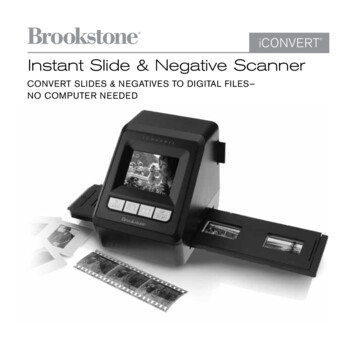
ContentsEnglish . 03Français . 13Deutsche . 23Italiano . 34Português . 44Español . 54русский . 64English1. What’s in the box? Veho Smartfix SF-1 Scanner135 slider tray135 negative tray110 negative tray126 negative trayCleaning brushUSB-A to Mini-B USB cable3.5mm jack to yellow RCA cableLithium-ion batteryMulti-Lingual user manual2. Controls日本語 . 74中文 . 84Playback ModeFilm Type/Up ButtonEV/DeleteSD Card SlotDown ButtonOK/Copy ButtonPower ON/OFFLCD DisplayFilm/Slide HolderSlotTV Out ConnectorUSB Out ConnectorBattery Cover23
EnglishEnglish3. Installing and charging the battery3. Put a slide/negative into the holder as shown.4. Close the holder, making sure that the tray closes correctly.1. Insert the battery into the base of the scanner.2. C onnect the Mini-B USB cable to the rear of the scanner, then plug the other end of theUSB cable into a USB port on a computer or 5V/1A AC Adaptor.3. W hen charging, a red LED will light up. When the battery is fully charged, the red LEDwill turn off.4. Status LEDRedPurpleBlueThe Veho Scanner is turned off and the battery is charging.The Veho Scanner is turned on and the battery is charging.The Veho Scanner is turned on.6. Using the VFS-014-FS 1. Insert an SD card into the scanner, following the illustration on the rear of the scanner.5. Inserting Slides or Negatives into the holder1. Place the holder so the glossy side faces up.2. Open the holder as illustrated.45
EnglishEnglish2. Press the power button to turn the power on. 3. Press the Film Type button to select the correct mode for the slide/negative in the holder.x15. Align the slide/negative holder in the scanner using the LCD screen on the front.6. P ress the copy button to scan the slide/negative into a digital image. To get the best result, waitfor 3-4 seconds for the scanner to adjust the brightness for each slide/negative before pressingthe copy button.x2x3x4x54. I nsert the slide/negative holder into the right hand side of the scanner, as indicated by the psymbol on the scanner and the slide/negative holder.67. A fter the brightness has automatically been set, you can manually adjust the exposure of theimage before scanning. Press the EV/Delete Button to adjust the exposure Value (EV), thenuse the Up to Down button to adjust from 2EV to -2EV in increments of 0.5. The value ofEV adjustment is shown at the bottom of the LCD screen.8. O nce you have scanned the first image in the holder, move the holder to the next positionand repeat until you need to put new slides/negatives into the holder.7
English Please note: To save power, the Veho Scanner will go to sleep mode after 3 minutes of beinginactive. You can come out of sleep mode by pressing any button on the scanner.If the Veho Scanner is inactive for 6 minutes, it will turn off automatically.7. Playback mode1. You can use Playback mode to view the images that you have scanned onto the SD card.2. Press the Playback button to enter playback mode:English8. Deleting images1. Enter Playback mode, then select the image you want to delete.2. Press the Delete button once, then Okay to delete the selected image.3. Press the Delete button twice, then Okay to delete all images.4. Press the Delete button three times then press the Okay button to format the SD card. Please note: formatting the SD card will remove all files from the SD card, not just the imagessaved by the scanner.9. Connecting the scanner to a computer.1. Plug the USB cable into the rear of the scanner and to a USB port on the computer.2. Press the Power button to turn the scanner on.3. Use the Up or Down button to select Yes or No and press Okay.4. S elect Yes to view the files on your computer, the SD card will appear as a removable discin “My Computer” or “This PC” for Windows users or on your desktop for Macintosh users.5. Select No to use the scanner to scan slides/negatives while charging from a USB port.10. Viewing images on a TV The scanner is compatible with Mac and Windows operating systems, allowing you to copy thefiles directly from the SD card in the scanner without using a USB card reader. There is nosoftware included or required to use the scanner on either operating system.3. Press the Up or Down button to change the selected image.4. Press the playback button again to enter slideshow mode.1. S et the TV to the correct input, and then connect the scanner to the TV using the 3.5mmjack to yellow RCA cable.2. Turn the scanner on.3. Press the Playback button.4. Use the Up or Down button then the Okay button to select PAL or NTSC to match your region.5. Press the Up or Down button to change the selected image.6. P ress the Playback button again to start a slideshow. You can use the Up or Down buttonto pause a slideshow, then press the Playback button to resume the slideshow.11. Safety information and specificationsSpecifications5. Press the Playback button again to go back to scanning mode.8Image SensorPreview and ReviewLens SpecificationColor BalanceExposure Control1/2.33" 14 Mega CMOS Sensor,2.4" Color LCD DisplayF 4.8, f 12.95mmAutomaticAutomatic & Manual adjustment9
EnglishEnglishSupport Film Size Auto CroppingSupport Film Type Auto ConvertingFocusingEV adjustmentPC InterfaceImage FormatLight SourcePowerTV SystemDimension135 Negative & Slide (3:2)110 Negative (4:3) (optional)126 Negative (1:1) (optional)135 SlideColor Negative Film (135 ,110 & 126)Black & White Negative FilmFixed Focus - 2.0 EVUSB 2.0135 Negative 3:2 Ratio110 Negative 4:3 Ratio126 Negative 1:1 Ratio3 white LEDFrom USB port, Li-ion 3.7V/ 1050mAh Battery,NTSC and PAL14.4 (H) x 11.6 (W) x 11.9 (L) cmIcons & IndicatorsPC System Requirements Pentium P4 1.6GHz or equivalent AMD AthlonFree USB2.0 port512MB RAM500MB free hard disk space1024 x 768 pixel colour monitorCD-ROM driveWindows XP Service Pack II / Vista , 32/64 bitsWindows 7/Windows 8/Windows 10Mac System Requirements PowerPC G5 or Intel Core Duo processor recommendedFree USB2.0 port768MB RAM500MB free hard disk space1024 x 768 colour monitorCD-ROM driveMac 10.5 UpThis symbol on the product or in the instructions means that your electrical and electronic equipment should be disposed atthe end of its life separately from your household waste. There are separate collection systems for recycling in the EU. For moreinformation, please contact the local authority or your retailer where you purchased the product.Battery FullDelete OneBattery 2/3Delete AllBattery 1/3Format SD CardBefore using the VFS-014-SF (Veho Scanner), please ensure that you read and understand the safety precautions described below.Always ensure that the VFS-014-SF is operated correctly.Battery EmptyYesNever operate the VFS-014-SF inside of an aircraft or anywhere else where operation of such devices is restricted. Improper use createsthe risk of serious accident.135 SlideNoDo not try to open the case of the VFS-014-SF or attempt to modify the VFS-014-SF in any way. High-voltage internal components createthe risk of electric shock when exposed. Maintenance and repairs should be performed only by authorised service providers.135 Negative FilmCard ErrorB/W 135 Negative FilmCard FullKeep the VFS-014-SF away from water and other liquids. Do not use the VFS-014-SF with wet hands. Never use the VFS-014-SF in the rainor snow. Moisture creates the danger of fire and electric shock.110 Negative FilmCard Lock126 Negative FilmPlayback ModePC-SD-Card SelectionSlide ShowIf you notice smoke or a strange odour coming from the VFS-014-SF, turn the power off immediately. Take the VFS-014-SF to the nearestauthorised service centre for repairing. Never attempt to repair the VFS-014-SF on your own.PC-SD-Card Link-ConnectedWaitUse only the recommended power accessories. Use of power sources not expressly recommended for the VFS-014-SF may lead tooverheating, distortion of the equipment, fire, electrical shock or other hazards.TV System SelectionEV Compensation IndicatorEV CompensationAvailable number take in SD card10System RequirementsKeep the VFS-014-SF and its accessories out of the reach of children and animals to prevent accidents or damage to the VFS-014-SF.The VFS-014-SF may become slightly warm during use. This is normal and does not indicate malfunction.If the exterior of the VFS-014-SF needs cleaning, wipe it with a soft, dry cloth.FCC NoticeThis equipment has been tested and found to comply with the limits for a Class B Digitise device, pursuant to Part 15 of the FCC Rules.These limits are designed to provide reasonable protection against harmful interference in a residential installation. This equipmentgenerates, uses and can radiate radio frequency energy. If not installed and used in accordance with the instruction, it may cause harmfulinterference to radio communication. However, there is no guarantee that interference will not occur in a particular installation. If thisequipment does cause harmful interference to radio or television reception, which can be determined by turning the equipment on to off,the user is encouraged to try to correct the interference by one or more the following suggestion.11
English FrançaisReorient or relocate the receiving antenna.Increase the distance between the equipment and the receiver.Connect the equipment to a different power outlet other than the one where the receiver is connected.Consult an experienced television or radio technician for help.CAUTIONTo comply with the limits for a Class B Digitise device, pursuant to Part 15 of the FCC Rules, this device must only be installed on computerequipment certified to comply with the Class B limits.This unit may contain a microcomputer for signal processing and control function. In very rare situations, severe interference, noise from anexternal source, or static electricity may cause it to lockup. In the unlikely event that this should happen, turn off the unit, wait at least fiveseconds, and then turn it back on again.Other Veho Products1. Qu’est-ce qu’il y a dans la boîte? Scanner Veho Smartfix SF-1135 tiroir135 bac négatif110 bac négatif126 tiroir négatifBrosse de nettoyageCâble USB USB-A vers Mini-BPrise 3,5 mm sur le câble RCA jauneBatterie aux ions lithiumGuide de démarrage rapide2. ContrôlesPebble P1 10,400mAh Portable ChargerVPP-007-P1Mode de lectureType de film/bouton HautEV/SupprimerEmplacement pour carte SDBouton DownOK/Copier le boutonMarche/arrêtAffichage LCDM7 Bluetooth Wireless SpeakerVSS-014-M7FILM/Slot de supportde glissièreConnecteur TV OutUSB Travel AdapterVAA-200-TA112Connecteur USB OutHousse de batterie13
Français3. Installation et chargement de la batterieFrançais3. Mettez une glissière / négative dans le support comme illustré4. Fermez le support, en vous assurant que le plateau se ferme correctement.1. Insérez la batterie dans la base du scanner. 2. C onnectez le câble USB Mini-B à l’arrière du scanner, puis branchez l’autre extrémité du câbleUSB dans un port USB sur un ordinateur ou un adaptateur secteur 5V / 1A. 3. L ors de la charge, une LED rouge s’allume. Lorsque la batterie est complètement chargée, la LEDrouge s’éteint.4. Voyant d’étatRougeVioletBleuLe scanner Veho est éteint et la batterie est en cours de chargement.Le scanner Veho est allumé et la batterie est en cours de chargement.Le scanner Veho est allumé.6. Utilisation du VFS-014-FS1. Insérez une carte SD dans le scanner, en suivant l’illustration à l’arrière du scanner5. Insérer des diapositives ou des négatifs dans le support1. Placez le support de sorte que le côté brillant soit orienté vers le haut.2. Ouvrez le support comme illustré1415
FrançaisFrançais2. Appuyez sur le bouton d’alimentation pour mettre l’appareil sous tension.3. A ppuyez sur le bouton Type de film pour sélectionner le mode correct pour la diapositive /négatif dans le support.5. Alignez le support coulissant / négatif dans le scanner à l’aide de l’écran LCD à l’avant.6. A ppuyez sur le bouton de copie pour numériser la diapositive / négative dans une imagenumérique. Pour obtenir le meilleur résultat, attendez 3-4 secondes pour que le scanner ajustela luminosité pour chaque diapositive / négatif avant d’appuyer sur le bouton de copie.x1x2x3x4x54. I nsérez le tiroir / support négatif dans le côté droit du scanner, comme indiqué par le symbole psur le scanner et le support coulissant / négatif.167. U ne fois la luminosité réglée automatiquement, vous pouvez ajuster manuellement l’expositionde l’image avant la numérisation. Appuyez sur le bouton EV / Delete pour régler la valeurd’exposition (EV), puis utilisez le bouton Haut vers le bas pour régler de 2EV à -2EV parincréments de 0,5. La valeur du réglage EV est affichée au bas de l’écran LCD.8. U ne fois que vous avez scanné la première image du support, déplacez le support à la positionsuivante et répétez jusqu’à ce qu’il soit nécessaire de mettre de nouvelles diapositives / négatifsdans le support.17
Français Notez s’il vous plaît: Pour économiser de l’énergie, le scanner Veho va au mode veille après 3minutes d’inactivité. Vous pouvez sortir du mode veille en appuyant sur n’importe quel boutondu scanner.Si le Veho Scanner est inactif pendant 6 minutes, il s’éteint automatiquement.7. Mode de lecture1. V ous pouvez utiliser le mode de lecture pour afficher les images que vous avez numériséessur la carte SD.2. Appuyez sur le bouton de lecture pour accéder au mode de lecture:Français8. Suppression d’images1. Entrez en mode Lecture, puis sélectionnez l’image que vous souhaitez supprimer.2. Appuyez une fois sur le bouton Supprimer, puis sur OK pour supprimer l’image sélectionnée3. Appuyez deux fois sur le bouton Supprimer, puis sur OK pour supprimer toutes les images4. Appuyez trois fois sur le bouton Supprimer, puis appuyez sur le bouton OK pour formater la carte SD. Remarque: le formatage de la carte SD supprime tous les fichiers de la carte SD, et pas seulementles images enregistrées par le scanner.9. Connexion du scanner à un ordinateur. Le scanner est compatible avec les systèmes d’exploitation Mac et Windows, vous permettantde copier les fichiers directement à partir de la carte SD dans le scanner sans utiliser de lecteurde carte USB. Aucun logiciel n’est inclus ou n’est requis pour utiliser le scanner sur l’un ou l’autresystème d’exploitation.1. Branchez le câble USB à l’arrière du scanner et à un port USB de l’ordinateur.2. Appuyez sur le bouton d’alimentation pour allumer le scanner3. Utilisez les boutons Haut ou Bas pour sélectionner Oui ou Non et appuyez sur OK.4. S électionnez Oui pour afficher les fichiers sur votre ordinateur, la carte SD apparaîtra commeun disque amovible dans «Mon ordinateur» ou «Ce PC» pour les utilisateurs de Windows ousur votre ordinateur pour les utilisateurs de Macintosh.5. S électionnez Non pour utiliser le scanner pour numériser des diapositives / négatifs pendantle chargement à partir d’un port USB.10. Affichage d’images sur un téléviseur3. Appuyez sur le bouton Haut ou Bas pour changer l’image sélectionnée4. Appuyez à nouveau sur le bouton de lecture pour accéder au mode de diaporama1. R églez le téléviseur sur l’entrée correcte, puis connectez le scanner au téléviseur à l’aidede la prise 3,5 mm sur le câble RCA jaune.2. Allume le scanner.3. Appuyez sur le bouton Lecture.4. U tilisez le bouton Haut ou Bas puis le bouton OK pour sélectionner PAL ou NTSC pourcorrespondre à votre région.5. Appuyez sur le bouton Haut ou Bas pour changer l’image sélectionnée6. A ppuyez à nouveau sur le bouton Lecture pour lancer un diaporama. Vous pouvez utiliserle bouton Haut ou Bas pour interrompre un diaporama, puis appuyez sur le bouton Lecturepour reprendre le diaporama.11. Informations et spécifications de sécuritéCaractéristiques5. Appuyez à nouveau sur le bouton Lecture pour revenir au mode de numérisation.18Capteur d’imageAperçu et revueSpécification des lentilles1 / 2.33" 14 capteur méga CMOSÉcran LCD couleur 2,4 poF 4,8, f 12,95 mm19
FrançaisFrançaisBalance des couleursContrôle de l’expositionTaille du film pris en chargeType de film pris en chargeConversion automatiqueMise au point réparéeRéglage EVInterface PCFormat d’imageSource de lumièrePuissanceSystème de télévisionDimensionsAutomatiqueRéglage automatique et manuelAuto Cropping 135 négatif et diapositive (3: 2)110 négatif (4: 3)126 négatif (1: 1)135 SlideFilm négatif couleur (135, 110 et 126)Film négatif noir et blancConcentrer - 2.0 EVUSB 2.0135 Ratio 3: 2 négatif110 Ratio 4: 3 négatif126 Négatif 1: 1 Ratio3 LED blancheDu port USB, batterie Li-ion 3.7V / 1050mAh,NTSC et PAL14,4 (H) x 11,6 (W) x 11,9 (L) cmIcônes et indicateursConfiguration requiseExigences du système PC Pentium P4 1.6GHz ou équivalent AMD AthlonPort USB2.0 gratuit512 Mo de RAM500 Mo d’espace disque libreMoniteur couleur de 1024 x 768 pixelslecteur de CD-ROMWindows XP Service Pack II / Vista , 32/64 bitsWindows 7 / Windows 8 / Windows 10Configuration système requise Le processeur PowerPC G5 ou Intel Core Duo est recommandéPort USB2.0 gratuit768 Mo de RAM500 Mo d’espace disque libreMoniteur couleur 1024 x 768lecteur de CD-ROMMac 10.5 UpCe symbole sur le produit ou dans les instructions signifie que vos équipements électriques et électroniques devraient être disposésen fin de vie séparément de vos ordures ménagères. Il existe des systèmes de collecte distincts pour le recyclage dans l’UE. Pourplus d’informations, contactez l’autorité locale ou votre détaillant où vous avez acheté le produit.Batterie pleineSupprimer unBatterie 2/3Supprimer toutAvant d’utiliser le VFS-014-SF (Veho Scanner), assurez-vous de lire et de comprendre les consignes de sécurité décrites ci-dessous. Assurezvous toujours que le VFS-014-SF fonctionne correctement.Batterie 1/3Format de la carte SDN’utilisez jamais le VFS-014-SF à l’intérieur d’un avion ou ailleurs où le fonctionnement de ces appareils est restreint. Une mauvaiseutilisation crée un risque d’accident grave.Batterie VideOui135 SlideNonN’essayez pas d’ouvrir le cas du VFS-014-SF ou tentez de modifier le VFS-014-SF de quelque façon que ce soit. Les composants interneshaute tension créent le risque d’électrocution lorsqu’ils sont exposés. La maintenance et les réparations ne doivent être effectuées que pardes fournisseurs de services autorisés.135 Carte de film négatifErreurGardez le VFS-014-SF loin de l’eau et d’autres liquides. N’utilisez pas le VFS-014-SF avec les mains humides. N’utilisez jamais le VFS-014-SFsous la pluie ou la neige. L’humidité crée un risque d’incendie et de choc électrique.N/A 135 Film négatifCarte complèteGardez le VFS-014-SF et ses accessoires hors de la portée des enfants et des animaux afin de prévenir les accidents ou les dommages auVFS-014-SF.110 Film négatifVerrouillage de carteLe VFS-014-SF peut devenir légèrement chaud pendant l’utilisation. Ceci est normal et n’indique pas de dysfonctionnement.126 Film négatifMode de lectureSélection de la carte PC-SDDiaporamaConnexion PC-SD-Card connectéeAttendezSélection du système TVIndicateur de compensation EVCompensation EVSi l’extérieur du VFS-014-SF doit être nettoyé, essuyez-le avec un chiffon doux et sec.Si vous remarquez une fumée ou une odeur étrange provenant du VFS-014-SF, mettez l’appareil hors tension immédiatement. Prenez leVFS-014-SF au centre de service agréé le plus proche pour la réparation. N’essayez jamais de réparer le VFS-014-SF seul.Utilisez uniquement les accessoires d’alimentation recommandés. L’utilisation de sources d’énergie non expressément recommandées pourle VFS-014-SF peut entraîner une surchauffe, une distorsion de l’équipement, des incendies, des chocs électriques ou d’autres risques.Avis FCCCet équipement a été testé et s’est conformé aux limites d’un dispositif de numérisation de classe B, conformément à la partie 15 desrègles de la FCC. Ces limites sont conçues pour fournir une protection raisonnable contre les interférences nuisibles dans une installationrésidentielle. Cet équipement génère, utilise et peut émettre de l’énergie radiofréquence. Si elle n’est pas installée et utilisée conformémentaux instructions, elle peut causer des interférences nuisibles à la communication radio. Cependant, il n’y a aucune garantie que desinterférences ne se produiront pas dans une installation particulière. Si cet équipement provoque des interférences nuisibles à la réceptionNuméro disponible dans la carte SD2021
FrançaisDeutschede la radio ou de la télévision, ce qui peut être déterminé en allumant l’équipement, l’utilisateur est encouragé à essayer de corriger lesinterférences en prenant une ou plusieurs des suggestions suivantes. Réorientez ou déménagez l’antenne de réception.Augmenter la distance entre l’équipement et le récepteur.Connectez l’équipement à une prise de courant différente de celle où le récepteur est connecté.Consultez un technicien expérimenté de télévision ou de radio pour obtenir de l’aide.MISE EN GARDEPour respecter les limites d’un appareil de numérisation de classe B, conformément à la partie 15 des règles de la FCC, cet appareil doituniquement être installé sur un équipement informatique certifié conforme aux limites de classe B.Cette unité peut contenir un micro-ordinateur pour le traitement du signal et la fonction de contrôle. Dans des situations très rares, desinterférences graves, du bruit provenant d’une source externe ou de l’électricité statique peuvent l’empêcher de se bloquer. Dans le casimprobable où cela se produirait, éteignez l’appareil, attendez au moins cinq secondes, puis rallumez-le.Autres produits Veho1. Was ist in der Box? Veho Smartfix SF-1 Scanner135 Schieberfach135 negatives Tablett110 negatives Tablett126 negatives TablettReinigungsbürsteUSB-A zu Mini-B USB-Kabel3,5 mm Klinke zum gelben RCA KabelLitium-Ionen-BatterieSchnellstartanleitung2. SteuertWiedergabemodusPebble P1 10,400mAh Portable AusschaltenLCD BildschirmFILM/Slide HalterSlotM7 Bluetooth Wireless SpeakerVSS-014-M7TV-Out-AnschlussUSB Travel 23
Deutsche3. Batterie einlegen und aufladenDeutsche3. Setzen Sie einen Schieber / Negativ in den Halter wie gezeigt4. Schließen Sie den Halter und achten Sie darauf, dass das Tablett richtig geschlossen ist.1. Legen Sie den Akku in die Unterseite des Scanners ein.2. S chließen Sie das Mini-B USB-Kabel an die Rückseite des Scanners an, und stecken Sie dasandere Ende des USB-Kabels in einen USB-Anschluss an einem Computer oder 5V / 1ANetzadapter.3. B eim Aufladen leuchtet eine rote LED auf. Wenn der Akku vollständig aufgeladen ist, schaltetsich die rote LED aus.4. Status-LEDRotLilaBlauDer Veho Scanner ist ausgeschaltet und der Akku wird geladen.Der Veho Scanner ist eingeschaltet und der Akku wird geladen.Der Veho Scanner ist eingeschaltet.6. Verwendung des VFS-014-FS1. S etzen Sie eine SD-Karte in den Scanner ein, und folgen Sie der Abbildung auf der Rückseite desScanners5. Einfügen von Folien oder Negativen in den Halter1. Legen Sie den Halter so, dass die glänzende Seite nach oben zeigt.2. Öffnen Sie den Halter wie abgebildet2425
DeutscheDeutsche2. Drücken Sie den Netzschalter, um das Gerät einzuschalten.3. D rücken Sie die Taste Film Type, um den richtigen Modus für die Folie / Negativ im Halterauszuwählen.5. Richten Sie den Schieber / Negativhalter im Scanner mit dem LCD-Bildschirm auf der Vorderseite aus.6. D rücken Sie die Kopiertaste, um die Folie / Negativ in ein digitales Bild zu scannen. Um das besteErgebnis zu erhalten, warten Sie 3-4 Sekunden, bis der Scanner die Helligkeit für jede Folie /Negativ anpasst, bevor Sie die Kopiertaste drücken.x1x2x3x4x54. S etzen Sie den Schieber / Negativhalter in die rechte Seite des Scanners ein, wie durch dasSymbol p auf dem Scanner und den Schieber / Negativhalter angezeigt.267. Nachdem die Helligkeit automatisch eingestellt wurde, können Sie die Belichtung des Bildes vordem Scannen manuell einstellen. Drücken Sie die Taste EV / Delete, um den Belichtungswert (EV)einzustellen. Verwenden Sie dann die Aufwärts-Ab-Taste, um von 2EV auf -2EV in Schritten von0,5 einzustellen. Der Wert der EV-Einstellung wird am unteren Rand des LCD-Bildschirms angezeigt.8. S obald Sie das erste Bild im Halter gescannt haben, bewegen Sie den Halter in die nächstePosition und wiederholen Sie, bis Sie neue Folien / Negative in den Halter legen müssen.27
Deutsche Bitte beachten Sie: Um den Strom zu sparen, wird der Veho Scanner nach 3 Minuten inaktivbleiben. Sie können aus dem Ruhemodus kommen, indem Sie eine beliebige Taste auf demScanner drücken.Wenn der Veho Scanner für 6 Minuten inaktiv ist, wird er automatisch ausgeschaltet.7. Wiedergabemodus1. M it dem Wiedergabemodus können Sie die Bilder ansehen, die Sie auf die SD-Karte gescannthaben.2. Drücken Sie die Wiedergabetaste, um in den Wiedergabemodus zu gelangen:Deutsche8. Löschen von Bildern1. G eben Sie den Wiedergabemodus ein, und wählen Sie dann das Bild aus, das Sie löschenmöchten.2. Drücken Sie einmal die Taste “Löschen” und dann “Okay”, um das ausgewählte Bild zu löschen3. Drücken Sie zweimal die Taste “Löschen” und dann “Okay”, um alle Bilder zu löschen4. D rücken Sie dreimal die Löschtaste und drücken Sie dann die Okay-Taste, um die SD-Karte zuformatieren. Bitte beachten Sie: Die Formatierung der SD-Karte entfernt alle Dateien von der SD-Karte, nichtnur die vom Scanner gespeicherten Bilder.9. Anschließen des Scanners an einen Computer. Der Scanner ist mit Mac- und Windows-Betriebssystemen kompatibel, so dass Sie die Dateiendirekt von der SD-Karte im Scanner kopieren können, ohne einen USB-Kartenleser zu verwenden.Es ist keine Software enthalten oder erforderlich, um den Scanner auf beiden Betriebssystemen zuverwenden.1. Stecken Sie das USB-Kabel in die Rückseite des Scanners und an einen USB-Port am Computer.2. Drücken Sie den Netzschalter, um den Scanner einzuschalten3. V erwenden Sie die Nach-oben- oder Nach-unten-Taste, um Ja oder Nein auszuwählen unddrücken Sie Okay.4. W ählen Sie Ja, um die Dateien auf Ihrem Computer anzuzeigen. Die SD-Karte wird als“Wechseldatenträger” oder “Dieser PC” für Windows-Benutzer oder auf Ihrem Desktop fürMacintosh-Benutzer als Wechseldatenträger angezeigt.5. W ählen Sie Nein, um den Scanner zu verwenden, um Folien / Negative während desLadevorgangs von einem USB-Port zu scannen.3. Drücken Sie die Nach-oben- oder Nach-unten-Taste, um das ausgewählte Bild zu ändern4. Drücken Sie die Wiedergabetaste erneut, um den Diashow-Modus aufzurufen10. Anzeigen von Bildern auf einem Fernseher1. S tellen Sie das Fernsehgerät auf den richtigen Eingang und verbinden Sie den Scanner mit dem3,5-mm-Klinkenstecker mit dem gelben RCA-Kabel.2. Schalten Sie den Scanner ein.3. Drücken Sie die Wiedergabetaste.4. V erwenden Sie die Aufwärts- oder Abwärts-Taste, dann die Okay-Taste, um PAL oder NTSCauszuwählen, um mit Ihrer Region übereinzustimmen.5. Drücken Sie die Nach-oben- oder Nach-unten-Taste, um das ausgewählte Bild zu ändern6. D rücken Sie die Wiedergabetaste erneut, um eine Diashow zu starten. Sie können die Aufwärtsoder Abwärts-Taste verwenden, um eine Diashow anzuhalten, und drücken Sie dann dieWiedergabetaste, um die Diashow fortzusetzen.5. Drücken Sie die Wiedergabetaste erneut, um zum Scan-Modus zurückzukehren.2829
DeutscheDeutsche11. Sicherheitshinweise und SpezifikationenTechnische DatenBildsensorVorschau und BewertungObjektiv tützte FilmgrößeUnterstützter Filmtyp Auto ConvertingFokussierung quelleLeistungTV-SystemMaße1 / 2,33" 14 Mega CMOS Sensor2.4" Farb-LCD-AnzeigeF 4,8, f 12,95 mmAutomatischAutomatische und manuelle EinstellungAuto Cropping 135 Negative & Slide (3: 2)110 Negativ (4: 3)126 Negativ (1: 1)135 rutschenFarbnegativfilm (135, 110 & 126)Black & White Negative FilmFokus - 2,0 EVUSB 2.0135 Negative 3: 2-Verhältnis110 Negatives 4: 3 Verhältnis126 Negatives 1: 1 Verhältnis3 weiße LEDVon USB-Hafen, Li-Ion 3.7V / 1050mAh Batterie,NTSC und PAL14,4 (H) x 11,6 (W) x 11,9 (L) cmIcons & Indikatoren30110 NegativfilmKartensperre126 owPC-SD-Karte Link-VerbundenWarte abTV-SystemauswahlEV KompensationsindikatorEV-KompensationVerfügbare Nummer in SD-Karte nehmenSystem AnforderungenPC-Systemanforderungen Pentium P4 1.6GHz oder gleichwertig AMD AthlonFreier USB2.0 Port512MB RAM500 MB freier Festplattenspeicher1024 x 768 Pixel FarbmonitorCD-ROM-LaufwerkWindows XP Service Pack II / Vista , 32/64 BitsWindows 7 / W
Inserting Slides or Negatives into the holder. 1. Place the holder so the glossy side faces up. 2. Open the holder as illustrated. English. English. 6 7 5. Align the slide/negative holder in the scanner using the LCD screen on the front. ess the copy button to scan the slide/negative into a digital image. To get the best result, wait 6. Pr

