Transcription
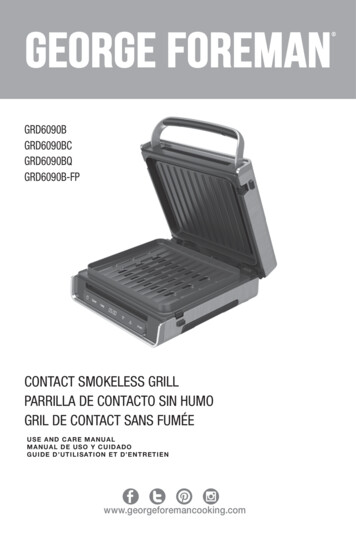
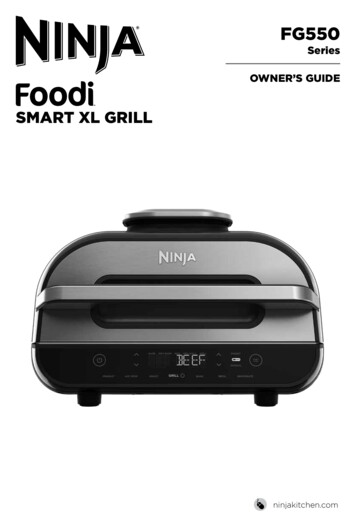
FG550SeriesOWNER’S GUIDESMART XL GRILLninjakitchen.com
THANK YOUfor purchasing the Ninja Foodi Smart XL GrillCONTENTSImportant Safeguards . . . . . . . . . . . . . . . . . . . . . . . . . . . . . . . . . 4Parts . . . . . . . . . . . . . . . . . . . . . . . . . . . . . . . . . . . . . . . . . . . . . . . . 6Getting to Know the Ninja Foodi Smart XL Grill . . . . . . . . . . 7Function Buttons . . . . . . . . . . . . . . . . . . . . . . . . . . . . . . . . . . . . . . . . . 7Operating Buttons . . . . . . . . . . . . . . . . . . . . . . . . . . . . . . . . . . . . . . . . 7Before First Use. . . . . . . . . . . . . . . . . . . . . . . . . . . . . . . . . . . . . . . . 7REGISTER YOUR PURCHASEregisteryourninja.comScan QR code using mobile deviceRECORD THIS INFORMATIONModel Number: Serial Number: Date of Purchase: (Keep receipt)Store of Purchase: TIP: You can find the model and serialnumbers on the QR code label on theback of the unit by the power cord.Using the Ninja Foodi Smart XL Grill. . . . . . . . . . . . . . . . . . . . . . 8Splatter Shield. . . . . . . . . . . . . . . . . . . . . . . . . . . . . . . . . . . . . . . . . . . . 8GrillControl Technology. . . . . . . . . . . . . . . . . . . . . . . . . . . . . . . . . . . . 8Batch Grilling. . . . . . . . . . . . . . . . . . . . . . . . . . . . . . . . . . . . . . . . . 8Using the Foodi Smart Thermometer . . . . . . . . . . . . . . . . . . . . . . . 9Using the Thermometer in Different Cooking Scenarios. . 10How to Correctly Insert the Thermometer . . . . . . . . . . . . . . . 11Cooking Functions. . . . . . . . . . . . . . . . . . . . . . . . . . . . . . . . . . . . . . . 12Grill. . . . . . . . . . . . . . . . . . . . . . . . . . . . . . . . . . . . . . . . . . . . . . . . . 12Air Crisp. . . . . . . . . . . . . . . . . . . . . . . . . . . . . . . . . . . . . . . . . . . . . 13Roast . . . . . . . . . . . . . . . . . . . . . . . . . . . . . . . . . . . . . . . . . . . . . . . 14Bake. . . . . . . . . . . . . . . . . . . . . . . . . . . . . . . . . . . . . . . . . . . . . . . . 15Dehydrate. . . . . . . . . . . . . . . . . . . . . . . . . . . . . . . . . . . . . . . . . . . 16Broil. . . . . . . . . . . . . . . . . . . . . . . . . . . . . . . . . . . . . . . . . . . . . . . . . 16Troubleshooting . . . . . . . . . . . . . . . . . . . . . . . . . . . . . . . . . . . . . . 17TECHNICAL SPECIFICATIONSCleaning the Ninja Foodi Smart XL Grill. . . . . . . . . . . . . . . . . . 18Voltage:120V 60HzWatts:1760WReplacement Parts . . . . . . . . . . . . . . . . . . . . . . . . . . . . . . . . . . . . 182ninjakitchen.comWarranty. . . . . . . . . . . . . . . . . . . . . . . . . . . . . . . . . . . . . . . . . . . . . 19ninjakitchen.com3
IMPORTANT SAFEGUARDSHOUSEHOLD USE ONLY READ ALL INSTRUCTIONS BEFORE USEWhen using electrical appliances, basic safety precautions should alwaysbe followed, including the following: WARNING1 o eliminate a choking hazard forTyoung children, discard all packagingmaterials immediately upon unpacking.2 his appliance can be used by personsTwith reduced physical, sensoryor mental capabilities or lack ofexperience and knowledge if they havebeen given supervision or instructionconcerning use of the appliance in asafe way and understand the hazardsinvolved.3 Keep the appliance and its cord out ofreach of children. DO NOT allow theappliance to be used by children. Closesupervision is necessary when usednear children.4 This appliance is for household useonly. DO NOT use this appliance foranything other than its intended use.DO NOT use in moving vehicles orboats. DO NOT use outdoors. Misusemay cause injury.5 Ensure the surface is level, cleanand dry. DO NOT place the appliancenear the edge of a countertopduring operation.10 DO NOT use the appliance if there isdamage to the power cord or plug.Regularly inspect the applianceand power cord. If the appliancemalfunctions or has been damaged inany way, immediately stop use and callCustomer Service.11 NEVER use outlet belowcountertop surface.12 DO NOT place appliance and let cordhang over edges of tables, counters ortouch hot surfaces.13 O nly use recommended accessoriesincluded with this appliance orauthorized by SharkNinja. The useof accessories or attachments notrecommended by SharkNinja maycause a risk of fire or injury.14 B efore placing any accessory into thecooker, ensure they are clean and dry.15 DO NOT use the appliance without theremovable cooking pot and splattershield installed.17 DO NOT move the appliance whenin use.718 DO NOT cover the air intake vent orair outlet vent while unit is operating.Doing so will prevent even cookingand may damage the unit or cause itto overheat.8 DO NOT use an extension cord. Ashort power-supply cord is used toreduce the risk of children grabbingthe cord or becoming entangled andto reduce the risk of people trippingover a longer cord.9 To protect against electrical shock DONOT immerse cord, plugs, or main unithousing in water or other liquid.21 DO NOT use this appliance fordeep-frying.22 DO NOT place hands near Foodi Smart Thermometer cord when inuse to prevent burning or scalding.23 The Foodi Smart Thermometerdoes NOT replace an externalfood thermometer.24 To prevent possible illness, ALWAYSuse an external food thermometer tocheck that your food is cooked to therecommended temperatures.19 D O NOT touch hot surfaces. Appliancesurfaces are hot during and afteroperation. To prevent burns or personalinjury, ALWAYS use protective hot padsor insulated oven mitts and use availablehandles and knobs.25 Should a grease fire occur or theunit emits black smoke, unplugimmediately. Wait for smokingto stop before removing anycooking accessories.26 Please refer to the Cleaning &Maintenance section for regularmaintenance of the appliance.27 To disconnect, turn unit to “off”, thenunplug from socket when not in useand before cleaning.28 Allow to cool before cleaning,dissasembly, putting in or taking offparts and storage.29 DO NOT clean with metal scouringpads. Pieces can break off the pad andtouch electrical parts, creating a risk ofelectric shock.30 Cleaning and user maintenance shallnot be made by children.31 DO NOT place on or near a hot gas orelectric burner or in a heated oven.32 E xtreme caution must be used whenmoving an appliance containing hot oilor other hot liquids.16 ALWAYS ensure hood is fully closedbefore operating.6 ALWAYS ensure the appliance isproperly assembled before use. hen using this appliance, provideWat least 6 inches (15.25 cm) ofspace above and on all sides forair circulation.20 DO NOT touch accessories during orimmediately after cooking. The grillgrate and basket becomes extremelyhot during the cooking process. Avoidphysical contact while removingthe accessory from the appliance.To prevent burns or personal injuryALWAYS use care when interfacingwith product. Recommend use of longhanded utensil and protective hot padsor insulated oven mitts.Indicates to read and review instructions to understand operation and use of product.Indicates the presence of a hazard that can cause personal injury, death orsubstantial property damage if the warning included with this symbol is ignored.Take care to avoid contact with hot surface. Always use hand protection toavoid burns.For indoor and household use only.SAVE THESE INSTRUCTIONS4ninjakitchen.comninjakitchen.com5
GETTING TO KNOW THENINJA FOODI SMART XL GRILLPARTSGrill GrateDouble-sidedCleaning BrushNOTE: Not all functions included in each model.FUNCTION BUTTONSGRILL Grill indoors while creating evenchar, grill marks, and grilled flavor.Crisper BasketFoodi SmartThermometerAIR CRISP For crispiness and crunch withlittle to no oil.BAKE Bake cakes, treats, desserts, and more.ROAST Tenderize meats, roast vegetables,and more.Cooking PotRemovableSplatter ShieldHoodMain Unit(power cordnot shown)ControlPanelOnboardThermometerStorageNOTE: Additional accessories are available for purchase at ninjaaccessories.com.6ninjakitchen.comDEHYDRATE Dehydrate meats, fruits,and vegetables for healthy snacks.BROIL Add the crispy finishing touch tomeals or melt cheese on sandwiches.OPERATING BUTTONSPOWER button Once the unit isplugged in, press the powerbutton toturn on the unit. Pressing it during cookingstops the current cooking function andturns off the unit.and downLeft arrows Use the uparrows to the left of the display to adjustthe cooking temperature in any functionor to set the internal doneness when usingPRESET and MANUAL buttons.and downRight arrows Use the uparrows to the right of the display to set thefood type when using PRESET or to adjustthe cook time when not cooking with theFoodi Smart Thermometer.MANUAL button Switches the display screenso you can manually set the thermometerinternal doneness. Manual button does notwork with Dehydrate function.PRESET button Switches the displayscreen so you can set the thermometer,food type, and internal doneness basedon the preset temperatures. Preset buttondoes not work with Dehydrate function.NOTE: To adjust the temperature or timeduring cooking, press the up and downarrows. The unit will then resume atthose settings.START/STOP button After selectingtemperature and time, press theSTART/STOP button to begin cooking.Standby Mode If there has been nointeraction with the control panel for10 minutes and the unit is not cooking,the unit will go into Standby Mode andthe control panel will dim.Preheat If the unit is preheating, it willbe indicated by a progress bar on thedisplay screen and the PREHEAT buttonwill illuminate. To turn off Preheat, pressthe PREHEAT button while the grill is inpreheat state. ADD FOOD will display.BEFORE FIRST USE1 Remove all packaging material, promotional labels, and tape from the unit.2 Remove all accessories from the package and read this manual carefully. Please payparticular attention to operational instructions, warnings, and important safeguardsto avoid any injury or property damage.3 Wash the grill grate, splatter shield, crisper basket, thermometer, cleaning brush, and cooking potin warm, soapy water, then rinse and dry thoroughly. All accessories, except the thermometer,are dishwasher safe. NEVER clean the main unit or thermometer in the dishwasher.ninjakitchen.com7
USING THE NINJA FOODI SMART XL GRILLSPLATTER SHIELDGRILLCONTROL TECHNOLOGYLocated on the underside of the hood, thesplatter shield keeps the heating elementclean. ALWAYS ensure the splatter shield isinstalled when cooking. Failure to use thesplatter shield will result in oil buildup on theheating element, which can cause smoking.When using the Grill function, you will needto select the grill grate temperature setting.Below are recommended temperaturelevels for common ingredients.Removing the splatter shieldRemove the splatter shield for cleaning afterevery use. Once the splatter shield hascooled completely, remove it by pushing theupper left tab toward the back of the hood.This will release the splatter shield, allowingyou to remove it.Press TabLO(400 F) Bacon SausagesMED(450 F) Frozenmeats M arinated/ Whensaucedusingmeatsthick BBQsauceHI(500 F)MAX(up to 510 F) Steaks Veggies Chicken Fruit Burgers Pizzas Hot dogs F resh/frozen M eatseafoodkebabs VeggieKebabsNOTE: For less smoke, we recommendusing canola, coconut, avocado,grapeseed, or vegetable oil instead ofolive oil. Heating oil past its smoke pointcan impart food with a burnt, acrid flavor.USING THE FOODI SMART THERMOMETERIMPORTANT: DO NOT place hands nearFoodi Smart Thermometer cord when inuse to prevent burning or scalding.Before First UseMake sure the thermometer jack is free ofany residue and the cord is free of knotsbefore plugging it into the jack.1 Pull the thermometer storage compartmenton the right side of the unit outward. Thenunwind the cord from the compartment toremove the thermometer.2 Plug the thermometer into the jack.Push firmly on the plug until it cannotgo into the jack any further. Place thestorage compartment back onto the sideof the unit.4 Press PRESET and use the arrows to theright of the display to select your desiredfood type and the arrows to the left ofthe display to set the internal donenessof your food (Rare through Well).NOTE: Cooking different meats or thesames ones to different doneness? Refer tothe next page for details on programming.If selecting the MANUAL button, use the belowrecommended internal cook temperatures.FOOD TYPE:FishSET DONENESS TO:Medium (130 F)Medium Well (140 F)NOTE: The unit may produce smoke whencooking ingredients on a hotter settingthan what is recommended. For morecooking charts, refer to your InspirationGuide or visit ninjakitchen.com.Installing the splatter shieldTo install, insert the splatter shield so thegrooves on the splatter shield ring matchthose of the fixed heat shield ring notchon the right. Then gently push the splattershield upward until it clicks into the tab onthe left side.Heat ShieldRing Notch8ninjakitchen.comSwitching to Grill afterusing another functionIf the unit is already warm from using adifferent function, “ADD FOOD” may appearon the screen immediately. We recommendallowing the grill grate to heat up for at least6 minutes before placing ingredients on it.Batch grillingWhen grilling more than two consecutivebatches of food, it is recommendedthat you empty the fat/oil from theremovable cooking pot. It is also HIGHLYrecommended to clean the splatter shieldin between uses. This will help preventgrease from burning and causing smoke.If you would like to skip the Preheatprocess, press the PREHEAT button.Well Done (150 F)Chicken/TurkeyPorkWell Done (165 F)Medium (130 F)Medium Well (150 F)Well Done (160 F)Beef/Lamb3 Once the thermometer is plugged intothe jack, it will enable and illuminate thePRESET and MANUAL thermometerbuttons. Select the desired cook function(e.g., Grill) and cook temperature.Rare (115 F)Medium Rare (125 F)Medium (130 F)Medium Well (145 F)Well Done (150 F)NOTE: Reference USDA guidelines forfood-safe temperature recommendations.NOTE: Set doneness for BEEF/LAMB arelower than normal recommendations asunit will carry-over cook 10-15 F.NOTE: There is no need to set a cooktime, as the unit will automatically turnoff the heating element and alert youwhen your food has finished cooking.5 Place the accessory required for yourselected cook function in the unit andclose the hood. Press START/STOP tobegin preheating.ninjakitchen.com9
USING THE NINJA FOODI SMART XL GRILL – CONT.6 While the unit is preheating, insertthe thermometer horizontally into thecenter of the thickest part of the pieceof protein. Refer to the chart on theadjacent page on further thermometerplacement instructions.7 When the unit has preheated and“ADD FOOD” appears on the screen,open the hood, place food with insertedthermometer in the unit, and close thehood over the thermometer cord.Correct thermometer placement.Thermometer grip is fully inside unit.8 The progress bar at the top of thedisplay will track doneness. Flashingdoneness indicates progression tothat doneness.9 The unit will automatically stop whendesired doneness is almost reached, asit accounts for carry-over cooking, and“GET FOOD” will display on the screen.10 Transfer the protein to a plate while “REST”displays on the screen. Thermometer doesnot need to still be inserted. The proteinwill continue to carry-over cook to yourset doneness, which will take about3–5 minutes. This is an important step, asnot resting could lead to results looking“less” cooked. Carry-over cook timescan vary based on size of protein, cutof protein, and type of protein.NOTE: The thermometer will be HOT.Use either oven mitts or tongs to takethe thermometer out of the protein.USING THE THERMOMETER INDIFFERENT COOKING SCENARIOS:Cooking 2 or more proteins of the samesize to different levels of doneness: Set the Preset feature to the highestdesired level of doneness. Insert the thermometer in the protein withthe higher desried level of doneness. After preheating, place proteins insidethe grill. When the lower desired level ofdoneness is reached, remove the proteinwithout thermometer. Continue cooking the remaining proteinuntil the next desired level of donenessis reached.HOW TO CORRECTLY INSERT THE THERMOMETERFOOD TYPE:SteaksPork chopsLamb chopsChicken breastsBurgersTenderloinsFish filletsCooking 2 or more proteinsof different sizes: Insert thermometer in the smaller proteinand use the Preset feature to choose thelevel of doneness. When that protein is done cooking,remove it from the unit. Using oven mitts, transfer thermometerto the larger protein and use the arrowsto the left of the display to choose itslevel of doneness.Cooking 2 or more different typesof protein: Insert thermometer in the protein withthe lower desired level of doneness. Use the Manual feature to choose thedesired internal temperature. When that protein is done cooking,remove it from the unit. Using oven mitts, transfer thermometer tothe other protein and use the Manual featureto choose the desired internal temperature.PLACEMENTCORRECTINCORRECT I nsert thermometerhorizontally into thecenter of the thickestpart of the meat. M ake sure thethermometer is close to(but not touching) thebone and away from anyfat or gristle. M ake sure the tip of thethermometer is insertedstraight into the centerof the meat, not angledtoward the bottom ortop of it.NOTE: The thickestpart of the fillet maynot be the center. It isimportant that the endof the thermometer hitsthis area so that desiredresults are achieved.Whole chicken I nsert thermometerhorizontally into thethickest part of thebreast, parallel to, butnot touching, the bone. Make sure the tipreaches the center ofthe thickest part of thebreast and doesn’t goall the way through thebreast into the cavity.NOTE: DO NOT use the thermometer with frozen protein or for cuts of meat thinnerthan 1 inch.NOTE: To check the internal temperatureof other pieces of protein, press and holdMANUAL and insert the thermometerinto each piece of meat.10 ninjakitchen.comninjakitchen.com11
USING THE NINJA FOODI SMART XL GRILL – CONT.COOKING FUNCTIONSPlug in the unit and press the powerbutton to turn it on.Grill1 Place the cooking pot in the unit withthe indent on the pot aligned with thebump on the main unit. Then place thegrill grate in the pot with the handlesfacing up. Ensure the splatter shield isin place, then close the hood.NOTE: If you are using the thermometer,refer to the Using the Foodi SmartThermometer section.2 Press the GRILL button. The defaulttemperature setting will display. Use theset of arrows to the left of the display toadjust the temperature up to MAX.4 Press START/STOP to begin preheating.The progress bar will begin illuminating.It will take approximately 10 minutes forthe unit to preheat.6 Open the hood and place ingredients onthe grill grate. Once the hood is closed,cooking will begin and the timer willstart counting down.NOTE: To use the thermometer just tocheck your food’s internal doneness,press MANUAL for 2 seconds and thefood’s internal temperature will appearon the screen. Press and hold buttonagain to exit mode.NOTE: If batch cooking, refer to page 8for instructions.NOTE: While preheating is stronglyrecommended for best results, you canskip it by pressing the PREHEAT button.“ADD FOOD” will appear on the display.Open the hood and place ingredientsin the crisper basket. Once the hood isclosed, cooking will begin and the timerwill start counting down.5 When preheating is complete, the unit willbeep and “ADD FOOD” will appear onthe display.5 When preheating is complete, the unitwill beep and “ADD FOOD” will appearon the display.7 When cook time is complete, the unit willbeep and END will appear on the display.3 Use the set of arrows to the right ofthe display to adjust the cook time, in1-minute increments, up to 30 minutes,or, if using the thermometer, refer to theinstructions on previous pages.Air Crisp1 Place cooking pot in the unit with theindent on the pot aligned with the bumpon the main unit. Place the crisper basketin the pot. Ensure the splatter shield is inplace, then close the hood.2 Press the AIR CRISP button. Thedefault temperature setting will display.Use the set of arrows to the left of thedisplay to adjust the temperature upto 400 F.3 Use the set of arrows to the right ofthe display to adjust the cook time, in1-minute increments, up to 1 hour, or, ifusing the thermometer, refer to Using theFoodi Smart Thermometer section.6 Open the hood and place ingredientsin the crisper basket. Once the hood isclosed, cooking will begin and the timerwill start counting down.NOTE: To check your food’s internaldoneness, press MANUAL for 2 secondsand the food’s internal temperature willappear on the screen. Press and holdbutton again to exit mode.7 For best results, we recommendshaking ingredients frequently. Whenyou open the hood, the unit will pause.Use silicone-tipped tongs or ovenmitts to shake the basket. When done,replace the basket and close the hood.Cooking will automatically resume afterhood is closed.4 Press START/STOP to begin preheating.The progress bar will begin illuminating.It will take approximately 3 minutes forthe unit to preheat.8 When cook time is complete, the unit willbeep and END will appear on the display.12 ninjakitchen.comninjakitchen.com 13
USING THE NINJA FOODI SMART XL GRILL – CONT.Roast1 Place cooking pot in the unit with theindent on the pot aligned with the bumpon the main unit. Ensure the splattershield is in place, then close the hood.2 Press the ROAST button. The defaulttemperature setting will display. Use theset of arrows to the left of the displayto adjust the temperature up to 425 F.NOTE: Convert traditional oven recipes byreducing the temperature by 25 F. Checkfood frequently to avoid overcooking.3 Use the set of arrows to the right of thedisplay to adjust the cook time, in 1-minuteincrements up to 1 hour and 5-minuteincrements from 1 to 4 hours, or, if usingthe thermometer, refer to the Using theFoodi Smart Thermometer section.4 Press START/STOP to begin preheating.The progress bar will begin illuminating. Itwill take approximately 3 minutes for theunit to preheat.NOTE: While preheating is stronglyrecommended for best results, you canskip it by pressing the PREHEAT button.“ADD FOOD” will appear on the display.Open the hood and place ingredientsin the cooking pot. Once the hood isclosed, cooking will begin and the timerwill start counting down.5 When preheating is complete, the unitwill beep and “ADD FOOD” will appearon the display.6 Open the hood and place ingredientsin the pot. Once the hood is closed,cooking will begin and the timer willstart counting down.NOTE: To use the thermometer just tocheck your food’s internal doneness,press MANUAL for 2 seconds and thefood’s internal temperature will appearon the screen. Press and hold buttonagain to exit mode.Bake1 Place cooking pot in the unit with theindent on the pot aligned with the bumpon the main unit. Ensure the splattershield is in place, then close the hood.5 When preheating is complete, the unitwill beep and “ADD FOOD” will appearon the display.2 Press the BAKE button. The defaulttemperature setting will display. Use theset of arrows to the left of the displayto adjust the temperature up to 400 F.NOTE: Convert traditional oven recipes byreducing the temperature by 25 F. Checkfood frequently to avoid overcooking.3 Use the set of arrows to the right of thedisplay to adjust the cook time, in 1-minuteincrements, up to 1 hour and in 5-minutesincrements from 1 to 2 hours, or, if usingthe thermometer, refer to Using theFoodi Smart Thermometer section.7 When cook time is complete, the unit willbeep and END will appear on the display.4 Press START/STOP to begin preheating.The progress bar will begin illuminating. Itwill take approximately 3 minutes for theunit to preheat.14 ninjakitchen.comNOTE: While preheating is stronglyrecommended for best results, you canskip it by pressing the PREHEAT button.“ADD FOOD” will appear on the display.Open the hood and place ingredientsin the crisper basket. Once the hood isclosed, cooking will begin and the timerwill start counting down.6 Open the hood and add ingredientsto the pot or set the bake pan directlyin the pot, and close the hood to startcooking. Once the hood is closed,cooking will begin and the timer willstart counting down.Bake pannot includedNOTE: To use the thermometer to justcheck your food’s internal doneness,press MANUAL for 2 seconds and thefood’s internal temperature will appearon the screen. Press and hold buttonagain to exit mode.7 When cook time is complete, the unit willbeep and END will appear on the display.ninjakitchen.com 15
USING THE NINJA FOODI SMART XL GRILL – CONT.TROUBLESHOOTINGDehydrate (Not available on all models)1 Place cooking pot in the unit with theindent on the pot aligned with the bumpon the main unit. Place a single layer ofingredients in the pot. Then place thecrisper basket in the pot on top of theingredients and add another layer ofingredients to the basket. Ensure thesplatter shield is in place, then closethe hood. Broil (Not available on all models)1 Place cooking pot in the unit with theindent on the pot aligned with the bumpon the main unit. Place ingredients in thepot. Ensure the splatter shield is in place,then close the hood. “Plug In” appears on the control panel display. The thermometer is not plugged into the jack on the right side of the control panel. Plugthe thermometer in before proceeding. Press the thermometer in until you hear a click. “E” appears on the control panel display. The unit is not functioning properly. Contact Customer Service at 1-877-646-5288. So wemay better assist you, please register your product online at registeryourninja.com andhave the product on hand when you call. Why is my food overcooked or undercooked even though I used the thermometer?It is important to insert the thermometer lengthwise into the thickest part of theingredient to get the most accurate reading. Make sure to allow food to rest for3–5 minutes to complete cooking. For more information, refer to the Using the Foodi Smart Thermometer section. Why does the preheat progress bar not start from the beginning? When the unit is warm from previously being used, it will not require the full preheating time.3 Use the set of arrows to the right of thedisplay to adjust the cook time, in 1-minuteincrements up to 30 minutes, or, if usingthe thermometer, refer to the Using theFoodi Smart Thermometer section.3 Use the set of arrows to the right of thedisplay to adjust the dehydration time, in15-minute increments, up to 12 hours.4 Press START/STOP to begin. (The unitdoes not preheat in Broil mode.)4 Press START/STOP to begin. (The unitdoes not preheat in Dehydrate mode.)5 When dehydration time is complete, theunit will beep and END will appear onthe display. “Shut Lid” appears on the control panel display.The hood is open and needs to be closed for the selected function to start. “PRBE ERR” appears on the control panel display. This means the unit timed out before food reached the set internal temperature.As a protection for the unit, it can run for only certain lengths of time at specifictemperatures.2 Press the BROIL button. The defaulttemperature setting will display. Use theset of arrows to the left of the display toadjust the temperature up to 500 F.2 Press the DEHYDRATE button. Thedefault temperature setting will display.Use the set of arrows to the left of thedisplay to adjust the temperature upto 195 F.“Add Food” appears on the control panel display.The unit has completed preheating and it is now time to add your ingredients.NOTE: To check your food’s internaldoneness, press MANUAL for 2 secondsand the food’s internal temperature willappear on the screen. Press and holdbutton again to exit mode.5 When cook time is complete, the unit willbeep and END will appear on the display. Can I cancel or override preheating?Preheating is highly recommended for best results, but you can skip it by selecting thePREHEAT button after you press the START/STOP button. Should I add my ingredients before or after preheating?For best results, let the unit preheat before adding ingredients. Why is my unit emitting smoke? When using the Grill function, always select the recommended temperature setting.Recommended settings can be found in the Quick Start Guide and in the InspirationGuide. Make sure the splatter shield is installed. How do I pause the unit so I can check my food? When the hood is opened during a cooking function, the unit will automatically pause. Will the thermometer grip melt if it touches the hot grill grate? No, the grip is made of a high-temperature silicone that can handle the Ninja Foodi Smart XL Grill’s high temperatures. My food is burned. Do not add food until recommended preheat time is complete. For best results, checkprogress throughout cooking, and remove food when desired level of brownness has beenachieved. Remove food immediately after the cook time is complete to avoid overcooking. Why did a circuit breaker trip while using the unit?The unit uses 1760 watts of power, so it must be plugged into an outlet on a 15-ampcircuit breaker. Using an outlet on a 10-amp breaker will cause the breaker to trip. It isalso important that the unit be the only appliance plugged into an outlet when in use.To avoid tripping a breaker, make sure the unit is the only appliance plugged into anoutlet on a 15-amp breaker. Why does the unit have a 1–9 scale for the
Make sure the thermometer jack is free of any residue and the cord is free of knots before plugging it into the jack. 1 Pull the thermometer storage compartment on the right side of the unit outward. Then unwind the cord from the compartment to remove the thermometer. 2 Plug the thermometer into the jack. Push firmly on the plug until it cannot