Transcription
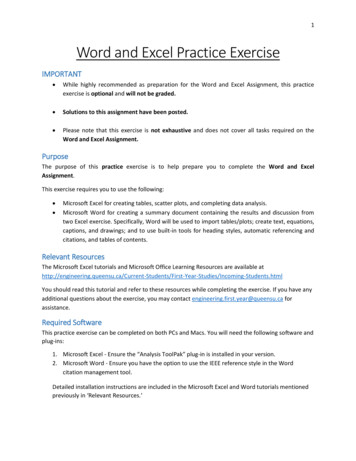
Microsoft Word 2016 TutorialMicrosoft Word 2016 TutorialThis tutorial requires a basic understanding of how to use Microsoft Word and focuses only onoperations useful for the Word and Excel Assignment 2020. This transcript is supplementary to the videoseries “FEAS Microsoft Word Tutorials.”The two column sections indicate the desired action on the left side and the steps to achieve it on theright side. Underlined phrases indicate menu tabs (such as Home), italicized phrases indicate menuoptions (such as Font), and bolded phrases indicate actions within each menu option (such as Font Size).Words enclosed in (such as Enter ) indicate keyboard keys.1. Quick StylesFirst we’re going to discuss Quick Styles, which can be used to create professional headings andsubheadings. This is located in the Home bar under Styles and contains a number of options. It isrecommended that the Title style be used for titles, Heading 1 be used for section headings andHeading 2 be used for subheadings. Other styles can be used as desired.To apply a style:Add text then highlight the line by moving thecursor over to the left margin until it changes to awhite arrow. Left click next to the text tohighlight, then go to the Styles bar in the Hometab and select the desired style.This method can be used to apply styles to headings and other text. Simply follow the highlighting stepsthen select your desired style. To preview a style, highlight the text then hover the cursor over the style.The style will be temporarily applied to the highlighted text until the cursor is moved.2. BreaksA useful formatting element in Word is breaks. Breaks are used to insert new pages or sections into adocument and preserve formatting within sections. It is generally recommended that breaks (eitherpage or section depending on required formatting) be used after the title page, after the table ofcontents and list of tables/figures, and before appendices.2.1 Page BreaksPage breaks are added to start at a new page and allow additions to previous pages without altering theformat of pages below it.To add a page break:After adding text, click Enter to start a newline. In the Insert tab under Pages, select PageBreak.1 of 15
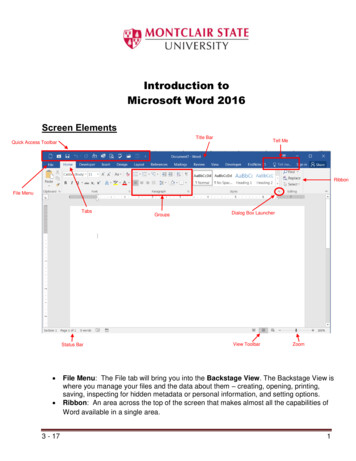
Microsoft Word 2016 Tutorial2.2 Section breaksSection breaks are used to change document formatting for sections within a larger document. Forexample, page number format often varies throughout a document. Generally, the title page has nonumber, table of contents/list of tables/figures uses Roman numerals (i, ii, iii etc.) and the body of thedocument uses Arabic numbers (1, 2, 3 etc.). Section breaks allow the page number component of thedocument to have multiple formats throughout.To add a section break:After adding text, click Enter to start a newline. In the Layout tab under Page Setup, selectthe Breaks drop down menu and choose NextPage.This action creates a section break on the next page, and formatting for the next section can be doneindependently from previous sections. Adding a next page section break automatically adds a pagebreak. Note that it is essential to add a next page section break when changing page number formattingwithin a document.3. Table of Contents, Table of Figures, List of TablesNext we’ll cover table of contents, table of figures and lists of tables. Professional reports include all ofthese elements for quick reference for the reader. These can be created automatically in Word if QuickStyles are used to format headings, subheadings, titles and captions.To insert a Table of Contents:In the References tab under Table of Contentsselect Table of Contents Automatic Table 2.To insert a Table of Figures or List of Tables:In the References tab under Captions selectInsert Table of Figures. Make sure the followingboxes are checked: Show Page Numbers, RightAlign Page Numbers, Include Label and Number.To create a Table of Figures, select Figure fromthe Caption Label drop down menu. For a List ofTables, select Table instead.These instructions will only work if Quick Styles is used for formatting headings and subheadings.2 of 15
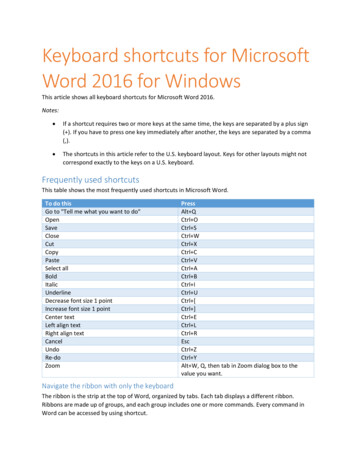
Microsoft Word 2016 Tutorial4. Page NumbersPage numbers are used in all professional reports to improve ease of locating information within thedocument.To add page numbers to a document:In the Insert tab under Header & Footer, selectthe Page Number drop down menu and selectTop of Page Plain Number 3This will place Arabic numbers in the top right hand corner of every page starting at 1 on the first pageof the document.As mentioned, general formatting for Engineering reports has no page number on the title page, romannumerals starting at i for tables of contents and figures, and Arabic numbers starting at 1 for the reportbody. Section specific formatting requires a few more steps. These steps may have to be altered oromitted depending on specific formatting requirements.First, format document with section breaks:Add next page section breaks in the documentbetween sections that will have differentformatting. If you’ve already used page breaks,you’ll have to delete them then add a sectionbreak instead.Next, add page numbers:As described previously.To add Roman numerals to a section:Double click the header of the first page of thesection to select it. This causes the Header &Footer Tools tab to open. Under Header & Footerselect Page Numbers Format Page Numbers. Inthe window that opens, use the Number Formatdrop down menu to select Roman numerals.Make sure ‘Include Chapter Numbers’ isunchecked, select ‘Start at:’ and type i in the‘Start at:’ box.Follow the same process for any subsequent sections to switch to any other numbering format.Numbers can be set to start at any value at the beginning of a section using the ‘Start at:’ box.To remove number from title page:Select header on title page. In the Header &Footer Tools tab under Options, check the boxnext to Different First Page. This will leave theheader blank on the first page only.To add text (such as last name) next to numbers:Double click the header and type next to thenumber.3 of 15
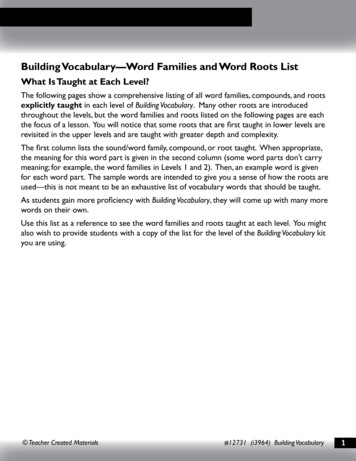
Microsoft Word 2016 TutorialIn headers with right aligned page numbers, text will automatically appear to the left of the numbersuch that the number is always right aligned. Changes to one header will appear on every page,regardless of section breaks, except for the first page if the Different First Page box is checked.5. Equation EditorIn engineering reports it is often useful to include equations that are relevant to the analysis. To insertequations easily into a document, use Equation Editor.To create a new equation:In the Insert tab under Symbols, select the Equation dropdown menu and select Insert New Equation. Type yourequation in the box that appears.Alternatively, click Alt and .The following keyboard shortcuts are particularly useful for generating equations quickly in Word.To create subscripted text:Type the base number, , followed by the desired subscript.Click space to make the subscript appear.e.g. 𝑎 𝑏 𝑓𝑜𝑙𝑙𝑜𝑤𝑒𝑑 𝑏𝑦 𝑎 𝑠𝑝𝑎𝑐𝑒 𝑝𝑟𝑜𝑑𝑢𝑐𝑒𝑠 𝑎𝑏If you would like to include multiple terms in your subscript,enclose them in brackets.e.g. 𝑎 (𝑏 𝑐) 𝑓𝑜𝑙𝑙𝑜𝑤𝑒𝑑 𝑏𝑦 𝑎 𝑠𝑝𝑎𝑐𝑒 𝑝𝑟𝑜𝑑𝑢𝑐𝑒𝑠 𝑎𝑏 𝑐To create superscripted text:Type the base number, , followed by the desired superscript.Click space to make the superscript appear.e.g. 𝑎 𝑏 𝑓𝑜𝑙𝑙𝑜𝑤𝑒𝑑 𝑏𝑦 𝑎 𝑠𝑝𝑎𝑐𝑒 𝑝𝑟𝑜𝑑𝑢𝑐𝑒𝑠 𝑎𝑏If you would like to include multiple terms in your superscript,enclose them in brackets.e.g. 𝑎 (𝑏 𝑐) 𝑓𝑜𝑙𝑙𝑜𝑤𝑒𝑑 𝑏𝑦 𝑎 𝑠𝑝𝑎𝑐𝑒 𝑝𝑟𝑜𝑑𝑢𝑐𝑒𝑠 𝑎𝑏 𝑐To create a multiplication sign:Type your first number, space , \ , the word “times”, space ,followed by your second number.e.g. 𝑎 \𝑡𝑖𝑚𝑒𝑠 𝑏 𝑓𝑜𝑙𝑙𝑜𝑤𝑒𝑑 𝑏𝑦 𝑎 𝑠𝑝𝑎𝑐𝑒 𝑝𝑟𝑜𝑑𝑢𝑐𝑒𝑠 𝑎 𝑏To create a fraction:Type your numerator, / , followed by the denominator.Click space to make the subscript appear.𝑎e.g. 𝑎/𝑏 𝑓𝑜𝑙𝑙𝑜𝑤𝑒𝑑 𝑏𝑦 𝑎 𝑠𝑝𝑎𝑐𝑒 𝑝𝑟𝑜𝑑𝑢𝑐𝑒𝑠𝑏If you would like to include multiple terms in your denominator,enclose them in brackets.𝑎e.g. 𝑎/(𝑏 𝑐)𝑓𝑜𝑙𝑙𝑜𝑤𝑒𝑑 𝑏𝑦 𝑎 𝑠𝑝𝑎𝑐𝑒 𝑝𝑟𝑜𝑑𝑢𝑐𝑒𝑠 𝑏 𝑐4 of 15
Microsoft Word 2016 TutorialTo create a square root sign:Type \ , the word “sqrt”, space , followed by the expressionyou would like to take the root of.e.g. \𝑠𝑞𝑟𝑡 𝑎 𝑓𝑜𝑙𝑙𝑜𝑤𝑒𝑑 𝑏𝑦 𝑎 𝑠𝑝𝑎𝑐𝑒 𝑝𝑟𝑜𝑑𝑢𝑐𝑒𝑠 𝑎If you would like to include multiple terms under your squareroot, enclose them in brackets.e.g. \𝑠𝑞𝑟𝑡 (𝑎 𝑏) 𝑓𝑜𝑙𝑙𝑜𝑤𝑒𝑑 𝑏𝑦 𝑎 𝑠𝑝𝑎𝑐𝑒 𝑝𝑟𝑜𝑑𝑢𝑐𝑒𝑠 𝑎 𝑏To create a degree sign:Type your number, \ , the word “degree”, followed by a space .e.g. 10 \𝑑𝑒𝑔𝑟𝑒𝑒 𝑎 𝑓𝑜𝑙𝑙𝑜𝑤𝑒𝑑 𝑏𝑦 𝑎 𝑠𝑝𝑎𝑐𝑒 𝑝𝑟𝑜𝑑𝑢𝑐𝑒𝑠 10 To create a therefore sign:Type \ , the word “therefore”, followed by a space .e.g. \𝑡ℎ𝑒𝑟𝑒𝑓𝑜𝑟𝑒 𝑎 𝑓𝑜𝑙𝑙𝑜𝑤𝑒𝑑 𝑏𝑦 𝑎 𝑠𝑝𝑎𝑐𝑒 𝑝𝑟𝑜𝑑𝑢𝑐𝑒𝑠 To create a lowercase Greek lettere.g. 𝛿:Type \ , the word “delta”, followed by a space .e.g. \𝑑𝑒𝑙𝑡𝑎 𝑎 𝑓𝑜𝑙𝑙𝑜𝑤𝑒𝑑 𝑏𝑦 𝑎 𝑠𝑝𝑎𝑐𝑒 𝑝𝑟𝑜𝑑𝑢𝑐𝑒𝑠 𝛿To create an uppercase Greek lettere.g. Δ :Type \ , the word “Delta”, followed by a space .e.g. \𝐷𝑒𝑙𝑡𝑎 𝑎 𝑓𝑜𝑙𝑙𝑜𝑤𝑒𝑑 𝑏𝑦 𝑎 𝑠𝑝𝑎𝑐𝑒 𝑝𝑟𝑜𝑑𝑢𝑐𝑒𝑠 ΔA number of other useful equation shortcuts can be found in Microsoft Office help forums online.5 of 15
Microsoft Word 2016 Tutorial6. References in IEEEIt is often necessary for engineers to use information found online and in texts, which necessitates usingcitations. Citation management tools make this process more accurate and efficient. While this tutorialonly outlines the use of the Microsoft Word citation management tool, other tools such as Zotero,RefWorks, and Mendeley, are appropriate.It is important to be aware that no citation management tools are perfect. Whenever citations aregenerated using a citation management tool, they should be closely compared with the appropriatecitation style guide to ensure they follow the correct format.For example, when referencing in IEEE, all citations should be reviewed to ensure they follow the formatdescribed in the official IEEE Editorial Style Manual.The IEEE Editorial Style Manual can be accessed at the following l.pdfThe following link is also very fRemember that any manual changes made to a reference list automatically generated by a citationmanagement tool will be lost every time the list is updated. Complete all manual changes after yourreference list is complete.In the Microsoft Word citation management tool, the Source Manager is used to cite material notwritten by the authors of the document. The Source Manager saves sources and can be used togenerate references lists and add citations to text. To use these functions, sources must be saved in theSource Manager.The style of citations can be selected in the Citations and Bibliography bar in the Styles drop downmenu. Generally, IEEE format is used.To select IEEE format:In the References tab under Citations andBibliography select the Style drop down menuand choose IEEE.To add sources to the Source Manager:In the References tab under Citations andBibliography select Insert Citation Add NewSource. A new window will come up. Select thetype of source in the drop down menu and fill asmuch information into the manager as possible.Select OK to add to the current list of sources.Be mindful of how you are entering theinformation in the Source Manager. Detailedinstructions describing how to correctly enterinformation for the most common types ofsources have been included below.6 of 15
Microsoft Word 2016 TutorialTo add citations to text:Place the cursor in the text where the citationneeds to be placed. In the References tab underCitations and Bibliography select Insert Citationand double click the citation to place it.In text citations should always be placed at theend of a sentence before the period.Each sentence containing information publishedby another author should be cited. It is notsufficient to cite the last sentence in a paragraphcontaining information from one source.To add a List of References to a document:In the References tab under Citations &Bibliography select Bibliography References.This will automatically insert a list of Referencesinto the document.Ensure that the list that is generated isappropriately formatted and the list of numbersis properly aligned.It is useful to cross-reference tables and figures in reports so changes to table/figure numbers isautomatically updated. A cross-reference essentially links the table/figure reference in the text to thespecific table/figure being referenced. Cross-referenced tables/figures must have captions donecorrectly using Styles.To add a cross-reference:Place the cursor in the desired location for thecross-reference. In the Insert tab under Linksselect Cross-Reference. In the window underReference type select the item type (usuallyeither table or figure) and change InsertReference to Only Label or Number. Select OKand the reference will be placed.The following outlines, in detail, how to properly input information into the Microsoft Source Managerto ensure that citations are generated in proper IEEE format.7 of 15
Microsoft Word 2016 TutorialTo cite a journal article:In the References tab under Citations &Bibliography select Insert Citation Add NewSource. A new window will come up.In the Type of Source drop-down menu selectJournal Article.To enter the author names:1. Do NOT simply type the author namesinto the Author field.2. Instead, click Edit next to the Authorfield.3. Starting with the first author listed on thejournal, type their first, middle, and lastnames into the appropriate fields. SelectAdd.4. Repeat this process for all authors of thejournal in order.5. Click OK.To enter the journal title:1. Simple type the full journal title into theTitle field.To enter the journal name:1. Do NOT type the full journal name intothe Journal Name field.2. Instead, research the abbreviated journalname and type this into the JournalName field. All journals have abbreviatednames that can very easily be foundonline.To enter the year, pages, volume, and issue:1. Simply type the year, page ran
Microsoft Word 2016 Tutorial 1 of 15 Microsoft Word 2016 Tutorial This tutorial requires a basic understanding of how to use Microsoft Word and focuses only on operations useful for the Word and Excel Assignment 2020. This transcript is supplementary to the video series “FEAS Microsoft Word Tutorials.” The two column sections indicate the desired action on the left side and the steps to .File Size: 624KBPage Count: 15