Transcription
Simulink and AdvancedTopics in MATLABHans-Petter Halvorsenhttps://www.halvorsen.blog
Simulink and AdvancedTopics in MATLAB
University of South-Eastern NorwayMATLABSimulink and Advanced TopicsHans-Petter Halvorsen, 2022.05.24http://www.halvorsen.blog
PrefaceCopyright You cannot distribute or copy this document withoutpermission from the author. You cannot copy or link to this documentdirectly from other sources, web pages, etc. You should always link to theproper web page where this document is located, typicallyhttp://www.halvorsen.blogIn this MATLAB Course, you will learn basic MATLAB and how to useMATLAB in Control and Simulation applications. An introduction toSimulink and other Tools will also be given.MATLAB is a tool for technical computing, computation and visualization inan integrated environment. MATLAB is an abbreviation for MATrixLABoratory, so it is well suited for matrix manipulation and problemsolving related to Linear Algebra, Modelling, Simulation and Controlapplications.This is a self-paced course based on this document and some short videoson the way. This document contains lots of examples and self-paced tasksthat the users will go through and solve on their own. The user may gothrough the tasks in this document in their own pace and the instructorwill be available for guidance throughout the course.The MATLAB Course consists of 3 parts:1. Introduction to MATLAB2. Modelling, Simulation and Control3. Simulink and Advanced TopicsIn Part 3 of the course, you will learn how to use some of the moreadvanced features in MATLAB. We will also take a closer look at Simulink,which is a Block Diagram Simulation Tool used together with MATLAB. Wewill also give an overview to other tools for numerical mathematics andsimulation.You must go through MATLAB Course – Part 1: Introduction to MATLABbefore you start.ii
The course consists of lots of Tasks you should solve while reading thiscourse manual and watching the videos referred to in the text.Make sure to bring your headphones for the videos in thiscourse. The course consists of several short videos that will give you anintroduction to the different topics in the course.Prerequisites: You should be familiar with undergraduate-levelmathematics and have experience with basic computer operations.What is MATLAB?MATLAB is a tool for technical computing, computation and visualization inan integrated environment. MATLAB is an abbreviation for MATrixLABoratory, so it is well suited for matrix manipulation and problemsolving related to Linear Algebra.MATLAB is developed by The MathWorks. MATLAB is a short-term forMATrix LABoratory. MATLAB is in use world-wide by researchers anduniversities.For more information, see www.mathworks.comWhat is Simulink?MATLAB offers lots of additional Toolboxes for different areas such asControl Design, Image Processing, Digital Signal Processing, etc.Simulink, developed by The MathWorks, is a commercial tool for modeling,simulating and analyzing dynamic systems. Its primary interface is agraphical block diagramming tool and a customizable set of block libraries.It offers tight integration with the rest of the MATLAB environment andcan either drive MATLAB or be scripted from it. Simulink is widely used incontrol theory and digital signal processing for simulation and design.This training will give you the basic knowledge of Simulink and how youcan use it together with MATLAB.For more information about MATLAB, Simulink, etc., please visithttp://www.halvorsen.blogiii
Online MATLAB ts/programming/matlab/MATLAB ming/matlab/matlab basics.phpModelling, Simulation and Control with ming/matlab/matlab mic.phpMATLAB atlab basics videos.phpMATLAB for ing/courses/matlab.phpOn these web pages you find video solutions, complete step by stepsolutions, downloadable MATLAB code, additional resources, etc.iv
Table of ContentsPreface . iiTable of Contents . v1Introduction .12Simulink .22.1Start using Simulink .22.1.1Block Libraries .42.1.2Create a new Model .62.2Wiring techniques .72.3Help Window .82.4Configuration . 102.5Examples . 11Task 1: Simulation in Simulink – Bacteria Population . 202.6Data-driven Modelling . 212.6.1Using the Command window. 212.6.2Using a m-file . 242.6.3Simulation Commands . 25Task 2: Mass-Spring-Damper System . 26Task 3: Simulink Simulation . 293Debugging in MATLAB. 303.1The Debugging Process . 32Task 4: Debugging . 334More about Functions . 35v
viTable of Contents4.1Getting the Input and Output Arguments . 35Task 5: Create a Function . 36Task 6: Optional Inputs: Using nargin and nargchk . 37Task 7: Optional Outputs: Using nargout and nargoutchk. 385More about Plots . 395.1LaTEX or TEX Commands . 39Task 8: LATEX Commands . 40Task 9: 3D Plot . 406Using Cells in the MATLAB Editor . 42Task 10: Using Cells . 437Importing Data . 44Task 11: Import Data. 468Structures and Cell Arrays . 478.1Structures . 47Task 12: Using Structures . 489Alternatives to MATLAB . 499.1Octave . 499.2Scilab and Scicos . 499.3LabVIEW MathScript . 509.3.1How do you start using MathScript? . 519.3.2Functions . 529.3.3ODE Solvers in MathScript. 539.4LabVIEW . 549.4.1The LabVIEW Environment . 549.4.2Front Panel . 559.4.3Block Diagram . 58MATLAB Course - Part III: Simulink and Advanced Topics in MATLAB
viiTable of Contents9.4.49.5LabVIEW Control Design and Simulation Module . 59Mathematics in LabVIEW . 639.5.1Basic Math . 649.5.2Linear Algebra . 659.5.3Curve Fitting . 669.5.4Interpolation . 679.5.5Integration and Differentiation . 679.5.6Statistics . 689.5.7Optimization . 689.5.8Differential Equations (ODEs) . 699.5.9Polynomials . 699.6MATLAB Integration (MATLAB Script) in LabVIEW . 709.7Python . 71Appendix A – MathScript Functions . 73Appendix B: Mathematics characters . 76MATLAB Course - Part III: Simulink and Advanced Topics in MATLAB
1 IntroductionAdditional Resources, Videos, etc. are available ng/matlabPart 3: Advanced Topics, Simulink and other Tools consists of thefollowing topics: Introduction to SimulinkAdvanced Topics in MATLAB:o Debugging in MATLABo More about functionso More about Plotso Using Cells in the MATLAB Editoro Importing Datao Structures and Cell ArraysAlternatives to MATLAB1
2 SimulinkSimulink is an environment for simulation and model-based design fordynamic and embedded systems. It provides an interactive graphicalenvironment and a customizable set of block libraries that let you design,simulate, implement, and test a variety of time-varying systems, includingcommunications, controls, signal processing, video processing, and imageprocessing.Simulink offers: A quick way of develop your model in contrast to text basedprogramming language such as e.g., C.Simulink has integrated solvers. In text based-programminglanguage such as e.g., C you need to write your own solver.Graphical Programming: In Simulink you program in a graphical way.LabVIEW is another programming language where you use graphicalprogramming instead of text-based programming. LabVIEW is developedby National Instruments. You will use LabVIEW in a later chapterBefore you start, you should watch the following videos: “Simulink Overview”“Getting Started with Simulink”The videos is available /courses/matlab/matlab3.php2.1Start using SimulinkYou start Simulink from the MATLAB IDE:Open MATLAB and select the Simulink icon in the Toolbar:2
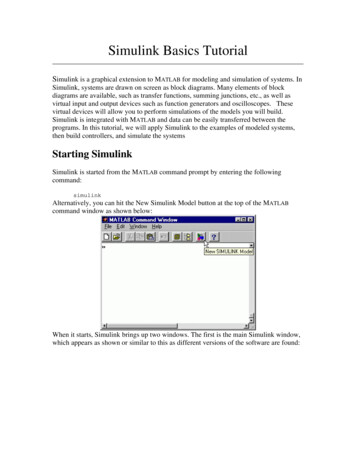
3SimulinkOr type “simulink” in the Command window, like this:Then the following window appears (Simulink Library Browser):MATLAB Course - Part III: Simulink and Advanced Topics in MATLAB
4SimulinkThe Simulink Library Browser is the library where you find all theblocks you may use in Simulink. Simulink software includes an extensivelibrary of functions commonly used in modeling a system. These include: Continuous and discrete dynamics blocks, such as Integration,Transfer functions, Transport Delay, etc.Math blocks, such as Sum, Product, Add, etcSources, such as Ramp, Random Generator, Step, etc2.1.1 Block LibrariesHere are the most used “Continuous” Blocks:MATLAB Course - Part III: Simulink and Advanced Topics in MATLAB
5SimulinkHere are some common used “Math Operations” Blocks:Here are some common used “Signal Routing” Blocks:Here are some common used “Sinks” Blocks:Here are some common used “Sources” Blocks:MATLAB Course - Part III: Simulink and Advanced Topics in MATLAB
6SimulinkIn addition, there are lots of block in different Toolboxes:2.1.2 Create a new ModelClick the New icon on the Toolbar in order to create a new Simulinkmodel:The following window appears:MATLAB Course - Part III: Simulink and Advanced Topics in MATLAB
7SimulinkYou may now drag the blocks you want to use from the Simulink LibraryBrowser to the model surface (or right-click on a block and select “Addto ”).Example:In this example we place (drag and drop) to blocks, a Sine Wave and aScope, on the model surface:2.2Wiring techniquesUse the mouse to wire the inputs and outputs of the different blocks.Inputs are located on the left side of the blocks, while outputs are locatedon the right side of the blocks.MATLAB Course - Part III: Simulink and Advanced Topics in MATLAB
8SimulinkWhen holding the mouse over an input or an output the mouse changes tothe following symbol.Use the mouse, while holding the left button down, to drag wires from theinput to the output.Automatic Block Connection:Another wiring technique is to select the source block, then hold down theCtrl key while left-clicking on the destination block.Try the different techniques on the example above.Connection from a wire to another blockIf wire a connection from a wire to another block, like the example below,you need to hold down the Ctrl key while left-clicking on the wire andthen to the input of the desired block.2.3Help WindowIn order to see detailed information about the different blocks, use thebuilt-in Help system.MATLAB Course - Part III: Simulink and Advanced Topics in MATLAB
9SimulinkAll standard blocks in Simulink have detailed Help. Click the Help button inthe Block Parameter window for the specific block in order to get detailedhelp for that block.The Help Window then appears with detailed information about theselected block:MATLAB Course - Part III: Simulink and Advanced Topics in MATLAB
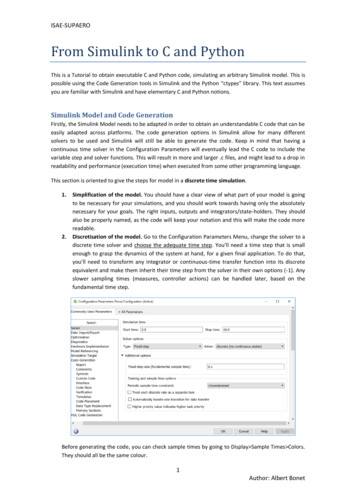
102.4SimulinkConfigurationThere are lots of parameters you may want to configure regarding yoursimulation. Select “Configuration Parameters ” in the Simulation menu.The following window appears:MATLAB Course - Part III: Simulink and Advanced Topics in MATLAB
11SimulinkHere you set important parameters such as: Start and Stop time for the simulationWhat kind of Solver to be used (ode45, ode23 etc.)Fixed-step/Variable-stepNote! Each of the controls on the Configuration Parameters dialog boxcorresponds to a configuration parameter that you can set via the “sim”and “simset” commands. You will learn more about these commandslater.Solvers are numerical integration algorithms that compute the systemdynamics over time using information contained in the model. Simulinkprovides solvers to support the simulation of a broad range of systems,including continuous-time (analog), discrete-time (digital), hybrid (mixedsignal), and multirate systems of any size.2.5ExamplesBelow we will go through some examples in order to illustrate how tocreate block diagrams and related functionality.Example:Integrator with initial valueMATLAB Course - Part III: Simulink and Advanced Topics in MATLAB
12SimulinkCreate the following model (an integrator) and run the simulation:Step1: Place the blocks on the model surfaceThis example uses the following blocks:Step 2: ConfigurationDouble-click on the Integrator block. The Parameter window for theIntegrator block appears:MATLAB Course - Part III: Simulink and Advanced Topics in MATLAB
13SimulinkSelect “Initial condition source external”. The Integrator block nowlooks like this:Double-click on the Constant block. The Parameter window for theConstant block appears:MATLAB Course - Part III: Simulink and Advanced Topics in MATLAB
14SimulinkIn the Constant value field we type in the initial value for the integrator,e.g., type the value 1.Step 3: WiringUse the mouse to wire the inputs and outputs of the different blocks.When holding the mouse over an input or an output the mouse change tothe following symbol.Draw a wire between the output on the Constant block to the lower inputin the Integrator block, like this:MATLAB Course - Part III: Simulink and Advanced Topics in MATLAB
15SimulinkYou could also do like this:Wire the rest of the blocks together and you will get the followingdiagram:Step 4: SimulationStart the simulation by clicking the “Start Simulation” icon in the Toolbar:Step 5: The ResultsDouble-click in the Scope block in order to see the simulated result:MATLAB Course - Part III: Simulink and Advanced Topics in MATLAB
16SimulinkExample:Sine WaveCreate the block diagram as shown below:Set the following parameter for the Integrator block:MATLAB Course - Part III: Simulink and Advanced Topics in MATLAB
17SimulinkThe result should be like this:Example:Using vectorsMATLAB Course - Part III: Simulink and Advanced Topics in MATLAB
18SimulinkCreate the following block diagram:For the Gain block, type the following parameters:As you see, we can use standard MATLAB syntax to create a vector.If you want to see the signal dimensions, select “Signal Dimensions” and“Wide Nonscalar Lines” as shown here:MATLAB Course - Part III: Simulink and Advanced Topics in MATLAB
19SimulinkThe block diagram should now look like this:The thick lines indicate vectors, while the number (8) is the size of thevector.Let’s change the Saturation block:MATLAB Course - Part III: Simulink and Advanced Topics in MATLAB
20SimulinkAs you see you may use standard MATLAB functions and syntax.Run the simulation and see the results in the Scope block.Task 1:Simulation in Simulink – Bacteria PopulationIn this task we will simulate a simple model of a bacteria population in ajar (known from a previous task).The model is as follows:birth rate bxdeath rate px2Then the total rate of change of bacteria population is:𝑥̇ 𝑏𝑥 𝑝𝑥 !Set b 1/hour and p 0.5 bacteria-hourWe will simulate the number of bacteria in the jar after 1 hour, assumingthat initially there are 100 bacteria present.Procedure:1. Create the block diagram for the system using “pen & paper”MATLAB Course - Part III: Simulink and Advanced Topics in MATLAB
21Simulink2. Start Simulink and create a New Model3. Drag in the necessary blocks from the Simulink Library Browser4. Configure the different blocks (double-click/right-click dependingon what you need). Some blocks need to be “flipped” (Right-click Format Flip Block), while in other blocks you need to set a value(double-click)5. Draw lines between the different blocks using the mouse6. Set Simulation Settings (Simulation Configuration Parameters).The simulation Time (Stop Time) should be set to 1 (hour)7. Use a Scope to see the Simulated ResultYou will need the following blocks: Integrator blockInitial value x0 100 Two Gain blocks Product block Sum block Scope blockAutoscaleTo solve the differential equation. Note!For p ( 0.5) and b ( 1)To compute x2Note! One plus ( ) must be changed to minus (-)To show the simulated result. Note! Set to[End of Task]2.6Data-driven ModellingYou may use Simulink together with MATLAB in order to specify data andparameters to your Simulink model. You may specify commands in theMATLAB Command Window or as commands in an m-file. This is calleddata-driven modeling.2.6.1 Using the Command windowExample:Given the following system:MATLAB Course - Part III: Simulink and Advanced Topics in MATLAB
22SimulinkNote! In order to get 3 inputs on the Scope block:Double-click on the Scope and select the Parameters icon in the Toolbar:Then select Number of Axes 3:Configure the zero-order hold blocks like this:MATLAB Course - Part III: Simulink and Advanced Topics in MATLAB
23SimulinkWrite the following in the Command window in MATLAB:Run the Simulink model from the Simulink:MATLAB Course - Part III: Simulink and Advanced Topics in MATLAB
24SimulinkWe then get the following results:2.6.2 Using a m-fileIt is good practice to build your model in Simulink and configure and runthe simulation from a MATLAB m-file.A Typical m-file could look like this:MATLAB Course - Part III: Simulink and Advanced Topics in MATLAB
25SimulinkYou use the simset command to configure your simulation parametersand the sim command to run the simulation.The variables you refer to in the m-file is set in the Constant value field inthe Parameter window for each block.2.6.3 Simulation CommandsMATLAB Course - Part III: Simulink and Advanced Topics in MATLAB
26SimulinkThe most used command is: simsetsimUse these commands if you configure and run your Simulink model from am-file.Example:%Simulator Settingst stop 100; %[s]T s t stop/1000; %[s]options simset('solver', 'ode5', 'fixedstep', T s);%Starting simulationsim('mass spring damper', t stop, options);[End of Example]Task 2: Mass-Spring-Damper SystemIn this example we will create a mass-spring-damper model in Simulinkand configure and run the simulation from a MATLAB m-file.In this exercise you will construct a simulation diagram that representsthe behavior of a dynamic system. You will simulate a spring-massdamper system.𝐹(𝑡) 𝑐𝑥̇ (𝑡) 𝑘𝑥(𝑡) 𝑚𝑥̈ (𝑡)where t is the simulation time, F(t) is an external force applied to thesystem, c is the damping constant of the spring, k is the stiffness of thespring, m is a mass, and x(t) is the position of the mass. 𝑥̇ is the firstderivative of the position, which equals the velocity of the mass. 𝑥̈ is thesecond derivative of the position, which equals the acceleration of themass.The following figure shows this dynamic system.MATLAB Course - Part III: Simulink and Advanced Topics in MATLAB
27SimulinkThe goal is to view the position x(t) of the mass m with respect to time t.You can calculate the position by integrating the velocity of the mass. Youcan calculate the velocity by integrating the acceleration of the mass. Ifyou know the force and mass, you can calculate this acceleration by usingNewton's Second Law of Motion, given by the following equation:Force Mass AccelerationTherefore,Acceleration Force / MassSubstituting terms from the differential equation above yields thefollowing equation:𝑥̈ 1(𝐹 𝑐𝑥̇ 𝑘𝑥)𝑚You will construct a simulation diagram that iterates the following stepsover a period of time. Create the block diagram for the mass-spring-damper model above.Instead of hard-coding the model parameters in the blocks you shouldrefer to them as variables set in an m-file.MATLAB Course - Part III: Simulink and Advanced Topics in MATLAB
28SimulinkThese variables should be configured: x initdxdt initm c kt step FF OF 1m-FileThe following variables should then be set in the m-file:x init 4; %[m]. Initial position.dxdt init 0; %[m/s]. Initial Speed.m 20; %[kg]c 4; %[N/(m/s)]k 2; %[N/m]t step F 50; %[s]F O 0; %[N]F 1 4; %[N] Create the model of the system in Simulink, and then create a m-filewhere you specify model and simulation parameters. Then use the simfunction in order to run the simulation within the m-file.[End of Task]MATLAB Course - Part III: Simulink and Advanced Topics in MATLAB
29SimulinkTask 3: Simulink SimulationGiven the autonomous system:𝑥̇ 𝑎𝑥"where 𝑎 # ,where 𝑇 is the time constantThe solution for the differential equation is found to be:𝑥(𝑡) 𝑒 % 𝑥&Set 𝑇 5 and the initial condition 𝑥(0) 1.Simulate the system in Simulink where we plot the solution 𝑥(𝑡) in thetime interval 0 𝑡 25[End of Task]MATLAB Course - Part III: Simulink and Advanced Topics in MATLAB
3 Debugging in MATLABDebugging is about different techniques for finding bugs (errors that makeyour code not work as expected) in your code.In all but the simplest programs, you are likely to encounter some type ofunexpected behavior when you run the program for the first time.Program defects can show up in the form of warning or error messagesdisplayed in the command window, programs that hang (neverterminate), inaccurate results, or some number of other symptoms.It is difficult to write code without errors (bugs), but MATLAB havepowerful Debugging functionality, similar to other tools like, e.g., VisualStudio.Why we call it debugging? They found a bug (actually a moth) inside acomputer in 1947 that made the program not behaving as expected. Thiswas the “first” real bug which was debugged.Step 1: Removing Warnings and Errors notified by MATLABThe first step in order to avoid errors is to remove all warnings and errorsnotifies by MATLAB in the Editor. On the right side of the Editor there willbe shown symbols to illustrate that MATLAB have found potential errors inyour code.Warnings - Click thespecific warningsymbols to get more information about aExample:30
31Debugging in MATLABErrors - Click theerrorsymbols to get more information about a specificExample: Take necessary actions in order to remove these Errors and Warnings!Step 2: Using Debugging Tools and Techniques in the MATLABEditorIn addition MATLAB have more sophisticated debugging tools we will learnmore about below. These are tools you use when your program is running.Below we see the basic debugging functionality in MATLAB:MATLAB Course - Part III: Simulink and Advanced Topics in MATLAB
32Debugging in MATLABThe MATLAB Debugger enables you to examine the inner workings of yourprogram while you run it. You can stop the execution of your program atany point and then continue from that point, stepping through the codeline by line and examining the results of each operation performed. Youhave the choice of operating the debugger from the Editor window thatdisplays your program, from the MATLAB command line, or both.3.1The Debugging ProcessYou can step through the program right from the start if you want. Forlonger programs, you will probably save time by stopping the programsomewhere in the middle and stepping through from there. You can dothis by approximating where the program code breaks and setting astopping point (or breakpoint) at that line. Once a breakpoint has beenset, start your program. The MATLAB Editor/Debugger window will show agreen arrow pointing to the next line to execute. From this point, you canexamine any values passed into the program, or the results of eachoperation performed. You can step through the program line by line to seewhich path is taken and why. You can step into any functions that yourprogram calls, or choose to step over them and just see the end results.You can also modify the values assigned to a variable and see how thataffects the outcome.When the program is in debug-mode, the command prompt is changed to“K ” and the following message appears in the status bar:MATLAB Course - Part III: Simulink and Advanced Topics in MATLAB
33Debugging in MATLABYour code could look something like this:A red circle indicates that you have set a breakpoint, which meansyour program will stop at this place in your code and wait for furtherinstructions from you.The green arrow indicates at what line your program is at themoment.Now you can use the “debugging toolbar” to step through your code:The “debugging toolbar” contains the following buttons:Set/Clear BreakpointClear all BreakpointsStep through the program, line by lineStep in (to a function, etc.)Step out (of a function, etc.)ContinueExit Debug modeTask 4: DebuggingCreate a similar program like this:MATLAB Course - Part III: Simulink and Advanced Topics in MATLAB
34Debugging in MATLABSet a Breakpoint inside the loop and use the Debugging functionality tostep through the program and watch the result in each iteration.Test all the different buttons in the “debugging toolbar”:In addition you should open some of your previous programs you havemade, and try the debugging tools on them.[End of Task]MATLAB Course - Part III: Simulink and Advanced Topics in MATLAB
4 More about Functions4.1 Getting the Input and OutputArgumentsA function may have several inputs and several outputs. Use nargin andnargout to determine the number of input and output arguments in aparticular function call. Use nargchk and nargoutchk to verify that yourfunction is called with the required number of input and outputarguments.Example:We create the following function:function [x,y] myfunc(a,b,c,d)disp(nargchk(2,4,nargin)) % Allow 2 to 4 inputsdisp(nargoutchk(0,2,nargout)) % Allow 0 to 2 outputsx a b;y a * b;if nargin 3x a b c;y a * b * c;endif nargin 4x a b c d;y a * b * c * d;endWe test the function in the Command window with different inputs andoutputs: [x, y] myfunc(1,2)x 3y 2 [x, y] myfunc(1,2,3)35
36More about Functionsx 6y 6 [x, y] myfunc(1,2,3,4)x 10y 24 [x] myfunc(1,2)x 3 [x, y, z] myfunc(1,2)? Error using myfuncToo many output arguments. myfunc(1,2)ans 3 Note! In newer versions of MATLAB, the error function is recommendedinstead of the disp function, but both should work.[End of Example]Task 5: Create a FunctionYou may have experienced standing on top of a hill or mountain and itfeels you can see everything. How far can you really see? It depends onthe height of the mountain and the radius of the earth, as shown in thesketch below.MATLAB Course - Part III: Simulink and Advanced Topics in MATLAB
37More about FunctionsIn this task we will create a function that finds the distance to thehorizon 𝑥' .You may use the Pythagorean law to find 𝑥' :𝑅! 𝑥'! (𝑅 ℎ)! 𝑥' Fℎ(2𝑅 ℎ)𝐷 is the diameter of the earth, 𝑅 is the radius of the earth, ℎ is yourheight above the earth, where you standing on a mountain. The radius onthe earth is 𝑅 6378𝑘𝑚. Create a function that finds xh from input parameter h, xh horizon(h)How far can you see if you are on top of the Mount Everest?Make sure the function ma
Graphical Programming: In Simulink you program in a graphical way. LabVIEW is another programming language where you use graphical programming instead of text-based programming. LabVIEW is developed by National Instruments. You will use LabVIEW in a later chapter Before you start, you
