Transcription
DEPLOYMENT GUIDELoad Balancing Sage X3 ERPv1.1.1Deployment Guide
Contents1. About this Guide. 32. Deployment. 33. Initial Setup. 3Accessing the Loadbalancer.org Appliance.4Licensing Steps.4Setup IP Addressing and Hostname.4Setup Time Zone.5Configuring a Highly Available Pair.5Set System Passwords/Protect Management Ports.6Change System Passwords. 6Firewall Lockdown Wizards. 6Running Lbsecure. 6Ports used by the Appliance. 64. Setting up the Virtual Service (VIP) for Sage X3 ERP. 7Define the Virtual Service.7Define the Associated Real Servers.75. Additional Information. 8Health Checks.8Built-in Layer 7 Checks. 9ACL’s.9Built-in ACL’s. 9Built-in Actions. 10Use built-in ACL’s via WebUI. 10Defining additional Manual Backends.10Setting up additional backends. 10Retaining the Source IP, making things Source IP Transparent.10Setting up L7 TPROXY. 11SSL Offloading.11Setting up SSL Offloading. 116. Testing HA Failover. 11Using the System Overview.12Using the HB Takeover Command.127. Real Server Control. 128. Further Documentation. 139. Technical Support and Assistance. 13Accessing Technical Support.13Generating a Technical Support Download. 13Uploading a Technical Support Download. 1410. Document Revision History. 152 Copyright Loadbalancer.org www.loadbalancer.org sales@loadbalancer.org
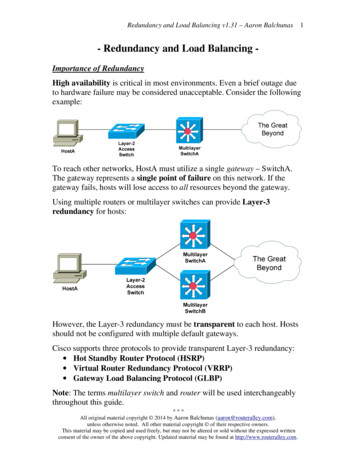
1. About this GuideThis guide details the steps required to configure a load balanced Sage X3 ERP environment utilizing Loadbalancer.orgappliances.2. DeploymentThe following section covers the most common deployment scenario.SNAT mode is used as the default mode of operation. SNAT mode is achieved using a Layer 7 virtual service in HTTPmode. In this deployment guide the load balancer and real servers are in the same subnet, although when using Layer 7the real server can also be remote. When the Loadbalancer.org appliance receives a request from the client it will createa second connection to the real server with the source address becoming a load balancer IP. This creates twoconnections as described below:Client VIPLB Real ServerYou can define the source address used for the connection between LB and Real Server or leave it blank (Default)allowing it to use the load balancer’s base IP address.Note: Should you choose to use a specific source address (SNAT Address) not already on theappliance then you will also need to add this IP address as an additional Floating IP to be used for thistask.3. Initial SetupNote: We recommend using Firefox or Chrome web browsers for maximum compatibility.3 Copyright Loadbalancer.org www.loadbalancer.org sales@loadbalancer.org
Note: The load balancer will have a default IP address of 192.168.2.21/24.Accessing the Loadbalancer.org Appliance1.Login via the console using the following credentials to automatically start the Network Setup Wizard andconfigure the network settings:Username: setupPassword: setup2.Alternatively, open a web browser and use the default IP address:https://192.168.2.21:9443/lbadmin3.When prompted accept the self signed local SSL certificate.4.Login to the WebUI using the following default credentials:Username: loadbalancerPassword: loadbalancer5.Once logged in, you can “Dismiss” the setup wizard prompt as it won't usually be used for this guide.Licensing Steps1.Navigate to Local Configuration License Key2.Now browse to and select the license key file providedSetup IP Addressing and HostnameNote: If you’ve already configured the base interface IP address using the setup utility (logged in assetup / setup) you may be able to skip these steps.1.Navigate to Local Configuration Network Interface Configuration in the WebUI2.Optionally apply any interface bonding settings, configure VLAN tagging and set base interface IP addresses.You may configure multiple interfaces / VLAN’s if you desire a separate management network or more subnets3.Navigate to Local Configuration Routing4 Copyright Loadbalancer.org www.loadbalancer.org sales@loadbalancer.org
4.Configure the IPv4 and/or IPv6 Default Gateway addresses and static routes (Optional)5.Navigate to Local Configuration Hostname and DNS to configure DNS servers and configure a hostname(Optional)Setup Time Zone1.Navigate to Local Configuration System Time & Date2.Select the System Timezone, provide any NTP servers and set the current Date and TimeConfiguring a Highly Available Pair1.Power up a second appliance that will be the slave and configure initial network settings as described earlier2.In the WebUI of the master appliance, navigate to Cluster Configuration High-Availability Configuration3.Specify the IP address and the load balancer user’s password (the default is 'loadbalancer') for the slave (peer)appliance4.Click Add new node5.A warning will be displayed indicating that the pairing process will overwrite the new slave appliance's existingconfiguration, click OK to continue6.The pairing process now commences7.Once complete, restart heartbeat as prompted in the blue message boxNote: The following settings are not replicated between master & slave appliances and must beconfigured on each appliance: Hostname & DNS settings
1. About this Guide This guide details the steps required to configure a load balanced Sage X3 ERP environment utilizing Loadbalancer.org appliances. 2. Deployment The following section covers the most common deployment scenario. SNAT mode is used as the default mode of operation. SNAT mode is achieved using a Layer 7 virtual service in HTTP .