Transcription
Using OnBase15 (Document Imaging System) for Advisinghttp://imaging.naz.edu/Academic Advisement2/9/2016
Who has an electronic file? All freshmen entering in 14/FA and beyond All undergraduate and graduate students entering in 15/SP and beyond Some returning students who entered prior to these terms may have a file if something was scannedWho has access to electronic student files? The staff members of the Registrar’s Office and Academic Advisement Center have access to all electronic student files.Department Chairs have access to the electronic files of all students in their department.Program Directors have access to the electronic files of all students in their program.Advisors have access to the electronic files of all of their assigned advisees (major, second major, minor).What information is available through OnBase?Most of the information that you need for advisement is still available through NazNet such as the program evaluation,Nazareth transcript, student schedule, and profile information.The following additional document types are available to advisors through OnBase: College transcriptsHigh school transcriptsTransfer credit evaluationsAdvising/registration worksheetsStudent petition formsAdd/drop formsStudy abroad approval formsAdvising notesSee OnBase for other document typesYou are strongly encouraged to keep your advising notes in OnBase using the Advising Notes form explained in a subsequentsection.
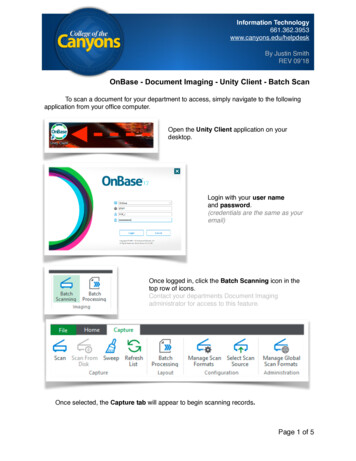
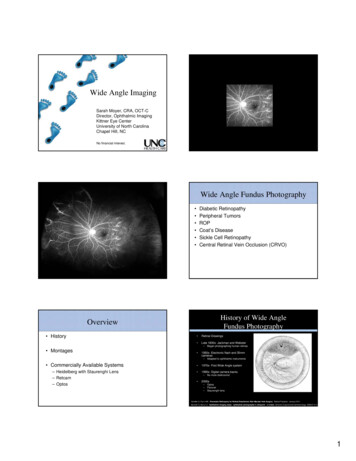
Accessing OnBaseElectronic student files are accessed through the OnBase system. This web‐based system may only be accessed on campus atthis link:http://imaging.naz.edu/Use your My Naz username and password to log in.You must use one of these supported browsers:Internet Explorer (up to v11) ‐ Preferred browserSafari (up to v8)Firefox (up to v38)Logging into OnBase15 on a MACIn order to connect to OnBase15 successfully, Mac users will need to use Safari. If running Safari 9 , UserAgent settings will also need to be adjusted.1) Open Safari2) Go to the following website:http://imaging.naz.edu/AppNet/Login.aspxIf you are running Safari 9 you will receivean error message, indicating that the webbrowser is unsupported.
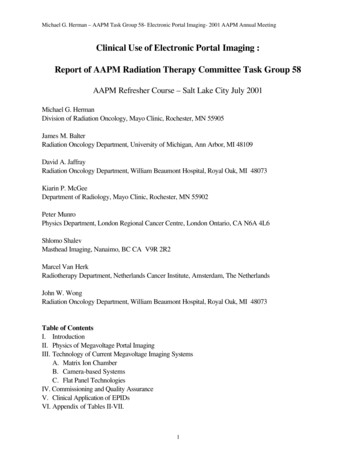
3) Safari - Preferences. Select Advanced. Check box marked “Show Develop menu in menu bar”.4) Optional: Select Security. Uncheck box marked “Block pop-up widows”.5) Close Preferences window.
6) Develop - User Agent - Internet Explorer 9.0.7) Go to the following website: http://imaging.naz.edu/AppNet/Login.aspx8) Click OK when “Failed to load Popup Blocker Assistant ActiveX control” message appears
9) Login to OnBase with MyNaz credentials, verifying that HTML button is selected.10) After exiting OnBase, Develop - User Agent - Default (Automatically Chosen)
Logging into OnBase15 on a PCStep 1: Click on Tools(Gear or wrench icon onyour far top left side ofyour browser.)Find the ‘CompatibilityView settings’ in the drop‐down selection.Step 2: Type ‘naz.edu’ inthe ‘Add this website’dialog box, click on Add.Naz.edu should appear inthe ‘Websites you’veadded to CompatibilityView’ box.
Enter ‘OK’ through all the compatibility warnings.Click on the risk free Install to add‐on the‘Hyland WebControls Files' to the website,or you may get a dial box. Click on “More Options”arrow and on Always install software from “HylandSoftware, Inc”
Useful tip: Save the website to your favorites for future access.
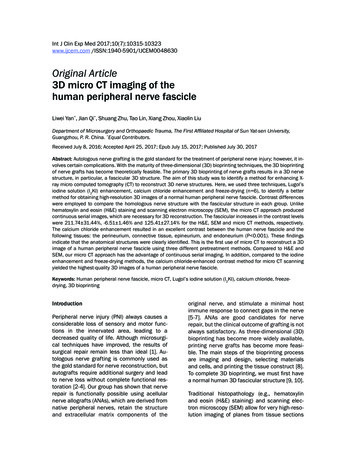
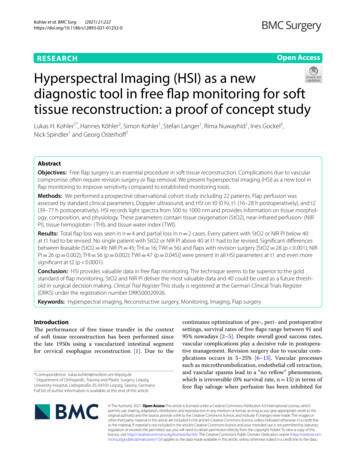
Document RetrievalTo retrieve documents by student folder, click on ‘Folders’ from the Document drop‐down menu. Click on the plus symbol to view all of your studentadvisees’ electronic files.Smart, Suzie - 1234567Doe, John - 1345678Smith, Jane - 1456789Neuss, Gee - 1567891Tastic, Fannie - 100000Wiser, I. M. - 1500000All your advisee records will show asindividual files. Click on the file or plussymbol, to view all documents scannedfor a particular student.
If the system times out before your folders load, try this:1) Select “Folders” from the Documents drop‐down menu (onupper left corner)3) Search for one of your advisees by ID or last name byentering it in the search screen and clicking the Findbutton.4) The student’s folder should show up in the Searchresults panel (bottom left). You may need to adjust thesize of the panes to see it.2) On the bar that says “Folder type” (upper left), click on thesearch icon. It looks like a folder with a magnifying glass onit.Click on the folder tosee the documents.
There are two types of documents that advisors can view, Academic Affairs (AA) documents and Admissions (AD) documents. Academic Affairsdocuments include things like Add/Drop Forms, Petitions, Advising Notes, and AP/CLEP Score Reports. Admissions documents include high schooland college transcripts if applicable.Smart, Suzie - 1234567Doe, John - 1345678Smart, Suzie - 1234567Smith, Jane - 1456789Neuss, Gee - 1567891Tastic, Fannie - 100000Wiser, I. M. - 15000001234567 - Smart, Suzie - 07/22/20141234567 - Smart, Suzie - 07/23/2014Smart, Suzie - 1234567This student’s folder is openAcademic Affairs (AA) documents (Add/Drop Forms, Petitions, AdvisingNotes, AP/CLEP Score Reports, etc.) will display in this Documents area.Double click on a document to open it.Admissions (AD) documents (high school and college transcripts) need tobe accessed through a subfolder in this area. See next page.
1234567 - Suzie Smart - 08/18/2014Smart, Suzie - 1234567Doe, John - 1345678Smart, Suzie - 1234567Smith, Jane - 1456789Neuss, Gee - 1567891Tastic, Fannie - 100000Wiser, I. M. - 15000001234567 - Smart, Suzie - 07/22/20141234567 - Smart, Suzie - 07/23/20141234567 - Smart, Suzie - 08/15/20141234567 - Smart, Suzie - 08/18/2014Smart, Suzie - 1234567To view Admissions documents (i.e., high school and college transcripts),double click on the student’s folder in the area on the lower left. Alladmissions documents will now display on the Documents area. Double clickon the document you wish to view. It will open in a window on the right.Note about printing:Although you are discouraged from printing from the Imaging System, if you need to print something, open the document and right click on it.Select Print.
Adding a Sticky Note to a Document1234567 - Suzie Smart - 08/18/2014Tool Bar AreaTo view other sticky notescreated for a document, clickon the sticky note icon withthe magnifying glass.Double clickEnter notes hereTo add additional information regarding a scanned document, double click on the sticky note icon with a plus sign in the tool bar area, then doubleclick on the Advising Note in the Add Note prompt. Enter your text. The sticky note will have a time and date stamped. To delete a note, right clickon the note on the document and select Delete Note. To search for prior sticky notes created or view all sticky notes at once, click on the sticky noteicon with the magnifying glass. Please do not delete notes that you did not create.
General Advising NotesWe recommend that you document your advising sessions through OnBase. A special electronic form has been created for you to log your advising notes.The first time you create an advising note for each student, select New Form from the Custom Queries drop‐down menu. Select the AA Advising Notes form bydouble clicking on it.
General Advising Notes (continued)You MUST enter the student ID# in the form for it to be indexed properly. (NOTE: To locate your advisees’ ID numbers, go to the Faculty menu on NazNet and clickon “Advisees”. Select the appropriate term from the drop‐down menu. You will get a list of your advisees with ID numbers.)This is a required field. Enter the studentID and hit the TAB button to populate theother fields.In this area, enter the date, your notes and your initials.IMPORTANT! Click the ‘submit’ button at the bottom of the page whendone. This creates a document with an AA Advising Notes document type.The next time you want to add advising notes to the student’s file, you canretrieve the document that you created from the student’s folder usingthe retrieval method described in the previous section and selecting theAA Advising Notes document. Enter a new date, your notes and initials.This way, all advising notes will be logged in one place.NOTE: You can copy and paste email correspondence between you and an advisee into the Advising Notes form and then hit Submit.
Uploading Advising Emails or Other Electronic Documents to OnBase (Optional)In order to upload an email or other electronic document (i.e., academic program plan) to OnBase, you should save it as a pdf document first.To save email documents as a PDF, select the Print icon of your email. (Continued on the next page)In the Print option box, click on ‘Change ’ in the Destination area. A Select a destination dialog box should appear. Select the ‘Save as PDF’ option.(Continued on the next page)Wise Guy wguy0@naz.edu
Wise Guy wguy0@naz.edu In the Destination area, click on Change. Then in the Select a destination box, click on Save as PDF. (Continued on the next page)
In the Print option box, click on ‘Save’. A Save As dialog box should appear. Change the file name if you prefer, and save the email to your Desktopor any other folder for later retrieval. Click on ‘Save’. (Continued on the next page)Suzie SmartWise Guy
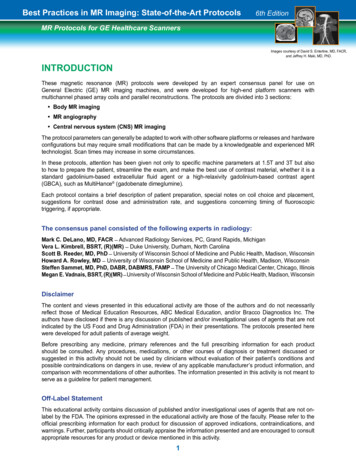
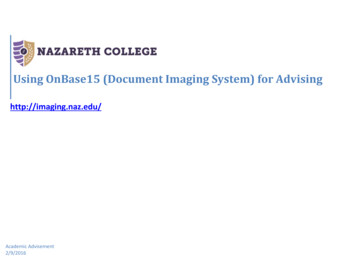
Upload or Import PDF Documents to OnBaseAfter you saved your email or document as a PDF, log into OnBase. On the Document Retrieval drop‐down menu, select Import Document. To findthe document to import, click on the Browse button, and find your File Path for the PDF document you saved in your computer. Under theDocument Types select the correct type of document you are uploading. It is important to select the correct type of document for future retrieval.Drop‐down menu option for a selection document typesBe sure to select the correct type!
Enter the Naz student ID (this will auto generate the information for the student). Click the Upload button at the bottom of the Import Documentsbox to save the document. If OnBase received the upload, the words ‘Import Succeeded’ should appear above the Document Queque / Browse areaat the top of the box. You can search for the document by type or go to your student’ folder and find it under the documents uploaded for youradvisee. The document is now in OnBase. You can retrieve the document. You can go to your student’s folder and find it under the documentsuploaded for your advisee.‘Import Succeeded’ messageEnter the student Nazareth IDMust be accurate!Upload button
Exiting OnBaseTo close out of OnBase, click on log out at the top of the screen, below the OnBase logo and next to your username.
Notes:
Although you are discouraged from printing from the Imaging System, if you need to print something, open the document and right click on it. Select Print. To view Admissions documents 1234567 - Smart, Suzie