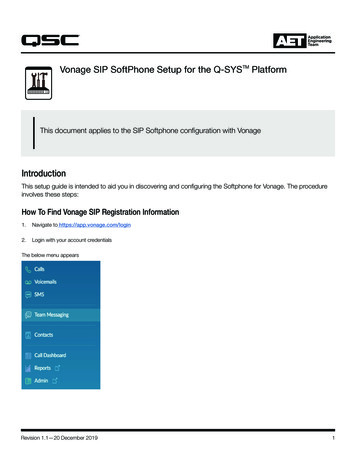
Transcription
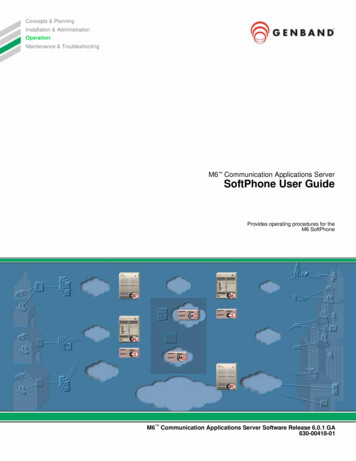
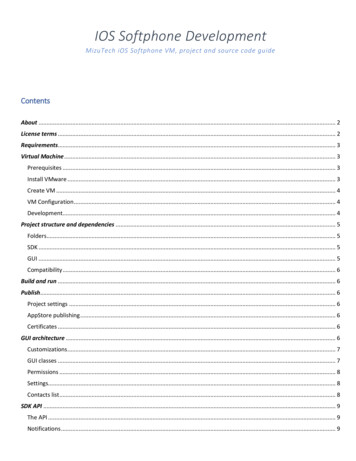
IOS Softphone DevelopmentMizuTech iOS Softphone VM, project and source code guideContentsAbout . 2License terms . 2Requirements. 3Virtual Machine . 3Prerequisites . 3Install VMware . 3Create VM . 4VM Configuration . 4Development. 4Project structure and dependencies . 5Folders. 5SDK . 5GUI . 5Compatibility . 6Build and run . 6Publish. 6Project settings . 6AppStore publishing . 6Certificates . 6GUI architecture . 6Customizations . 7GUI classes . 7Permissions . 8Settings. 8Contacts list . 8SDK API . 9The API . 9Notifications . 9
Important tasks . 9Push notifications. 9CallKit . 9In-App Purchase . 9Error handling . 10Customization/branding . 10Change the login page (setup page) . 11Change the main page (num pad). 11Add a new setting . 11Remove a setting . 11Change launch image . 11Translate . 11Test. 12Prepare VM . 12MBuilder. 12Miscellaneous . 15VM Cleanup . 16Objective-C . 16Support . 18Resources . 18AboutMizuPhone for iOS is a simple to use SIP softphone for iPhone, iPod and iPad devices based on PJSIP and Siphon. The iOS SIP softphone can be usedwith in any SIP networks, with any SIP server, PBX or softswitch.Aside from the public and customized versions, we can also provide the source code to our customers as a ready turnkey project so you can furthercustomize, modify or improve the softphone after your needs.In this guide, we will provide all the necessary information on how to start development with the iOS softphone.License termsThe Mizutech iOS softphone source code is a confidential material.We (Mizutech SRL) provide the source code of the iOS softphone for your organization (as an individual, company or any organization), under thefollowing terms: Title, ownership rights, and intellectual property rights in the Software shall remain with MizuTech and/or its suppliers. The agreement and the license granted hereunder will terminate automatically if you fail to comply with the limitations described herein. Upontermination, you must destroy all copies of the Software You can use the source code to develop your own iOS application.
We reserve all rights regarding the source code. The iOS source code constitutes valuable copyrighted intellectual property and you will notbecome the owner of the software.We can provide the source for your organization only as a confidential material to fulfill your own app development requirements.You are allowed to use the source code only for your organization internal needs. Any kind of distribution of the source code is strictly forbidden.No right is granted to sell, resell, rent, distribute, make available, publish or otherwise transfer the source code. The source code must never leakout of your organization.The softphone is based on PJSIP, which is licensed under GPL or proprietary. By using the source code or the virtual machine provided byMizutech, you must also agree with the PJSIP license terms.You shall not employ source code in any way that competes either directly or indirectly with us including but not limited to creation of derivativeworks that compete either directly or indirectly with our MizuPhone software.You shall not sell or offer as a service the derivative works for other companies, organizations or individuals.The source code and the virtual machine is provided "as is" without any warranty of any kindBy opening or coping the source code files, you agree with all the above terms.Otherwise, you must immediately delete all copies of the MizuTech virtual machine and all the source code from all your computers.Requirements1.2.3.4.Familiarity with MacOS, Objective-C and iOS development knowledgeMacOS virtual machine image from Mizutech with the turn-key MizuPhone projectAlternatively, your own MacOS with a new version of XCode (which is often required for publishing) might not work on older versions ofMac OS.a. Register an Apple Developer Account.b. Download and install the latest version of XCode. This will install also the latest version of iOS SDK.c. Download the iOS softphone project sourceOpen XCode and import the project: File menu - Add Files to - locate and open “MizuPhone.xcodeproj” file.Virtual MachineThis chapter is useful only if you received a developer virtual machine image. Otherwise, please skip this chapter.MizuTech can provide a turnkey virtual machine with everything configured for the iOS softphone development.This section describes how to configure and launch the development environment VMware image. The virtual machine contains a completely setupand working environment for iOS softphone development; just download the VMware image, run it and you are ready to develop and publish iOSsoftphone to App Store.Prerequisites-A PC running windowsVMware Player or VMware WorkstationDeveloper Mac image form MizutechIf you do not like VMware, you might convert the virtual machine image to other format such as VirtualBox, but that might require some additionaltweaking to work with the MacOS guest and in this guide, we are using VMware only.Download the virtual machine image first from Mizutech. If compressed, unzip it (usually compressed with zip).The steps required to run the MacOS developer virtual machine are described below:Install VMwareFollow the steps below on your host PC:1.2.3.Install the VMware player or workstationUnzip the Developer Mac image downloaded form MizutechPatch VMware to be able to run Mac OS:a. Make sure VMware is closed
b.c.d.Navigate to “vmware-unlocker” which can be found in the downloaded imageRight click on “win-install.cmd” - Run as administratorWait a few minutes until the operation is finished (the command line widow will close)Create VMFollow the steps below to create the guest MacOS virtual machine:1.2.3.4.5.6.7.Launch VMware and click File menu - New virtual machine.On the first page of the wizard select Typical and click Next.On the Guest Operating System Installation page click I will install the operation system later and click Next.On the Select a Guest Operating System page select Apple Mac OS X for the operating system and select macOS 10.14 form the dropdownlist. Click Next.On the Name the Virtual Machine page give a name to your machine and select the location for this machine. Click Next.On the Specify disk capacity page just click Next. We will replace this disk anyway in the following steps.Click Finish.VM ConfigurationFollow the steps below to edit the virtual machine settings:1.2.3.4.5.6.Go to VM menu - SettingsOn Hardware tab:a. Select Memory and give it at least 4GB of system memory.b. Select Processors and set the number of processors and processor cores based on your hardwarec. Select USB Controller: for USB Compatibility select USB 2.0 and check Show all USB input devices checkboxOn Hardware tab select Hard Disk:a. Click Remove.b. Click Add.c. On Hardware Type page select Hard Disk and click Next.d. On Select a Disk Type page leave the recommended settings and click Next.e. On Select a Disk page select Use an existing virtual disk and click Next.f. On Select an Existing Disk page click Browse and select the virtual machine that you have downloaded from Mizutech and clickFinish.g. If a popup appears asking “Convert existing virtual disk to newer format?”, just click “Keep existing Format”Click OK on the bottom of the Settings page.Navigate to your virtual machine files on your hard disk and find the file with extension “vmx”a. Open this file with Notepadb. Go to the end of the file and add the following text in a new line: smc.version "0"c. Save the file and close it.Adjust the Network and other settings after your needs.We have finally finished setting up the Mac OS development virtual machine. Just start the virtual machine.For the MAC machine the login (admin) username is “Mizutech” and the password is “mizutech”.We do not recommend installing any upgrades as this might result in unbootable virtual machine - unless if new OS or XCode version is enforced byApple. We also upgrade the virtual machine image usually once a year.DevelopmentAfter the virtual machine started and you have logged in using “mizutech” password we are ready to start development. A shortcut to the MizuDemoand or to MizuPhone iOS softphone project directory can be found on the desktop or under the Apps shortcut.Note: files and folders name might be slightly different depending on the source code type (softphone source, SDK source, etc) and version.Go to project directory and open MizuDemo.xcodeproj.MizuDemo can be installed and launched from XCode on an iOS device or on iOS Simulator.
Launch on device1.2.3.Connect your iOS device to you PC using your USB-Lightning cableIn VMware click VM in the top menu bar - Removable devices - Apple iPhone - click Connect(Disconnect from host)In XCode select your device and click Run.Launch on Simulator1.2.To run on Simulator we need to change a few things:a. Go to MizuDemo project directory and rename pjproject-svn X64Simulator to pjproject-svn (rename original pjproject-svn tosomething else)b. In XCode click on MizuDemo project in the left pane, go to Build Settings and change Valid Architectures from armv7 arm64 tox86 64Select the Simulator in the top-left corner in XCode and click Run.Do not forget to reverse the above described changes to be able to run the project on a device or to be able to publish it.Project structure and dependenciesThe project consists of the modified and prepared PJSIP communication library and the user interface.FoldersThe most important folders are the followings:o Apps: root foldero pjproject-svn: PJSIP library built for iOS (the ARM version by default)o pjproject-svn X64Simulator: PJSIP for x86/x64 (rename to pjproject-svn if you need this)o Siphon2: contains all the GUI related files and resources (if not exists, then the Apps folder)o Classes: source code, requiredo Mizu: source and iconso MizuPhone SDK.xcodeprj: the test project to be openedo Other: pjsip APIo Resources: project resourceso Sounds: sound resourceso Settings: settings app (will generate Settings.bundle; not needed)o Settings.bundle: settings appo SiphonSettings.xcodeproj: settings app projecto MizuPhoneNew: generated app icons and launch imageso build: auto generated (not relevant, might be missing)o G729: not needed but can be kept if later modifications are requiredo GoogleMobileAdsSDK: not needed but can be kept if later modifications are requiredo Info.plist: test project plistThe pjproject-svn and the GUI project (Siphon2 or other) folders must be in the same directory, otherwise you will have to change the paths to PJISPlibrary.Note: You might not receive all these folders or the folder names might be slightly different in your deliverable, depending on your license, order andversion.SDKFor the SIP stack, the PJSIP library is used. The library is compiled for iOS arrmv7 and arm64 architectures. G729 and Opus codecs and other patchesare also added to the library.A detailed SDK specific guide can be found here.GUI
As mentioned above, all the user interface related files are located inside the Apps folder, usually in the “Mizu” or “Siphon2” directory. This isbundled in an XCode project named: “MizuPhone.xcodeproj”. The project is written in Objective-C and C languages.CompatibilityThe softphone is backward compatible including iOS 8. It can run on both armv7 and arm64 architecture devices.Build and runConnect an iOS device to your Mac and click Build and Run button. The application will be installed on the device. On first start, the Setup page will bedisplayed where the user can enter his/hers SIP login details.PublishYou can publish MizuDemo or MizuPhone under your own brand name (MizuDemo and MizuPhone is already used by MizuTech, rename your app toyour own brand name).Project settingsooooootarget: armv7 amr64def custom.h (config)SettingsForCustomized.bundle / SettingsMizuPhone.bundle - rename to Settings.bundleXCode - Preference
IOS Softphone Development MizuTech iOS Softphone VM, project and sou
