Transcription
Interwrite Workspace 8.5Getting StartedTechnology Department0910/2009
TABLE OF CONTENTSOpening Interwrite Workspace 8.5 . 4Interwrite Workspace Toolbar Overview . 5More on Customizing Your Toolbar . 7Removing Tools from a Toolbar . 8Custom Schemes . 8Calibrating the Board . 9Opening an Existing Document . 9Personalizing Your Picture Gallery. 11Using eInstruction Device Manager . 12Using Device Manager Icons . 13File Menu . 14Exiting Device Manager. 14Connecting Devices to Workspace . 15Using Device Manager General Properties . 16Using Page Sorter . 18Using the Pen Tool . 19Using the Shapes Tool. 20Using the Line Tool. 21Using the Picture Pen . 22Using the Selection Tool . 23Using Presentation Tools: Curtain and Spotlight . 24Using the Text Tool. 25Using the Fill Tool . 26Moving Images to Background . 27Using the Capture Tool . 28Creating a Blank Page . 29Create Gradient Page . 30Creating a Grid Page . 32Using the Eraser Tool . 33Using Exam View . 34Adapted from the Interwrite Workspace Tutorials and C:\Program Files\eInstruction\Interwrite Workspace\Help\wsENU\workspace.htm2
Using the Freehand Text . 36Using the Stamper ToolUsing the Interwrite Workspace Gallery . 37Using the Interwrite Workspace Gallery. 38Finding Images in the Gallery . 39Using SIMS . 40Using the Highlighter Tool . 41Using Layers . 42Using Various Modes in Interwrite Workspace . 43Using Annotate Over Desktop Mode . 44Using Office ModeUsing Office Mode Tools . 45Using Office Mode Tools. 46Using the Multi User Functionality. 47Using Record and Playback . 49Using the Student Response Menu . 50Selecting an SRS . 50Locating the SRS Within the Toolbar . 51Using the Compass . 52Using the Protractor . 54Using the Ruler. 55Using the Triangle . 56Interactive Whiteboard Troubleshooting Checklist . 58Using Workspace Online HELP . 62More Online Assistance: . 62References . 62Adapted from the Interwrite Workspace Tutorials and C:\Program Files\eInstruction\Interwrite Workspace\Help\wsENU\workspace.htm3
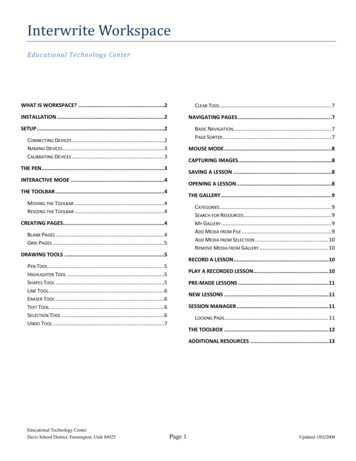
Opening Interwrite Workspace 8.51. Double-click on the Interwrite Starter icon on your desktop.2. Click on the eInstruction Tools icon at the bottom right corner of your desktopand select Workspace.#1#23. The (default) Intermediate toolbar will appear on your desktop (in vertical view).#3#44. Click on the Create Blank Page icontoolbar) to create a new page.(about the 14th icon from the top of theAdapted from the Interwrite Workspace Tutorials and C:\Program Files\eInstruction\Interwrite Workspace\Help\wsENU\workspace.htm4
Interwrite Workspace Toolbar Overview(Default Intermediate)IconTool NameDescriptionApplicationMinimize ToolbarShows or hides the main toolbarWorkspace MenuOffers quick access to the options most often usedMouse ModeSwitches modes and displays the desktopOpens items on the desktopLesson ModeIs the primary operational modeUses mouse & annotation toolsSelectionSelects the desired target, text, or imageGrabs and manipulates itemsPenCreates freehand annotationsWrites or draws on the pageHighlighterEmphasizes important passages in textHighlights anythingEraserRemoves selected informationClears selected text/objectsShapesDraws a varitey of geometric shapesCreates shapesLineDraws different types of line styles, width, & colorsDraws lines on the pageTextAdds a text box to the pageAdds typed-textUndoReverses the last or series of operations/entriesUndoes the latest operationClearRemoves text and images on the current pageDeletes selected object(s)Create Blank PageAdds a new page to the presentation fileCreates a new pageCreate Grid PageAdds a new grid page to the workspace fileCreates a new grid pageGalleryContains teaching resources, images, and simulationsInserts selected images/SIMSPrevious PageSelects the previous pageGoes to the previous pageNext PageSelects the next pageGoes to the next pagePage SorterDisplays thumbnail images of all pages within the fileDuplicates, deletes, merges,views, renames, exports pagesSaveSaves the currently open file to the selected directoryToolboxDisplays tools not available on the main toolbarContains seldomly used toolsStudent ResponseSystem FunctionsDisplays when a student response system (clicker) isinstalledCreates, poses, and editsquestions to use with clickersExitExits Interwrite WorkspaceCloses Interwirte WorkspaceAdapted from the Interwrite Workspace Tutorials and C:\Program Files\eInstruction\Interwrite Workspace\Help\wsENU\workspace.htm5
Quick Overview: Click on the Workspace Menu icon and select the following:Preferences, Customize Toolbar, Current, and Advanced.Mouse ModeMinimize ToolbarAnnotate Over DesktopSelectionLesson ModeWorkspace MenuOffice ModePenFreehand TextFreehand ShapeMulticolor PenPicture Pen (Add Picture)HighlighterLineFillTextClearCurtainRecord and PlaybackRulerTriangleCreate Grid pagePrevious PagePage SorterToolboxLink HistoryExitShapesStamper (Add picture)EraserUndoCapture (Freeform)Gallery (Exam View, Special Needs, Video & Lessons)CompassProtractorCreate Blank PageNew Page Setup (Create Gradient page)Next PageSaveStudent Response System FunctionsImport from Devices*New Tool or IconPlease note that your toolbar fades to be less obstructiveAdapted from the Interwrite Workspace Tutorials and C:\Program Files\eInstruction\Interwrite Workspace\Help\wsENU\workspace.htm6
More on Customizing Your ToolbarUse this Preferences selection to organize, add, and remove tools on your Toolbar andin your Toolbox. The Current pane lists the tools in the selected scheme. The tools arelisted as they would display in the tool, preferences, and the right-click toolbar.The table below describes the toolbar scheme options.Toolbar SchemeBasicIntermediateAdvancedDescriptionBasic set of commonly used toolsDefault setting. Includes the most commonly used pens and set upoptions on the toolbarIncludes more graphically oriented options on the toolbarAdding ToolsComplete the following steps to add a tool from the Main Toolbar, the Toolbox, or theRight-Click Toolbar.1. Locate the tool you want to add in the Available Tools field.2. Select the tool with the mouse or Interwrite Pen.3. Drag the tool to the location you require. Repeat until you are finish adding ormoving the tools you need. Click OK. The tools are saved in their new location.Adapted from the Interwrite Workspace Tutorials and C:\Program Files\eInstruction\Interwrite Workspace\Help\wsENU\workspace.htm7
Removing Tools from a ToolbarComplete the following steps to remove a tool from the Main Toolbar, the Toolbox, orthe Right-Click Toolbar.1.Select the tool to be removed with the mouse or Interwrite Pen.2.Drag the tool away from the box where it is displayed. Repeat until you are finishremoving the tools.3.Click the Remove All button if you want to delete all the tools from the CurrentTools list.4.Click OK. The tools are removed from the Toolbar, Toolbox or right-ClickToolbar.Custom SchemesAfter moving tools to the desired locations, you can save it to a custom scheme.Saving a Custom SchemeClick Save Scheme. The Enter Name window opens.Type the name of the new scheme and click OK.The new scheme is added to the Scheme drop-down list.Deleting a Custom SchemeSelect the custom scheme to be deleted from the Scheme drop-down list. Click DeleteScheme. The custom scheme is deleted.Adapted from the Interwrite Workspace Tutorials and C:\Program Files\eInstruction\Interwrite Workspace\Help\wsENU\workspace.htm8
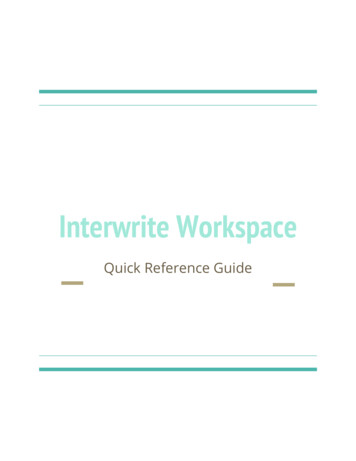
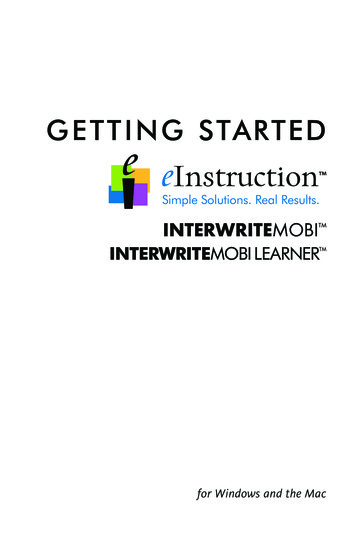
Calibrating the BoardThere are three ways to calibrate your Interactive board. Calibrate yourboard when you wish to align the position of the pen relative to theprojected image on the surface of the Interwrite board.1. Click on the “Calibrate” hot spot on the right side of yourInteractive board and tap on each of the nine bull’s eye target(See Figure 1)2.3. Double-click on the eInstruction Tools icon. SelecteInstruction Device Manager , click on the Calibrate icon ,and use the Interwrite pen to tap each red calibration point as itbecomes visible on the blue screen.Figure 1#2#14. Click on the Workspace MenuCalibrate icon#3. Select Device Manager Click on theor select Options and Calibrate.Recalibration is required when either the Interwrite Board or the projector has been moveOpening an Existing DocumentAdapted from the Interwrite Workspace Tutorials and C:\Program Files\eInstruction\Interwrite Workspace\Help\wsENU\workspace.htm9
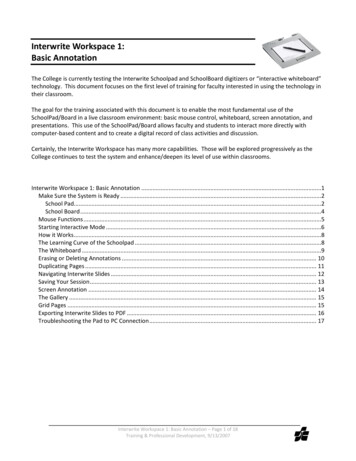
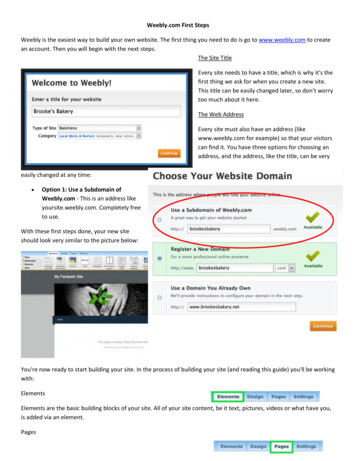
If this does not work 5. Once the Workspace is opened, either6. Right click on the menu toolbarOR7. Click on the Workspace menu (3rd icon on the menu bar)8. Click on File9. Then click on Open and navigate tothe folder that has your Interwritefile(s)Adapted from the Interwrite Workspace Tutorials and C:\Program Files\eInstruction\Interwrite Workspace\Help\wsENU\workspace.htm10
Personalizing Your Picture GalleryYou can add your own images and backgrounds to the Gallery. Your pictures will beimmediately available from the main toolbar. Your frequently used pictures, graphs,charts, tables and organizers should be considered for placement in the Gallery.Interwrite supports the following file formats: JPG, JPEG, BMP, GIF, DIB, RLE, EMF,WMF, TIFF, and PNG. Compressed pictures work best. Open the Gallery from the Interwrite Workspace toolbar. Select a Category. This is where you want the picture to bestored.o Note: You can add a new category. Click on the NewCategory button. Type the name of the new category andhit the enter key or right-clicking an existing category. Select Add Files to Category button. The Add File(s) to Gallerywindow will open. Find and select the picture you would like to add to the Gallery. Click on Open to add the picture to the category. Your image will now be a part of the Interwrite Workspace Galleryand can be accessed directly from your toolbar.To use a picture as a background: Right click the picture that you wouldlike to use as a background. Select Properties. Click the box Use picture asbackground. Click on OK to close the window. Theright corner of the image will now beturned down to indicate that it is abackground picture.You can add an image or Workspace Page to the Gallery. Click on the Add to Galleryicon on the bottom of the Workspace toolbar. Select Add Current Page to Gallery toadd the entire page or select Add Selection to Gallery to add a selected image.Adapted from the Interwrite Workspace Tutorials and C:\Program Files\eInstruction\Interwrite Workspace\Help\wsENU\workspace.htm11
Using eInstruction Device ManagerDevice ManagerTo open the Device Manager main window, select the eInstruction Toolsicon on the far right bottom of your computer and select eInstruction DeviceManager.The Device Manager main window allows you to connect devices, viewproperties, lock or unlock pads, identify connected devices, and performother management functions.The following menu options are available from this window.File Menu Setting Preferences Exiting Device ManagerOptions Menu Add Bluetooth Discover Lock All Pads Connect Remove Device Beep Calibrate Set Presenter Set Autoconnect PropertiesHelp Menu Setting Logging Options Viewing the About WindowAdapted from the Interwrite Workspace Tutorials and C:\Program Files\eInstruction\Interwrite Workspace\Help\wsENU\workspace.htm12
Using Device Manager IconsAddBluetoothIconConnect rdLock ropertiesUsed ToAddBluetoothLocate and connect Bluetooth devices to the Workspace software.Connect orDisconnectDeviceDisconnect the device or devices from communicating with Workspace.The icon changes depending on which device is selected.RemoveDeviceRemoves device from the Device Manager.BeepIdentify a specific Interwrite Device listed but not given a unique name.Select a device in the Devices list window. Click Beep to make the devicebeep.CalibrateBoardAlign the Interwrite Pen position relative to the projected image on theInterwrite Board's surface. Use the Interwrite Pen to tap each whitecalibration point as it appears on the blue screen.Recalibration is required when either the Interwrite Board or the projectorhas been moved.Lock orUnlockDevicePrevents all connected devices from inputting to the current session.Locked Pads remain connected unless they are powered off. This tool is atoggle. As the Unlock Pads tool, it can be used to activate, or unlock, thelocked Pads.Allows for a specific device to control the interaction of Workspace and hascontrol over the other connected Interwrite Devices in a session. Select adevice in the Devices list window. Click Select Presenter to activate thedevice.Connects pre-selected devices when Device Manager is activated. Anydevice that does not connect after three attempts must be manuallyconnected using the Connect button. Select the checkbox next to eachBluetooth-enabled device to connect automatically.Select s the Properties window for the selected Interwrite Device.Adapted from the Interwrite Workspace Tutorials and C:\Program Files\eInstruction\Interwrite Workspace\Help\wsENU\workspace.htm13
File Menu Setting Preferences and Exiting Device ManagerThe Preferences window determines the default language for Workspace, as well asBluetooth connection defaults and novice settings.Use the table to determine your preferences.FieldActionLanguageUse the drop-down list box to select the language you need Workspace todisplay.ClearBluetoothDevices ListSelecting this checkbox clears all Bluetooth connected devices after eachWorkspace session. When Workspace is reopened, you will have torediscover and reconnect all devices.Show FirstLookwindow atStartupIf selected, displays a window that helps novice Workspace users withconnecting devices to the Device Manager.Exiting Device Manager Right-click the eInstruction Device Manager icon. The Device Manager Menu opens.Select Exit. The Device Manager application closes and removes the Device Managericon from the Task Bar. To Exit Device Manager from the Main Device Manager MenuAdapted from the Interwrite Workspace Tutorials and C:\Program Files\eInstruction\Interwrite Workspace\Help\wsENU\workspace.htm14
While in the Device Manager Main window, select File Exit.The Device Manager application closes and removes the Device Manager icon from theTask Bar.Options Menu Add Blue
Adapted from the Interwrite Workspace Tutorials and C:\Program Files\eInstruction\Interwrite Workspace\Help\wsENU\workspace.htm 10 If this does not work 5. Once the Workspace is opened, either 6. Right click on the menu toolbar OR 7. Click on the Workspace menu (3rd icon on the menu ba