Transcription
Interwrite WorkspaceQuick Reference Guide
Table of ContentsIntroductionIntroduction to Workspace3Calibrating your Board4ToolbarsInterwrite Toolbars5WorkspaceModes7Window9Main Menu12File Menu13Edit Menu14Pages Menu15Help Menu16Annotate & Lesson Mode172
Introduction to Workspace Teach as with a traditional chalkboard, vary the paceof your presentations and deliver practical trainingsessions. Write and draw, then erase, just as you normallywould. Save your pages as a flipchart file, then retrievethem for use with a different class, or in anotherclassroom. Add pictures, movies and sounds to your lesson’sflipchart pages. Quickly structure your lesson content and timing tomatch your lesson plan. Add text, for ex. from Microsoft Word , or directlyfrom the Internet. WorkSpace can even recognizeyour writing and convert it to text. Use simple but effective tools to stimulate thought,engage your students and focus their attention.3
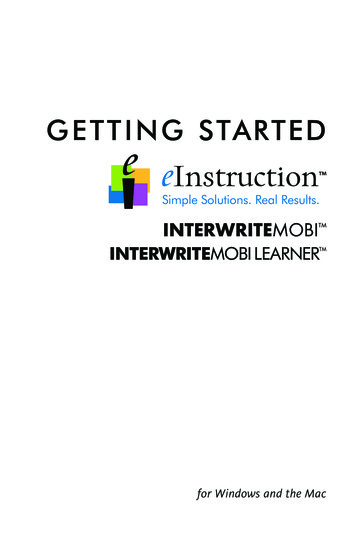
Calibrating Your BoardKeeping your boardcalibrated is alwaysimportant for the pen totrack correctly at theboard.Make sure to goto the bottom righthand corner ofyour screen andlook for theeinstruction deviceManager icon.4
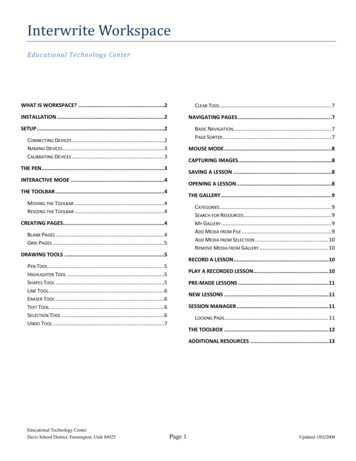
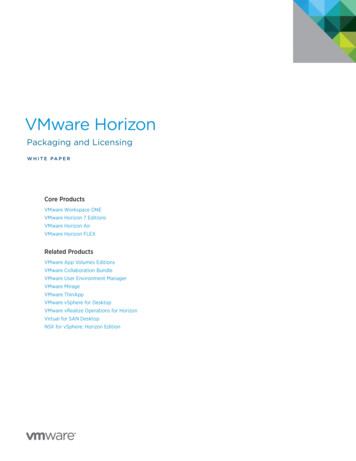
Interwrite Toolbars5
To move the toolbar: Position the cursor atthe top of the toolbarnear the WorkSpaceicon and then click anddrag to the desiredlocation.ToolbarsTidbits of information To resize the toolbar: Position the cursor atthe edge of the toolbaruntil a double-headedarrow appears andthen click and drag toresize. The WorkSpacetoolbar will becometransparent if not inuse. Click anywhere onthe toolbar toreactivate it.6
Workspace ModesWorkSpace allows you to capture text, graphics, or virtually any image fromany application that you can project from your computer. The software iscategorized into six "modes," each consisting of different capabilities.B y default, WorkSpace opens in Lesson Mode. In Lesson Mode,WorkSpace takes a screenshot of the desktop allowing you toannotate over the static image - write, draw, insert images,highlight, interact with, and annotate over prepared material. Ablank page can be used as a whiteboard in a lesson without leavingthe WorkSpace presentation.In Mouse Mode, the internet can be accessed using the Mouse tool.Additionally, select any of the annotation tools while in Mouse Modeto change/return to Lesson Mode.By selecting Annotate Over Desktop Mode, the desktop is turnedinto a canvas. Use the Annotation Tools, Page Tools or Capture Toolsto write and draw on the desktop.Multi-User Mode allows two or more participants to interact withTurning Technologies whiteboards using collaborative (shared) ordefined (one person per defined area) space. Multiple Mobi devicescan be displayed on the whiteboard at the same time.7
Workspace ModesOpen and interact with Microsoft Office applications directlyfrom the WorkSpace software in Office Mode.All notes made on the whiteboard can be captured andsaved as pages within WorkSpace for distribution, without the use ofthe projector in Whiteboard Mode.8
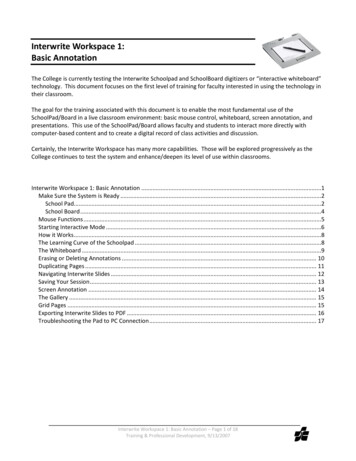
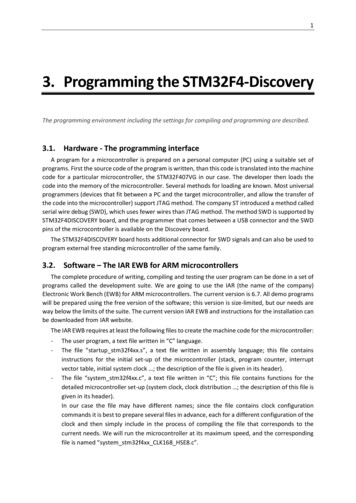
Workspace WindowThe WorkSpace Window consists of a page in thepresentation file and several toolbars on the rightside and bottom of the window. By default, thewindow can be sized and moved.9
Workspace Window ContinuedThe Toolbar displays when WorkSpace is opened in Lesson Mode.The default toolbar scheme is set to Intermediate.The Page Navigation Toolbar displays the tools used to navigatethrough the presentation file, including the Pan Page, Previous Page,Page Counter, Next Page and Multi-User Mode tools.Click the Extend/Scroll Page arrows to extend the page.The Properties Bar provides options to change the properties ofthe selected annotation tool (pen, highlighter, shape). For example,the pen tool Properties Bar includes color, width, transparency, lineends and line styles.The Properties Bar also contains the PageProperties, including backgrounds, color and transparency, whichcan be accessed by clicking the Selection tool on the WorkSpaceToolbar.10
Workspace Window ContinuedTo the left of the Properties Bar is the Layers Toolbar. The Layerswindow appears when using the Layers Toolbar. By default, allannotations on a page are arranged in a single layer. Add, delete,show, hide, and arrange different layers.Use the Recycle Bin to delete selected objects from the page. Dragthe selected object and drop it in the Recycle Bin. Click the Undotool to retrieve objects dropped into the Recycle Bin.11
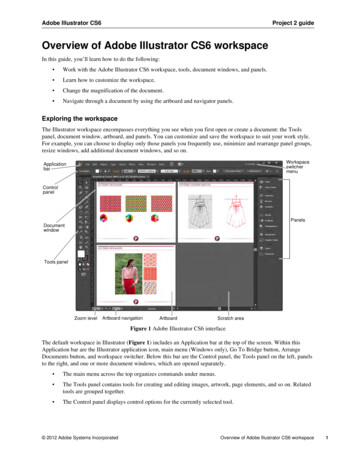
Workspace Main MenuThe WorkSpace toolbar Main Menuicon reveals a list ofsub-menus. The following provides an overview of eachavailable menu.The File Menu provides options for saving and distributingWorkSpace presentation files.The Edit Menu provides options for the WorkSpace editingtools. The tools are only active when WorkSpace is inAnnotation Mode and when the Selection tool is active.The Tools Menu is displayed when the Toolbox is selected. Itdisplays the less frequently used tools.The Pages Menu includes the page creation tools such asCreate Blank Page, Create Grid Page, Create Image Page,Create Calendar Page, Gradient Page, Create Duplicate Pageand New Page Setup.The Help Menu opens the WorkSpace for PC User Guide andthe following options: Check for Updates, Register Online andAbout.12
File MenuNew - Create a new presentation file.Open - Open an existing presentation file.Save - Save the current presentation file. You will be promptedto save the presentation when you close the file or exitWorkSpace. The Save function is also available on the DualBoardFeatures Menu. Save As - Save the presentation file with a different file name. Close - Close the presentation file. Print - Print the presentation file. Export - Export the current presentation file to a WorkSpacefile (GWB) or a common file format (IWB). For moreinformation, refer to Distributing Files. E-mail - E-mail a presentation file. Before the message form isdisplayed, you are given the option to e-mail the selected fileeither as a GWB file, or as a PDF file. The recipient must haveInterwrite WorkSpace installed in order to view a GWB file.Make your selection and click the E-mail icon to display ane-mail message form with the attachment already in place. Export PDF File - Export the currently opened presentation fileto PDF. By default, the PDF file is saved in theDocuments\Interwrite WorkSpace\Export folder.NOTEPresentation files are automatically saved and titled as the currentdate and lesson number: e.g., August 1, 2016 1.GWB 13
Edit Menu Undo - Use this option to undo the most recently performedaction.Redo - Use this option to redo the last undo action. The tool isunavailable until something has been undone.Cut - Remove the selected object or objects with the Cut option.Cut is only available when one or more objects have beenselected. Objects that are cut are moved to the Clipboard,making them available for pasting. Alternatively, press Ctrl Xon the keyboard to cut an object or objects.Copy - The Copy option duplicates a selected object or objects.Copy is only available when one or more objects have beenselected. Alternatively, pressCtrl C on the keyboard to copy anobject or objects.Paste - Paste the copied or cut object or objects onto thecurrent page. Paste is only available when an object has been cutor copied to the Clipboard. Text pasted into a presentation filefrom another application, such as Word, retains the textattributes of the first character of the pasted text. Thoseattributes will be applied to the characters of the pasted text.Alternatively, press Ctrl V on the keyboard to paste an objector objects.Select All - Use this option to select all of the objects on thecurrent page. Alternatively, press Ctrl A on the keyboard toselect all objects on the current page.Clear - Delete the selected object or objects. If nothing isselected on the page, the Clear Page tool deletes everything onthe page.Change Authorizations - Enter a valid Authorization Code for14WorkSpace (if applicable)
Pages Menu Create Blank Page - Add a blank page to the presentation.Create Grid Page - Add a grid page to the presentation.Create Image Page - Add an image page to the presentation.Create Duplicate Page - Add a duplicate of the current page inthe Annotation Window to the presentation. The duplicate pageis added to the presentation file immediately following theoriginal page.Create Calendar Page - Add a new page with a calendar to thepresentation.Create Gradient Page - Add a page with a Gradient element. SeeChanging a Gradient.Open ExamView File - Access ExamView files from yourcomputer or network.Annotate Over Desktop - Access the Annotate Over Desktopfunction within WorkSpace.Import from a Device - Save images or documents from adevice, such as a scanner or digital camera, to WorkSpace.Previous Page - Go to the previous page in the presentation.This tool is unavailable when the first page of the presentation isin the Annotation Window.Next Page - Go to the next page in the presentation file. Thistool is unavailable when the last page in the is in the AnnotationWindow.Page Sorter - View thumbnails of the pages in a presentation.Additionally, select a page by clicking on it, click and drag apage to a different location within the presentation, or use theUp and Down arrows to move pages around the presentation.15
Help Menu Help - Opens the current WorkSpace user guide.Check for Updates - Checks for WorkSpace software updates. Ifthe text is gray in color, the software is up-to-date.Register Online - Opens the Product Registration page, whereyou can submit your registration information.About - This window provides contact information, a copy ofthe End User License Agreement (EULA) and copyrightinformation.16
Annotate Over desktop & Lesson ModePen- Use the Pen tool to write or draw on a blank page.Multi-Color pen -Has two different styles: Gradient - Theproperties to the left of the Gradient Style button define the startingcolor, while the properties to the right define the ending color.Color on Color - The properties to the left of the Gradient Stylebutton define the outside border color, while the properties to theright define the inside color.Picture Pen-Draw a path of images with the Picture Pen tool. Theselected picture is displayed on the left side of the properties bar.Line-Use this tool to draw lines on a blank page.Freehand Text-Convert handwritten text into typed text and insertthe typed text into a blank page or an active application, such asExcel, PowerPoint, Word (in Office Mode).Free hand shape-Convert an object drawn freehand, such as arectangle, into a true rectangle with 90 degree corners and straightperimeter lines with the Freehand Shape tool.Highlighter-Highlight anything on the current page with theHighlighter tool.17
Annotate Over desktop & Lesson ModeShapes-Draw different shapes - including squares, circles andtriangles - with the Shapes tool.Flash Player-Adding SWF files to the presentation:Click the Flash Player icon from the toolbar and select a file fromthe directory.Click the green arrow to activate the flash file.Use the Selection tool to move, resize or delete the flash file.Only two flash files are permitted per page.Type Text-Adding typed text to the presentation:Click the Type Text tool. Change font properties prior to typing.Click to insert a Text box and begin typing.When you have finished typing, click the Selection tool. The Text boxcloses and the text is placed on the page.Stamper-Use the Stamper tool to add stamps. Personalize theStamper by adding images to the Documents\InterwriteWorkSpace\User Stamps folder. The images must be in a BMP, GIF,JPEG, TIFF or PNG format. If images are added to the User Stampsfolder while WorkSpace is open, the stamps will not be available foruse until WorkSpace is closed and re-opened.18
Annotate Over desktop & Lesson ModeVideo Files-Add video files to the presentation. The following filetypes are supported: AVI, WMV, MOV, and MPG.Audio Files-Add audio files to the presentation file. WorkSpacesupports WAV, MP2, MP3, MPA, MPEG, SND and WMA files. Audiofiles made with the Record and Playback tool, and those downloadedfrom other sources (e.g., iTunes), are also supported.Pan Page-Use the Pan Page tool to move the page around in theAnnotation window.Selection-Select and size, move, cut, copy, paste, delete, reorder,rotate, group, ungroup export objects with the Selection tool.Additionally, objects can also be moved to the background andadded to the Gallery.Eraser-From the toolbar, click the Eraser icon to erase annotatedcontent.Zoom-Magnify the page with the Zoom tool.Blank page-Add a blank page to the presentation file.Duplicate page-Add a duplicate of the current page to thepresentation file directly after the current page.19
Annotate Over desktop & Lesson ModeCalendar page-Add a calendar page to the presentation file. Selectand preview a one week or one-, two-, three-, or four-monthcalendar. Indicate a starting month and year (the current month andyear is the default) and choose a background color for the calendar.Grid page-Add a grid page to the presentation.Image page-Add an image page to the presentation.Gallery-The Gallery contains an extensive collection of images andinteractive Flash simulations called Interwrite Sims.Page Sorter-Use the Page Sorter to view thumbnails of pages in apresentation file. To select a page, simply click the page you wish toview. The Page Sorter also allows you to click and drag a page to adifferent location in the presentation file.(not available in Annotate Over Desktop mode)Previous Page-Go to the previous page in the presentation file.Next Page-Go to the next page in the presentation file.Clear-Delete the selected object or objects. If nothing is selected onthe page, the Clear tool deletes everything on the page.Save-Save the current presentation file. By default, the Auto Savefeature automatically saves the presentation file every five minutes.Disable Auto Save or change the frequency in the Preferenceswindow.20
Annotate Over desktop & Lesson ModeOn-Screen Keyboard-Use the On-screen Keyboard to typecharacters on the desktop.LockPads-Lock all connected devices (clickers or tablets),preventing Ithem from providing input to the current session.Locked devices remain connected unless they are turned off. Clickthe Unlock icon that appears in its place to reactivate connecteddevices.Internet browser-Open an internet browser to the web pageindicated in the Preferences window.Page Up-Go to the previous page in a PowerPoint slide show whilesaving the annotated page in the Annotation window to thepresentation file.Page down-Go to the next page in a PowerPoint slide show whilesaving the annotated page in the Annotation window to thepresentation file.Curtain-Hide the current page, or hide the current desktop screen,with the Curtain tool.Insert Media-Insert any type of media file including BMP, JPEG,GIF, EMF, WMF, TIFF PNG, ICO, audio files, video files and Flashfiles.21
Annotate Over desktop & Lesson ModeCapture-Capture a snapshot of the full screen, a selected windowor a selected portion of the screen.Undo-Undo the most recent action.Redo-Redo the last Undo action.Preference-Open the Preferences window to configure settings formany of the WorkSpace tools and functions.Freehand recognition-Convert handwritten text into typed text andinsert the typed text into an active application, such as Word orExcel. The Freehand Text Recognition Window provides a spellchecker.Freehand equation pen-Convert any written numeric charactersinto typed text.Equation-Adding typed equations to the presentation:1. Click the Equation icon. Click where the Equation window is todisplay and begin typing.2. When you have finished typing, select Insert Equation. TheEquation window closes and the equation is placed on the page.22
Annotate Over desktop & Lesson ModePDF File-Export the current presentation file to a PDF format. Bydefault, the PDF file is saved in the Documents\InterwriteWorkSpace\Export folder.Email PDF-Export the current presentation file to a PDF format andautomatically attach it to an e-mail message.Timer-Use the Timer tool to time classroom activities, exams, orquizzesRuler-Demonstrate how to use measurements between two pointswith the Ruler tool.Triangle-Demonstrate triangle measurements with the Triangle toolProtractor-Demonstrate angle measurements with the Protractortool.Compass-Demonstrate circles and arcs, and measure distances withthe Compass tool.New page setup-sets the page options for a new page.Fill-Fill any object with color, or change the background of the pageif no object is selected, with the Fill tool.23
Annotate Over desktop & Lesson ModeGradient page-Add a gradient page to the presentation.Exit-Close WorkSpace.Toolbox-Display all available WorkSpace tools. Customize theorganization of the tools on this menu and on the toolbar in thePreferences window.Device Manager-Click the Device Manager icon to open the DeviceManager application.Minimize toolbar-Minimize or restore the toolbar to full size.Workspace menu-Open the WorkSpace Main Menu.24
The End25
Interwrite WorkSpace installed in order to view a GWB file. Make your selection and click the E-mail icon to display an e-mail message form with the attachment already in place. Export PDF File - Export the currently opened presentation file to PDF. By default, the PDF file is saved