Transcription
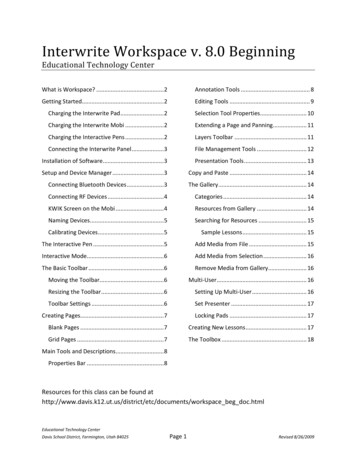
Interwrite Workspace v. 8.0 BeginningEducational Technology CenterWhat is Workspace? . 2Annotation Tools . 8Getting Started. 2Editing Tools . 9Charging the Interwrite Pad . 2Selection Tool Properties. 10Charging the Interwrite Mobi . 2Extending a Page and Panning. 11Charging the Interactive Pens . 2Layers Toolbar . 11Connecting the Interwrite Panel . 3File Management Tools . 12Installation of Software. 3Presentation Tools . 13Setup and Device Manager . 3Copy and Paste . 14Connecting Bluetooth Devices . 3The Gallery . 14Connecting RF Devices . 4Categories . 14KWIK Screen on the Mobi . 4Resources from Gallery . 14Naming Devices. 5Searching for Resources . 15Calibrating Devices . 5Sample Lessons . 15The Interactive Pen . 5Add Media from File . 15Interactive Mode. 6Add Media from Selection . 16The Basic Toolbar . 6Remove Media from Gallery. 16Moving the Toolbar. 6Multi-User . 16Resizing the Toolbar . 6Setting Up Multi-User . 16Toolbar Settings . 6Set Presenter . 17Creating Pages. 7Locking Pads . 17Blank Pages . 7Creating New Lessons . 17Grid Pages . 7The Toolbox . 18Main Tools and Descriptions. 8Properties Bar . 8Resources for this class can be found s/workspace beg doc.htmlEducational Technology CenterDavis School District, Farmington, Utah 84025Page 1Revised 8/26/2009
What is Workspace?Workspace is a program that connects a computer to an Interwrite interactive whiteboard,panel or wireless pad.The program includes tools for writing and drawing during a presentation.Teachers can use Workspace to create and conduct interactive lessons.Interactive PanelInteractive MobiInteractive PadInteractive WhiteboardGetting StartedBefore using the Interwrite Pad, Interwrite Mobi, or the interactive pen for the first time, theyshould be charged for about 12 hours.Make sure Pad and Pen(s) are charged before connecting to the computer.Charging the Interwrite PadPlug the AC adapter into the top of the pad and then into a power source.Note: The Interwrite Pad can be used while it is charging.Secure the pen in the recharging holder.Two orange lights will appear indicating the Pad’s battery and pen.Lights turn off once the Pad and/or pen are fully charged.Charging the Interwrite MobiWhen the Mobi battery is low, the Battery Status icon will display as an empty battery.Place the Interactive Pen in the Pen slot.Connect the Mini USB Cable to the Mini USB port at the top of the Mobi andthen into a USB port on the computer. Note: The Interwrite Mobi can be usedwhile it is charging.When fully charged the Battery Status icon will display a full battery.Unplug the charging cable from the Mobi.Charging the Interactive PensPlug in the AC adapter for the Interwrite Board.Make sure the charging pen holder is plugged into the control box on the board.Secure the pens into the holder.Green lights will appear for each pen.Lights turn off once the pens are fully charged.Note: extra pen tips can be stored on the charging pen holder.Educational Technology CenterDavis School District, Farmington, Utah 84025Page 2Revised 8/26/2009
Connecting the Interwrite PanelPlug in the AC adapter for the Panel.Connect the USB cable and the VGA cable to the computer.Installation of SoftwareInstall Interwrite Workspace using the CD that came with the interactive Panel, Board or Pad.Workspace may also be downloaded fromhttp://www.einstruction.com/support downloads/downloads.html.For wireless pads and wireless whiteboards:o Plug in the USB Bluetooth Receiver.o A Found New Hardware wizard will appear indicating a new device has been detected.o After a minute the wizard will indicate that the drivers are found and the device is readyto use.Note: Take notice of the USB port in which the Bluetooth Receiver is installed. If the receiver isplugged into a different USB port another time, the Hardware Wizard will reappear indicating anew device has been detected again as noted in the steps above.Once the software and Bluetooth Receiver have beeninstalled, restart the computer. Two new icons willdisplay in the System Tool tray on the bottom right ofeInstruction Tools IconBluetooth Iconthe screen.Setup and Device ManagerConnecting Bluetooth DevicesThe Interwrite Board and the Interwrite Pad connect to the computerwirelessly using a USB Bluetooth connection. The Interwrite Panelconnects directly through a USB cable. Note: If there is not an internalBluetooth in the computer, make sure that the Bluetooth “dongle” isconnected and installed on the computer.Turn on the Board or Pad. A series of beeps will sound. For thepanel, make sure the power is turned on.Click on the eInstruction Toolsicon.Select eInstruction Device Manager.Close the Device Manager First Look Window after reading thetop section to find the Bluetooth address. Note: Uncheck the box at the bottom of this windowto not show the First Look Window at start up.Click on the green plus buttonto add a BluetoothEducational Technology CenterDavis School District, Farmington, Utah 84025Page 3Revised 8/26/2009
device and/or the panel.Type in the last four digit or letter combination of theBluetooth address and click Connect.Or click on Scan for Devices. Wait for the scan to finish.Once the scan finds the device, select the device and clickConnect.The device manager will connect the device and thendisplay the device icon in the eInstruction Device Manager window.The pad or board will beep when connected.Connecting RF DevicesThe Interwrite Mobi and the Interwrite DualBoard connect to the computer wirelessly using an RF(Radio Frequency) communication module.Plug the RF Receiver into a USB port on the computer. The computer will automatically detectthe USB device and install the new hardware for use.A blue LED light on the RF Receiver will light up when it is plugged in.Turn on the Mobi or DualBoard.Press the lighted Activation button on the RF Receiver. The blue LED light will start blinking.Turn over the Mobi and press the blue button next tothe battery case to activate the RF signal. Note: Up totwo minutes is allowed to press the Activation button onthe Mobi or DualBoard.When paired, the blue LED light on the RF Receiver willstop blinking and remain solid blue until either thecomputer or the Mobi is turned off.The Mobi or DualBoard device icon will display in theeInstruction Device Manager window and willautoconnect from this point on.KWIK Screen on the MobiThe Mobi KWIK Screen displays icons associated with the Mobi status.IconNameMouse ModeDescriptionPen used as a mousePairedPaired with computerUSBConnected via USB cableIn ProximityIn MenuPen within proximity, detected by MobiKWIK screen in use, out of proximityBattery StatusPen ChargeBattery life and charge shownPen charge shownEducational Technology CenterDavis School District, Farmington, Utah 84025Page 4Revised 8/26/2009
Naming DevicesSelect the device icon in the Device Manager window.Click on Options and select Properties or click on thewrenchProperties button.Select the General tab at the top of the window.Type a device name in the Name text field.Note: This is also where the battery status of theInterwrite pad can be checked.Calibrating DevicesNote: Only Whiteboards and Panels require calibration.Select the device from the Device Manager window.Click the Options button.Select Calibrate.A blue screen will appear with instructions.Click on each cross-hair target as it appears on the screen.The blue screen will disappear after last cross-hair target is clicked.The Interactive Whiteboard also features a shortcut softkey on the side of the board for quickcalibration.The Interactive PenInterwrite Boards, Panels, and Pads require an interactive pen.Tap on the board, pad or panel with the pen tip to leftclick.Right ClickHold pen just above the surface of the board, pad or panelLeft Clickand press the upper part of the button towards the top ofthe pen to right click.Hold pen just above the surface of the board, pad or paneland press the lower part of the button towards the tip ofDouble Left Clickthe pen to double click.Recharge the pen regularly.o Place the pen firmly in the recharging holder.o A light will indicate if the pen is charging properly. Note: When charging the Mobi pen, apen and a battery icon will appear on the KWIK screen indicating the pen is charging.o Remember to return the pen to the recharging holder when not in use.Educational Technology CenterDavis School District, Farmington, Utah 84025Page 5Revised 8/26/2009
Interactive ModeClick on the eInstruction Tools icon in the tool tray and select Workspace.Interactive mode may also be accessed through the Start menu All Programs eInstruction Interwrite Workspace Interactive Mode.A toolbar will appear near the right hand side of the desktop.The toolbar will go transparent after non-use.The Basic ToolbarMinimize ToolbarMouse ModeSelection ToolHighlighterShapesTextClearCreate Grid PagePrevious PagePage SorterToolboxMoving the ToolbarWorkspace MenuLesson ModePenEraserLineUndoCreate Blank PagePosition the mouse pointerat the top of the toolbarnear the Interwrite icon.Click and drag the toolbarto new location.Resizing the ToolbarPosition the mouse pointeron the edge of the Toolbaruntil a double-headedarrow appears.Click and drag the doubleheaded arrow to changethe size and layout of theToolbar.GalleryToolbar SettingsNext PageSaveStudent ResponseSystemExitClick on the WorkspaceMenu buttonandselect Preferences.Click on the ToolbarSettings tab.Under the section ShapeFiles, select a desiredshape. A preview willdisplay.Under the section ToolbarButton Size in Pixels, selectthe desired size.Click Ok.Educational Technology CenterDavis School District, Farmington, Utah 84025Page 6Revised 8/26/2009
Creating PagesToolNameBlank Page ToolGrid Page ToolDescriptionClick to create blank pages for lessons, notes, etc.To change the color of the page:Choose the selection tool.Click on the white box located on theproperty toolbar at the bottom of thescreen.Choose color.Click Ok.Note: The color will only change onthis page.Click to create grid pages for lessons, notes, etc.To change a blank page to a grid page:Click on the grid page tool located on the propertiestoolbar at the bottom of the screen.Blank PagesTo customize the page color:ooooooClick on the Workspace Menu buttonClick on New Page Setup tab at thetop of the window.Click on the Change BackgroundColor button.Select a new color as the defaultpage color.Click Ok.Click on the Create Blank Pageand select Preferences.buttonon the toolbar to createa new page in Workspace.Grid PagesTo customize the grid lines and colors:o Click on the Workspace Menuoobuttonand selectPreferences.Click on the New Page Setup tab atthe top of the window.Make desired changes in the GridEducational Technology CenterDavis School District, Farmington, Utah 84025Page 7Revised 8/26/2009
oooooPage area.Click on the Change Background Color button.Select a new color as the default grid page color.Select other desired changes such as vertical lines, center grid, title box, line color, linespacing, etc.Click Ok.Click on the Create Grid Page buttonWorkspace.on the toolbar to create a new grid page inMain Tools and DescriptionsProperties BarWhen selecting any tool a Properties Bar will appear at the bottom of the screen with optionsspecific to that tool.Change Line EndChange to Preset Pen ColorChange Line StyleCustom Pen ColorChange Line WidthChange Line TransparencyPreviewAnnotation ToolsToolNamePen ToolHighlighterDescriptionClick to write and/or make notes on the screen or Workspacepage. This tool gives the option to change pen color, width,transparency, style, etc. by using the property bar.Click to highlight any text or image on the screen or Workspacepage. This tool gives the option to change highlighter color,shape, width, transparency, etc. by using the property bar.Click to create basic shapes.To change to a different shape:Click on the shape in the property bar and selectdesired shape.Shapes ToolUse options on the property bar to modify the shapeoutline, width, outline style, transparency, shape style,color fill, etc.Click and drag to draw the shape on the screen orWorkspace page.Educational Technology CenterDavis School District, Farmington, Utah 84025Page 8Revised 8/26/2009
ToolNameDescriptionClick and drag to create lines on thescreen or Workspace page.Line ToolNote: Use the selection tooltoselect the line and then use the fourheaded arrows to change the angle orlength of the line. Use the eraser tool tocut the line in parts maintaining theendpoints chosen for the original line.Click on the text tool then click on thepage where the text will be placed andtype text into the box that appears.Text ToolClick on the Duplicate Text buttonthe text box with the same text.to create a new copy ofClick on the Split Text buttonto separate multiple wordsinto their own individual text boxes.Editing ToolsToolNameEraserUndoClearDescriptionClick to erase annotations. Note: the Eraser tool only eraseslines drawn with the Pen, Highlighter, and Line tools. It doesnot work with Shapes, Imported images, or Sims.Change eraser size by clicking and dragging the slider in theEraser property bar.Use pad Pen to erase by holding the double click button whenthe Pen tool is in use.Click to Undo or remove the most recent change to aWorkspace page. Keep clicking to continue removing changesuntil there are no more changes to remove.Click to remove items on a Workspace page. With theSelection tool, select any Item on a page and then click theClear tool to delete the selected item. If no selection is madethe Clear tool will clear all items from a page.Educational Technology CenterDavis School District, Farmington, Utah 84025Page 9Revised 8/26/2009
ToolNameDescriptionClick to select items on a Workspace page. This tool gives theoption to redo, undo, cut, copy, paste, select all, arrange,rotate, group, export, move to background, move to gallery,etc., by using the property bar.Selection ToolUse the selection tool to click on text, lines, shapes or imageson a Workspace page. A bounding box will appear around theitem selected. Options for that item will appear in theproperty bar at the bottom of the screen. Select desiredoptions to change previous options. To move, resize, or rotatean item:Move: Select an item to get thefour-headed arrow. Drag item tonew location.Resize: Select an item. Click onthe resize iconat the lowerright corner of the selection bounding box and dragbox to new size.Rotate: Select an item. Click on the rotate iconatthe top center of the selection bounding box and dragbox to new angle.To lock or easily copy multiple copies of an item:Lock: Select an item. Click on the Lock Tool. Thiswil display a lock icon on the item when it is selected.Copier: Select an item. Click on the Copier Tool .Click and drag as many times as desired to get copiesof the item. This will diplay a copier icon on the itemwhen it is selected.Selection Tool PropertiesToolNameUndo/RedoCutDescriptionClick to undo or redo the most recent performed task.Continue to click for undoing or redoing more tasks.Click to remove a selected item.CopyClick to copy a selected item.PasteClick to paste a cut or copied item onto a Workspace page.Educational Technology CenterDavis School District, Farmington, Utah 84025Page 10Revised 8/26/2009
Select AllOrder SelectedEntitiesRotate SelectedEntitiesGroupUngroupMove to BackgroundExport EntitiesAdd files to GalleryClick to select all items on a Workspace page.Click to change the position of a selected item to be in front ofor in back of other items on the Workspace page.Click to rotate a selected item 90 , 180 , or flip itemhorizontally or vertically.Click to group separate selected items together to create oneitem.Click to ungroup a previously grouped item to separate theitems.Click to permanently “glue” an item to the background of aWorkspace page.Click to export a selected item and convert it into an imagefile.Click to add a selected item or the entire page to the Gallery.Extending a Page and PanningBy clicking on either the downward extend buttonor the right side extend buttonwill extend the default blank page space onto the Workspace page.thisClick on the Pan Toollocated at the bottom right corner of the screen and then click anddrag on the Workspace page to move in any direction across a page that is larger than thecurrent screen size.The cursor will change to a hand.Click on the pan tool again to turn off the pan option.Layers ToolbarBy default, all items are organized in a single layer. To add layers:Locate the Layers Toolbarpage.at the bottom left corner of the WorkspaceTo view the layers click on the maximize layers button.Click the Add Layer button.The Layer Toolbar has additional options such as moving layersup/down, selecting layers, showing/hiding layers, editinig layers, anddeleting layers.Educational Technology CenterDavis School District, Farmington, Utah 84025Page 11Revised 8/26/2009
File Management ToolsToolNameWorkspace MenuPrevious/Next PageDescriptionClick to access files, edit, print, change preferences, etc.To Save a File:Click on the Menubutton.Select File.Click Save As.Type in a file name.Click Ok.To Open a File:Double click on the file.Or click on the Menubutton.Select File.Click Open.Choose the file to be opened and click OK.To Export a File:Click on the Menubutton.Select File.Click Export.Choose the formatdesired for export, thelocation for export, and the page(s) desired to export.Click Export when done.To Print a File:Click on the Menubutton.Select File.Click Print.Choose the options for the printer and click Print.Click to navigate backward or forward through already createdpages in Workspace.Note: There is an alternative method to navigate pages in thelower right-hand corner of the screen. This method alsoincludes the current page number andpage count.Educational Technology CenterDavis School District, Farmington, Utah 84025Page 12Revised 8/26/2009
ToolNameDescriptionClick to view all Workspace pages.For viewing size, click on the Page SorterPage SorterSaveToolboxExitMenu button. Select Zoom andchoose desired page size for Page Sorterwindow.To reorder/rearrange
Interwrite Workspace Interactive Mode. A toolbar will appear near the right hand side of the desktop. The toolbar will go transparent after non-use. The Basic Toolbar at the top of the toolbar Page Sorter Moving the Toolbar Position the mouse pointer near the Interwrite icon.Mouse Mode Click and drag the toolbar to new location.
