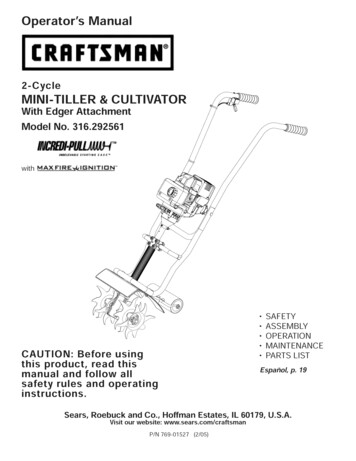
Transcription
DishwasherLavavajillasModel/Modelo587.1418 ,587.1518 ,587.1519 ,587.1618 ,587.1619 color number, nQmero de color154563301Sears Roebuck and Co., Hoffman Estates, IL 60179 U.S.A.Sears Canada Inc., Toronto, Ontario, Canada M5B 2B8www.sears.comwww.sears.ca
Tableof ContentsMasterProtectionAgreementsWarranty .3Safety Instructions .4Before Using Your Dishwasher .5Dishwasher Features .6Congratulations on making a smart purchase. Your newKenmore appliance is designed and manufactured foryears of dependable operation. But like all products, itmay require preventive maintenance or repair from timeto time. That's when having a Master Protection Agreement can save you money and aggravation.Wash System .7Purchase a Master Protection Agreement now andprotect yourself from unexpected hassle and expense.Operating Instructions .7-9Preparing and Loading Dishes .10-12The Master Protection Agreement also helps extend thelife of your new appliance. Here's what's includedin the Agreement:Dishwasher Dispenser and Detergents . 13-14Expert Service by our 12,000 professional repairspecialistsFactors Affecting Performance .14Care and Cleaning .15Unlimited service and no charge for parts andlabor on all covered repairsSolutions to CommonDishwashing Problems .Service ."No-lemon"guarantee - replacement of yourcovered product if more than three product failuresoccur within twelve months16-17Back Cover71 Product replacement if your covered product can'tbe fixedEIAnnual Preventive Maintenance Check at yourrequest - no extra chargeFast help by phone - non-technical andinstructional assistance on products repairedin your home, plus convenient repair schedulingIPower surge protection against electricaldamage due to power fluctuations1 Rental reimbursement if repair of your coveredproduct takes longer than promisedOnce you purchase the Agreement, a simple phone callis all that it takes for you to schedule service. You cancall anytime day or night, or schedule a serviceappointment online.Sears has over 12,000 professional repair specialists,who have access to over 4.5 million quality parts andaccessories. That's the kind of professionalism you cancount on to help prolong the life of your new purchasefor years to come. Purchase your Master ProtectionAgreement today!Some limitations and exclusions apply. For pricesand additional information call 1-800-827-6655.Sears Installation ServiceFor Sears guaranteed professional installation of homeappliances and items like garage door openers andwater heaters, in the U.S.A. call 1-800-4-MY-HOME .
WarrantyFU LL ONE-YEARWARRANTYDISHWASHERSON KENMOREFor one year from the date of purchase, when thisdishwasher is installed and operated according toinstructions provided in the Installation Instructions andUse & Care Guide, Sears will repair this dishwasher,free of charge, if defective in material or workmanship.FULL TEN-YEAR WARRANTY AGAINST LEAKS INTHE TUB AND INNER DOOR PANELFor ten years from the date of purchase, if a leak shouldoccur as a result of failure of the polypropylene tub orinner door panel due to cracking, chipping or peeling,Sears will replace free of charge the tub or inner doorpanel.WARRANTYSERVlCEWARRANTY SERVICE IN THE U.S.A. AND CANADA ISAVAILABLE BY CONTACTING SEARS AT 1-800-4-MYHOME . This warranty applies only while the product isin use in the United States. This warranty gives youspecific legal rights and you may also have other rightswhich vary from state to state.For Sears Warranty information in the United States orCanada, please reference the service numbers locatedon the back page of this manual.Sears, Roebuck and Co.,Dept. 817WA, Hoffman Estates, IL 60179Sears Canada Inc.Toronto, Ontario, Canada M5B 2B8WARRANTY RESTRICTIONIf the dishwasher is subject to other than private familyuse, the above warranty coverage is effective for only 90days.In the space below, record your complete model number,serial number and purchase date. You canfind this information on the model and serial numberlabel, located as shown in the Dishwasher Featuressection of this book. Have this information available tohelp you quickly obtain assistance or service when you ycontact Sears concerning your appliance.Model Number: 587.Serial Number:Purchase Date:Save these instructions and your sales receipt forfuture reference.
DishwasherSafetyYour safety and the safety of others are very important.We have provided many important safety messages in the manual and on your appliance. Always read and obey allsafety messages.This is the safety alert symbol.This symbol alerts you to potential hazards that can kill or hurt you and others.All safety messages will follow the safety alert symbol and either the word "DANGER" or"WARNING."Thesewordsmean:You can be killed or seriously injured if you don'timmediatelv follow instructions.You can be killed or seriously injured if you don't followinstructions.All safety messages will tell you what the potential hazard is, tell you how to reduce the chance of injury, and tell youwhat can happen if the instructions are not followed.IMPORTANTWARNING:SAFETYWhen using the dishwasher, follow basic precautions, including the following: Read all instructions before using the dishwasher. Use your dishwasher only as instructed in thisUse and Care Guide. If the dishwasher drains into a food disposer,make sure disposer is completely empty beforerunning dishwasher.Use only detergents or rinse agents recommendedfor use in a dishwasher, and keep them out of thereach of children. Disconnect electrical power to dishwasher beforeservicing. Do not tamper with controls.When loading items to be washed: - Locate sharp items and knives so that theyare not likely to damage the door seal ortub.Do not let children abuse, sit, stand or play ondoor or racks of a dishwasher. Keep young children and infants awayfromdishwasher when it is operating. Under certain conditions, hydrogen gas may beproduced in a hot water system that has not beenused for two weeks or more. HYDROGEN GAS- Load sharp items and knives with thehandles up to reduce the risk of cut-typeinjuries. INSTRUCTIONSIS EXPLOSIVE. If the hot water system has notbeen used for such a period, before using thedishwasher turn on all hot water faucets and letthe water flow from each for several minutes. ThisDo not wash plastic items unless marked"dishwasher safe" or the equivalent. Check withmanufacturer for recommendations, if not marked.Items that are not dishwasher safe may melt andcreate a potential fire hazard. Do not touch the heating element during orimmediately after use. Do not operate your dishwasher unless allenclosure panels are properly in place.SAVE THESEwill release any accumulated hydrogen gas. Asthe gas is flammable, do not smoke or use anopen flame during this time. To avoid entrapment and/orsuffocation, removedoor or door latch mechanism from anydishwasher that is discarded or not in use.INSTRUCTIONS
BeforeUsingYourDishwasherGROUNDING INSTRUCTIONSFor a grounded, cord-connecteddishwasher:Do not use dishwasher until completelyinstalled.The dishwasher must be grounded. In the eventof a malfunction or breakdown, grounding willreduce the risk of electric shock by providing apath of least resistance for electric current. Thedishwasher is equipped with a cord having anequipment-grounding conductor and a groundingplug. The plug must be plugged into anappropriate outlet that is installed and groundedin accordance with all local codes andordinances.Do not push down on open door.WARNING:Tip Over HazardImproper connection of theequipment-grounding conductor can result in arisk of electric shock. Check with a qualifiedelectrician or service representative if you are indoubt whether the dishwasher is properlygrounded. Do not modify the plug provided withthe dishwasher. If it will not fit the outlet, have aproper outlet installed by a qualified electrician.Doing so can result in serious injury or cuts. For a permanentlyconnected dishwasher:The dishwasher must be connected to agrounded metal, permanent wiring system, or aequipment-grounding conductor must be run withthe circuit conductors and connected to theequipment-grounding terminal or lead on thedishwasher.Electrical Shock HazardElectrically ground dishwasher.Connect ground wire to green ground nut interminal box.Do not use an extension cord.Failure to do so can result in death, fire, orelectrical shock.SAVE THESE INSTRUCTIONS
DishwasherFeaturesNozzle and Upper SprayFunnelpagesTub Gasketpage 6Top Rackpage10,11SerialLabel(locatedsideon rightof ng Elementpage 15
GettingYour Kenmore dishwasher filters 100% of the waterfor optimum cleaning. The wash system usesalternating arms to save water and energy andincludes a heavy-duty stainless steel food disposerthat grinds up large food particles.How the wash systemworks1.Load the dishwasher (See Preparing and LoadingDishes).2.Hot water enters the dishwasher and covers thefilter.3.Detergent is dispensed at the appropriate time andmixed with the hot water. This mixture is pumpedthrough the lower spray arm and sprays against thesoiled surfaces of the dishes to remove foodparticles.may vary from your model.Started1.Load dishwasherLoading Dishes).2.Add detergent (See DishwasherDispenser & Detergents).3.Add rinse aid, if needed4.Select desiredCYCLE5.Select desiredOPTIONSSelections).selected.(See Preparingand(See Rinse Aid).(See Cycle Chart).The indicator(See Optionwilt glow when6.If using WASH8.DELAY, go to step number7.Run hot water faucet nearest dishwasheruntil water is hot. Turn water off.8.To start, press START/CANCEL4.Water passes through the fine mesh primary filterwhere food soil is removed and the clean water isthen recirculated.5.Ports under the lower wash arm direct the food soilStatus Indicatorthrough a secondary filter into a collection chamber.The WASHING light comes on at the beginning of cycleand remains on until the end of the final rinse.6.Food soil is held in the collection chamber until it isflushed away during the drain cycle.7.Clean, hot water enters the dishwasher and thesequence is repeated.8.Beginning with the third water fill, the wash actionswitches between the lower spray arm and middlespray arm in 90 second intervals. You may notice achange in sound as the wash action pauses andswitches to the other arm.9.The dishwasher may pause during the cycle whilewater is being heated. Wash action will continueduring this time.10. Rinse aid is automatically dispensed in the finalrinse to aid in drying.pad.LightsThe DRYING light indicates the drying portion of thecycle. The light will come on when either drying option isselected.When the SANITIZE option is selected, the SANITIZEDlight will glow when the SANITIZE cycle is finished. If thedishwasher did not properly sanitize the dishes, the lightwill not come on. This can happen if the cycle isinterrupted. The light will remain on until the door isopened.The CLEAN light will come on at end of cycle andremain on until door is opened.
OperatingInstructions(continued)Wash Cycle SelectionsNote: Cycle times are approximateand witl vary with optionsCycleDescriptionCycleTo Select CycleHeavyWashForheavilysoileddishesandsilverware. Turn dialto HEAVYWASH. Select desired OPTIONS.NormalWashselected.Not all cycles availableon all ses8.5 gal.32.2 liters1 3/4 hrs.2washes5 rinsesFor regularly soiled dishes Turn dial to NORMAL WASH.andsilverware. Select desired options.6.1 gal.23.1 liters1 1/2 hrs.2washes3 rinsesLightFor lightly soiled or prerinsed dishes andsilverware. Turn dialto LIGHTWASH. Select desired options.6.1 gal.23.1 liters1 1/2 hrs.2wash3 rinsesChina/CrystalFor lightly soiled chinaand crystal. Turn dialto CHINA/CRYSTAL Select drying option.Note: HI-TEMP WASH option is notrecommended for use with this cycle.4.9 gal.18.6 liters1 1/4 hrs.1 wash3 rinsesUpperRackFor glasses and otherlightly soiled items. Turn dial to UPPER RACK. Select desired options.3.7 gal.14.0 liters1 hrs.1 wash2 rinsesQuickRinseFor rinsing dishes that will DO NOT USE detergent.bewashed later. Turn dial to QUICK RINSE. Select HEAT DRY OFF.2.4 gal.9.1 liters1/4 hrs.2 rinse Includes dry time.OptionHi TempSelectionsWash OptionWhen HI TEMP WASH option is selected, thedishwasher heats the water in the main wash toapproximately 140 F (60 C). Wash action will continuebut timer will not advance until proper temperature isreached. The hotter water provided by this option helpsactivate dishwasher detergent to clean food grease andsoil from dishes. HI TEMP WASH option can be usedwith any cycle except QUICK RINSE.When HI TEMP WASH option is selected, the lightabove the pad will come on and remain on until end ofcycle. To turn offthe HI TEMP WASH option, press thepad a second time. The light above the pad will turn off.To turn off the HI TEMP option, press the pad a secondtime. The light above the pad will turn off.Heat Dry OptionThe HEAT DRY option in combination with rinse aid willgive you excellent drying results. The energy to useHEAT DRY costs pennies per cycle. You may turn offthe HEAT DRY option, however you will have items inyour dish load that will not be dry at the end of thecycle.With either option, you may see water vapor comingfrom vent during the drying portion of the cycle. Somemodels have a vent that is closed during washing to holdmoisture and sound inside and then opens for drying.To turn off the HEAT DRY option, press the pad asecond time. The light above the pad will turn off.The drying option may be changed at any time duringthe cycle and affects only the drying period.
OperatingSanitizeInstructionsOptionTo sanitize your dishes and glassware, select theSANITIZE option. When selected, the light above the padwill come on and remain on until end of cycle. The watertemperature in the final rinse will be raised to 155 F(68 C) and will maintain that temperature for 9 minutes.This option is available in HEAVY, NORMAL and LIGHTWASH cycles. Only these sanitization cycles have beendesigned to meet NSF requirements.The cycle time will be extended until the proper watertemperature is reached. Washing action will continueduring the water heating delay. For best results, theincoming water temperature should be at least 120 F(continued)Delay StartThe DELAY START option allows you to automaticallydelay starting your dishwasher from 2-4 or 2-4-6 hoursdepending on your model.On models with 2-4-6 hour delay, press the pad once fora 2 hour delay, twice for 4 hours and three times for 6hours. A light will come on indicating the delay starthours and will remain on until cycle starts.To cancel the DELAY START option and begin the cyclebefore the delay period is over, press the START/CANCEL pad.(49 c).The sanitize criteria may not be satisfied if there is aninterruption of the cycle, power failure or if the incomingwater temperature is below 120 F (49 C).To turn off the SANITIZE option, press the pad a secondtime. The light above the pad will turn off.To Cancela CycleYou can cancel a cycle anytime during the cycle. PressSTART/CANCEL pad and the dishwasher will start a 90second drain. At the end of the drain, select the desired ' ' ;cycle.
PreparingDishandLoadingDishesLong-handled knives and utensils can be placed in toprack.PreparationScrape away large pieces of food, bones, pits,toothpicks, etc. The continuous filtered wash system willremove remaining food particles. Burned-on foods shouldbe loosened before loading. Empty liquids from glassesand cups.Be sure nothing protrudes through the bottom of the rackto block rotation of middle spray arm.Foods such as mustard, mayonnaise, vinegar, lemonjuice and tomato based products may causediscoloration of stainless steel and plastics if allowed tosit for a long period of time. Unless the dishwasher is tobe operated at once, it is best to rinse off these foodsoils.Load racks sothat large items/ . 'do not'\f- . ' - -prevent thedetergentdispenserfrom opening.\({//(-\\))//. j - /Check,.- . ,, .manufacturers.recommendationsbefore washing items in question.Y"/Do not cover funnelIf the dishwasher drains into a food disposer, besure disposer is completely empty beforestarting dishwasher.Loadingthe Top RackFeatures and appearance of racks and silverware basketmay vary from your model.Important: Do not cover the funnel when loading.The top rack is designed for flexibility in loading a widevariety of items including cups, glasses, stemware,small plates, bowls, etc.Load glasses in top rack. Damage may occur if placedin bottom rack.Some models have a fold-down cup shelf or a cup shelf/stemware holder. They can be used to load two levels ofcups, juice glasses, and other short items. Staggeritems on upper level so that water can reach all insidesurfaces. Fold up to load tall glasses.Load plastic items in top rack only. Melting may occur ifplaced in bottom rack.Load items with open ends facing down for bettercleaning and draining.Damage may occur if delicate items touch each otherduring dishwasheroperation.10
PreparingandLoadingDishes(continued)10 place setting10 place setting12 place settingLoadingthe BottomRackFeatures and appearance of racks and silverware basketmay vary from your modelThe bottom rack is best for plates, saucers, bowls, andcookware. Large items should be placed along the edgeso they do not block the spray arm rotation. For bestresults, place bowls, casseroles, and sauce pans withsoiled surface facing down or toward the center. Tiltslightly for better drainage.Make sure tall items do not block spray arm rotation.Be sure pan handles do not protrude through the bottomof the rack and block the spray arm rotation.12 place setting11
PreparingLoadingandthe SilverwareLoadingDishes(continued)BasketWhen covers are up, mix items in each section of thebasket with some pointing up and some down to avoidnesting. Water spray cannot reach nested items Cut InjuryLoad sharp items (knives, skewers, etc ) pointingdown.Failure to do so may result in injury Load the silverware basket while it is in the bottom rackor take the basket out for loading on a counter or table.Place small items like baby bottle caps, jar lids, corncob holders, etc., in a covered section. Close the coverto hold small items in place.To remove small basket:1 Hold the center basket and one small basket. Slide 9the small basket back to release the tabs from thecorresponding slots.2.Pull the baskets apart.Features and appearance of racks and silverware basketmay vary from your model.Use suggested loading patterns, as shown, to increasewashability of your silverware.Be sure nothing protrudes through bottom of basket orrack to block the spray arm.Adding a DishDo not mix silver and stainless to avoid damaging thesilverfinish. The silverware basket can be separated and placed inseveral locations in the bottom rack. Load silverware in To add or remove items after wash cycle starts:Unlatch door and wait a few seconds until washaction stops before opening.Add the item and wait a few seconds to allow cold airto slowly expand inside dishwasher.all sections or just one, depending on your load. 12Close door firmly to latch and resume cycle.
DishwasherDispenserFilling the Detergent& DetergentsHow much DetergentDispenserThe amount of detergent to use depends on the waterhardness. Water hardness is measured in grains pergallon. Using too little detergent can result in poor cleaningand hard water filming or spotting. Using too muchdetergent in soft water can cause a permanent film calledetching. Your local water company, water softenercompany or county extension agent can tell you the waterhardness in your area.The detergent dispenser has one main wash cup and oneprewash cup. The covered cup opens automatically torelease detergent. Use only fresh automatic dishwashingOther detergents will cause oversudsing. When using automatic dishwashing detergent tabs,place one tab in main wash cup and close. Add detergent just before starting cycle. Store detergent in a cool, dry location. Moist or cakeddetergent will not dissolve properly.to usedetergent.Pre Wash CupCover LatchMain Wash Cup\Cover\Note: If the cover is closed on the Main Wash Cup,open by pressing the cover latch.DetergentCycleSoft Water(0-3 grains)Heavy WashorNormal Wash2 teaspoons(each cup1/4 full)MediumUsageHard Water(4-8 grains)5 teaspoons(each cup-fill to lineabove "Regular")GuideHard WaterVery Hard Water*(9-12 grains)(over 12 grains)8 teaspoons(each cupcompletelyfull)Each CupCompletelyFull(watersoftenerrecommended)Light WashorChina/CrystalQuick Rinse2 teaspoons(Main Wash cup1/4 full)No Detergent5 teaspoons(Main Wash cup-fill tolineabove "Regular")No Detergent8 teaspoons(Main Wash cupcompletely full)No DetergentMain Wash CupCompletely Full(water softenerrecommended)No Detergent(watersoftenerrecommended)*Note: For very hard water, detergent alone may not be enough. A water softener is recommended to improve water qualityand dishwashing performance. Try adding more detergent at the beginning of the main wash portion of the cycle. As a rule,use 1 teaspoon for each grain above 12. Unlatch the door, open slowly and add detergent to the bottom of the tub. Close thedoor to latch and the dishwasher will continue through the cycle.13
Dishwasher& tinued)Rinse AidWaterRinse aid greatly improves drying and reduceswater spots and filming. Water "sheets" off dishesrather than forming water droplets that cling and leavespots.The hot water line to dishwasher must provide waterpressure between 20 and 120 psi.A dispenser, located next to the detergent cup,automatically releases a measured amount of rinse aidduring the last rinse. If spotting and poor drying areproblems, increase the amount of rinse aid dispensedby rotating the dial to a higher number. The dial islocated under the dispenser cap. The indicator will bedark when full and will show clear when it is time to refill.starting dishwasher.Low water pressure may occur when laundry or showersare in operation. Wait until water use is reduced beforeWaterTo check water temperature entering dishwasher: Turn on hot water faucet nearest dishwasher forseveral minutes to clear cool water from pipes.liquid touches the indicated fill level. Replace cap.Do not overfill since this can cause oversudsing. Wipeup any spills with a damp cloth.RMNSEAMDMoreAdjustableHold a candy or meat thermometer in streamof water to check the temperature. If temperature is below 120 F (49 C), have a qualified DImportant: Before starting a cycle, run hot waterto clear cool water from pipe.IndicatorDis )enser Cap person raise the hot water heater thermostat setting.The dispenser holds enough for 35 to 140 washes,depending on setting.LessTemperatureHot water is needed for best dishwashing and dryingresults. Water entering dishwasher should be 120 F(49 C) to give satisfactory results.To add liquid rinse aid, turn dispenser cap 1/4 turncounterclockwise and lift out. Pour in rinse aid untilDispenser OpeningPressuresettingThe HEAT DRY option in combination with rinse aid willgive you excellent drying results. The energy to useHEAT DRY costs pennies per cycle. You may turn offthe HEAT DRY option, however you will have items inyour dish load that will not be dry at the end of thecycle.14
CareandCleaningCare of Drain Air GapIf a drain air gap was installed for your built-indishwasher, check to make sure it is clean so thedishwasher will drain properly. A drain air gap is usuallymounted on countertop and can be inspected byremoving the cover. This is not part of your dishwasherand is not covered by warranty.Burn HazardAllow heating element to cool beforecleaning the interior.Failure to do so can result in burns.Outside--Occasionallywipe with a mild nonabrasivedetergent and water. Rinse and dry.PropertyDamageHazardInside--Theinside of the dishwasher is self-cleaningwith normal use. If needed, clean around the tub gasketarea with a damp cloth.Freezing temperatures may cause water lines torupture. Be sure all supply lines to and circulatinglines within dishwasher are protected.The filter is self-cleaning. A glass trap located in thecenter of the filter is designed to collect pieces of brokenglass, straws, bones and pits. To remove items in glasstrap, grasp handle, lift out, empty and replace.Failure to do so could result in property damage.WinterizingA dishwasher left in an unheated place should beprotected from freezing. Have a qualified person dothe following:To DisconnectService:1. Turn off electrical power to the dishwasher at thesupply source by removing fuses or tripping circuitbreaker.2. Shut offwater supply.3. Place a pan underthe inlet valve. Disconnect waterline from inlet valve and drain into pan.4. Disconnect drain line from pump and drain water intopan.Note: Hard water may cause lime deposit buildup on theinterior of the dishwasher. For cleaning instructions see"Removing Spots and Film" section.Note: See Installation Instructions for more details.To RestoreService:1. Reconnect the water, drain and electrical powersupply.OverfillProtector--keepsdishwasher fromoverfilling and is located in the left front corner of the tub. Clean occasionally with household cleaner containingvinegar or bleach todissolve any buildup. . Overfill Protector shouldmove up and down freelyabout one inch. If it doesnot move, lift and cleanunderneath.2. Turn on water and electrical power supply.3. Fill both detergent cups and run dishwasher througha NORMAL cycle.4. Check connections to make sure they do not leak.Note: See Installation Instructions for more details.15
Solutionsto CommonBefore calling for service, review thissave you both time and expense. Thiscommon experiences that are not thedefective workmanship or material ind ishwasher.DishwashingDishwarelist. It maylist includesresult ofyourLoad with care and do not overload. (See Preparingand Loading Dishes.) Place delicate items in top rack. Place glasses securely against pins and not overpins. Load items so they are secure and don't jar loosewhen moving racks in and out. Move racks in and outslowly. Make sure tall glasses and stemware will clear top oftub when rack is pushed in.Fine antique china and crystal should be handwashed. Choose another cycle for longer washing time. Check rack loading section for proper loading--avoidnesting items. Home water pressure may be too low--shouldto 120 pounds per square inch (psi). Check incoming water temperature. It should be120 F (49 C). (See Factors Affecting Performance.) Check water hardness. For extremely hard water, itmay be necessary to install a water softener. (SeeDetergent Chart.)Dishware Usefreshdetergent. Check to make sure funnel in top rack is not blocked. Make sure items are not blocking the spray arms,preventing them from rotating.DishesSelect HEAT DRYoption. Make sure the rinse aid dispenser is filled. Increase the amount of rinse aid. (See Rinse Aid.) Check the incoming water temperature. It should be120 F (49 C). Checkforproperloading--avoid Plastic items may need to be towel dried. Cups with a concave bottom will collect water.Glassware/FlatwareCloudySpotted Water temperature may be low. Avoid extremely lowor high temperatures. (See Factors AffectingPerformance.) Avoid overloading and improperloading.Preparing and Loading Dishes.) Use fresh detergent. Old detergent is ineffective. Make sure rinse aid dispenser is filled. Check to see that proper amount of detergent isbeing used for cycle selected. Also, check phosphatelevel. (See Detergent Usage Guide.)or DiscoloredTea and coffee can stain cups. Remove the stains by Iron deposits in water can cause a yellow or brownfilm. A special filter installed in the water supply linewill correct this problem. (See Removing Spots andFilm.) Aluminum utensils can leave gray/black marks whenthey rub against other items. Load properly. Certain high acid foods can cause discoloration ofstainless steel and plastics if allowed to sit for a longperiod. Use the QUICK RINSE cycle or rinse by handif not operating dishwasher at once. Mixing stainless steel and silver utensils in silverwarebasket can cause pitting of the stainless steelblades. Avoid mixing stainless steel and silver.EtchingorCheck water hardness. For extremely hard water, itmay be necessary to install a water softener. (SeeDishwasher Dispenser & Detergents.)Stainedhand washing in a solution of 1/2 cup (120 ml) bleachand one quart (1 L) of warm water. Rinse thoroughly.nesting items. not Dry Chipped Food Soils Left on Dishesbe 20Problems Using too much detergent in soft or softened watercauses this film that cannot be removed. Adjust the amount of detergent based on the waterhardness. (Check Detergent Usage Guide.) Lower the water temperature.Detergent(SeeLeft in Cups Detergent may be old. Discard and use freshdetergent. Be sure water action can reach the dispenser. Check to see if cycle has been completed. Make sure items do not prevent the detergentdispenser from opening.Home water pressure may be too low--it should be20 to 120 pounds per square inch (psi).16
Solutionsto CommonDishwashingProblems(continued)Dishwasher LeaksCycl
Some limitations and exclusions apply. For prices and additional information call 1-800-827-6655. Sears Installation Service For Sears guaranteed professional installation of home appliances and items like garage door openers and water heaters, in the U.S.A. call 1-800-4-MY-HOME .