Transcription
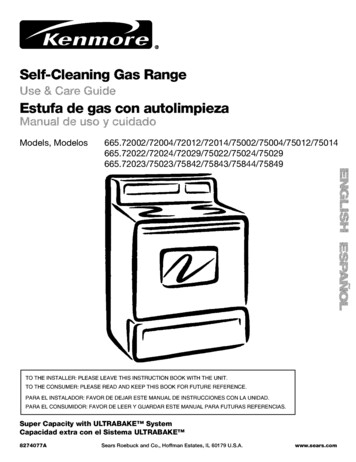
E/!TE HE4 HE5Gas DryerSecadoraa GasModels/Modelos110.9586#, 9587## color number/nQmero de color8562130Sears Roebuck and Co., Hoffman Estates, IL 60179 U.S.A.www.sears.com
TABLE OF CONTENTSPROTECTION AGREEMENTSPROTECTION AGREEMENTS .WARRANTY .23PEDESTAL OPTION WARRANTY .3DRYER SAFETY .4INSTALLATION INSTRUCTIONS .Tools and Parts .Optional Pedestal .Location Requirements .Electrical Requirements .Gas Supply Requirements .Venting Requirements .Plan Vent System .Install Vent System .Install Leveling Legs .Level Dryer .Make Gas Connection .Connect Vent .Reverse Door Swing .Complete Installation .66668891011121212131314DRYER USE .Starting Your Dryer .Stopping Your Dryer .Pausing or Restarting .Control Locked .Loading .Drying and Cycle Tips .Status Lights .Cycles .Options .Modifiers .1515161616161617171818Changing Cycles, Options and Modifiers . 19End of Cycle Signal .19TUMBLE FREETM Heated Dryer Rack . 19DRYER CARE .20Cleaning the Dryer Location . 20Cleaning the Lint Screen .20Cleaning the Dryer Interior .21Removing Accumulated Lint .21Vacation and Moving Care .21Changing the Drum Light .21TROUBLESHOOTING.SERVICE NUMBERS .221BACK COVERMaster Protection AgreementsCongratulations on making a smart purchase. Your newKenmore product is designed and manufactured for years ofdependable operation. But like all products, it may requirepreventive maintenance or repair from time to time. That's whenhaving a Master Protection Agreement can save you money andaggravation.Purchase a Master Protection Agreement now and protectyourself from unexpected hassle and expense.The Master Protection Agreement also helps extend the life ofyour new product. Here's what's included in the Agreement:if Expert serviceby our 12,000 professionalrepair specialistsV' Unlimited service and no charge for parts and labor on allcovered repairsif "No-lemon"guarantee - replacement of your coveredproduct if four or more product failures occur within twelvemonthsif Product replacementif your covered product can't be fixedif Annual Preventive Maintenanceextra chargeCheck at your request - noif Fast help by phone - phone support from a Sears technicianon products requiring in-home repair, plus convenient repairschedulingif Power surge protection against electrical damage due topower fluctuationsif Rental reimbursementlonger than promisedif repair of your covered product takesOnce you purchase the Agreement, a simple phone call is all thatit takes for you to schedule service. You can call anytime day ornight, or schedule a service appointment online.Sears has over 12,000 professional repair specialists, who haveaccess to over 4.5 million quality parts and accessories. That'sthe kind of professionalism you can count on to help prolong thelife of your new purchase for years to come. Purchase yourMaster Protection Agreement today!Some limitations and exclusions apply. For prices andadditional information, call 1-800-827-6655.Sears InstallationServiceFor Sears professional installation of home appliances, garagedoor openers, water heaters, and other major home items, in theU.S.A. call 1-800-4-MY-HOME .
WARRANTYFULL ONE-YEAR WARRANTYELECTRICAL PARTSON MECHANICALANDFor one year from the date of purchase, when this dryer isinstalled and operated according to the instructions provided inthis Use and Care Guide, Sears will repair this dryer, free ofcharge, if defective in materials or workmanship.NOTE: Exhausting this dryer with a plastic vent can void thiswarranty. See "Installation Instructions" for the complete exhaustrequirements for this dryer.Limited Two-Year WarrantyElectronic Control Boardon SENSORSMARTPEDESTAL OPTIONWARRANTYTMFor the second year from the date of purchase, Sears will replacethe electronic control board if defective in material orworkmanship. You will be charged for labor after the first year.Warranty RestrictionIf the dryer is subject to other than private family use, the abovewarranty coverage is effective for only 90 days.Full One-Year Warranty on Mechanical PartsFor one year from the date of purchase, supplier will repair orreplace any of its mechanical parts if defective in material orworkmanship. This Pedestal must be installed with this dryeraccording to the instructions provided in the Pedestal InstallationInstructions.Warranty RestrictionIf the Pedestal is subject to other than private family use and/orused with any other product than those listed in the installationinstructions, this warranty is null and void.In the space following, record your complete model number,serial number, and purchase date. You can find this informationon the model and serial number label.Have this information available to help you quickly obtainassistance or service when you contact Sears concerningappliance.yourModel number 110,Warranty ServiceWarranty service is available by contacting the nearest SearsService Center. This warranty applies only while the product is inuse in the United States.This warranty gives you specific legal rights and you may alsohave other rights which vary from state to state.For Sears Warranty information or to contact a Sears ServiceCenter, please refer to the service numbers located on the backpage of this manual.Sears, Roebuck and Co.D/817WA, Hoffman Estates, IL 60179Product RecordIn the space following, record your complete model number,serial number, and purchase date. You can find this informationon the model and serial number label, located at the top insidedryer door well.Have this information available to help you quickly obtainassistance or service when you contact Sears concerningappliance.Model number 110.yourSerial numberPurchasedateSave these instructionsreference.and your sales receipt for futureSerial numberPurchasedateSave these instructionsreference.and your sales receipt for future
DRYER SAFETYYour safety and the safety of others are very important.We have provided many important safety messages in this manual and on your appliance. Always read and obey all safetymessages.This is the safety alert symbol.This symbol alerts you to potential hazards that can kill or hurt you and others.All safety messages will fellow the safety alert symbol and either the word "DANGER" or "WARNING."These words mean:You can be killed or seriously injured if you don't immediateLYfollow instructions,You can be killed or seriously injured if you don't followinstructions,All safety messages will tell you what the potential hazard is, tell you how to reduce the chance of injury, and tell you what canhappen if the instructions are net followed.WARNING: For your safety, the informationin this manual must be followedto minimizethe risk of fire or explosion, or to prevent property damage, personal injury, or death.- Do not store or use gasolineor any other appliance.or other flammable- WHAT TO DO IF YOU SMELLGAS:vaporsand liquids in the vicinity of this Do not try to light any appliance. Do not touch any electrical switch; do not use any phone in your building. Clear the room, building, or area of all occupants. Immediately call your gas supplier from a neighbor's phone. Follow the gas supplier'sinstructions. If you cannotreach your gas supplier,- Installation and servicethe gas supplier.In the State of Massachusetts,call the fire department.must be performedby a qualifiedinstaller,serviceagency,orthe following installation instructions apply: Installations and repairs must be performed by a qualified or licensed contractor, plumber, or gasfitter qualified or licensed bythe State of Massachusetts. If using a ball valve, it shall be a T-handle type. A flexible gas connector, when used, must net exceed 3 feet.4
IMPORTANTSAFETYINSTRUCTIONSWARNING:To reduce the risk of fire, electric shock, or injury to persons when using the dryer, follow basic precautions,including the following: Read all instructions before using the dryer.Do not place items exposed to cooking oils in your dryer,Items contaminated with cooking oils may contribute toa chemical reaction that could cause a load to catch fire. Do not repair or replace any part of the dryer orany servicing unless specifically recommendedUse and Care Guide or in published user-repairtions that you understand and have the skills to Do not dry articles that have been previously cleaned in,washed in, soaked in, or spotted with gasoline, drycleaning solvents, other flammable, or explosivesubstances as they give off vapors that could ignite orexplode. Do not use fabric softeners or products to eliminate staticunless recommended by the manufacturer of the fabricsoftener or product. Do not allow children to play on or in the dryer. Closesupervision of children is necessary when the dryer isused near children. Do not use heat to dry articles containing foam rubber orsimilarly textured rubber-like materials.Clean lint screen before or after each load. Before the dryer is removed from service or discarded,remove the door to the drying compartment. Do not reach into the dryer if the drum is moving. Do not install or store the dryer where it will be exposedto the weather. Do not tamper with controls.SAVE THESEattemptin thisinstruccarry out. Keep area around the exhaust opening and adjacent surrounding areas free from the accumulation of lint, dust,and dirt. The interior of the dryer and exhaust vent should becleaned periodically by qualified service personnel. See installationinstructionsfor groundingrequirements.INSTRUCTIONSIMPORTANT: The gas installation must conform with local codes, or in the absence of local codes, with the National Fuel GasCode, ANSI Z223.1/NFPA 54.The dryer must be electrically grounded in accordance with local codes, or in the absence of local codes, with the NationalElectrical Code, ANSI/NFPA 70.
INSTALLATION INSTRUCTIONSCheck that you have everything necessary for correct installation.Proper installation is your responsibility.8" or 10" pipe wrench Knife8" or 10" adjustablewrench (for gasconnections)Flat-blade screwdriver Safety glasses Duct tape Pipe-joint compoundresistant to L.R gasAdjustable wrench thatopens to 1" (2.54 cm) orhex-head socket wrench(for adjusting dryer feet) Caulking gun andcompound (for installingnew exhaust vent)Level Gloves Pliers/4"nut driver or socketwrenchAre you placing the dryer on a pedestal? You can purchase apedestal separately for this dryer. This pedestal will add about14" (35.56 cm) to the height of your unit for a total height ofapproximately 52" (132.08 cm).Optional pedestalThe pedestal is available in three colorsWhite - Part Number 42842BiscuitParts suppliedRemove parts package from dryer drum. Check that all partswere included.1Graphite- Part Number 42844- Part Number 42846To order, call your local Sears store. For further information,please call f-800-4-M -HOMEe (1-800-469-4663)., 0[.0t, *4 Leveling legsNOTE: Do not use leveling legs if installing the dryer on apedestal.Parts neededCheck local codes and with gas supplier. Check existing gassupply, electrical supply and venting. Read "ElectricalRequirements," "Gas Supply Requirements" and "VentingRequirements" before purchasing parts. Explosion HazardKeep flammable materials and vapors, such asgasoline, away from dryer.For close-clearance installations between 31.5" (80.01 cm)and 37" (93.98 cm), see "Plan Vent System" section forventing requirements.Place dryer at least 18 inches (46 cm) above the floorfor a garage installation.Failure to do so can result in death, explosion, or fire.I3T'(93.99 cmMobile home installations require special parts (listed following)available for purchase from your local Sears store or SearsService Center. For further information, please call1-800-4-MY-HOME (f-800-469-4663). Mobile Home Installation Kit. Ask for Part Number 346764. 6Metal exhaust system hardware.You will need A location that allows for proper exhaust installation. A gasdryer must be exhausted to the outdoors. See "VentingRequirements." A grounded electrical outlet located within 2 ft (61 cm) ofeither side of the dryer. See "Electrical Requirements." A sturdy floor to support the total dryer weight of 200 Ibs(96.7 kg). The combined weight of a companion applianceshould also be considered.
A level floor with a maximum slope of 1" (2.5 cm) under entiredryer. (If slope is greater than 1" [2.5 cm], install ExtendedDryer Feet Kit, Part No. 279810.) Clothes may not tumbleproperly and automatic sensor cycles may not operatecorrectly if dryer is not level.Custom undercounterinstallation- Dryer only0"For a garage installation, you will need to place the dryer atleast 18" (46 cm) above the floor. If using a pedestal, you willneed an additional 6" (15.24 cm).Do not operate your dryer at temperatures below 45 F (7 C). Atlower temperatures, the dryer might not shut off at the end of anautomatic cycle. Drying times can be extended.0"Closet installation27"0"- Dryer onlyThe dryer must not be installed or stored in an area where it willbe exposed to water and/or weather.3 ,(7.6 cm)Check code requirements. Some codes limit, or do not permit,installation of the dryer in garages, closets, mobile homes, orsleeping quarters. Contact your local building inspector.NOTE: No other fuel-burningsame closet as a dryer.10 cm2)appliance can be installed in the48 in?Installation clearancesThe location must be large enough to fully open the dryer door.LIDryer Dimensions3 ,(124 ions2)(7.6 cm)Io"l 31,/o" o"I(O cm) (80 cm)501/ "128.27 cm)(O cm)ABA. Side view - closet or confinedB. Closet door with ventsRecessed or closet installationarea- Dryer on pedestalolo*Most installations require a minimum 51 '' (14 cm) clearancebehind the dryer for the exhaust vent with elbow. See "VentingRequirements."O"(O cm)The dimensions shown following are for the minimum spacingallowed.Additional spacing should be considered for ease ofinstallation and servicing. Additional clearances might be required for wall, door andfloor moldings. Additional spacing of 1" (2.5 cm) on all sides of the dryer isrecommended to reduce noise transfer.For closet installation, with a door, minimum ventilationopenings in the top and bottom of the door are required.Louvered doors with equivalent ventilation openings areacceptable. Companionappliance spacing should also be considered.-vMinimum installation spacing for recessed area, customundercounter or closet installation 14" max,q{-27" O"(68.6 cm)10"t - al,/2" -I 0"(0 cm)(O cm) (80 crn) (0 cm)ABA, Recessed areaB. Side view - closet or confined areaMobile home - additional installationrequirementsThis dryer is suitable for mobile home installations.The installation must conform to the Manufactured HomeConstruction and Safety Standard, Title 24 CFR, Part 3280(formerly the Federal Standard for Mobile Home Constructionand Safety, Title 24, HUD Part 280).Mobile home installationsrequire: Metal exhaust system hardware which is available forpurchase from your local Sears store or Sears Service Center. Mobile home Installation Kit Part Number 346764. See "Toolsand Parts" section for ordering information. Special provisions must be made in mobile homes tointroduce outside air into the dryer. The opening (such as anearby window) should be at least twice as large as the dryerexhaust opening.
Explosion HazardElectrical Shock HazardPlug into a grounded 3 prong outlet.Use a new AGA or CSA approved gas supply line.Do not remove ground prong.Install a shut-off valve.Do not use an adapter.Securely tightenDo not use an extension cord.If connected to LP, have a qualified person make suregas pressure does not exceed 13" (33 ca) watercolumn.Failure to follow these instructionsfire, or electrical shock.ncan result in death,INSTRUCTIONS For a grounded, cord-connected dryer:This dryer must be grounded. In the event of malfunction orbreakdown, grounding will reduce the risk of electric shockby providing a path of least resistance for electric current.This dryer is equipped with a cord having an equipmentgrounding conductor and a grounding plug. The plug mustbe plugged into an appropriate outlet that is properlyinstalled and grounded in accordance with all local codesand ordinances.WARNING:Improper connection of the equipmentgrounding conductor can result in a risk of electric shock.Check with a qualified electrician or service representativeor personnel if you are in doubt as to whether the dryer isproperly grounded. De not modify the plug provided with thedryer: if it will not fit the outlet, have a proper outlet installedby a qualified electrician.SAVE THESE8Examples of a qualifiedINSTRUCTIONSperson include:licensed heating personnel,authorized gas company personnel,authorized service personnel.120-Volt, 60-Hz., AC-only, 15- or 2g-amp fused electricalsupply is required. (Time-delay fuse or circuit breaker isrecommended.) It is recommended that a separate circuitserving only this dryer be provided.GROUNDINGall gas connections.andFailure to do so can result in death, explosion, or fire.Gas TypeNatural gas:This dryer is equipped for use with natural gas. It is designcertified by CSA International for L.R (propane or butane) gaseswith appropriate conversion.nYour dryer must have the correct burner for the type of gas inyour home. Burner information is located on the rating platein the door well of your dryer. If this information does notagree with the type of gas available, contact your local Searsstore or Sears Service Center.LR gas conversion:Conversionmust be made by a qualifiedtechnician.No attempt shall be made to convert the appliance from the gasspecified on the model/serial rating plate for use with a differentgas without consulting the serving gas supplier.Gas supply linen 1/2"IPS pipe is recommended.n%" approved tubing is acceptable for lengths under 26 ft(6.1 m) if local codes and gas supplier permit.nMust include 1/8"NPT plugged tapping accessible for testgauge connection, immediately upstream of the gasconnection to the dryer (see following illustration).
Must include a shutoff valve:An individual shutoff valve must be installed within 6 feet(1.8 m) of the dryer in accordance with the National Fuel GasCode, ANSI Z223.1. The location should be easy to reach foropening and closing.ACEBurner input requirementsElevations up to 10,000 ft (3,048 meters): The design of this dryer is certified by CSA International foruse at altitudes up to lg,000 ff (3,048 m) above sea level atthe B.T.U. rating indicated on the model/serial number plate.Burner input adjustments are not required when the dryer isoperated up to this elevation.Elevations above 10,000 ft (3,048 meters): BA. %" flexible gas connectorB. 3/8"pipe to flare adapter fittingC. 1/8"NPT plugged tappingD. /2"NPT gas suppty lineE. Gasshutoff valveGas supply connection requirementsThere are many methods by which your gas dryer can beconnected to the gas supply. Listed here are some guidelines fortwo different methods of connection.Option1 (RecommendedWhen installed above 10,000 ft (3,048 m) a 4% reduction ofthe burner B.T.U. rating shown on the model/serial numberplate is required for each 1,000 ft (305 m) increase inelevation.DGas supply pressure testing The dryer must be disconnected from the gas supply pipingsystem during pressure testing at pressures greater than/2psi.method)Flexible stainless steel gas connector: If local codes permit, use a new flexible stainless steel gasconnector (Design Certified by the American Gas Associationor CSA International) to connect your dryer to the rigid gassupply line. Use an elbow and a %" flare x %" NPT adapterfitting between the stainless steel gas connector and thedryer gas pipe, as needed to prevent kinking.Option 2 (AlternateFire Hazardmethod)Approved aluminum or copper tubing:Use a heavy metal vent. Lengths under 20 ft (6.1 m) can use %" approved tubing (ifcodes and gas supplier permit).Do not use a plastic vent. If you are using natural gas, do not use copper tubing. %" flare x %" NPT adapter fitting between dryer pipe and%" approved tubing. Lengths over 20 ft (6.1 m) should use larger tubing and adifferent size adapter fitting.WARNING: If your dryer has been converted to use L.R gas, %" L.Rcompatible copper tubing can be used. If the total length ofthe supply line is more than 20 ft (6.1 m), use larger tubing.4" (10.2 cm) heavy metal exhaust vent and clamps must be used.DURASAFE TM venting products are recommended and areavailable from your local Sears store or Sears Service Center.NOTE: Pipe joint compounds that resist the action of L.E gasmust be used. Do not use TEFLON , tape.DURASAFE TM vent products can be purchased from your dealer.For further information, please call 1-800-4-MY-HOME (1-800-46g-4663) or visit our Internet site at: www.sears.com.Dryer gas pipe The gas pipe that comes out through the rear of your dryerhas a %" male pipe thread.*6 A,,(15.9 cm)/*NOTE: If the dryer is mounted on a pedestal, the gas pipe heightmust be an additional 14" (38.86 cm) from the floor.is a registered trademarkFailure to follow these instructions can result in deathor fire.To reduce the risk of fire, this dryer MUST BEEXHAUSTED OUTDOORS. The dryer exhaust must not be connected into any gas vent,chimney, wall, ceiling, or a concealed space of a building. Do not use an exhaust hood with a magnetic latch. Do not install flexible metal vent in enclosed walls, ceilings orfloors. Use clamps to seal all joints. Exhaust vent must not beconnected or secured with screws or other fastening deviceswhich extend into the interior of the duct. Do not use ducttape.IMPORTANT: Observe all governing codes and ordinances.A. Y2"NPT gas supply lineB. %" NPT dryer pipeTEFLONDo not use a metal foil vent.of E.I. Du Pont De Nemours and Company.Improper venting can cause moisture and lint to collectindoors, which may result in: Moisture damage to woodwork,wallpaper, carpets, etc. Housecleaningfurniture, paint,problems and health problems.
Use a heavy metal vent. Do not use plastic or metal foil vent.Rigid metal vent is recommendedkinking.to prevent crushing andFlexible metal vent must be fully extended and supported whenthe dryer is in its final position. Remove excess flexible metal ventto avoid sagging and kinking that may result in reduced airflowand poor performance.Optional exhaust installationsThis dryer can be converted to exhaust out the right side, leftside, or through the bottom. Contact your local dealer to have thedryer converted.An exhaust hood should cap the vent to prevent rodents andinsects from entering the home.Exhaust hood must be at least 12" (30.5 cm) from the ground orany object that may be in the path of the exhaust (such asflowers, rocks or bushes, etc.).If using an existing vent system, clean lint from the entire lengthof the system and make sure exhaust hood is not plugged withlint. Replace any plastic or metal foil vent with rigid metal orflexible metal vent.Fire HazardCover unused exhaust holes with one of thefollowing kits:279818 (white)279915 (graphite)279925 (biscuit)Typical exhaust installationsTypical installations vent the dryer from the rear of the dryer.Other installations are possible.BContact your local dealer.Failure to follow these instructions can result in death,fire, electrical shock, or serious injury.C.F.GAA DryerB. ElbowC. WaftD. Exhaust hoodE. ClampsE Rigid metal or flexible metal ventG. Vent length necessary to connect elbowsH. Exhaust outletBCA. Standard rear offset exhaust installationB. Left or right side exhaust installationC. Bottom exhaust installation (Not an optionwith pedestal installations.)Alternate installations for close clearancesVenting systems come in many varieties. Select the type best foryour installation. Two close-clearance installations are shown.Refer to the manufacturer's instructions.IiLiL //isI/l1ABA. Over-The-Top installation (also available with oneoffset elbow)B. Periscope installationNOTE: The following kits for close clearance alternateinstallations are available for purchase. For further information,please call f-8OO-4-M -HOME e (1-800-469-4663). Over-The-Top Installation:Part Number 26-49900lO
Periscope Installation (For use with dryer vent to wall ventmismatch):The angled hood style (shown following) is acceptable.4"Part Number 26-49901 - Less than 5" (12.7 cm) mismatchPart Number 26-49998 - 5" (12.7 cm) to 18" (45.72 cm)mismatch) , ( Part Number 26-49904 - 18" (45.72 cm) to 29" (73.66 cm)mismatchSee the exhaust vent length chart that matches your hoodtype for the maximum vent lengths you can use.Part Number 26-49995 - 29" (73.66 cm) to 50" (127 cm)mismatchSpecial provisions for mobile home installationsThe exhaust vent must be securely fastened to a noncombustibleportion of the mobile home structure and must not terminatebeneath the mobile home. Terminate the exhaust vent outside.)Exhaust3.systemslonger than specifiedwill: Shorten the life of the dryer. Reduce performance, resulting in longer drying times andincreased energy usage.Determine the number of elbows you will need.IMPORTANT: Do not use vent runs longer than specified inthe Vent Length Chart.The following chart helps you determine your maximum ventlength based on the number of 90 turns or elbows you willneed and the type of vent (rigid or flexible metal) and hoodthat you will use.Vent Length ChartDetermine Vent Lengfi1. Select the route that will provide the straightest and mostdirect path outdoors. Plan the installation to use the fewestnumber of elbows and turns. When using elbows or makingturns, allow as much room as possible. Bend vent graduallyto avoid kinking. Avoid 99 turns when possible.better2.DetermineNumber of90 turnsor elbowsType ofventBox orLouveredhoodsAngledhoodsORigid metalFlexible metal64 ft (20 m)36 ft (11 m)58 ft (17.7 m)28 ft (8.5 m)1Rigid metalFlexible metal54 ff (16.5 m)31 ft (9.4 m)48 ft (14.6 m)23 ft (7 m)2Rigid metalFlexible metal44 ft (13.4 m)27 ft (8.2 m)38 ft (11.6 m)19 ft (5.8 m)3Rigid metalFlexible metal35 ft (10.7 m)25 ft (7.6 m)29 ft (8.8 m)17 ft (5.2 m)4Rigid metalFlexible metal27 ft (8.2 m)23 ft (7 m)21 f1 (6.4 m)15 ft (4.6 m)goodvent lengthThe maximumlength of the exhaustsystemdepends The type of vent (rigid metal or flexible metal). The number Type of hood.Recommendedof elbowsupon:NOTE: Side and bottom exhaust installations have a 90 turninside the dryer. To determine maximum exhaust length, add one90 turn to the chart.used.hood styles are shown here.1. (Optional) Put on safety glasses and gloves.2.A3.4.(10.2 cm)A. Louveredhood styleB. Box hood styleInstall exhaust hood. Use caulking compound to seal exteriorwall opening around exhaust hood.Connect vent to exhaust hood. Vent must fit inside exhausthood. Secure vent to exhaust hood with 4" (10.2 cm) clamp.Run vent to dryer location. Use the straightest path possible.See "Determine Vent Length." Avoid 90 turns. Use clamps toseal all joints. Do not use duct tape. screws or other fasteningdevices that extend into the interior of the vent to securevent.11
Lgl esCheck the levelness of the dryer. Check levelness firstside to side, then front to back.1. To protect the floor, use a large flat piece of cardboard fromthe dryer carton. Place cardboard under the entire back edgeof the dryer. See illustration.2.Firmly grasp the body of the dryer (n
Sears has over 12,000 professional repair specialists, who have access to over 4.5 million quality parts and accessories. That's . assistance or service when you contact Sears concerning your appliance. Model number 110. Serial number . and 37" (93.98 cm), see "Plan Vent System" section for venting requirements. I_ 3T' (93.99 cm
