Transcription
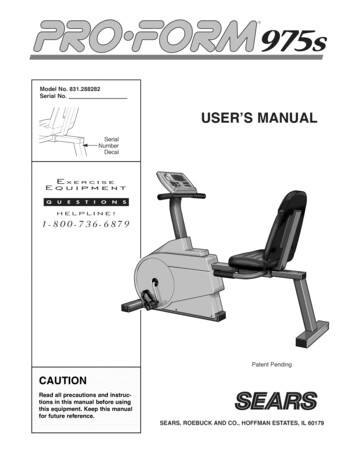
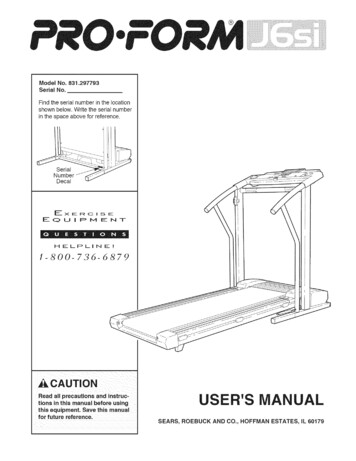
Model No. 831.297793Serial No.Find the serial number in the locationshown below. Write the serial numberin the space above for reference.SerialDecalEXERCISEEOuIPMENTOHELPL NE!1-800-736-6879kCAUTIONRead all precautions and instructions in this manual before usingthis equipment. Save this manualfor future reference.'SALSEARS, ROEBUCK AND CO., HOFFMAN ESTATES, IL 60179
TABLE OF CONTENTSIMPORTANT PRECAUTIONS .BEFORE YOU BEGIN .ASSEMBLY .OPERATION AND ADJUSTMENT.HOW TO FOLD AND MOVE THE TREADMILL .MAINTENANCE AND TROUBLE-SHOOTING.CONDITIONING GUIDELINES .PART LIST .ORDERING REPLACEMENT PARTS .FULL 90-DAY WARRANTY .Note: An EXPLODED DRAWING is attached in the center of this manual.356914151719Back CoverBack Cover
iMPORTANT PRECAUTIONSDANG ER: Toreducetheriskofburns,fire,electricshock,orinju topersons,readthefollowingimportant precautions and information before operating the treadmill.It is the responsibility of the owner to ensurethat all users of this tread mill are adequatelyinformed of all warnings and precautions,of 400 volts or less and a minimum surge dissipation of 450 joules. The surge suppressormust be electrically rated for 120 volts AC and15 amps.2. Use the treadmill only as described in thismanual.12. Keep the power cord and the surge suppressor away from heated surfaces.3. Place the treadmill on a level surface, with atleast eight feet of clearance behind it. Do notplace the treadmill on any surface that blocksair openings. To protect the floor or carpetfrom damage, place a mat under the treadmill,4.13. Never move the walking belt while the poweris turned off. Do not operate the treadmill ifthe power cord or plug is damaged, or if thetreadmill is not working properly. (SeeBEFORE YOU BEGIN on page 5 if the treadmill is not working properly.)Keep the treadmill indoors, away from moisture and dust. Do not put the treadmill in agarage or covered patio, or near water.14. Never start the treadmill while you are standing on the walking belt. Always hold thehandrails while using the treadmill.5. Do not operate the treadmill where aerosolproducts are used or where oxygen is beingadministered.15. The treadmill is capable of high speeds.Adjust the speed in small increments to avoidsudden jumps in speed.6. Keep children under the age of 12 and petsaway from the treadmill at all times.7.16. The pulse sensor is not a medical device.Various factors, including the user's movemerit, may affect the accuracy of heart ratereadings. The pulse sensor is intended onlyas an exercise aid in determining heart ratetrends in general.The treadmill should not be used by personsweighing more than 250 pounds.8. Never allow more than one person on thetreadmill at a time.9. Wear appropriate exercise clothing whenusing the treadmill. Do not wear loose clothing that could become caught in the treadmill,Athletic support clothes are recommended forboth men and women. Always wear athleticshoes. Never use the treadmill with bare feet.wearing only stockings, or in sandals.17. Never leave the treadmill unattended while itis running. Always remove the key, unplugthe power cord and move the on/off switch tothe off position when the treadmill is not inuse. (See the drawing on page 5 for the Iocation of the on/off switch.)18. Do not attempt to raise, lower, or move thetreadmill until it is properly assembled. (SeeASSEMBLY on page 6. and HOW TO MOVETHE TREADMILL on page 14.) You must beable to safely lift 45 pounds (20 kg) in order toraise, lower, or move the treadmill.10. When connecting the power cord (see page9), plug the power cord into a surge suppressor (not included) and plug the surge suppressor into a grounded circuit capable ofcarrying 15 or more amps. No other applianceshould be on the same circuit. Do not use anextension cord.19. Do not change the incline of the treadmillplacing objects under the treadmill.11. Use only a single-outlet surge suppressorthat is UL 1449 listed as a transient voltagesurge suppressor (TVSS). The surge suppressot must have a UL suppressed voltage ratingby20. When folding or moving the treadmill, makesure that the storage latch is fully closed.3
21. Inspect and tighten all parts of the treadmillregularly.22. Never drop or insert any object into anye pening.23.DAN G ER: Alwaysthepowerunplugcord immediately after use, before cleaningthe treadmill, and before performing the maintenance and adjustment procedures de-scribed in this manual. Never remove themotor hood unless instructed to do so by anauthorized service representative. Servicingother than the procedures in this manualshould be performed by an authorized servicerepresentative only.24. This treadmill is intended for in-home useonly. Do not use this treadmill in any commercial, rental, or institutional setting.WARNING:Before beginning this or any exercise program, consult your physician. Thisis especially important for persons over the age of 35 or persons with pre-existing health problems.Read all instructions before using. SEARS assumes no responsibility for personal injury or propertydamage sustained by or through the use of this product.SAVE THESE INSTRUCTIONSThe decals shown at the right and belowhave been placed on your treadmill. If adecal is missing, or if it is not legible,please call our toll-free HELPLINE toorder a free replacement decal (see theback cover of this manual). Apply thedecal in the location shown.ACAUTiONKEEP HANDSAND FEETAWAYFROMTHiSAREAWHILETHETREADMILLiS iN OPERATION., Never allow children onor around treadmill, Storage latch must befully engaged beforetreadmillis moved orstored, incline must be set atlowest level before foldingtreadmillinto storageposition.
BEFORE YOU BEGINThank you for selecting the new PROFORM J6sitreadmill. The J6si treadmill combines advanced tech-Monday through Saturday, 7 a.m. until 7 p.m. CentralTime (excluding holidays). To help us assist you,please note the product model number and serial number before calling. The model number of the treadmillis 831.297793. The serial number can be found on anology with innovative design to let you enjoy an excellent form of cardiovascular exercise in the convenienceand privacy of your home. And when you're not exercising, the unique J6si can be folded up, requiring lessthan half the floor space of other treadmills.decal attached to the treadmill (see the front cover ofthis manual for the location).For your benefit, read this manual carefully beforeusing the treadmill. If you have additional questions,please call our toll-free HELPLINE at 1-800-736-6879,Before reading further, please review the drawingbelow and familiarize yourself with the parts that arelabeled.Book HolderWater BottleHolder (Bottlenot included)JConsolePulse SensorHandrailStorage LatchLEFT SIDERIGHSIDEOn/Off SwitchWalking BeltCircuitBreakerFrontWheelFoot RailsPower CordCushioned Walking Platformr RollerAdjustment Bolts5
ASSEMBLYAssembly requires two people. Set the treadmill in a cleared area and remove all packing materials. Do notdispose of the packing materials until assembly is completed. Assembly requires the included allen wrenchand your own phillipsscrewdriver@ C] ,adjustableWith the help of a second person, carefully raise thetreadmill to the upright position. While the other persontips the treadmill to one side and holds it, insert one of theExtension Legs (103) into the treadmill. Make sure thatthe Extension Leg is turned so the Warning Decal (20) ison top. Tighten two of the four Short Screws (101) into thetreadmill and the Extension Leg.wrenchand scissors1J.020Next, tip the treadmill to the other side and attach the otherExtension Leg (not shown) in the same way. Lower theside of the treadmill so that both Extension Legs (103) areresting flat on the floor.Refer to HOW TO LOWER THE TREADMILLAFOR USEon page 14. Follow step 2 to lower the treadmill.Attach the latch support to the center hole in the left Upright(82) with a 3/4" Screw (81) as shown. Make sure that theScrew is tight, but do not overtighten it; if the Screwis overtightened,the latch will not slide smoothly.Remove the tape from the Latch Assembly (77). Be careful to hold the parts together. Inset drawings A and Bshow how the parts fits together. Make sure that the tabson the latch are touching one side of the bracket and theback end of the latch is flush with the other side of the28277 81Bracket. II ' " . ' [ISupportLatchBTabsFlush, 7,Spring.i! .Spring-- ./bracket. Then, insert the two springs into the bracket.Attach the Latch Assembly (77) to the left Upright (82)with two 3/4" Screws (81).Cut the plastic tie off the bracket on the base of eachUpright (82).9:PlaNext, cut the plastic tie off the Left Handrail (74).Position the Left Handrail on the left Upright (82). Thebracket on the base of the left Upright should be insideof the lower end of the Left Handrail, as shown in theinset drawing.6Tie)/
While a second person holds the Right Handrail (85) andthe Console Base (87) near the right Upright (82), cut theindicated plastic ties off the Right Handrail. Do not cutthe other plastic tie off the Right Handrail, Next, cutthe plastic tie off the Upright Wire Harness (34) in theright Upright (82). Do not drop the Upright WireHarness into the right Upright,Do notRefer to the inset drawing. Connect the Upright WireHarness (34) to the Console Wire Harness (48). Thelatch on the Console Wire Harness should snap onto theUpright Wire Harness. If the Wire Harnesses do not fittogether easily, turn them; do not force the WireHarnesses together,85Cut Plastic TieNext, connect the right pulse wire, the left pulse wire andthe ground wire to the corresponding connectors on theConsole Wire Harness (48); make sure that the wireswith tags are connected to each other,Note that there is still a wire tie in the RightHandrail (85); do not remove this wire tie,Do notRemoveWire Tie87Set the left side of the Console Base (87) on the LeftHandrail (74). Insert as much of the wires as possible into the Right Handrail (85) and down into theright Upright (82).85Next, set the right side of the Console Base (87) on theRight Handrail (85). Insert all excess Console WireHarness (48) into the Right Handrail,6. Position the Right Handrail (85) on the right Upright (82)as shown; be careful not to damage the wires, Thebracket on the base of the right Upright should be insideof the lower end of the right Handrail, as shown in theinset drawing.Thread two Handrail Bolts (78) with Washers (36) into theLeft Handrail (74) and the left Upright (82) as shown. Donot tighten the Handrail Bolts yet. Next, thread twoHandrail Bolts (78) with Washers (36) into the RightHandrail (85) and the right Upright (82). Do not tightenthe Handrail Bolts yet. Be careful to avoid damagingthe wires,87363678"ket
7. (74,85)withfourLongScrews(114).787Refer to assembly step 6. Tighten the four HandrailBolts (78) used in assembly step 6,8. Press two Small Upright Plugs (79) into the holes nearthe upper ends of the Uprights (82).9. Remove the backing from the Adhesive Clip (99). Pressthe Adhesive Clip onto the base of the right Upright (82)as shown. Press the Allen Wrench (100) into theAdhesive Clip.S O9910. Make sure that all parts are tightened before you use the treadmill, To protect the floor or carpet, place amat under the treadmill.8
OPERATION AND ADJUSTMENTTHE PERFORMANTLUBE TM WALKING BELTThis product is for use on a nominal 120-volt circuit,and has a grounding plug that looks like the plug illustrated in drawing 1 below. A temporary adapter thatlooks like the adapter illustrated in drawing 2 may beused to connect the surge suppressor to a 2-polereceptacle as shown in drawing 2 if a properlygrounded outlet is not available.Your treadmill features a walking belt coated withPERFORMANT LUBE TM, a high-performance lubricant.IMPORTANT: Never apply silicone spray or othersubstances to the walking belt or the walking platform. Such substances will deteriorate the walkingbelt and cause excessive wear,HOW TO PLUG IN THE POWER CORDOutlet BoxJk DANG ER:ImproperSuppressorconnectionGrounding Pinof the equipment-grounding conductor canresult in an increased risk of electric shock.Check with a qualified electrician or serviceman if you are in doubt as to whether theproduct is properly grounded. Do not modifythe plug p rovided with the product--if it willnot fit the outlet, have a proper outletinstalled by a qualified electrician.Grounding PinGrounded OutletGrounding PlugGrounded Outlet BoxAdapterYour treadmill, like any other type of sophisticatedelectronic equipment, can be seriously damaged bysudden voltage changes in your home's power.Voltage surges, spikes, and noise interference canresult from weather conditions or from other appliancesbeing turned on or off. To decrease the possibility ofyour treadmill being damaged, always use a surgesuppressor with your treadmill (see drawing 1 atthe right).Metal ScrewSurge suppressors are sold at most hardware storesand department stores. Use only a single-outlet surgesuppressor that is UL 1449 listed as a transient voltagesurge suppressor (TVSS). The surge suppressor musthave a UL suppressed voltage rating of 400 volts orless and a minimum surge dissipation of 450 joules.The surge suppressor must be electrically rated for120 volts AC and 15 amps.The temporary adapter should be used only u
'S AL SEARS, ROEBUCK AND CO., HOFFMAN ESTATES, IL 60179 TABLE OF CONTENTS . _WARNING: Before beginning this or any exercise program, consult your physician. This is especially important for persons over the age of 35 or persons with pre-existing health problems. Read all instructions before using. SEARS assumes no responsibility for personal injury or property damage
