Transcription
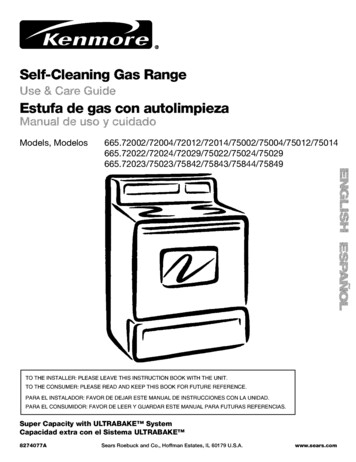
Self-CleaningGas RangeEstufa de gas con autolimpiezaModels, 12/75014665. 72022/72024/72029/75022/75024/75029665. 72023/75023/75842/75843/75844/75849rTO THE INSTALLER:TO THE CONSUMER:PLEASE LEAVE THIS INSTRUCTIONJBOOK WITH THE UNIT.PLEASE READ AND KEEP THIS BOOK FOR FUTURE REFERENCE.PARA EL INSTALADOR:PARA EL CONSUMIDOR:FAVOR DE DE JAR ESTE MANUAL DE INSTRUCCIONESFAVOR DE LEER Y GUARDAR ESTE MANUAL PARA FUTURAS REFERENCIAS.Super Capacity with ULTRABAKE TM SystemCapacidadextra con el Sistema ULTRABAKE8274077ACON LA UNIDAD.TMSears Roebuck and Co, Hoffman Estates, IL 60179 U.S.A.www.sears.com
TABLE OF CONTENTSWE SERVICE WHAT WE SELL . 3WARRANTY .3RANGE4SAFETY .The Anti-Tip Bracket .PARTSAND FEATURES.COOKTOPUSE .Control Knobs .Cooktop Lockout .Sealed Surface Burners .SURESIMMER TM .Home Canning .Cookware .ELECTRONICOVENCONTROL.Display .Start/Enter .Off/Cancel .Clock .Tones .Fahrenheit and Celsius .Timer .Oven Lockout .Oven Temperature Control .567778999t0101010101011111111BEFORE USING .Aluminum Foil .Positioning Racks and Bakeware .STURDIGLIDE TM Oven Racks .Bakeware .Meat Thermometer .Oven Vent .12121212131313OVENUSE .13Baking and Roasting .Broiling .RECIPE RECALL TM .Serve Warm .Timed Oven Control .1314151516Using Warm & Ready Drawer .12-Hour Shut-Off .1718RANGECARE .Self-Cleaning Cycle .General Cleaning .Oven Light .Console Night Ught .Oven Door .Warming Drawer .Storage Drawer .TROUBLESHOOTING2.181820212222232324
WE SERVICEWHAT WE SELLYour purchase has added value because you can depend onSears HomeCentraP for service. With over 12,000 trained repairspecialists and access to over 4.2 million parts and accessories,we have the tools, parts, knowledge and skills to ensure ourpledge: We Service What We Sell.Sears Maintenance AgreementsYour Kenmore appliance is designed, manufactured and testedto provide years of dependable operation. Yet any majorappliance may require service from time to time. The SearsMaintenance Agreement offers you an outstanding serviceprogram, affordably priced.The Sears Maintenance Agreement Is your way to buy tomorrow's service at today's price. Eliminates repair bills resulting from normal wear and tear. Provides for non-technical Even if you don't need repairs, provides an annual PreventiveMaintenance Check, at your request, to ensure that yourappliance is in proper running condition.and instructionalWARRANTYFULL ONE-YEARWARRANTYFor information concerning Sears Canada MaintenanceAgreements, call 1-800-361-6665.ON ALL PARTSRESTRICTIONIf the range is subject to other than private family use, the abovewarranty coverage is effective for only 90 days.WARRANTY SERVICEWARRANTY SERVICE IS AVAILABLE BY CONTACTING THENEAREST SEARS SERVICE CENTER IN THE UNITED STATES.This warranty applies only while the product is in use in theUnited States. This warranty gives you specific legal rights andyou may also have other rights which vary from state to state.For Sears warranty information469-4663.in the United States call 1-800-Sears, Roebuck and Co.D/817WA, Hoffman Estates, IL 60179assistance.Some limitations apply. For more information, call1-800-827-6655.WARRANTYFor one year from the date of purchase, when this range isinstalled and operated according to instructions provided in theInstallation Instructions and Use & Care Guide, Sears will repairthis range, free of charge, if defective in material or workmanship.PRODUCTRECORDIn the space below, record your complete model number, serialnumber, and purchase date. You can find this information on themodel and serial number label, located as shown in the Parts andFeatures section of this book. Have this information available tohelp you quickly obtain assistance or service when you contactSears concerning your appliance.Model number 665.Serial numberPurchase date .Save these instructions and your sales receipt for futurereference.3
RANGE SAFETYYoursafety and the safety of othersare veryimportant.We have provided many important safety messages in this manual and on your appliance. Always read and obey allsafety messages.This symbol alerts you to potential hazards that can kill or hurt you and others.All safetyfollow the safety alert symbol and either the word "DANGER" orThisis themessagessafety alertwillsymbol."WARNING." These words mean:You can be killed or seriously injured if you don'timmediately follow instructions.You can be killed or seriously injured if you don'tfollow instructions.All safety messages will tell you what the potential hazard is, tell you how to reduce the chance of injury, and tell youwhat can happen if the instructions are not followed.ImayARNING:result causingIf the informationpropertydamage,in this manualpersonalis notinjuryfollowedor death.exactly,- Do not store or use gasolineor any other appliance.or other flammable- WHAT TO DO IF YOU SMELLGAS:vaporsa fire or explosionand liquids in the vicinityof this Do not try to light any appliance. Do not touch any electricalswitch. Do not use any phone in your building. Immediately call your gas supplier from a neighbor'sinstructions. If you cannotreach your gas supplier,- Installation and servicethe gas supplier.phone. Follow the gas supplier'scall the fire department.must be performedby a qualifiedinstaller,serviceagencyorThe California Safe Drinking Water and Toxic Enforcement Act requires the Governor of California to publish a listof substances known to the State of California to cause cancer, birth defects, or other reproductive harm, andrequires businesses to warn of potential exposure to such substances.WARNING: This product contains a chemical known to the State of California to cause cancer, birth defects, orother reproductive harm.This appliance can cause low-level exposure to some of the substances listed, including benzene, formaldehyde,carbon monoxide, toluene, and soot.4
The range will not tip during normal use. However, the range can tip if you apply too much force or weight to the open doorwithout the anti-tip bracket fastened down properly.Tip Over HazardA child or adult can tip the range and be killed.Connect anti-tip bracket to rear range foot.Reconnect the anti-tip bracket, if the range is moved.See the installation instructions for details.Failure to follow these instructions can result in death or serious burns to childrenand adults.Anti-Tip BracketMaking sure the anti-tip bracket is installed: Slide range forward. Look for the anti-tip bracket securely attached to floor. Slide range back so rear range foot is under anti-tip bracket.Range FootIMPORTANT SAFETY INSTRUCTIONSWARNING:To reduce the risk of fire, electricalshock, injury to persons, or damage when using therange, follow basic precautions, including thefollowing: WARNING: TO REDUCE THE RISK OFTIPPING OF THE RANGE, THE RANGE MUST BESECURED BY PROPERLY INSTALLED ANTI-TIPDEVICES. TO CHECK IF THE DEVICES AREINSTALLED PROPERLY, SLIDE RANGE FORWARD,LOOK FOR ANTI-TIP BRACKET SECURELYATTACHED TO FLOOR, AND SLIDE RANGE BACKSO REAR RANGE FOOT IS UNDER ANTI-TIPBRACKET. CAUTION:Do not store items of interest tochildren in cabinets above a range or on thebackguard of a range - children climbing on therange to reach items could be seriously injured. Proper Installation - The range, when installed, mustbe electrically grounded in accordance with localcodes or, in the absence of local codes, with theNational Electrical Code, ANSI/NFPA 70.Be sure therange is properly installed and grounded by aqualified technician. Disconnect the electrical supply before servicing theappliance. Never Use the Range for Warming or Heating theRoom. Injuries may result from the misuse of appliance doorsor drawers such as stepping, leaning, or sitting on thedoors or drawers. Maintenance - Keep range area clear and free fromcombustible materials, gasoline, and other flammablevapors and liquids. Storage in or on the Range - Flammable materialsshould not be stored in an oven or near surface units. Top burner flame size should be adjusted so it doesnot extend beyond the edge of the cooking utensil.For self-cleaning ranges Before Self-Cleaning the Oven - Remove broiler panand other utensils. Wipe off all excessive spillagebefore initiating the cleaning cycle. This range is equipped with a three-prong groundingplug for your protection against shock hazard andshould be plugged directly into a properly groundedreceptacle. Do not cut or remove the grounding prongfrom this plug.SAVE THESE INSTRUCTIONS5
PARTS AND FEATURESThis manual covers several different models. The range you have purchased may have some or all of the items listed. The locations andappearances of the features shown here may not match your model.ControlPanel24356oO.O00nsoop TOW1.Surface Burner Indicator2.Left Rear Burner Control3.Left Front Burner Control (PowerBurner)5.Right Rear Control(SURESIMMER TM)4.Right Front Control (Power Burneron some models)6.Warm & Ready Selector Switch (onsome models)Range2IX\\345II\\\\\\1415161761, Oven Vent62,Sealed Surface Burner3.Center Grate (on somemodels)4.5,Burner Grate SystemPower Burner6,Anti-Tip Bracket7,8,Door Stop clipModel and Serial NumberPlate (behind left side ofstorage drawer)10, Console Night Light(on some models)11, Electronic Oven Control9.Warm & Ready WarmingDrawer (on some models);Storage Drawer (on somemodels)13. Control Panel12. SURESIMMER Burner14, AutomaticSwitchOven Light15. Door Gasket16. STURDIGLIDE TM HaftRack with removableinsert (on some models)17. STURDIGLIDE Oven Rackwith integrated handle (onsome models)
COOKTOP USEIREMEMBER: When range is in use or (on somemodels) during the Self-Cleaning cycle, the entirecooktop area may become hot.Power failureIn case of prolonged power failure, the surface burners can be litmanually. Hold a lit match near a burner and turn knobcounterclockwise to LITE. After burner lights, turn knob tosetting.Power BurnerThe left front burner is designed to give ultra-high power when itis turned to HI. It can be used to rapidly bring liquid to a boil andto cook large quantities of food. On some models both frontburners are Power Burners.Fire HazardDo not let the burner flame extend beyond theedge of the pan.Turn off all controls when not cooking.Failure to follow these instructions can result indeath or fire.Electric ignitors automatically light the surface burners whencontrol knobs are turned to LITE.Before setting a control knob, place filled cookware on the grate.Do not operate a burner using empty cookware or while the grateis vacant.To Set1.Push in and turn knob counterclockwiseto LITE.All four surface burners will click. Only the burner with thecontrol knob turned to LITE will produce a flame.2.Turn knob anywhere between HI and LO. Use the followingchart as a guide when setting heat levels.SETTINGRECOMMENDEDLITE Light the burner.HI Start food cooking. Bring liquid to a boil. Hold a rapid boil. Quickly brown or sear food. To fry chicken. Maintain a slow boil. Fry or saut6 foods. Cook soups, sauces and gravies.Mid-range(between HI and LO)LO USEThe Cooktop Lockout prevents unintended use of the surfaceburners. When the cooktop is locked out, the surface burnerscannot be turned on by the control knobs.The cooktop will remain locked after a power failure if it waslocked before the power failure. If the product loses power,appliance will automatically go into the lockout position. Thesurface burners cannot be activated until power is restored andthe Cooktop Lockout is disengaged.To Lock/Unlock Cooktop:Before using, turn all control knobs to OFF. PressTOP keypad for 5 seconds until a single tone andappear on the display. After 5 seconds, "Loc On"from the display, and a picture of the cooktop willand hold the"Loc on" willwill disappearappear.Repeat to unlock cooktop. "Loc OFF" will appear on the displayfor 5 seconds and the picture of the cooktop will disappear fromthe display.Keep food warm.To simmer.Power Burner(left front burner) Provide highest heat settingSURESIMMER TM(right rear burner) Provide lowest simmer/heatsetting. Melt chocolate or butter.7
Burner ports: Check burner flames occasionally for proper sizeand shape as shown above. A good flame is blue in color, notyellow. Keep this area free of soil and do not allow spills, food,cleaning agents or any other material to enter the burner ports.To Clean:IMPORTANT: Before cleaning, make sure all controls are off andthe oven and cooktop are cool. Do not use oven cleaners, bleachor rust removers.421.Remove the burner cap from the burner base and cleanaccording to "General Cleaning" section.2.Clean the gas tube opening with a damp cloth.3.Clean clogged burner ports with a straight pin as shown. Donot enlarge or distort the port. Do not use a woodentoothpick. If the burner needs to be adjusted, contact a Searstrained repair specialist.31. Burner cap2. Burner base3. Alignment pins4. Ignitor5. Gas tube openingIMPORTANT: Do not obstruct the flow of combustionventilation air around the burner grate edges.[andBurner cap: Always keep the burner cap in place when using asurface burner. A clean burner cap will help prevent poor ignitionand uneven flames. Always clean the burner cap after a spill-overand routinely remove and clean the caps according to the"General Cleaning" section.Gas tube opening: Gas must flow freely throughout theopening for the burner to light properly. Keep this areasoil and do not allow spills, food, cleaning agents orother material to enter the gas tube opening. Protectspillovers by always using a burner cap.4.Replace the burner cap, making sure the alignment pins areproperly aligned with the burner cap.gas tubefree ofanyit from. 21, Incorrect2, Correct5.v21. !-1½" (25-38mm)2. Burner ports8Turn on the burner. If the burner does not light, check capalignment. If the burner still does not light, do not service thesealed burner yourself, but contact a trained repair specialist.
The SURESIMMER burner is an adjustable heat setting for moreprecise simmering and low temperature cooking. It is the rightrear burner.IMPORTANT: Never leave empty cookware on a hot surfacecooking area, element or surface burner.Ideal cookware should have a fiat bottom, straight sides, a wellfitting lid and the material should be of medium-to-heavythickness.Rough finishes may scratch the cooktop. Aluminum and coppermay be used as a core or base in cookware. However, when usedas a base it can leave permanent marks on the cooktop or grates.Cookware matedal is a factor in how quickly and evenly heat istransferred, which affects cooking results. A non-stick finish hasthe same characteristics as its base material. For example,aluminum cookware with a non-stick finish will take on theproperties of aluminum.To Use:1.Push the right rear burner control knob in and turn counterclockwise to "LITE", then to "LO".2.Push in and turn knob to OFF when finished.Use the following chart as a guide for cookware minum Heats quickly and evenly. Suitable for all types of cooking. Medium or heavy thickness is best formost cooking tasks. Heats slowly and evenly. Good for browning and frying. Maintains heat for slow cooking.Ceramic or Follow manufacturer'sCeramic glass Heats slowly, but unevenly. Ideal results on low to medium heatsettings.Copper Heats very quickly and evenly.Earthenware Follow manufacturer's Use on low heat settings.Porcelainenamel-onsteel or castiron See stainless steel or cast iron.Stainless steel Heats quickly, but unevenly. A core or base of aluminum or copperon stainless steel provides evenheating.When canning for long periods, alternate the use of surfacecooking areas, elements or surface burners between batches.This allows time for the most recently used areas to cool. Center the canner on the grate or largest surface cookingarea or element. Canners should not extend more than 1 in.(2.5 cm) outside the cooking area. Do not place canner on two surface cooking areas, elementsor surface burners at the same time. On ceramic glass models, only use flat-bottomed On coil element models, the installation of a Canning Unit Kitis recommended. If not installed, the life of the coil elementwill be shortened. See back cover for ordering instructions. For more information, contact your local U.S. GovernmentAgricultural Department Extension Office. Companies whomanufacture home canning products can also offerassistance.canners.Cast ironinstructions.instructions.9
ELECTRONIC OVEN CONTROL345m#w71. RECIPE RECALLTM(on some models)2. Display3. Clock4. Timer5. CooktopCooktopLockout (on some models)/Light (on some models)891011--,,,0,,,01314mm126. Oven Light/Oven Lockout7. Oven Selectors (SERVE WARM onsome models)8. Serf-CleanSENS-A-CLEAN TM (on some models);LOGICLEAN TM (on some models)SELECT CLEAN TM (on some models)CLEAN (on some models)9.10.11.12.13.14.Temperature SettingTimed CookingHourMinuteSTART/ENTEROFF/CANCELWhen power is first supplied to the appliance, make sure thesurface burners are in the OFF position. Everything on the displaywill light up for 5 seconds. Then the time, "PF" will appear on thedisplay.This is a 12 hour clock and does not show a.m. or p.m.Any other time "PF" appears, a power failure occurred. Toremove "PF" and to reset the clock, press OFF/CANCEL.2.When the oven is in use, this display shows time, temperatureand what command pads have been pressed.When the oven is not in use, the display will show the time of day.3.To Set:1. Press CLOCK.Press the HOUR/MIN "up" or "down" arrow pads until thecorrect time of day shows on the display.Press CLOCK or START/ENTER.Tones are audible signals, indicating the following:The START/ENTER pad begins any oven function. If not pressedwithin 5 seconds after pressing a pad, "START?" will appear onthe display as a reminder. If not pressed within 5 minutes afterpressing a pad, the display will show the time of day and theprogrammed function will be cancelled.One tone Valid pad press Oven is preheating, or has been preheated Function has been enteredThree tones The OFF/CANCEL pad stops any oven function except for theClock, Timer and Cooktop or Oven Lockouts.After pressing OFF/CANCEL, the display will show the time ofday or, if the minute timer is also being used, the time remaining.Invalid pad pressFour tones End-of-cycle Reminder, repeating each minute after the end-of-cycletonesError TonesError tones indicate a problem with the electronic oven control.An error code will appear in the display.10
Tone VolumeOveThe volume can be adjusted between high and low.Lock@s,,To Change: Press and hold DELAY START for 5 seconds. A shorttone will sound and either "Snd HI" or "Snd Lo" will appear on thedisplay. Press and hold DELAY START again for 5 seconds tochange to desired setting.The Oven Lockout prevents unintended use of the control panelcommand keypads. The oven can only be locked out when theoven is not in use or the oven control has not been set.To remove "Snd on", "Snd OFF", "rEP on", "rEP off", "Snd HI" or"Snd Lo" press any pad, and the keyed function will appear onthe display.The oven will remain locked out after a power failure if it waslocked before the power failure.To Enable/DisableOven Lockout:Reminder TonesReminder tones are four 1-second tones which indicate that theset time has expired for a timer or a timed oven control function.Press and hold OVEN for 5 seconds. A single tone will sound,and "Loc on" and a lock icon will appear on the display. After 5seconds, "Loc on" will disappear from the display and "Loc" willappear.TimerTo Turn Tones Off/On: Press and hold SET for 5 seconds. Ashort tone will sound and "rEP OFF" will appear on the display.Repeat to turn back on.Timed CookingTo Turn Tones Off/On: Press and hold COOK TIME. A short tonewill sound and "Snd OFF" will appear on the display. Repeat toturn back on.The temperature is preset at Fahrenheit, but can be changed toCelsius.To Change: Press and hold BROIL for 5 seconds. A short tonewill sound and the temperatures displayed will switch to " C".Repeat to change back to Fahrenheit.The Timer can be set in minutes and seconds or hours andminutes and counts down the set time. The Timer does not startor stop the oven.Three tones will sound when the oven is locked and anycommand pad other than CLOCK, TIMER, START/ENTER, OFF/CANCEL or OVEN has been pressed.To unlock oven, press and hold OVEN for 5 seconds. "Loc OFF"will appear on the display and lock icon will disappear from thedisplay.IMPORTANT: Do not use a thermometer to measure oventemperature because opening the oven door and element orburner cycling may give incorrect readings.The oven provides accurate temperatures; however, it may cookfaster or slower than your previous oven, so the temperaturecalibration can be adjusted. It can be changed in Fahrenheit orCelsius.A minus sign means the oven will cook cooler by the adjustmentamount. No sign means the oven will cook warmer by theadjustment amount. Use the following chart as a guide.ADJUSTMENT F(ADJUSTMENT C)COOKS FOOD10 F (50C).a little moreTo Set 1. Press TIMER SET.20 F (10 C).moderately2.30 F (15 C).much more-10 F (-5 C).a little less-20 F (-10 C).moderately-30 F (-15 C).much less3.Press the HOUR/MIN "up" or "down" arrow pads until thecorrect length of time shows on the display.Press START/ENTER or TIMER SET.The Timer will begin counting down after the Timer is started.The display will count down in hours and minutes if remainingtime is one hour or more, and in minutes and seconds ifremaining time is less than one hour.When the set time ends, four 1-second tones, if enabled, willsound, then reminder tones will sound every minute.4.Press TIMER OFF anytime to cancel the Timer and/or stopreminder tones.morelessTo Adjust Oven TemperatureCalibration:1. Press and hold BAKE for 5 seconds until the oven displayshows the current calibration, for example, "0 CAL".2.3.Press the TEMP "up" or "down" arrow pad to increase or todecrease the temperature in 10 F (5 C) amounts. Theadjustment can be set between 30 F (15 C) and -30 F(-15 C).Press START/ENTER.11@J3
BAKEWAREBEFORE USINGTo cook food evenly, hot air must be able to circulate. Allow 2 in.(5 cm) of space around bakeware and oven walls. Use thefollowing chart as a guide.Odors are normal when the range is new. This happens the firsttime the oven is used or when the oven is heavily soiled.NUMBER OFPAN(S)POSITION ON RACKIMPORTANT: The health of some birds is extremely sensitive tothe fumes given off. Exposure to the fumes may result in death tocertain birds. Always move birds to another closed and wellventilated room.1Center of rack.2Side by side or slightly staggered.3 or 4Opposite corners on each rack. Make surethat no bakeware piece is directly overanother.IMPORTANT: Do not line the oven bottom with any type of foil,liners or cookware because permanent damage will occur to theoven bottom finish. Do not block or cover the oven bottom vents. Do not cover entire rack with foil because air must be able tomove freely for best cooking results. To catch spills, place foil on rack below dish. Make sure foil isat least 1 in. (2.5 cm) larger than the dish and that it is turnedup at the edges.Pos IoIAIa ,,ASRack will Integrated HandleThe integrated handle area makes pulling out the rack easy. Theopening is large enough for a potholder or oven mitt.l-3aR,o.wa ,o.IMPORTANT: Never place food or bakeware directly on the ovendoor or bottom. Permanent damage will occur to the porcelainfinish.Half-Rackwith RemovableInsertThe half-rack with removable insert is a space maximizer. Whenthe two are attached, they make a full rack. The insert can also beused on the counter for a cooling rack.Do not place more than 25 pounds (11.4 kg) on the half-rack.2RACKSPosition racks before turning the oven on. Do not move rackswith bakeware on them. Make sure racks are level. To move arack, pull it out to the stop position, raise the front edge, then liftout. Use the following illustration and chart as a guide. ,, ,, ,, ,,FOODRACK POSITION1. Half-Rack2. Removable InsertTo Position Racks:1.Place a full rack on positonposition 3 or 4.1 or 2, and the half-rack onFrozen pies, large roasts, turkeys,angel food cakes1 or 22.Place large items on the right side of the full rack.Bundt cakes, most quick breads, yeastbreads, casseroles, meats23.4.Place deeper, covered dishes on the left side of the full rack.Place shallow dishes on the half-rack.5.When finished cooking, carefully remove items.Cookies, biscuits, muffins, cakes, nonfrozen pies2 or 3Extra large items612
The bakeware material affects cooking results. Followmanufacturer's recommendations and use the bakeware sizerecommended in the recipe. Use the following chart as a guide.BAKEWARE/RESULTSLight coloredaluminum Light goldencrusts Even browningDark aluminumand otherbakeware withdark, dull and/ornon-stick finish RECOMMENDATIONS Use temperature and timerecommended in recipe.!. Oven Vent May need to reduce bakingtemperatures 25 F (15 C). Use suggestedBrown, crispcrustsThe oven vent releases hot air and moisture from the oven, andshould not be blocked or covered. Doing so will cause poor aircirculation, affecting cooking and cleaning results. Never setplastics, paper or other items that could melt or burn near theoven vent.baking time.OVEN USEFor pies, breads and casseroles, usetemperature recommended inrecipe. Place rack in center of oven.Insulated cookiesheets or bakingpans Little or nobottombrowning Place in the bottom third of oven. May need to increase baking time.ULTRABAKE TM Temperature ManagementSystemThe ULTRABAKE system electronically regulates the oven heatlevels during preheat and bake to maintain a precise temperaturerange for optimal cooking results. The bake and broil burnerscycle on and off in intervals. This feature is automaticallyactivated when the oven is in use.Stainless steel May need to increase baking time. When using the oven for the first time, it is necessary to lightthe surface burners first to purge air from the gas lines. Do not try to light the oven burner during a power failure. Do not place food or bakeware directly on oven door or ovenbottom. Light, goldencrusts UnevenbrowningStoneware Ovenproofglassware,ceramic glass orceramic Follow manufacturer'sinstructions. May need to reduce bakingtemperatures 25 F (15 C).Crisp crustsTo Bake or Roast:Before baking and roasting, position the racks according to the"Positioning Racks and Bakeware" section. When roasting, it isnot necessary to wait for the oven to preheat before putting foodin, unless recommended in the recipe.1. Press BAKE.Press the TEMP "up" or "down" arrow pad to enter atemperature other than 350 F (175 C). The bake range can beset between 170 F and 500 F (75 C and 260 C).Bro
Sears Maintenance Agreements Your Kenmore appliance is designed, manufactured and tested to provide years of dependable operation. Yet any major appliance may require service from time to time. The Sears Maintenance Agreement offers you an outstanding service program, affordably priced. The Sears Maintenance Agreement