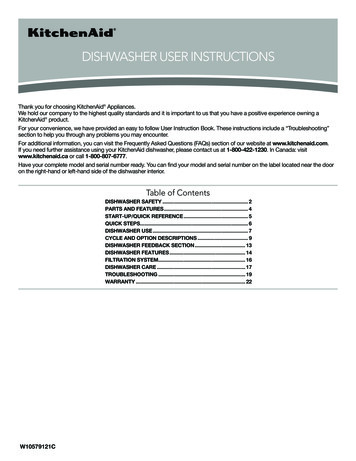
Transcription
DISHWASHER USER INSTRUCTIONSThank you for choosing KitchenAid Appliances.We hold our company to the highest quality standards and it is important to us that you have a positive experience owning aKitchenAid product.For your convenience, we have provided an easy to follow User Instruction Book. These instructions include a “Troubleshooting”section to help you through any problems you may encounter.For additional information, you can visit the Frequently Asked Questions (FAQs) section of our website at www.kitchenaid.com.If you need further assistance using your KitchenAid dishwasher, please contact us at 1-800-422-1230. In Canada: visitwww.kitchenaid.ca or call 1-800-807-6777.Have your complete model and serial number ready. You can find your model and serial number on the label located near the dooron the right-hand or left-hand side of the dishwasher interior.Table of ContentsDISHWASHER SAFETY . 2PARTS AND FEATURES. 4START-UP/QUICK REFERENCE. 5QUICK STEPS. 6DISHWASHER USE . 7CYCLE AND OPTION DESCRIPTIONS . 9DISHWASHER FEEDBACK SECTION. 13DISHWASHER FEATURES . 14FILTRATION SYSTEM. 16DISHWASHER CARE . 17TROUBLESHOOTING . 19WARRANTY . 22W10579121C
Dishwasher SafetyYour safety and the safety of others are very important.We have provided many important safety messages in this manual and on your appliance. Always read and obey all safetymessages.This is the safety alert symbol.This symbol alerts you to potential hazards that can kill or hurt you and others.All safety messages will follow the safety alert symbol and either the word “DANGER” or “WARNING.”These words mean:DANGERWARNINGYou can be killed or seriously injured if you don't immediatelyfollow instructions.You can be killed or seriously injured if you don't followinstructions.All safety messages will tell you what the potential hazard is, tell you how to reduce the chance of injury, and tell you what canhappen if the instructions are not followed.IMPORTANT SAFETY INSTRUCTIONSWARNING: When using the dishwasher, follow basic precautions, including the following: Read all instructions before using the dishwasher.Use the dishwasher only for its intended function.Use only detergents or rinse agents recommended for use ina dishwasher, and keep them out of the reach of children.When loading items to be washed:1) Locate sharp items so that they are not likely to damagethe door seal; and2) Load sharp knives with the handles up to reduce the riskof cut-type injuries.Do not wash plastic items unless they are marked“dishwasher safe” or the equivalent. For plastic items not somarked, check the manufacturer's recommendations.Do not touch the heating element during or immediately afteruse.Do not operate the dishwasher unless all enclosure panelsare properly in place. Do not tamper with controls.Do not abuse, sit on, or stand on the door, lid, or dish racksof the dishwasher.To reduce the risk of injury, do not allow children to play inor on the dishwasher.Under certain conditions, hydrogen gas may be produced ina hot water system that has not been used for two weeks ormore. HYDROGEN GAS IS EXPLOSIVE. If the hot watersystem has not been used for such a period, before usingthe dishwasher turn on all hot water faucets and let thewater flow from each for several minutes. This will releaseany accumulated hydrogen gas. As the gas is flammable,do not smoke or use an open flame during this time.Remove the door or lid to the washing compartmentwhen removing an old dishwasher from service ordiscarding it.SAVE THESE INSTRUCTIONS2
GROUNDING INSTRUCTIONS For a grounded, cord-connected dishwasher:The dishwasher must be grounded. In the event of amalfunction or breakdown, grounding will reduce the risk ofelectric shock by providing a path of least resistance forelectric current. The dishwasher is equipped with a cordhaving an equipment-grounding conductor and a groundingplug. The plug must be plugged into an appropriate outletthat is installed and grounded in accordance with all localcodes and ordinances.WARNING: Improper connection of the equipmentgrounding conductor can result in a risk of electric shock. Check with a qualified electrician or service representativeif you are in doubt whether the dishwasher is properlygrounded. Do not modify the plug provided with thedishwasher; if it will not fit the outlet, have a proper outletinstalled by a qualified electrician.For a permanently connected dishwasher:The dishwasher must be connected to a grounded metal,permanent wiring system, or an equipment-groundingconductor must be run with the circuit conductors andconnected to the equipment-grounding terminal or lead onthe dishwasher.SAVE THESE INSTRUCTIONSWARNINGTip Over HazardDo not use dishwasher until completely installed.Do not push down on open door.Doing so can result in serious injury or cuts.3
Parts and FeaturesProScrub Trio (on some models)powerful jets target water toward pots,pans, or casserole dishes loaded in theback of the dishwasher to cleanstubborn messes.Upper level washWater feed tubeModel and serial number labelPressurized spray nozzles and variablespeed motor provide effective cleaning.Water inlet openingLower spray armHeating elementOverfill protection floatRinse aid dispenser reduces spottingand improves drying.EQ Filtration System removes soilfrom water and improves cleaning action.Detergent dispenser(style and location vary)Active vents(on some models)Control panelPremium top rackadjustersCulinary tool rack/3rd level rack(on some models)Flexible fold-down tines(on some models)Cup shelves withstemware holderUpper spray armProScrub Trio(on some models) two sprayzones in the upper rackcorners to reach into deeperor oddly shaped items.Rack handleTOP RACKFlexible fold-down tinesSilverware basketSliding bowl tines(on some models) Culinary Caddyutensil basket(on some models)BOTTOM RACK4
Start-Up/Quick Reference (varies by model)Clean EQ Wash System removable filters to maintainpeak performanceCleaning the filtersperiodically helps keep thedishwasher working at peakperformance. The filters canbe found at the bottom centerof your dishwasher.See the “Filtration System”section for information onremoving and maintainingthe filters.ProWash cycle for optimal cleaningThe most advanced and versatile cycle.ProWash cycle senses the load size, soilamount, and toughness of soil, to adjust thecycle for optimal cleaning, using only theamount of water and energy needed. TheProWash and Tough cycles arerecommended for tough soil. No need toprerinse dishes; just scrape and load.ProScrub Option to clean baked-on food(on some models)IMPORTANT: Do not block detergent dispenser.For hinged style detergentdispensers, tall items placedin the lower rack may blockthe dispenser door. Cookiesheets and cutting boardsloaded on the left-hand sideof the dishwasher can easilyblock the dispenser. Ifdetergent is inside of thedispenser or on the bottom ofthe tub after the cycle iscomplete, the dispenser wasblocked.Drying – Rinse Aid is essential.When the ProScrub option is selected, itprovides aconcentrated washon the back of thelower dish rack forhard-to-clean dishes.Place these disheswith the soiledsurface of the dishtoward theProScrub spray jetsin the lower rack ofthe dishwasher.The upper rack has2 spray zones in thefront corners toreach into deeper oroddly shaped items.AA. Back of dishwasherPress START/RESUME every time you add a dish.You must use a drying agentsuch as a rinse aid for gooddrying performance (sampleincluded). Rinse aid alongwith the ProDry option willprovide best drying and avoidexcessive moisture in thedishwasher interior.IMPORTANT: If anyone opens the door (suchas, for adding a dish, even during the DelayHours option), the Start/Resume button mustbe pressed each time.If the Start/Resume button is located on top ofdoor: Push door firmly closed within3 seconds of pressing START/RESUME. If thedoor is not closed within 3 seconds, the Start/Resume button LED will flash, an audible tonewill be heard, and the cycle will not start.orProper Detergent DosingFor best drying, use the HeatDry or ProDry option.SLIDEDispensers vary by modelIt is possible to use too much detergent in your dishwasher.This can lead to etching of your dishes. See “Add Detergent”and “Add Rinse Aid” in the “Dishwasher Use” section, todetermine the amount of detergent needed based on yourwater hardness.Express Wash - When you need fast results.Efficient dishwashers run longer to save waterand energy, just as driving a car slower saveson gas. When you need fast results, theExpress Wash will clean your dishes usingslightly more water and energy. Select theHeat Dry or ProDry option to speed dryingtimes (adds approximately 27 to 35 minutesto the Express Wash cycle).5
Quick Steps13Prepare and loaddishwasher.Select a cycle and option.or2Add detergent for cleaning and rinse aid for drying.SLIDESLIDEDispensers vary by model64Start dishwasher.NOTE: If the Start/Resumebutton is located on the top ofdoor, push door firmly closedwithin 3 seconds of pressingSTART/RESUME.
Dishwasher UseSTEP 1Prepare and Load the DishwasherIMPORTANT: Remove leftover food, bones, toothpicks, andother hard items from the dishes. Remove labels from containersbefore washing.1231. Teaspoon2. Salad fork3. Dinner fork10-place load – upper rack44452222514135Make sure nothing keeps sprayarm(s) from spinning freely. It isimportant for the water spray toreach all soiled surfaces. Make sure that when thedishwasher door is closed, noitems are blocking the detergentdispenser. Items should be loaded withsoiled surfaces facing down andinward to the spray as shown.This will improve cleaning anddrying results.333333432442341231411231 41111331 4213 43 1321223 43 11112141141121542432136Do not block spray armsAvoid overlapping items like bowls or plates that may trap food. Place plastics, small plates, and glasses in the upper rack.Wash only plastic items marked “dishwasher safe.” To avoid thumping/clattering noises during operation, loaddishes so they do not touch one another. Make sure lightweightload items are secured in the racks. Improper loading can cause dishes to be chipped or damaged.When loading glasses or mugs, it is best to load these itemsin between rows of tines instead of loading them over tinesas shown. When loading silverware, always place sharp items pointingdown. Mix items in each section of the basket with somepointing up and some down to avoid nesting. Spray cannotreach nested items.10-place load – silverware basket56 533221112155121451245124445512-place load – lower rack54. Knife5. Tablespoon/largeserving spoon6. Large serving fork 10-place load – lower rack12-place load – upper rack412-place load – silverware basket7
STEP 2Add DetergentNOTE: If you do not plan to run a wash cycle soon, run a rinsecycle. Do not use detergent. Use automatic dishwasher detergent only. Add powder, liquid,or tablet detergent just before starting a cycle. Fresh automatic dishwasher detergent results in bettercleaning. Store tightly closed detergent container in a cool,dry place.Hinged lid styleNOTE: Fill amountsHard Watershown are for standardHard Waterpowdered detergent.Soft WaterSoft WaterFollow instructions on thepackage when using gelMain WashPre-Washdishwasher detergents.Premeasured forms aresuitable for all hardness and soil levels. Always place premeasureddetergents in the main compartment and close the lid.Add Rinse Aid (dispenser varies by model) Your dishwasher is designed to use rinse aid for good dryingperformance. Without rinse aid, your dishes and dishwasherinterior will have excessive moisture. The Heat Dry or ProDry option will not perform as well without rinse aid. Rinse aid keeps water from forming droplets that can dry asspots or streaks. It also improves drying by allowing water todrain off of the dishes after the final rinse. Rinse aid helps to reduce excess moisture on the dish racksand interior of your dishwasher. Check the rinse aid indicator with the door down (varies bymodel). Add rinse aid when indicator drops to “Add” level.Sliding lid styleSLIDEFullFullPremeasured DetergentsAddAdd---axm-OPENWashSLIDE654321- --8llfi- The amount of detergent to use depends on:How much soil remains on the items – Heavily soiled loadsrequire more detergent.The hardness of the water – If you use too little in hard water,dishes won't be clean. If you use too much in soft water,glassware can etch.Soft to Medium Water (0-6 grains per U.S. gallon)[typical water softener water and some city water]Medium to Hard Water (7-12 grains per U.S. gallon)[well water and some city water]Depending on your water hardness, fill the Main Wash sectionof the dispenser as shown. Fill the Pre-Wash section to thelevel shown if needed.- - - - -¹ ₄ turn clockwise to lock- axPowders and Gels654NOTE: For most water conditions, the factory setting will givegood results. If you have hard water or notice rings or spots, trya higher setting. Turn the arrow adjuster inside the dispenser byeither using your fingers or inserting a flat-blade screwdriver intothe center of the arrow and turning.mPush OPEN, as shown,and the lid will slide open.-1Place selected detergent in thedispenser. Place finger, asshown, and slide lid closed.Press firmly until it clicks.--2SLIDEll3SLIDETo add rinse aid to sliding lidstyle dispenser, open therinse dispenser lid by gentlypushing in the center of thelid with your thumb andpulling up on the edge. Pourrinse aid into the openinguntil the dispenser is full.Then, close the dispenserby pushing down gentlyon the lid.fi- Lock- -To open lidTo close lidAdd rinse aid to hinged lidstyle dispenser by twistingthe dispenser cap ¼ turnclockwise to open and lift off.Pour rinse aid into theopening until the indicatorlevel is at “Full.” Replace thedispenser cap and turn to“Lock.” Make sure cap isfully locked.Pre -Many detergents now come in several forms (gel packs, tablets,or powder packs).We recommend that you use high quality tablets or packs forconvenience and improved performance. High quality tabletsand packs have been proven better than powder, liquid, or geldetergents at reducing filming on dishes. Using tablets and packsover time will start to reduce or eliminate white film. Also, by usinga rinse aid, you can minimize repeat buildup of white film. Theseforms are suitable for all hardness and soil levels. Always placedetergents in the main compartment and slide lid to close.-- - - -Higher numbers dispense more rinse aid. You should change thissetting only a little at a time and then run a few cycles beforechanging it again because just enough rinse aid is more effectivethan too much.
STEP 3STEP 4Select a Cycle (vary by model)Start or Resume a CycleSee “Cycle and Option Descriptions” charts in the following section.Efficient dishwashers run longer to save water and energy, just asdriving a car slower saves on gas. Typical cycle time isapproximately 2¹ ₂ hours but can take less or more time tocomplete depending on selections. Select Options (vary by model)See “Cycle and Option Descriptions” charts in the followingsection.You can customize your cycles by pressing the options desired. Ifyou change your mind, press the option again to turn off the option.Not all options are available for every cycle. If an invalid option isselected for a given cycle, the lights will flash.Run hot water at the sink nearest your dishwasher until thewater is hot. Turn off water. Press START/RESUME once to show whichselections you used. Select the wash cycle andoptions desired OR press START/RESUME torepeat the same cycle and options as in theprevious wash cycle.IMPORTANT: If anyone opens the door (such as, for adding a dish,even during the Delay Hours option), the Start/Resume buttonmust be pressed each time. If the Start/Resume button is located on top of door, push doorfirmly closed within 3 seconds of pressing START/RESUME. Ifthe door is not closed within 3 seconds, the Start/Resumebutton LED will flash, an audible tone will be heard, and thecycle will not start.orCycle and Option DescriptionsThis information covers several different models. Your dishwasher may not have all of the cycles and options described.CYCLE SELECTIONSCYCLESThe most advanced and versatile cycle. ProWash cycle senses the load size, soil amount, and toughnessof soil, to adjust the cycle for optimal cleaning, usingonly the amount of water and energy needed.Use for hard-to-clean, heavily soiled pots, pans,casseroles, and tableware.This cycle, with only the Heat Dry or ProDry optionselected, and without other options selected, isrecommended to completely wash and dry a full load ofnormally soiled dishes. The energy usage label isbased on this cycle and option combination. IncludesHeat Dry.Use for lightly soiled items or china and crystal.SOIL LEVELWASH TIME* (MINS.)W/O OPTIONSTypical**MaxWATERUSAGEGALLONS(Liters)Light to Medium1101503.8 (14.5)Tough/Baked-On1251905.0 (19.1)Heavy1251907.7 (29.0)Heavy/Baked-On1402057.9 (30.0)Light1101502.8 (10.5)Medium1101504.0 (15.0)Heavy1251907.9 (30.0)Light to Medium1051454.2 (15.2)Heavy/Baked-On1201857.7 (29.0)9
CYCLE SELECTIONSCYCLESSOIL LEVELWASH TIME* (MINS.)W/O OPTIONSTypical**MaxWATERUSAGEGALLONS(Liters)When you need fast results, the Express Wash willclean dishes using slightly more water and energy.Select the Heat Dry or ProDry option to speeddrying times.All soil levels58646.2 (23.5)Use for rinsing dishes, glasses, and silverware that willnot be washed right away.Do not use detergent.All soil levels17202.4 (9.0)Wash times depend on water temperature, heavy soil condition, dish load size, and options selected. Adding options will add timeto the cycle.*Adding options will add time to the cycle. See “Option Selections” chart.**This is the approximate cycle time obtained with 120 F (49 C) hot water available at the dishwasher. Increase in time results fromlow temperature of the incoming water.OPTION SELECTIONSOPTIONSLower jets clean pans,casseroles, etc., withtough food soil toeliminate the need forsoaking and scrubbingof dirty, baked-on dishes.The upper rack has 2spray zones in the frontcorners to reach intodeeper or oddlyshaped items.Raises the main washtemperature to improvecleaning for loadscontaining tough,baked-on food.10CAN BESELECTED WITHWHAT IT DOESADDED TIME TO lProWash Top Rack OnlyActivates theProScrub sprayjets to provideintensified cleaningpower to specificwash areas.53730 - 3.0(0 - 11.2)ToughNormalRaises the mainwash temperatefrom 105 F (41 C)to either 130 F(55 C) or140 F (60 C).42600 - 3.0(0 - 11.2)
OPTION SELECTIONSOPTIONSSanitizes dishes andglassware in accordancewith NSF InternationalNSF/ANSI Standard 184for ResidentialDishwashers. Certifiedresidential dishwashers arenot intended for licensedfood establishments. Onlysanitizing cycles have beendesigned to meet therequirements of the NSF/ANSI 184 performancestandard for soil removaland for sanitization efficacy.There is no intention, eitherdirectly or indirectly, that allcycles on a NSF/ANSI 184certified dishwasher meetthe NSF/ANSI 184performance standard forsoil removal and forsanitization efficacy.CAN BESELECTED WITHWHAT IT DOESADDED TIME TO lIncreases the mainwash temperaturefrom 105 F (41 C)to 130 F (54 C) andthe final rinse from140 F (60 C) to155 F (68 C).53730 - 3.0(0 - 11.2)Available withany cycleSlightly faster washfor smaller loads-7-300Dries dishes with heat anda fan. This option with theuse of rinse aid will providethe best dryingperformance. Plastic itemsare less likely to deformwhen loaded in the toprack. Turn ProDry optionoff for an air dry.Available withany cycle exceptRinse OnlyUses the heatingelement to heat air,plus a system ofvents and a fan thatventilates moist airout of thedishwasher tospeed drying times.ProDry optiondefaults to ONwhen any cycle isselected except forExpress Wash.44510Dries dishes with heat.This option with the use ofrinse aid will provide thebest drying performance.Plastic items are less likelyto deform when loaded inthe top rack. Turn Heat Dryoff for an air dry.Available withany cycle exceptRinse OnlyActivates theheating element atthe end of the washcycle to speeddrying times. HeatDry defaults to ONwhen any cycle isselected except forExpress Wash.52520The Sani Rinse indicatorglows at the end of thecycle if the Sani Rinseoption was successfullycompleted. If the indicatordoes not activate, it isprobably due to the cyclebeing interrupted.For added convenience,use for washing asmall load of dishesin the top rack to helpkeep the kitchencontinuously clean.11
OPTION SELECTIONSOPTIONSororRuns the dishwasher ata later time or during offpeak electrical hours.Select a wash cycle andoptions. Press the Delaybutton. Press START/RESUME. Close thedoor firmly.NOTE: Anytime the door isopened (such as, to add adish), the Start/Resumebutton must be pressedagain to resume thedelay countdown.CAN BESELECTED WITHAvailable withany cycleWHAT IT DOESDelays the startof a cycle to thespecified time.ADDED TIME TO ids unintended use of the dishwasher between cycles or cycle and option changes during a cycle.To turn on Lock, press and hold CONTROL LOCK or 4 HOUR DELAY (depending on model) for 3 seconds. The ControlLock light will stay on for a short time, indicating that it is activated and all buttons are disabled. If you press any buttonwhile your dishwasher is locked, the light flashes 3 times. The dishwasher door can still be opened/closed while thecontrols are locked.NOTE: You may need to disable Sleep mode by pressing either START/RESUME or CANCEL, or by opening andclosing the door before you are able to turn Control Lock off.To turn off Control Lock, press and hold CONTROL LOCK or 4 HOUR DELAY (depending on model) for 3 seconds. Thelight turns off.NOTE: If your model requires you to press and hold 4 HOUR DELAY to lock the controls, the Control Lock LED will beon or off to indicate if Control Lock is active or not.CONTROLS AND CYCLE STATUSCONTROLPURPOSECOMMENTSTo start or resumea wash cycleIf the door is opened during a cycle or the power is interrupted, the Start/Resume indicatorflashes. The cycle will not resume until the door is closed and START/RESUME is pressed.NOTE: If the Start/Resume button is located on top of door, push door firmly closed within3 seconds of pressing START/RESUME. If the door is not closed within 3 seconds, theStart/Resume button LED will flash, an audible tone will be heard, and the cycle willnot start.To reset any cycleor options duringselection.To cancel a washcycle after it'sstarted.Press and hold CANCEL/DRAIN to reset any control selections made.To turn the audibletones on or off.12See “Canceling a Cycle” and “Changing a Cycle After Dishwasher Is Started” sections.Press and hold the Hi-Temp Wash button for 3 seconds to turn the audible tones on or off.Only audible tones for confirming button presses can be turned on/off. Important audibletones, such as indicating a cycle has been interrupted, cannot be deactivated.
Dishwasher Feedback SectionCONTROLS AND CYCLE STATUSCONTROLororAPURPOSECOMMENTSCycle Status indicator lightsare used to follow theprogress of the dishwashercycle. Located on the frontof the dishwasher for frontcontrol models, and locatedon the top of the door forhidden control models.Clean indicator glows when a cycle is finished.If you select the Sani Rinse option, when the Sani Rinse cycle is finished,the Sanitized indicator glows. If your dishwasher did not properly sanitizeyour dishes, the light flashes at the end of the cycle. This can happen if thecycle is interrupted, or the water could not be heated to the requiredtemperature.The Clean and Sanitized lights go off when you open and close the door orpress and hold CANCEL.The front indicator lightor single exterior light (A)shows progress of yourdishwasher cycle bycolor (for hidden controlmodels only).The light will be blue if the dishwasher is washing or rinsing. The light willbe red when the dishwasher is drying. The light will be white to indicatethat the cycle is complete. If the Front indicator light is blinking, see the“Troubleshooting” section.The Cycle Status display isused to follow the progressof the dishwasher cycle, andto show other information.(available on some modelsinstead of Cycle Statusindicator lights).The indicators will inform you if you are able to add a dish to the cycle afterit has started. It will also inform you if the dishwasher is washing, rinsing,drying, complete, and/or sanitized. They will show whether the control islocked and/or the delay option is selected. A series of bars will count downthe duration of the cycle remaining from left to right. Each bar equalsapproximately 24 minutes of cycle length. The bars will also count downthe delay feature from left to right, and the delay indicator will be activated.After every 30 cycles, the dishwasher will display “affresh,” providing atemporary reminder for you to perform a monthly maintenance procedure.See the “Dishwasher Care” section.Canceling a Cycle1. Open the door slightly to stop the cycle. Wait for the sprayingaction to stop before completely opening the door.2. Press and hold Cancel/Drain button once. The Cancel/Drainlight will light up.3. Close the door and the dishwasher starts a drain cycle (if waterremains in bottom of dishwasher). Let the dishwasher draincompletely. The Cancel/Drain light turns off after 2 minutes.Changing a Cycle After Dishwasher Is StartedYou can interrupt a cycle and restart your dishwasher from thebeginning using the following procedure:1. Open the door slightly to stop the cycle. Wait for the sprayingaction to stop, then open the door completely.2. Check that detergent dispenser cover is still closed. If cover isopen, you will need to refill the detergent dispenser beforerestarting your new cycle.3. Press and hold CANCEL/DRAIN twice to reset the control.4. Select new cycles and options.5. Press START/RESUME.Adding a Dish After Dishwasher Is Started1. Check if Add a Dish indicator is lit. (Available on some models.Otherwise, proceed to Step 2.)2. Open the door slightly to stop the cycle. Wait for the sprayingaction to stop, and then open the door completely.3. Check whether the detergent dispenser cover is still closed.If it is open, a wash cycle has already started and adding adish is not recommended.4. If detergent has not yet been used (detergent dispenser coveris closed), you may add a dish.5. Press START/RESUME.13
Dishwasher FeaturesYour KitchenAid dishwasher may have some or all of these features.ProScrub Option Wash Area The ProScrub option wash area is located at the back of the lowerlevel rack and the front corners of the upper level rack.ACULINARY CADDY Utensil BasketUse the utensil basket to hold specialtycooking utensils (serving spoons,spatulas, and similar items), oroverflow silverware items.The basket hangs on the bottom rackin the right-hand corner. Load thebasket while it is on the bottom rack orremove the basket for loading on acounter or table.NOTE: Spin the spray arms. Be sureitems in the basket do not stop therotation of the spray arms.SURE-HOLD Cup and Stemware HolderA. Back of dishwasherFold down the extra shelf on the left-hand or right-hand side of themid level rack to hold additional cups, stemware, or long itemssuch as utensils and spatulas.NOTE: You must select the ProScrub option to use this feature.Make sure items do not interfere with the water feed tube, sprayarms, or the lower rack ProScrub spray jets. Keep the last tine row in the back of the lower rack in the60 angled position when using the ProScrub option. In the back of the lower rack, load pans, casserole dishes, etc.,with the soiled surfaces facing the ProScrub Plus spray jets,and resting on the last row of tines in the angled position. Only one row of items may face the ProScrub spray jets.Stacking, overlapping, or nesting items will keep the ProScrub spray jets from contacting all of the surfaces. In the upper rack, place tall or oddly shaped glasses or bottlesin the front corners of the rack face down. It is best to loadthese items in between rows of tines. ProScrub Trio (on some models)Lower jets clean pans, casseroles, etc., with tough food soilto eliminate the need for soaking and scrubbing dirty,baked-on dishes.Upper rack has 2 spray zones in the front corners to reachinto deeper or oddly shaped items.Silverware BasketUse the slots in the covers to keep yoursilverware separated for optimum wash.There are specially designed slots (smallround holes) for chopsticks. Mixsilverware types to keep them separated.For best cleaning results, load knivesdown, forks up, and alternate spoons.NOTE: If yoursilverware does notfit into thedesignated slots,lift and slide thecovers off of thesilverware basket.14NOTE: Remove the culinary tool basket(s) when washing tallstemware or other tall items in the top rack.FLEXI-FOLD DOWN Flexible TinesThe row of tines on the left-hand andright-hand sides of the top rack canbe adjusted to make room for avariety of dishes.To adjust the fold-down tines:1. Grasp the tip of the tine that isin the tine holder.2. Gently push the tine out of theholder.3. Lay the tines down, toward thecenter
8 Add Detergent NOTE: If you do not plan to run a wash cycle soon, run a rinse cycle. Do not use detergent. Use automatic dishwasher detergent only. Add powder, liquid, or tablet detergent just before starting a cycle. Fresh automatic dishwasher detergent results in better cleaning. Store tightly closed detergent container in a cool,