Transcription
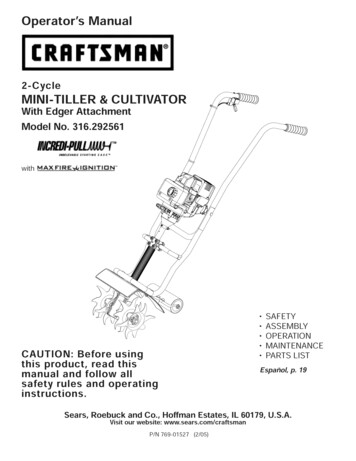
Operator'sManual2-CycleMINI-TILLER& CULTIVATORWith Edger AttachmentModelNo. 316.292561 CAUTION:Before usingthis product, read thismanual and followall.safety rules and operatinginstructions.Sears, RoebuckSAFETYASSEMBLYOPERATIONMAINTENANCEPARTS LISTEspa#oand Co., HoffmanVisit our website:Estates,www.sears.com/craftsmanP/N 769-01527(2/05)IL 60179, U.S.A.p. 19
TABLE OF CONTENTSWarrantyOperating Instructions.Service Information2.Rules for Safe Operation2.3Know Your Unit .6Assembly Instructions7.Maintenance and Repair Instructions .12Cleaning and Storage .15Troubleshooting16SpecificationsChart .EPA Warranty InformationOil and Fuel InformationStarting/Stopping.InstructionsFull Two-YearWarranty17.18Parts List .9.11Repair Protection Agreement .10Service Numbers .on CraftsmanMini-Tiller35-36Inside Back CoverBack Coverand CultivatorFor two (2) years from the date of purchase, if this Craftsman Equipment is maintained, lubricated, and tuned upaccording to the instructions to the operator's manual, Sears will repair or replace free of charge any parts found to bedefective in material or workmanship. Warranty service is available free of charge by returning Craftsman equipment toyour nearest Sears Service Center. In-home warranty service is available but a trip charge will apply. This Warrantyapplies only while this product is in the United States.This Warrantydoes not cover:Expendable items which become worn during normal use, such as spark plugs, air cleaners, belts, and oil filters., Tire replacement or repair caused by punctures from outside objects, such as nails, thorns, stumps, or glass.Repairs necessary because of operator abuse, including but not limited to, damage caused by objects, such as stonesor metal debris, oversized stock, impacting objects that bend the frame or crankshaft, or over-speeding the engine.Repairs necessary because of operator negligence, including but not limited to, electrical and mechanical damagecaused by improper storage, failure to use the proper grade and amount of engine oil, or failure to maintain theequipment according to the instructions contained in the operator's manual.Engine (fuel system) cleaning or repairs caused by fuel determine to be contaminatedfuel should be used within 30 days of its purchase date.Equipment used for commercialor oxidized (stale). In general,or rental purposes.TO LOCATE THE NEAREST SEARS SERVICE CENTER OR TO SCHEDULE SERVICE, SIMPLY CONTACT SEARS AT1-800-4-MY-HOME .This warranty gives you specific legal rights and you may also have other rights, which vary from state to state.CALIFORNIAPROPOSITION65 WARNINGTHE ENGINE EXHAUST FROM THISPRODUCT CONTAINS CHEMICALSKNOWN TO THE STATE OF CALIFORNIATO CAUSE CANCER, BIRTHOR OTHER REPRODUCTIVEDEFECTSHARM.SPARK ARRESTORNOTENOTE: For users on U.S. Forest Land and in thestates of California, Maine, Oregon and Washington.All U.S. Forest Land and the state of California (PublicResourcesCodes 4442 and 4443), OregonandWashingtonrequire,by law that certaininternalcombustion engines operated on forest brush and/orgrass-covered areas be equipped with a spark arrestor,maintained in effective working order, or the engine beconstructed, equipped and maintained for the preventionof fire. Check with your state or local authorities forregulations pertaining to these requirements. Failure tofollow these requirements could subject you to liability ora fine. This unit is factoryequippedwith a sparkarrestor.If it requires replacement,ask your LOCALSERVICE DEALER to install the AccessoryPart#753-04925 Spark Arrestor Kit.
Thepurposeof safetysymbolsis toattractyourattentionto esafetywarningsdo rwarningstheygivearenotsubstitutesfor t in serious injury to yourself or toothers. Always follow the safety precautionsto reduce the risk of fire, electric shock andpersonal injury.indicatesWARNING"danger,warning or caution. Attention is required inorder to avoid serious personal injury. Maybe used in conjunction with other symbolsor pictographs.CAUTION"ALLSAFETY INSTRUCTIONSINSTRUCTIONSBEFORE OPERATINGWARNING" []youWhen usingtheunit,must foreoperatingtheunitinorderto ensurethesafetyoftheoperatorand any bystanders.Pleasekeep these instructionsforlateruse.Read the instructions carefully. Be familiar with thecontrols and proper use of the unit.Do not operate this unit when tired, ill, or under theinfluence of alcohol, drugs, or medication.Children and teens under the age of 15 must not usethe unit, except for teens guided by an adult.All guards and safety attachments must be installedproperly before operating the unit.Inspect the unit before use. Replace damaged parts.Check for fuel leaks. Make sure all fasteners are inplace and secure. Replace parts that are cracked,chipped, or damaged in any way. Do not operate theunit with loose or damaged parts.Fa,urotoobeya[] safety warning mayresult in property damage or personal injuryto yourself or to others. Always follow thesafety precautions to reduce the risk of fire,electric shock and personal injury.Read the Operator's Manual(s) and follow allwarnings and safety instructions.Failure to do so can result in serious injury to theoperator and/or bystanders.READFailorotoobeya[] safety warning canresult in injury to yourself and others.Always follow the safety precautions toreduce the risk of fire, electric shock andpersonal injury.NOTE: Advises you of information or instructions vital tothe operation or maintenance of the equipment. IMPORTANTiDANGER: safetyF0,urotoobeyawarning willMEANINGSAFETY ALERT:MEANING Carefully inspect the area before starting the unit.Remove all debris and hard or sharp objects such asglass, wire, etc.Be aware of the risk of injury to the head, hands andfeet.Clear the area of children, bystanders, and pets. At aminimum, keep all children, bystanders, and petsoutside a 50 feet (15 m.) radius; there still may be arisk to bystanders from thrown objects. Bystandersshould be encouraged to wear eye protection. If youare approached, stop the unit immediately.Squeeze the throttle control and check that it returnsautomatically to the idle position. Make all adjustmentsor repairs before using unit.SAFETYWARNINGSFOR GAS UNITSWARNING:Gasolineishighlyflammable,and itsvaporscan explode ifignited.Take thefollowingprecautions:Store fuel only in containers specifically designed andapproved for the storage of such materials.Avoid creating a source of ignition for spilled fuel. Donot start the engine until fuel vapors dissipate.
Alwaysstoptheengineandallowitto efueltank,oraddfuel,whentheengineis place.Loosenthefueltankcapslowlyto relieveanypressureinthetank.Mixandaddfuelina rksor eor or operatingtheunit.WHILEOPERATINGNever start or run the unit inside a closed room orbuilding. Breathing exhaust fumes can kill. Operatethis unit only in a well ventilated outdoor area.Wear safety glasses or goggles that are marked asmeeting ANSI Z87.1-1989 standards. Also wearear/hearing protection when operating this unit. Weara face or dust mask if the operation is dusty. Longsleeve shirts are recommended.Wear heavy, long pants, boots and gloves. Do notwear loose clothing,jewelry, short pants, sandals orgo barefoot. Secure hair above shoulder level.This unit has a clutch. The tines remains stationarywhen the engine is idling. If it does not, have the unitadjusted by an authorized service technician.Be sure the tines are not in contact with anythingbefore starting the unit.Use the unit only in daylight or good artificial light.Avoid accidental starting. The operator and unit mustbe in a stable position while starting. SeeStarting/Stopping Instructions.Use the right tool. Only use this tool for the purposeintended.Use extreme caution when reversing or pulling the unittowards you.Do not overreach. Always keep proper footing andbalance. Take extra care when working on steepslopes or inclines.Always hold the unit with both hands when operating.Keep a firm grip on the grips.Keep hands, face, and feet at a distance from allmoving parts. Do not touch or try to stop the tineswhen they are rotating.,Do not touch the engine or muffler. These parts getextremely hot from operation. They remain hot for ashort time after you turn off the unit."Do not operate the engine faster than the speedneeded to cultivate. Do not run the engine at highspeed when you are not cultivating.Always stop the engine when cultivating is delayed orwhen walking from one cultivating location to another.If you strike or become entangled with a foreignobject, stop the engine immediately and check fordamage. Do not operate before repairing damage. Donot operate the unit with loose or damaged parts.Stop and switch the engine to off for maintenance,repair, or to install or remove the tines.Use only original equipment manufacturerreplacement parts and accessories for this unit. Theseare available from your authorized service dealer. Useof any unauthorized parts or accessories could lead toserious injury to the user, or damage to the unit, andvoid your warranty.Keep unit clean of vegetation and other materials.They may become lodged between the tines andguard.To reduce fire hazard, replace faulty muffler and sparkarrestor, keep the engine and muffler free from grass,leaves, excessive grease or carbon build up.OTHERSAFETYWARNINGSNever store the unit, with fuel in the tank, inside abuilding where fumes may reach an open flame orspark.Allow the engine to cool before storing or transporting.Be sure to secure the unit while transporting.Store the unit in a dry area, locked up or up highto prevent unauthorized use or damage, out of thereach of children.Never douse or squirt the unit with water or any otherliquid. Keep handles dry, clean and free from debris.Clean after each use. See the Cleaning and Storageinstructions., Keep these instructions. Refer to them often and usethem to instruct other users. If you loan someone thisunit, also loan them these instructions.SAVE THESEINSTRUCTIONS
SAFETYAND iNTERNATiONALSYMBOLSThis operator's manual describes safety and international symbols and pictographs that may appear on this product.Read the operator's manual for complete safety, assembly, operating and maintenance and repair information.SYMBOLMEANINGSYMBOL THROWN OBJECTS ANDROTATING CUTTER CAN CAUSESEVERE INJURY SAFETY ALERT SYMBOLIndicates danger, warning, orcaution. May be used in conjunctionwith other symbols or pictographs.WARNING: Donotoperate without the proper guards inplace. Keep away from the rotatingtines.WARNING - READ OPERATOR'SMANUALRead the Operator's Manual(s) andfollow all warnings and safetyinstructions. Failure to do so canresult in serious injury to theoperator and/or bystanders.WEAR EYE AND HEARINGPROTECTIONWARNING: Thrownobjects and loud noise can causesevere eye injury and hearing loss.Wear eye protection meeting ANSIZ87,1-1989 standards and earprotection when operating this unit.Use a full face shield when needed.KEEP BYSTANDERS AWAYMEANINGIO ON/OFF STOP CONTROLON / START / RUNON/OFF STOP CONTROLOFF or STOPHOT SURFACE WARNINGDo not touch a hot muffler orcylinder. You may get burned. Theseparts get extremely hot fromoperation. When turned off theyremain hot for a short time.WARNING:Keep allbystanders, especially children andpets, at least 50 feet (15 m.) from theoperating area.WARNING: UNLEADED FUELAlways use clean, fresh unleaded fuel. OiLRefer to operator'sproper type of oil.GARDEN CULTIVATORS ROTATING TINES CAN CAUSESEVERE INJURYmanual for theStoptheengine and allow the tines to stopbefore installing or removing tines,or before cleaning or performing anymaintenance. Keep hands and feetaway from rotating tines.
ApplicationsCultivatingsod and light to mediumCultivatingin gardenareas, aroundsoiltrees, etc.EdgingSTOP/OFF (0)\HandgripThrottleControlHandlebarOnlOff StopControlPrimer BulbFuel CapSTARTIONEZ FireTMLever\(I)Starter Rope GripHandlebarKnobTransportGripSparkPlugTine Guard\Transport uffler
ASSEMBLINGTHE UNiTHoleBefore operating, position the unit's handlebars.NOTE: You may also need to reposition the roller heightbefore using the cultivator. Refer to the AdjustingTine Depth section.BoltHandlebarKnobBegin by carefully unpacking the contents and makingsure that nothing is damaged.POSITIONINGTHE HANDLEBARS1.Loosen the two knobs on the inside of thehandlebars (Fig. 1).2.With the unit upright, swing the handlebars up intothe operating position (Fig. 1).NOTE: Take care not to pinch the throttle cable orswitch wires when positioning the handlebar.3.Tighten the knobs to secure the handlebars in place(Fig. 2).NOTE: Do not over-tighten.Handlebars\.Fig. 2INSTALLINGASSEMBLYTHETRANSPORTROLLERIf the roller assembly is not installed, or if you ever needto remove or reinstall it, perform the followinginstructions:WARNING:the knobs.To avoidinjurythetines,wear fromheavy glovesand a longsleeveshirtwheninstalling the roller assembly.Readjust the throttle cable and switch the wires sothey are smooth and tight against the handlebarassembly. This will help prevent them from catchingor snagging during normal operation.personal injury, theWARNING:Toprevent seriousroller assembly must be installed whenoperatingHandlebarKnobsHandlebarKnobsthe unit.1. With the unit on its side, place the transport rollerassembly on the underside of the tine guard (Fig. 3).Guard"" TransportRollerAssemblyFig. 1Wing Nuts &Lock WashersFig. 3
2.Install a carriage bolt through each of the slottedholes in the roller bracket and into the tine guard.3.On the TOP side of the tine guard, install a lockwasher and a wing nut onto each of the bolts (Fig. 3).4.Make sure the square shoulder of the bolts is pushedthrough the slotted holes in the roller bracket. Tightenthe wing nuts (Fig. 4).UpNOTE: Do not over-tighten the wing nuts. Loosen thewing nuts to adjust roller height./Downf\\\\Fig. 5ATTACHINGTHE EDGER WHEEL AND BLADETo convert the mini-tiller cultivator to an edger, proceedas follows:1.TransportRollerAssemblyFig. 4ADJUSTINGTINE DEPTHTine adjustment will vary depending on the type of soilbeing cultivated and how it will be used. Generally,adjusting the tines to break the soil 4 to 6 inches isrecommended for most gardens. Adjust the tines asfollows:,Stop the engine and disconnect the spark plug wire.2.Loosen (do not remove) the two wing nuts on thetine guard (Fig. 5).3.Slide the roller bracket assembly down for shallowerpenetration, and up for deeper tine penetration.4.,6.Push the On/Off switch to Off (O) position to stopengine and tines and disconnect spark plug to avoidaccidental starting.NOTE: It may be necessary to lay the mini-tiller back in ahorizontal position on a flat level surface with theupper handle touching the ground.2.,,,Remove the click pin from each end of the tine shaftand slide the tines off the shaft.Slide the edger wheel, with the hub facing inward,onto the right side of the tine shaft and secure withthe click pin in the inside hole (Fig. 6).Slide the edger blade with the hub facing out ontothe left side of tine shaft and secure with the click pinin the inside hole (Fig. 6).Guide the edger blade along a flowerbed, sidewalk,or driveway with the edger wheel along the outsideedge. Use the edger guide line to line up edger blade.Edger GuideLineOnce the tines are in the desired position, tighten thewing nuts, making sure that the carriage bolts areseated properly through the bracket.HubIf the tine depth is incorrect, repeat steps 2 to 4.Reconnect the spark plug wire and continue use.Edger WheelClick PinEdger BladeFig. 6
OiL ANDFUELMiXiNGiNSTRUCTiONSFUEL MIXTUREOld and/or improperly mixed fuel are the main reasonsfor the unit not running properly. Be sure to use fresh,clean unleaded fuel. Follow the instructions carefully forthe proper fuel/oil mixture.Definitionof Blendedi ,FuelsToday's fuels are often a blend of gasoline andoxygenates such as ethanol, methanol, or MTBE (ether).Alcohol-blended fuel absorbs water. As little as 1%water in the fuel can make fuel and oil separate. It formsacids when stored. When using alcohol-blended fuel,use fresh fuel (less than 60 days old).UNLEADED GAS2 CYCLE OIL1 GALLON US(3.8 LITERS)3.2 FL. OZ.1 LITER25 mlUsing BlendedFuelsIf you choose to use a blended fuel, or its use isunavoidable, follow recommended precautions:WARNING:, Always agitate the fuel mix before fueling the unitGaso,oeextremelyflammable. IgnitedVapors may explode.Always stop the engine and allow itto coolbeforefillingthe fueltank.Do not smokewhilefillingthe tank.Keep sparks and openflames at a distancefrom the area., Drain the tank and run the engine dry before storingthe unitFuel AdditivesThe bottle of 2-cycle oil that came with your unitcontains a fuel additive which will help inhibit corrosionand minimize the formation of gum deposits. It isrecommended that you use Craftsman 2-cycle oil withthis unit.WARNING:Remove fuel capslowly to avoid injuryfrom fuel spray. Never operate the unitwithout the fuel cap securely in place.If Craftsman 2-cycle oil is unavailable, use a good 2cycle oil designed for air-cooled engines along with afuel additive, such as STA-BIL :' Gas Stabilizer or anequivalent. Add 0.8 oz. (23 ml.) of fuel additive per gallonof fuel according to the instructions on the container.NEVER add fuel additives directly to the unit's fuel tank.Correct(95 ml)MIXING RATIO - 40:1, Always use the fresh fuel mix explained in youroperator's manualUsingTABLEWARNING:Add fuel in a clean,well ventilatedoutdoor area. Wipe up any spilled fuelimmediately. Avoid creating a source ofignition for spilt fuel. Do not start the engineuntil fuel vapors dissipate.CAUTION" [] operationForproperengineandNOTE: Dispose of the old fuel/oil mix in accordance toFederal, State and Local regulations.maximum reliability, pay strict attention tothe oil and fuel mixinginstructionson the2-cycle oil container.Usingimproperly mixedfuel can severely damage the engine.FiLLiNGTHE FUEL TANKMake sure the cultivator is in a horizontal position whenfilling or adding fuel to the tank.Fuel MixtureThoroughly mix the proper ratio of 2-cycle engine oilwith unleaded gasoline in a separate fuel can. Use a 40:1fuel/oil ratio. Do not mix them directly in the engine fueltank. See the Fuel Mixture Table for specific gas and oilmixing ratios.NOTE: One gallon (3.8 liters) of unleaded gasoline mixedwith one 3.2 oz. (95 ml.) bottle of2-cycle oil makes a 40:1 fuel/oil ratio.Fig. 7
IAIAE)I!I l , tl .Operate this unit only in a[] well- ventilated outdoorarea. Carbon monoxide exhaust fumes can be lethal ina confined area.WARNING"Avoid accidentalOFF (0)starting.[] Make sure you are in thestarting position when pulling the starter rope(Fig. 10). To avoid serious injury, the operator and unitmust be in a stable position while starting.STARTINGThrottleControlINSTRUCTIONS,Mix gas with oil. Fill fuel tank with fuel/oil mixture.See Oil and Fuel Mixing Instructions.,Make sure the On/Off Stop Control is in the ON [I]position (Fig. 8).Fully press and release the primer bulb 10 times,slowly. Some amount of fuel should be visible in theprimer bulb and fuel lines (Fig. 9). If you can't seefuel in the bulb, press and release the bulb as manytimes as it takes before you can see fuel in it.PrimerBulb !Push the blue EZ Fire TM Lever towards the primerbulb until it clicks and locks into place (Fig. 9).Blue EZ FireLeverLay the unit on the ground horizontally, with the endsof the handles resting on the ground (Fig. 10).iiii ii6.Put your free hand on the fuel tank to stabilize theunit. With your other hand, pull the starter rope outwith a smooth and steady pull until the engineattempts to start. Repeat until the engine starts.NOTE: The unit uses the Incredi-Pull TM starting systemwith MAX FIRE IGNITION TM, which significantlyreduces the effort required to start the engine. Youmust pull the starter rope out far enough to hearthe engine attempt to start. There is no need topull the rope briskly-- there is no harsh resistancewhen pulling. Be aware that this starting method isvastly different from (and much easier than) whatyou may be used to.Fig. 9StartingWhen the engine starts, squeeze the throttle controlfor 15 to 30 seconds. This will warm up the unit. Theblue EZ Fire TM Lever will click off automaticallywhen you squeeze the throttle control.IF. The engine does not start, go back to step 3.IF,,, The engine stops while you are squeezing thethrottle, go back to step 4.IF,,, The engine stops before you squeeze the throttlecontrol, hold the throttle control and pull the starterrope until the trimmer starts.NOTE: If you are having trouble starting the unit or areoperating in extreme temperatures (below 40 F,above 90 F), refer to the Troubleshooting section.STOPPINGINSTRUCTIONS1.Release your hand from the throttle control. Allow theengine to cool down by idling.2.Put the On/Off Stop Control in the OFF (O) position.Fig. 1010TMPosition
OPERATINGTiPSWARNING" []Dress properly toreduce the risk ofinjury when operating this unit. Do notwear loose clothing orjewelry. Wear eyeand ear/hearing protection. Wear heavylong pants, boots and gloves. Do not wearshort pants, sandals or operate barefoot.Move the cultivator to the work area prior to starting theengine. Transport the cultivator by pushing it on itsroller wheel or by carrying it by the transport grip.TransportGripWARNING" [] Topreveotseriouspersonal injury,never pick-up or carry the unit while theengine is running.2.Start the unit by following the Starting Instructions.3.With the engine running and the tines off the ground,depress the throttle control to increase the engine speed.4.Holding both of the handlebar grips firmly, slowlylower the cultivator until the tines make contact withthe ground (Fig. 11).5.As cultivating action begins, pull back on thecultivator so that the tines can penetrate the ground.6.Once the ground has been broken, continue at amoderate pace until you are familiar with the controlsand the handling of the cultivator.7.To improve the depth of cultivation, pull back on theunit as it moves forward to drive the tines deeperinto the ground.WARNING" [] Topreveotseriouspersonal injury, useextreme caution when reversingor pulling the unit towards you.Fig. 11TRANSPORTINGTHE UNITWARNING: Topreventseriouspersonal injury,always stop the engine when operation isdelayed or when transporting the unit fromone location to another1.Stop the engine.2.Slide the roller bracket assembly all the way down.3. Tilt the unit back until the tines clear the ground.8.If the tines are digging too deep or not deep enough,adjust them according to Adjusting -FineDepth.4.Push or pull the unit to the next location.5.If you need to move the unit over long distances, usethe transport grip.11
MAINTENANCESCHEDULEPerform these required maintenance procedures at thefrequency stated in the table. These procedures shouldalso be a part of any seasonal tune-up.NOTE: Some maintenance procedures may requirespecial tools or skills. If you are unsure aboutthese procedures, take your unit to a Sears orother qualified service dealer. Call 1-800-4-MYHOME for more information.IA#aDR R I .TO prevent seriousu u F-ill ' I u 1 jl [] injury,neverperformmaintenanceor repairswithunitrunning.Always serviceand repaira coolunit.Disconnectthesparkplugwireto ensurethatthe unitcannotstart.NOTE: Maintenance, replacement, or repair of theemission control devices and system may beperformed by a Sears or other qualified servicedealer. Call 1-800-4-MY-HOME for moreinformation.In order to assure peak performance of your engine,inspection of the engine exhaust port may be necessaryafter 50 hours of operation. If you notice lost RPM, poorperformance or general lack of acceleration, this servicemay be required. If you feel your engine is in need of thisinspection, refer service to a Sears or other qualifiedservice dealer. Call 1-800-4-MY-HOME for moreinformation. DO NOT attempt to perform this processyourself as engine damage may result from contaminantsinvolved in the cleaning process for the port.FREQUENCYMAINTENANCEBefore starting engineFill fuel tank with fresh fuel mixPage 9Every 10 hoursClean and re-oil air filterPage 13Check and clean spark arrestorPage 14Check spark plug condition and gapPage 15Inspect exhaust port and spark arrestor screen for clogging orobstruction to assure maximum performance levelsPage 14Every 25 hoursEvery 50 hoursTINE REMOVALREQUIREDREFER TOAND REPLACEMENTAll 4 tines should be replaced at the same time becausethey will wear evenly through normal use. Work on oneside at a time.A r"Tine[] injury, always wearWARNING"To prevent seriousheavy gloves when handling the tines.1.Put the On/OFFStop Control in the STOP (O) positionand disconnect the spark plug boot from the plug.NOTE: It may be necessary to lay the cultivator back in ahorizontal position on a flat level surface with thehandles touching the ground.2.3.4.Remove the click pin from each end of the tine shaft.Slide the tines off of the shaft (Fig. 12a).Clean and oil the shaft.CultivatorFrontClickPinHubsFig. 12aHubs on back sideWhen you are reinstalling tines, la out the tines andcompare them to those shown in Figure 12b. Notespecifics about each tine: its hub, curvature andlettering ("A" or "B"). This will help make sure thatyou are placing the correct tines in the correct order.NOTE: If you look closely, you can see a slight curvaturein the tine tips. These curves should point towardthe front of the cultivator when the tines areinstalled. Figure 12b shows the curve in each tine.5.Tine"A" Tine"B" Tine"B" TineHubsUsing Figures 12a and 12b for reference, slide on thenew tines with the hubs facing outward.The tines are stamped "A" or "B." The tine ordershould be "B, A, B, A" from left to right when facingthe cultivator from the front.6.12Secure the new tines to the shaft with click pins. Itmay be necessary to wash the dirt off the tines andshaft to help during this entire process.CultivatorFront"A" TineFig. 12b
AIR FILTER MAINTENANCERemovingthe Air Filter/MufflerWARNING"CoverToavoidse ioos[] personal injury,always turn the unit off and allow it to coolbefore you clean or service it.61. Remove the four (4) screws securing the airfilter/muffler cover (Fig. 13). Use a # T20 Torx bitscrewdriver.2.Air FilterPull the cover from the engine. Do not force.Blue EZ FireLeverScrewsIInside MufflerCoverFig. 14TMScrews!Fig. 15Fig. 13SPARKCleaning1.the Air FilterClean and re-oil the air filter every 10 hours of operation.It is an important item to maintain. Failure to maintainyour air filter properly can result in poor performance orcan cause permanent damage to your engine.,,3.,5.Remove the air filter/muffler cover. Refer to theRemoving the Air filter/Muffler Cover section.Remove the air filter from inside the air filter/mufflercover (Fig. 14).Wash the filter in detergent and water (Fig. 14). Rinsethe filter thoroughly. Squeeze out excess water.Allow it to dry completely.,Reinstallingthe Air filter/MufflerCover1.Place the air filter/muffler cover over the back of thecarburetor and muffler.2.Insert the four (4) screws into the holes in the air filter/muffler cover (Fig. 13) and tighten. Use a # T20 Torxbit screwdriver. Do not over tighten. Do not force.Remove air filter/muffler cover. Refer to Removingthe Air Filter/Muffler Cover.Locate the muffler, but do not remove it. Find thescrew on the bottom of the muffler (Fig. 16). Removethe screw using either a torx #20 or flat bladescrewdriver.CarefullyTwo tabsFlip openthen pull,Using a small flat blade screwdriver, carefully pry thespark arrestor screen out from the inside of the sparkarrestor hood.,6.Replace the air filter inside the muffler cover (Fig. 14).NOTE: Operating the unit without the air filter and coverassembly will VOID the warranty.MAINTENANCE,Apply enough SAE 30 oil to lightly coat the filter (Fig. 15).Squeeze the filter to spread and remove extra oil (Fig. 15).ARRESTORpry up the left side spark arrestor hood.act as hinges on the right side of the hood.the spark arrestor hood like a door andits tabs out of the muffler slots.Clean the spark arrestor screen with a wire brush.Replace it if it is damaged, or if you are unable toclean it thoroughly.Reinstall the spark arrestor screen snugly back intothe spark arrestor hood.7. Reinstall the two hood tabs into the two muffler slotsand flip the spark arrestor hood closed.8. Replace the screw you removed in Step 2 and tightenit securely.9. Reinstall the air filter/muffler cover.,NOTE: Make sure the blue EZ-Fire TM Lever ispositioned away from the primer bulb.13
lots/clothing andto preventIf after checking the fuel mixture and cleaning the airfilter the engine still will not idle, adjust the idle speedscrew as follows:1.Start the engine and let it run for about 2-3 minutesat a high speed (full throttle) to warm up. Refer to theStarting/Stopping Instructions.NOTE: Ensure the tine
TO LOCATE THE NEAREST SEARS SERVICE CENTER OR TO SCHEDULE SERVICE, SIMPLY CONTACT SEARS AT 1-800-4-MY-HOME . This warranty gives you specific legal rights and you may also have other rights, which vary from state to state. CALIFORNIA PROPOSITION 65 WARNING THE ENGINE EXHAUST FROM THIS PRODUCT CONTAINS CHEMICALS KNOWN TO THE STATE OF CALIFORNIA