Transcription
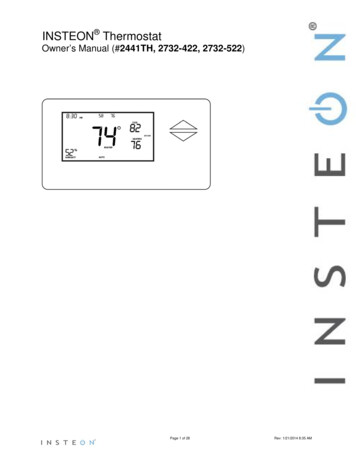
INSTEON ThermostatOwner’s Manual (#2441TH, 2732-422, 2732-522)Page 1 of 28Rev: 1/21/2014 8:35 AM
About INSTEON Thermostat3INSTEON Thermostat – Features and BenefitsWhat’s in the Box?33INSTEON Thermostat Button Overview4INSTEON Thermostat Operation and ProgrammingMode Button OperationEnergy Button OperationSet Button OperationTime/Sensor Button OperationsProgram Button OperationFan and Hold Button OperationsMaster Button Operation5567781010InstallationTools NeededInstallationWire ConnectionsTest Operation1111111213Adding an INSTEON Wireless Thermostat13INSTEON ProgrammingAdd INSTEON Thermostat as an INSTEON ControllerRemoving INSTEON Thermostat as an INSTEON ControllerAdd INSTEON Thermostat as an INSTEON ResponderRemove INSTEON Thermostat as an INSTEON ResponderUser Setup Mode OverviewUser Setup ModeTemperature and Humidity Calibration Mode1414161717191921Advanced 2-Stage Heating or Cooling Systems22Factory N OF CONFORMITY26Certification and WarrantyLimited WarrantyLimitations282828Page 2 of 28Rev: 1/21/2014 8:35 AM
About INSTEON ThermostatINSTEON Thermostat is a 7-day programmable INSTEON-compatible thermostat. INSTEON Thermostatincludes a humidity sensor and 2-stage heating plus 2-stage cooling capabilities.Expand the system by creating extra temperature zones in your home. Simply add one or more INSTEONWireless Thermostats as accessories to your system. Additionally, a Waterproof Temperature Sensor canbe added and extended up to 100 feet for remote temperature sensing.INSTEON Thermostat – Features and Benefits Installs and joins scenes with other INSTEON devices in minutesSaves energy and money by remotely controlling and automating your home’s heating and ACCommunicates wirelessly over radio frequency (RF)Can automatically remotely control INSTEON devices when INSTEON Thermostat reaches aspecified temperature or humidity level or switches to A/C or heatReports changes in thermostat modes, temperature, humidity, setpoints and fan to compatibleautomation controllers or softwareFine-tunes thermostat setpoints by single degrees from any INSTEON controller with specific Upand Down buttonsStores setup state in memory so settings aren’t lost during power outagesTwo-year warrantyTMControllable via the web and smartphone app (iOS/Android) using SmartLinc controller orINSTEON HubWhat’s in the Box? INSTEON ThermostatTwo mounting screwsTwo anchorsQuick Start GuideWire ID label stickersPage 3 of 28Rev: 1/21/2014 8:35 AM
INSTEON Thermostat Button OverviewTemperature of remotesensors or zone thermostatsposition 1 and position 2(up to 2)CurrenttemperatureINSTEON Thermostat SampleCool setpointTime of daystateTime1Heat setpointHumidity level2Currentthermostatmode:Off, Auto,Heat or CoolThe gray buttonsare under theINSTEONThermostat door98765431) Up/Down buttons adjust the temperature setpoint based on the current mode.2) Mode allows the user to select the current operational mode of the HVAC system. It cyclesamong Off, Heat, Cool, Auto and Time of Day.3) Energy (Leaf) button is designed as a quick access option that saves energy (and money). Whenpressed, it will set back the setpoint by a specified value. The default value is 4 from the currentTMsetting. To change the default offset value you must use software such as HouseLinc .4) Hold overrides a preprogrammed mode to stay in the current settings mode.5) Fan cycles between Auto and Always On – there is no indicator for Auto Fan.6) Master makes this device the master temperature controller when you have one or more zonethermostats. Pressing and holding “Master” does not alter any scene or screen settings; it justdefines this INSTEON Thermostat as the master temperature controller.7) Time/Sensor allows you to set the day and time. It cycles among hour, minute, day and timeprogramming.8) Program allows you to set up the various preprogrammed modes (Wake, Leave, Return andSleep). It also allows you to setup various features and calibrate the temperature and humidity.9) Set is for adding and removing INSTEON Thermostat to and from INSTEON scenes. It functionslike the Set button on other INSTEON devices.Page 4 of 28Rev: 1/21/2014 8:35 AM
INSTEON Thermostat Operation and ProgrammingMode Button OperationOff Mode: No setpoints are shown. Up/Down arrows do not do anything.Heat Mode: Only Heat setpoint is shown. Up/Down arrows change Heat setpoint.Cool Mode: Only Cool setpoint is shown. Up/Down arrows change Cool setpoint.Auto Mode: Both Cool and Heat setpoints areshown. Up/Down arrows increase or decreasevalues by the same amount.Time of Day Mode: The program mode is active as indicated bythe return annotation. The Time of Day annotation is notdisplayed in the other four modes (Off,Heat, Cool or Auto). Both Cool and Heat setpoints are shown. Up/Down arrows increase or decreasevalues by the same amount. When the thermostat moves to the nexttime period, the setpoints will be adjustedaccordingly.Note: To adjust the gap between the setpoints in Auto mode, press Mode to select Heat and set thetemperature you desire. Press Mode to select Cool and set the temperature you desire.Press Mode to return to Auto; the settings will reflect your changes.If you set Heat and Cool to the same temperature, Heat will automatically move down 2 (theminimum allowable gap).Page 5 of 28Rev: 1/21/2014 8:35 AM
Energy Button OperationThe Energy button is designed to be a quick, efficient energy-saving option. When you press the Energy(leaf) button, INSTEON Thermostat will adjust the Heat and Cool setpoints by a specified value. Thedefault value is 4 from the current setting. The default value can be changed via software such asHouseLinc. When you exit Energy mode, it will revert back the 4 that was changed upon entry. The unit remains in Energy mode until the Energy button is pressed again. Up/Down arrows adjust the temperature setpoint based on the mode you are in.From Off Mode: Energy button does nothing because thesystem is off (at maximum energy savingsalready). When “Energy” appears on the screen forAuto, Cool and Heat Modes, the 4 setbackis engaged.From Heat Mode: Heat setback as specified. Default setback is 4 less. Notice that “Heating” is active on the left,but not on the right since the setpoint islower that the actual temperature; theelement reads “Heat.”From Cool Mode: Cool setback as specified. Default setback is 4 more.From Auto Mode: Both Heat and Cool setpoints changed asspecified. Default setback is 4 more for Cooling and4 less for Heating. Notice that “Heating” is active on the left,but not on the right since the setpoint islower that the actual temperature; theelement reads “Heat.”Page 6 of 28Rev: 1/21/2014 8:35 AM
From Time of Day Mode: Both Heat and Cool setpoints changed asspecified. Default setback is 4 . Notice that “Heating” is active on the left, butnot on the right since the setpoint is lowerthan the current temperature; the elementreads “Heat.”Note: Onscreen text displaying “Heat” changes to “Heating” and “Cool” changes to “Cooling” to indicateHVAC system is active. The status LED, if enabled, under the door also indicates current active state:Cooling green, Heating red. At time of activation either Heating or Cooling text will blink for 3 secondsthen remain steady during the active cycle.Set Button OperationThe Set button adds and removes INSTEON Thermostat from INSTEON scenes. It functions like the Setbutton on other INSTEON devices.Time/Sensor Button Operations The Time/Sensor button allows the user to set the current day and time.It cycles among hour, minute, day and 12/24-hour format.Up/Down arrows cycle through the available options.Go to the next Time/Sensor step by pressing Time/Sensor button again.Exit Time/Sensor setup by:Timing out (4 minutes)Pressing Mode buttonNote: Colored elements indicate LCD element that should be blinking during setting procedure.First press of Time/Sensor:Hours settings Up/Down arrows cycle through time in 1-hourincrements. Pressing and holding Up/Down arrows cyclesthrough faster.Note: AM/PM changes automatically as needed.Second press of Time/Sensor:Minutes settings Up/Down arrows cycle through time in 1minute increments. Pressing and holding Up/Down arrowscycles through faster.Page 7 of 28Rev: 1/21/2014 8:35 AM
Third press of Time/Sensor:Day settings Up/Down arrows cycle through each day of the week as shown.Fourth press of Time/Sensor:Clock Format setting (12- or 24-Hour clock) Entire “time” blinks. Up/Down arrows cycle between 12- and 24-hour clock format.Note: AM/PM is not displayed when in 24-Hour format.Press Time/Sensor a fifth time to exit.Program Button Operation The Program button allows you to set up the various preprogrammed modes (Wake, Leave, Returnand Sleep). Go to the next step by pressing Program again. Exit Program setup by:- Timing out (4 minutes)- Pressing Mode buttonNote: Colored text below indicate element that should be blinking during setting procedure.First press of Program:Selects from available pre-program modesUp/Down arrows cycle through Wake, Leave, Return and Sleep.NOTE: Energy is not a part of this option. Once a preprogrammed mode is selected, that item remains displayed throughout toindicate the mode you are programming. The current mode settings are displayed on the thermostat at each setup step.Second press of Program:Day setting Up/Down buttons cycle among all week, weekdays, weekend days and each day, as shown.Page 8 of 28Rev: 1/21/2014 8:35 AM
Third press of Program:Start Time Up/Down arrows cycle through time in 15-minute increments. Note: when pressing the Down arrow, ifyou come within 15 minutes of another preprogrammed mode time, you will not be able to increasethe time any further. Pressing and holding Up/Down arrows cycles faster.Note: AM/PM changes automatically as needed.Note: The start of one program mode is also the end of the previous program mode.Fourth press of Program:Cool setpoint Up/Down arrows cycle through temperature.Fifth press of Program:Heat setpoint Up/Down arrows cycle through temperature.Sixth press of Program: Restarts the process to program another Mode/DayNOTE: The four modes come preprogrammed. The defaults are for all days:Day ModesStart TimeThermostat ModeHeat SettingCool SettingWake6:00AMAuto65 F (18 C)75 F (24 C)Leave8:30AMAuto60 F (16 C)80 F (27 C)Return5:00PMAuto65 F (18 C)75 F (24 C)Sleep11:00PMAuto60 F (16 C)80 F (27 C)Page 9 of 28Rev: 1/21/2014 8:35 AM
Fan and Hold Button OperationsFan button operations The Fan button cycles between Auto and Always On. On the display, it simply indicates the text “Fan Always” when selected. There is no indication for FanAuto.Always OnAutoHold OnHold OffHold button operations The Hold button overrides a preprogrammed mode until Hold is turned off.NOTE: While Hold is enabled, the next preprogrammed time that comes in Time of Day Mode will be ignored. While Hold is enabled, the preprogrammed time notations are not shown (i.e. Wake, Leave, Returnand Sleep). Hold can be remotely enabled/disabled from an INSTEON controller.Master Button OperationFirst press and hold:Makes the local INSTEON Thermostat the master temperature controller To perform this, press and hold Master button for 3 seconds.INSTEON Thermostat beeps once. Release.Note: This is only valid if at least one INSTEON Thermostat Zone Thermostat is linked to INSTEONThermostat.Before pressing Master button: Notice that the left remote sensor is currentlythe Master temperature controller.After pressing and holding Master button: Notice that the left remote sensor is nolonger the Master temperature controller. The local INSTEON Thermostat is now theMaster controlling temperature.Note: If no INSTEON scene is programmed to a INSTEON Wireless Thermostat, pressing and holding for3 seconds will cause the Master segment to display while the button is being held.Page 10 of 28Rev: 1/21/2014 8:35 AM
InstallationCAUTIONS AND WARNINGSRead and understand these instructions before installing and retain them for future reference.IMPORTANT: HOW DO I KNOW THIS WILL WORK WITH MY SYSTEM?1) Your existing HVAC can operate 2 stages of Heat and Cool.2) Your existing thermostat operates on 24V.3) Your system is not a heat pump.4) Your system is not a 120/240V electric radiant heater.5) Your existing thermostat is not millivolt controlled.6) Your existing thermostat has 5 or more wires connected.INSTEON Thermostat is designed to operate on a minimum 5-wire, 24V HVAC unit. If you have only 4wires you can purchase the “Add-A-Wire” adapter item #304AAW from www.smarthome.com.Note: Installation should be performed only by a qualified HVAC Technician or a homeowner who is familiar andcomfortable with electrical circuitry. If you have any questions regarding installation, consult an HVAC Technicianor call the INSTEON Support Line at 800-762-7845.Tools Needed Flathead screwdriverWire cutter/stripperInstallationProper installation of the INSTEON Thermostat will be accomplished by following these step-bystep instructions1) Do not remove wires from existing thermostat until instructed.2) If you have A/C, turn off A/C breaker.a. Confirm A/C is off by turning on air and observing that compressor/fan do not come on.3) Turn off breaker/fuse to furnace.a. If thermostat no longer functions, move to next step.b. If thermostat still functions, it is probably running off battery power. Try to turn on heat.i. If heat doesn’t turn on, move to next step.ii. Otherwise, turn off heat and wait until furnace fan stops, then try anotherbreaker until heat no longer runs.4) Remove cover from existing thermostat to gain access to wires (may need to detach from wall).5) If necessary, take photo of wiring connections to help with reconnections.6) If possible while still connected, attach the “C” label to the wire connected to “C” on yourthermostat. Otherwise, label C wire once disconnected.7) Disconnect your C wire from thermostat.8) Repeat for all your other wires, being careful to not pull off wire stickers or mar paint or wallpaper.9) Remove existing thermostat back from wall.10) Remove 3” of the outer jacket from the wires exposing theindividually colored wires. This ensures the outer insulation doesnot press against the internal components of the INSTEONThermostat upon closing the unit. Note: if your system has 4wires, you will need the “Add-a-Wire” adapter. See Cautions andWarnings above.)a. Be careful not to tear off the labels that you previouslyattached to the wire ends.b. If you do not have 3” after stripping away the outerjacket, you can extend the inner wires by splicing on anew longer conductor.i. "Thermostat" cabling is available at most home improvement centers. It comes indifferent wire configurations, but the same gauge. If the wire you have now is 5conductor cable, buy 5-conductor thermostat wire and connect it matching colorto-color.c. If wires are longer than 3”, trim them back or make sure you can push the excess backinto the wall. Be careful not to cut off the wire designation label.11) Slide all wires through large hole in back of INSTEON Thermostat.12) Mount INSTEON Thermostat to wall.Page 11 of 28Rev: 1/21/2014 8:35 AM
13) To ensure accurate temperature readings:a. Carefully slide wires through provided black grommet (draft shield). See diagram.b. Peel off protective backing.c. Rotate to most convenient orientation for wire entrance.14) Apply to round grommet placing indentation.Wire ConnectionsIf the terminal designations on your old thermostat do not match those on INSTEON Thermostat, refer tothe chart below or the wiring diagram that follows:Wire color from furnace/AC unitFunctionInstall on INSTEON Thermostat connectorBlack or blueCommon 24V24V COMRedPower 24V24 RHWhiteHeat 1W1BrownHeat 2W2GreenFanGYellowCooling 1Y1Light blueCooling 2Y2Wire colors may varyDiagram below shows inside of INSTEON Thermostat wall mount case:15) Insert C wire into terminal C and tighten using small screwdriver (either flathead or Philips).a. Be aware that incorrect connections may cause non-operation or Heat, Cool and Fan tobe wrongly triggered.16) Repeat for other wires matching terminal designations.17) Close front of INSTEON Thermostat onto back mounting plate.a. Press firmly until you feel the connecting pins fully seat into their receptacles. You shouldalso feel and hear a click as the door latches.18) Turn breaker(s) back on.19) Allow 10 seconds for INSTEON Thermostat to boot up.When screen displays current temperature, INSTEON Thermostat is powered and functional.Page 12 of 28Rev: 1/21/2014 8:35 AM
Test OperationHeating Mode Test1) Press Mode once to enter Heat mode.2) Tap the Up arrow several times until setpoint is 2 above current temperature.INSTEON Thermostat will call for heat and “Heat” segment will change to “Heating.”“Heating” segment will flash for 3 seconds, then remain steady when active.Status LED will display red if enabled (off by default).Allow furnace to operate long enough to begin blowing warm air.3) Tap the Up or Down arrows until you reach a desirable heat temperature setpoint (if this is belowambient, Heating will go inactive).Note: Fan stays controlled by HVAC and may continue running for a couple minutes.INSTEONThermostat has a default 5-minute delay between Heat and Cool settings.Cooling Mode Test1) Tap Mode button again to enter Cool mode.2) Tap the Down arrow several times until setpoint is 2 below current temperature.INSTEON Thermostat will call for cooling and “Cool” segment will change to “Cooling.”“Cooling” segment will flash for 3 seconds, then remain steady when active.Status LED will display green.Allow A/C to operate long enough to begin blowing cool air.3) Tap the Up or Down arrows until you reach a desirable cool temperature setpoint (if above ambient,Cooling will go inactive).Note: Fan will turn on and off with Cooling.Auto Mode Test1) Tap Mode once to enter Auto mode.2) Note that your Heat and Cool setpoints are both as set in previous steps, unless you did not have aminimum 2 gap between settings.3) Tap Up arrow once to increase both Heat and Cool setpoints by 1 .4) Tap Down arrow once to decrease both Heat and Cool setpoints by 1 .5) Tap Mode once to enter Time of Day mode.Indicated by Auto at bottom and relevant time of day (Wake, Leave, Return, Sleep) to right ofHeat/Cool set temps.6) Tap Mode once more to return to Off mode.Adding an INSTEON Wireless ThermostatINSTEON Thermostat can synchronize with a INSTEON Wireless Thermostat to provide a portablethermostat wherever you want temperature control. You can add up to two INSTEON WirelessThermostats.1) Press and hold Set button on INSTEON Wireless Thermostat.INSTEON Wireless Thermostat Set LED will blink green and unit will beep.2) Press and hold INSTEON Thermostat Set button.INSTEON Thermostat will beep, then double-beep.INSTEON Wireless Thermostat will double-beep.3) Test the scene by pressing and holding the Master button on the INSTEON Thermostat. When properly added, pressing the Master button on the INSTEON Thermostat will illuminate the“Master” segment on that same screen. Additionally, the present room temperature of theINSTEON Wireless Thermostat will be displayed in position 1 as the small temperature segmentsat top center of the display. A visual inspection of each display will reveal the Master status of each INSTEON Thermostat orZone Thermostat.Note: Only the INSTEON Thermostat is directly connected to the HVAC system via wires. If you plan onoperating multiple INSTEON Wireless Thermostats you must have at least one INSTEON Thermostat tocontrol the HVAC.Page 13 of 28Rev: 1/21/2014 8:35 AM
INSTEON ProgrammingAdd INSTEON Thermostat as an INSTEON ControllerINSTEON Thermostat can be set up to control other INSTEON devices or trigger software events whenthere is a change. The following INSTEON Thermostat changes can be configured as a controller: Group 1 - Cooling mode change (scene control)Group 2 - Heating mode change (scene control)Group 3 - Dehumidifiation, high humidity setpoint (scene control)Group 4 - Humidification, low humidity setpoint (scene control)1Group EF - Broadcast on any change (notification group for linked software controllers)NOTE: An INSTEON Wireless Thermostat can also be added to a scene as a controller to Groups 1 - 4.When it is added as a controller of a INSTEON Thermostat, the setpoints between INSTEON WirelessThermostat and INSTEON Thermostat will always be matched. When it is not added as a controller to aINSTEON Thermostat, the setpoints are local only. INSTEON Wireless Thermostat will send groupcommands based on local temperature or humidity level and the setpoint shown on the display,regardless of whether it’s added as a controller to a INSTEON Thermostat.Note: Humidity levels are taken from the local device only; they are not shared or matched amongthermostats.1) Press and hold INSTEON Thermostat’s Set button until it beeps.INSTEON Thermostat will beep.INSTEON Thermostat Set LED will blink green.2) Tap Up or Down arrows to select from Groups 1-4 to add to a scene. Group 1 – Cooling mode change (default) Group 2 – Heating mode change Group 3 – Dehumidification, high humidity setpoint Group 4 – Humidification, low humidity setpoint3) Adjust scene responder (such as OutletLinc with connected humidifier) to the state you want when2scene is activated (e.g., 50%, 25% or even Off).4) Press and hold responder’s Set button until it double-beeps or its LED flashes.INSTEON Thermostat will double-beep upon completion.LED will return to previous state.5) Confirm scene addition was successful by raising or lowering INSTEON Thermostat’s setpoint toactivate the particular mode.After INSTEON Thermostat changes to active mode set in step 2 above, responder will togglebetween the scene’s on-level and off.6) To add more responders to the scene, repeat steps 1-5 for each additional responder.Upon entering scene mode, this screen will display for 2 seconds.12Group FE is a hexadecimal representation of Group 254 and can only be configured using software.If the responder is a multi-scene device such as a KeypadLinc, tap the scene button you wish to control until its LED is in the desired scene state (on or off).Page 14 of 28Rev: 1/21/2014 8:35 AM
LCD display after 2 seconds.LCD display when using Up or Down arrows to select from the 4 controller groups.Page 15 of 28Rev: 1/21/2014 8:35 AM
Removing INSTEON Thermostat as an INSTEON ControllerIf you want to remove INSTEON Thermostat from a scene as a controller, follow instructions below.Whenever possible, use software for managing scene memberships.Note: If you choose to remove INSTEON Thermostat from use, it is important that you remove scenememberships from all responders. Follow the instructions below for each responder of which INSTEONThermostat is a member.1) Press and hold INSTEON Thermostat’s Set button until it beeps.INSTEON Thermostat Set LED will blink green.INSTEON Thermostat will beep.2) Press and hold INSTEON Thermostat’s Set button again to put it in scene mode.INSTEON Thermostat Set LED will blink red.INSTEON Thermostat will beep.LCD display indicates the group from which you are removing the scene.3) Tap Up and Down arrows to select appropriate group to remove from: Group 1 - Cooling mode change, default Group 2 - Heating mode change Group 3 - Dehumidifiation, high humidity setpoint Group 4 - Humidification, low humidity setpoint4) Press and hold responder’s Set button.INSTEON Thermostat will double-beep upon completion.LED will return to previous state.Upon entering Add to a Scene mode.Upon entering Remove from a Scene mode (defaults to Cooling mode).Page 16 of 28Rev: 1/21/2014 8:35 AM
LCD display when using Up or Down arrows to select from the 4 controller Groups.Add INSTEON Thermostat as an INSTEON ResponderAdd a scene to an incoming ON command1) Set INSTEON Thermostat to desired state (mode, setpoint, fan state, energy button state).2) Put controller in linking mode (press and hold controller Set button until it beeps).3) Press and hold INSTEON Thermostat’s Set button.INSTEON Thermostat Set LED will blink green and unit will beep.INSTEON Thermostat will double-beep.LED will return to previous state.Add a scene to an incoming OFF command1) Set INSTEON Thermostat to desired state.2) Put controller in linking mode (press and hold controller Set button).3) Simultaneously press and hold INSTEON Thermostat’s Set button and Down arrow.INSTEON Thermostat Set LED will blink green and unit will beep.INSTEON Thermostat will double-beep.LED will return to previous state.Display while in Add to a Scene Mode to ON or OFFRemove INSTEON Thermostat as an INSTEON ResponderIf you want to remove INSTEON Thermostat from a scene, follow instructions below. Whenever possible,use software for managing scene memberships.Note: If you choose to remove INSTEON Thermostat from use, it is important that you remove scenememberships from all controllers. Otherwise, controllers will retry commands repetitively, creating networkdelays. Follow the instructions below for each scene controller of which INSTEON Thermostat is amember.Page 17 of 28Rev: 1/21/2014 8:35 AM
Removing a scene from an incoming ON command11) Press and hold controller’s scene button until controller beeps.Controller’s LED will blink.2) Press and hold controller’s scene button again until controller beeps again.Controller’s LED will continue blinking.3) Press and hold INSTEON Thermostat’s Set button.INSTEON Thermostat Set LED will blink green and unit will beep.INSTEON Thermostat will double-beep.LED will return to previous state.Controller’s LED will stop blinking.3) Confirm scene removal was successful by tapping the controller scene button you just removed.INSTEON Thermostat will no longer respond.Removing a scene from an incoming OFF command1) Press and hold controller’s scene button until controller beeps.Controller’s LED will blink.2) Press and hold controller’s scene button until controller beeps againController’s LED will continue blinking.3) Simultaneously press and hold INSTEON Thermostat’s Set button and Down arrow.INSTEON Thermostat Set LED will blink green and unit will beep.INSTEON Thermostat will double-beep.LED will return to previous state.Controller’s LED will stop blinking.4) Confirm scene removal was successful by tapping the controller scene button you just removed.INSTEON Thermostat will no longer respond.1For devices without beepers hold until its LED begins blinking (this may take 10 seconds)Page 18 of 28Rev: 1/21/2014 8:35 AM
User Setup Mode OverviewPress and hold Program button for 3 seconds or more to enter the User Setup Mode.User Setup Mode1) Press and hold Program button to access the following options: Press Mode to step between menu items (sub-mode number will appear on top of the screen).o Sub-mode 01: Display LED on-time select (default is 10 seconds)o Sub-mode 02: Humidity low setpoint (default is 30%)Page 19 of 28Rev: 1/21/2014 8:35 AM
oooooooSub-mode 03: Humidity high setpoint (default is 90%)Sub-mode 04: Temperature format select (default is Fahrenheit)Sub-mode 05: Beep on button press (default is Off)Sub-mode 06: Status LED (default is Off)Sub-mode 07: Button lock (default is Off)Sub-mode 08: Programming lock (default is Off)Sub-mode 09: Activation delay (default is 5 minutes)Press the Up or Down arrow to change a setting. Sub-mode 01: LED backlight ON time (10–second default)a. Tap Up or Down arrow to step between Off, 10 sec, 60 sec and Onb. Use HouseLinc software to set the LED backlight ON-time in 1-second intervals Sub-mode 02: Humidity low setpoint (humidification, 30% default)a. Up arrow Increase humidity % setpointb. Down arrow Decrease humidity % setpointc. Range 0 to 79% Sub-mode 03: Humidity high setpoint (dehumidification, 90% default)a. Up arrow Increase humidity % setpointb. Down arrow Decrease humidity % setpointc. Range 20 to 90% Sub- mode 04: Temperature format select (C or F, F default)a. Up arrow Cb. Down arrow F Sub-mode 05: Beep on button press (enable/disable, OFF default)a. Up arrow ONb. Down arrow OFF Sub- mode 06: Status LED (enable/disable, OFF default)a. Up arrow ONb. Down arrow OFFPage 20 of 28Rev: 1/21/2014 8:35 AM
Sub- mode 07: Button lock (disables front button presses, OFF default)o For high-traffic common area locations, such as a business lobby.a. Up arrow ONb. Down arrow OFF Sub- mode 08: Programming lock (locks out Set button programming operations, OFF default)a. Up arrow ONb. Down arrow OFF Sub- mode 09: Delay between consecutive AC modes (5-minute default)a. Up arrow Adds 1-minute incrementsb. Down arrow Decreases 1-minute incrementsc. Range 2-20 minutesTemperature and Humidity Calibration ModeNote: Use a calibrated temperature or humidity source when adjusting INSTEON Thermostat1) Press and hold the Program button, tap Time/Sensor to enter Temperature Calibration Mode.2) Tap Mode to step between temperature calibration and humidity calibration.Temperature Calibration The top left number (77 in example) is the current reading according to the temperature sensor. The top right number (14 in example) is the current offset (represents 1.4). These numbers can change while this screen is displayed even though the primary temperaturedoes not change. They are floating point calculations.3) Tap Up or Down arrows to adjust the displayed temperature to match the calibrated source.i. Each press results in a 1 F (0.5 C) change.ii. The calculation using example numbers below is 78 77 1.4.iii. The offset range is from –10 to 10 actual degrees.Humidity Calibration ModePage 21 of 28Rev: 1/21/2014 8:35 AM
1) Once in Setup Mode for temperature calibration (step 1 above), tap Mode button to step betweentemperature calibration and humidity calibration.2) Press the Up or Down arrow to select the current humidity level. The top left
Thermostat . Owner's Manual (# 2441TH, 2732-422, 2732-522) Page 2 of 28 Rev: 1/21/2014 8:35 AM About INSTEON Thermostat 3 INSTEON Thermostat - Features and Benefits 3 What's in the Box? . Fine-tunes thermostat setpoints by single degrees from any INSTEON controller with specific Up