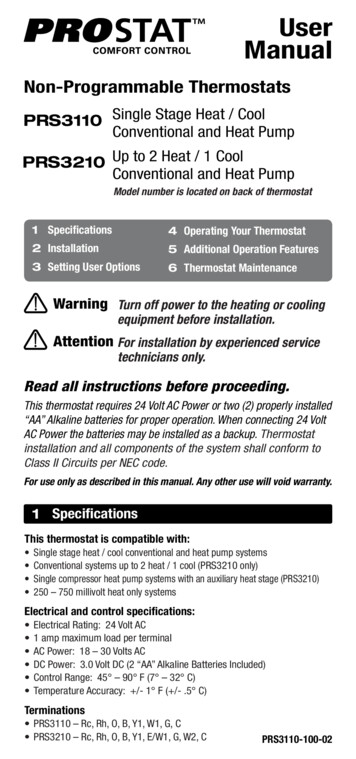
Transcription
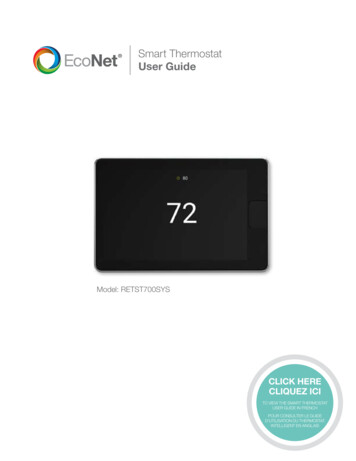
Smart ThermostatUser GuideModel: RETST700SYSCLICK HERECLIQUEZ ICITO VIEW THE SMART THERMOSTATUSER GUIDE IN FRENCHPOUR CONSULTER LE GUIDED’UTILISATION DU THERMOSTATINTELLIGENT EN ANGLAIS
User Guide Table of ContentsOverview.3Items Included in the Box.3Homescreen Overview.4Icons to Become Familiar With.5Standby Screen.6System Modes. 7–9Connecting to WiFi.10Weather.11Menu Options.12Settings. 12–16Settings Basic. 12–13Settings Time.13Settings Humidity. 14–15How to Test a Humidifier.15Settings Away Settings.15Settings Vacation. 15–16Settings Fan.16Schedules.17Status.18Service. 19–20Service Current.19Service History.19Service Alerts.19Service Support.20Service Equipment.20Water Heating.21EcoNet Smart Thermostat Installation Instructions.22Safety Considerations.23Thermostat Location.24Wiring Considerations.25Mounting EcoNet Smart Thermostat.26Wiring Remote Temperature Sensor.27Installer Settings. 28–31Furnace Settings. 28–29AC/HP Settings.30Thermostat Settings.31Air Handler Settings.31Caring for your Thermostat.32How to Connect a Ventilator to an EcoNet HVAC System.33Regulatory and Warranty Information.34EcoNet Smart Thermostat User Guide2
EcoNet Smart Thermostat User GuideThe EcoNet Smart Thermostat is an easy-to-use programmable thermostat that provides complete control overyour home’s smart air and water comfort systems. It’s smart enough to alert you when an issue is detected, yetit’s designed to be simple to operate with an intuitive touchscreen interface. And it has built-in WiFi so you canmonitor your system and adjust temperatures and schedules while on-the-go.More than a thermostat, it’s part of an intuitive system that maximizes comfort and efficiency while offeringcomplete peace of mind—so you can stay focused on what matters most.Items Included in the BoxEcoNet Smart ThermostatWall Mounting PlateFerrite ToroidMounting Screws and Drywall AnchorsLens ClothQuick Start GuideSTARTQUICK EGUIDTARTT ICK SSTARUx2QUICK EQGUIDEGUIDSTARTQUICK EGUIDR C S1 S2 E1 E2R C S1 S2 E1 E2x2EcoNet Smart ThermostatWall Mounting PlateFerrite ToroidMounting Screwsand Drywall AnchorsLens ClothRRRE2E2OUTDOOR UNITE2C Return to Table of ContentsOUTDOOR UNITRE2CRCCE1RE1E1RE1RE1E1E2E2CCE1INDOOR UNITE2E1RE2 RE1S1E2 OUTDOOR UNITS2RCE1E2CE1E2INDOOR UNITCOUTDOOR UOUTDOOR UNITECONETE1SMART THERMOSTATINDOOR UNITOPTIONAL REMOTETEMPERATURE SENSORE2CRCS1S2ECONETSMART THERMOCINDOOR UNITEcoNet Smart ThermostatUser Guide3 REMOECONETOPTIONALSMART THERMOSTATTEMPERATURE SE
Homescreen OverviewWeatherAlertBrand LogoWiFiHumidityMessaging BarOne-Touch AwayMotion SensorIndoor TemperatureTemperature AdjustmentMenuSystem ModeSystem Set PointWhat This Means to Me, The Homeowner:WeatherAlertCurrent weather condition and outsidetemperature; tap to see forecastIndicates an important reminder, minor alert, orcritical alarm; tap for additional detailsBrand LogoWiFiTap to access contractor information andsupport helpOne-Touch AwayTap once to enter preset Away settings; tapagain to return to previous settings orresume scheduleIndoor TemperatureShows the current temperatureinside your homeCurrent WiFi signal strength; tap to start thesetup processHumidityCurrent relative humidity in your home; tap toconfigure to your preferenceSystem ModeTap to navigate to Mode selection screen(auto/heat/cool/e-heat/fan/off)MenuTap to navigate to the full Menu where you canchange basic settings, customize yourschedule and more Return to Table of ContentsEcoNet Smart Thermostat User Guide4
Icons to Become Familiar WithSunnyPartly Cloudy/Partly Cloudy/CloudyMenuPartly Sunny Partly ttingsServiceHomeHomeWaterHeaterSystem OperationWiFi SignalHeatingConnectedConnectedrtly Cloudy/Strong SignalMedium SignalSnowingrtly SunnyFogWeatherWindyRainingOFFHeat E yAlertsE-2018AutoWiHome &CloudyAwayEmergencyHeatFan OnlyConnectedLow SignalPower OffNotConnectedRainCloudy FreezingLight Rain SmokeREV. 1AlertWindyFogFrostPartly Cloudy/Cloudy# 0 Partly Sunny# 1 Sunny WFRainingThunderstormThunderstormSnowingPartly SunnyAdditionalLight RainClearNightFog indyLight RainFog Return to Table of ContentsCloudyFog SmokeFreezingFogRainSnowing RainingRainySmokeFogSmokeFrost FrostThundersFreezing RainSnowingSmokeSunny# 8 Clear Night FSmokeEcoNet Smart Thermostat User Guide5
Standby ScreenIf the thermostat has not been touched for 30 seconds, the screen dims and the standby screen activatesdisplaying indoor temperature and outdoor weather conditions. If an alert or alarm is present, the alert / alarmicon will be displayed as well.The motion sensor will automatically wake the thermostat and activate the home screen as you approach.The standby screen can be turned off by disabling the back-light under basicsettings (Menu Settings Basic) Return to Table of ContentsEcoNet Smart Thermostat User Guide6
System ModesThe EcoNet Smart Thermostat will call for heat or cool based on the current settings and temperature. Coolingand heating equipment may have a delay period before operation is enabled. The delay can be up to 5 minutes(if the mode was changed right after equipment turns off). Status screen will show a “Hold-Off Timer” forEquipment State.Select the mode icon in the bottom right corner of the home screen to quicklychange the operating mode.!80Resume Schedule7175HomeAway44%Cooling to62706585Select from Auto, Heat, Cool, E-Heat, Fan and OffSelect a Mode80Resume ScheduleAutoHomeAway7175HeatCoolEE Heat44%OFFFanCooling to6570BACKSelect a Mode80Resume ScheduleAutoHomeAway7175HeatCoolEE Heat44%OFFFanCooling to6570BACKNote: The default deadband or separation between the heating and cooling set points is 2 degrees.!80Auto – Activates the heating or cooling system as required to keep your homewithin the configured range of set point temperatures. Select the desiredset point, and then use the large adjustment buttons to set the desiredtemperature. To adjust your cooling set point, tap the set point on the right it will turn blue, then adjust using the plus and minus buttons. The currenttemperature in the center of the screen will temporarily be replaced by theset point in large font during temperature adjustments.Resume Schedule7175HomeAway44%Cooling to62706585Heat – Turns on heating when the current temperature drops below your setpoint temperature. When there is an active call for heating, the words ‘HeatingTo’ will appear above the heating set point.Select a Mode80Resume ScheduleAutoHomeAway7175HeatCoolEE Heat44%OFFFanCooling toBACK657080(Heating set point screen)!Resume ScheduleHomeAway717544%Cooling to657062 Return to Table of ContentsEcoNet Smart Thermostat User Guide7
System Modes (con’t)Cool – Turns on cooling when the current temperature rises above your setpoint temperature. When there is an active call for cooling, the words ‘CoolingTo’ will appear above the cooling set point.Select a Mode80Resume ScheduleAutoHomeAway7175HeatCoolEE Heat44%OFFFanCooling to6570BACK(Cooling set point screen)!80Resume Schedule7175HomeAway44%Cooling to657085Select a Mode80Resume ScheduleAutoHomeAway7175HeatCoolEE Heat44%OFFFanCooling to6570BACKSelect a Mode80Resume ScheduleAutoHomeAway7175HeatCoolOFFEE Heat44%FanCooling toBACKE-Heat (Heat Pump Systems Only) – The emergency heat option is a manualsetting, not an automatic function initiated by the heat pump thermostat. Thepurpose of the emergency heat setting is to bring the backup heat sourceonline immediately to deliver 100% of the home’s heating demand whilesimultaneously locking out the heat pump.6570 Return to Table of ContentsFan Only – While in Fan Only mode, the heating/cooling equipment is turnedoff. Use the plus or minus adjustment buttons to navigate between fanspeeds from Low to High. Press Mode again to reactivate a heating or coolingmode. Fan only is a manual override of a set schedule. If a schedule is beingfollowed, the fan speed will return to the scheduled fan speed when youreactivate the heating/cooling equipment. You can set continuous fan when inHeating, Cooling or Auto mode from the Settings screen.EcoNet Smart Thermostat User Guide8
System Modes (con’t)80!Resume ScheduleHomeAway717544%Cooling to62706585You can manually adjust the temperature from the Home Screen by touchingthe plus and minus buttons. When the set point is being changed, the ringwill either turn blue or red—depending on the mode of operation—andthe new set point is displayed in the center of the screen. If Auto mode isselected, press the lower left set point (red) for heat or lower right set point(blue) for cool.(Cooling set point adjustment)80Resume ScheduleHomeAway71807544%42%Cooling to6570(Heating set point adjustment)80Resume Schedule716375Connecting to WiFiHomeAway44%42%Cooling to6570 Return to Table of ContentsEcoNet Smart Thermostat User Guide9
Connecting to WiFiYour EcoNet Smart Thermostat supports WiFi 802.11 b/g/n. WiFi is normally configured during initial setup. Youmay, however, be required to reconfigure the settings if your WiFi network settings change.Connecting to WiFi will enable you to view the local weather and allow you to remotely manage your comfort andreceive critical alarms should something ever go wrong. To save time, we recommend having your home WiFinetwork password and your Internet-connected smartphone or tablet close to the thermostat before you begin.1. Download the EcoNet App and ensure your smartphone or tablet is already connected to your homeWiFi network.2. Select ‘Create Account’ and follow the instructions.3. On the EcoNet Smart Thermostat, tap the WiFi icon in the top right corner of the home screen (See Fig. 1).4. Select ‘Get Started’ (See Fig. 2).5. When ‘Ready to Connect’ appears, use the EcoNet App to complete the setup process (See Fig. 3).6. Follow the in-app instructions to complete your connection.7. You may be required to enter your network password.8. Tap ‘Done’ to complete setup (See Fig. 4).Almost There!!8080Resume ScheduleHomeAway7175Resume ScheduleWhen "Ready to Connect" appears below use theCooling to62706585HomeAway6570Wi-Fi Setup807175EcoNet mobile app.6570(Fig. 3)Resume ScheduleCongratulations! Your thermostat has successfully beenand remotely manage your system with theCooling toWiFi StatusSetup Complete!80GetStarted44%Readyto ConnectCoolingto(Fig. 1)Resume ScheduleConnect to Wi-Fi to receive local weatherHomeAway7175EcoNet app to complete the setup process.44%connected to Wi-Fi.HomeAway44%SetupLater Return to Table of Contents(Fig. 2)7175Cooling to657044%Done(Fig. 4)EcoNet Smart Thermostat User Guide10
WeatherTap the weather icon on the home screen to display local weather conditions and view the hourly anddaily forecasts. The weather will be based on the current location or ZIP code used when creating yourEcoNet account.Current Weather Conditions!80Resume Schedule7175HomeAway44%Cooling to6270658524-Hour ForecastToday’s WeatherCurrently:71756 am12 pm6 pm657580505 ,N5 ,N0 ,N10 , N0%80%0%0%HomeAwayWind:8080 ºFResume50 Schedule%RhWind: 5MPH, N12 am44%Cooling to6570BACKFORECAST6-Day ForecastForecast80TUEWED ResumeTHU ScheduleFRISATSUN70757050550%0%7175Menu OptionsHomeAwayBACK807570605550500%0%0%80%Cooling to44%6570 Return to Table of ContentsEcoNet Smart Thermostat User Guide11
Menu OptionsTap the Menu icon in the bottom left corner of the home screen to easilyview and configure your personal and system settings.!80Resume Schedule7175HomeAway44%Cooling to62706585SettingsSettings (Menu Settings)Menu80Resume 4%Adjust system-level settings and preferences, from customizing your awaytemperatures to scheduling a vacation. Tap the Menu icon from the homescreen and then tap Settings.WaterHeatingCoolingto6570BACKBasic (Menu Settings Basic)Settings80Adjust thermostat or basic equipment settings and preferences.Resume ooling toFan6570BACK44%InstallerFollow Schedule – If a programmed schedule is desired, set to “Yes.”Basic SettingsFollow Schedule?80YesResume ScheduleAlarm Beep Enable?NoScreen edule Override Time2 hours44%toAuto-Changeover TimeCooling5 min.BACK6570MOREAlarm Beep Enable – Sounds an audible alarm tone shall a critical alarmcondition occur.Screen Lock– To lock the main screen from any changes, enable the lock. Tounlock, enter the Basic settings menu again and set Screen Lock to “No.” Thislocking function prevents any changes except changes made from within theBasic Settings.Temperature Display – Change your indoor temperature and set pointsbetween Fahrenheit and Celsius.Schedule Override Time – While a schedule is running, if a set temperaturechange occurs on the main screen, the change will be in effect for this amountof time. The default is 2 hours. You can customize between a minimumoverride of 1 hour and a maximum of 8 hours.Auto Changeover Time – When the system is in Auto mode, this is theamount of time demand must exist in the opposite mode (cooling or heating)in order for the system to switch to that mode. The default is 5 minutes. Thesetting is configurable between 5 and 60 minutes. Return to Table of ContentsEcoNet Smart Thermostat User Guide12
Settings (con’t)More Basic Settings802º FSet Point DeadbandResume ScheduleTemperature Offset0.0º F7175Relative Humidity Offset0.0 %RoomHomeAway Sensor SelectionInternalProximity Sensing?44%YesCoolingYestoSmooth Arrival Enabled?6570BACKMORESet Point Deadband – This is the minimum difference between heating andcooling set points in Auto mode. The default is 2 degrees. This setting isconfigurable between 0 and 6 degrees. A 0 degree deadband means yoursystem will switch between heating and cooling to maintain the specified setpoint. The smaller the deadband setting the more frequently your system willswitch between heating and cooling.Temperature Offset – This is an offset applied to the displayed roomtemperature. A negative offset will cause the displayed indoor temperature tobe less than the sensed temperature. A positive offset will cause the displayedtemperature to be higher than sensed temperature.Relative Humidity Offset – This is an offset applied to the indoor relativehumidity. A negative offset will cause the displayed relative humidity to be lessthan the sensed relative humidity. A positive offset will cause the displayedrelative humidity to be higher than sensed relative humidity.Note: You should allow the thermostat to calibrate in the conditioned space for 30 minutes beforeadjusting offsets.Room Sensor Selection – You can wire a remote 10K temperature sensor* tothe EcoNet Smart Thermostat. If a remote temperature sensor is connected,you can choose to use the remote sensor, internal sensor on the SmartThermostat or an average between the two for current indoor temperature.*Optimized for use with an Aprilaire 8051 indoor temperature sensor.Proximity Sensing – Selecting ‘No’ will disable the motion sensor. To activatethe thermostat, you will need to tap the screen.Basic Settings802º FSet Point DeadbandResume ScheduleTemperature Offset0.0º F7175Relative Humidity Offset0.0 %RoomHomeAway Sensor SelectionInternalProximity Sensing?44%YesCoolingYestoSmooth Arrival Enabled?6570BACKMOREBacklight Enabled – When the thermostat is not being used it will enterstandby mode. The default screen brightness in standby is 1%. You can turnoff the Backlight when in standby by selecting “No.”Basic SettingsBacklight Enabled?HomeAway mooth Arrival – The thermostat will start recovery at the optimum timeSto ensure the set point is reached at the scheduled time. If a setback intemperature is scheduled, for either cooling or heating, the set temperatureis ramped to the next scheduled set temperature 60 minutes before the nexttime period.80YesResume Schedule717544%Cooling to6570BACKTime & Date (Menu Settings Time)Settings80Resume ooling toFan44%6570BACKInstallerDST – At the bottom of this screen you can elect to enable or disabledaylight savings time.Time and Date802:Resume Schedule38pm7175Settings (con’t)HomeAwayJan29Set the current time and date. Your schedule times, vacation events andweather forecast will be based off the time entered on this screen. It isimportant to ensure the correct date and time are programmed beforesetting your schedule.44%2018Cooling toBACK6570AcceptD.S.T.Yes Return to Table of ContentsEcoNet Smart Thermostat User Guide13
Settings (con’t)Humidity Settings (Menu Settings Humidity)Settings80Resume ScheduleBasicHomeAwayAway7175TimeVacationCooling to6570BACKControl your home’s humidity settings for more ideal comfort.Humidity44%FanInstallerDehumidification (Menu Settings Humidity)Dehumidification80Enable Dehumidification?YesResume ScheduleDehumidify Set Point52 %7175Over-Cooling Amount0 ºFDehumidifyDrain TimerHomeAway5 min.44%Cooling toBACK6570HUMIDIFICATIONEnable Dehumidification – The system will attempt to reduce humidityin cooling mode by reducing fan speed and over-cooling the space (whenallowed by the Over-Cooling setting). The system will only reduce airflow ifthe room temperature is within one degree of set point, otherwise, full coolingairflow will be performed.Dehumidify Set Point – The indoor relative humidity to be controlled to whilein cooling mode.Over-Cooling Amount – The system will activate cooling, and possibly overcool the space by the desired number of degrees to improve dehumidificationperformance in an effort to reach the dehumidify set point. The factory settingfor over-cooling is zero (no over-cooling) and can be adjusted up to 5 degreesof over-cooling.Dehumidify Drain Timer – At the end of a cooling cycle, if set, the continuousfan setting will be turned off for the selected amount of time in order to drainwater from the indoor coil.Humidification (Menu Settings Humidity Humidification)Humidification80Enable Humidification?NoResume ScheduleHumidify Set Point30 %Humidify During.SmartHomeAway ControlHumidity With FanBACK7175HeatOff44%OffCooling to6570Enable Humidification – The system can control a humidifier attached to thefurnace or air handler to increase humidity in the space. It is important to noteyou cannot humidify above the dehumidification set point.Humidification Set Point – This setting allows you to choose the indoorrelative humidity desired, under which humidification will activate. The defaultis humidification set point is 30% and is configurable between 15 and 45%.Humidify During – Select the modes in which humidification will beperformed. Humidification can occur during heating, continuous fan and/orcooling mode. H eat – Humidifier will operate with equipment during Heat if ahumidification demand is present. H eat/Fan – Humidifier will operate with equipment during these modes ifa humidification demand is present. H eat/Fan/Cool – Humidifier will operate with equipment during thesemodes if a humidification demand is present. Return to Table of ContentsEcoNet Smart Thermostat User Guide14
Settings(con’t)Humidification80Enable Humidification?NoResume ScheduleHumidify Set Point30 %Humidify During.SmartHomeAway Control7175HeatOffHumidity With Fan44%OffCooling to6570BACKSmart Control – Smart Control is used to reduce or prevent watercondensation on the inside of windows while humidifying in the winter season.The control monitors indoor and outdoor temperatures and reduces thehumidification percentage according to the Smart Control level chosen by theuser. Start out with the Low setting. If objectionable condensation occurs onwindows, choose the Medium or High setting.Humidify With Fan – If there is a call to humidify and the fan and heating/cooling are off, the fan will be forced on to humidify. Select the desired fanspeed from Low to High.Note: Humidification is only available if a humidifier is installed.How to test a humidifierAdjust the humidify set point up to ‘TEST’, select Humidify during “Heat/Fan”, then turn on a continuous fanspeed on the Fan screen under Settings. This should force the humidifier to run. This setting will last for 30minutes, where the maximum setting will return to 4% below the dehumidification set point.Away Settings (Menu Settings Away)Settings80Resume ooling toFan44%6570BACKInstallerYour system will follow the customized heating, cooling and fan settings whenyou place your system into ‘Away’ mode. The system can be placed intoAway by selecting the Home icon (closed door) on the home screen. Oncethe system is placed into Away mode it will remain until canceled. Simply tapthe Away icon (open door) to exit Away mode. The system will resume theschedule or return to the previous settings if a schedule is not being followed.You can also exit Away by increasing or decreasing the temperature.Note: If your system is in Cool or Heat when placed into Away mode your system will only manage tothe respective Away set point.Vacation (Menu Settings Vacation)Settings80Resume oling toAwayFan6570BACKInstallerThe Vacation screen allows you to preschedule desired heating, cooling andfan settings when you are going to be away for an extended time.To schedule your vacation, select the time, month, day and year and then usethe up and down arrows to set desired start and end dates.Note: You will need to set the vacation end time and date before you can set its start.Select each set point and fan speed and then use the up down arrows to setto your desired vacation conditions. We recommend setting the fan speedto Auto.Vacation Settings8085º65º ResumeAutoScheduleHomeAway7175Start:02:00 pmJan.29End:02:30 844%Yes6570 Return to Table of ContentsEcoNet Smart Thermostat User Guide15
Settings %36%Cooling toYour HVAC equipment will automatically follow a vacation event. If you have aconnected water heater, you have the option to have your water heater followthe vacation event; simply toggle the button to Yes.646570Fan (Menu Settings Fan)Settings80Resume ng to6570Vacation Activated – A Vacation will be indicated by the word ‘Vacation’above the current temperature on the home screen and an active Away button.Tap Vacation on the home screen to cancel and resume schedule or return toprevious settings.Humidity44%FanInstallerFan Settings80Continuous Fan - Chose from one of 5 speeds to run continuous fan. Thissetting allows the fan to continue circulating air in between calls for heatingor cooling. If the system is following a schedule the fan speed presentedwill match the speed set in your schedule. You can temporarily override thescheduled fan speed here. You will notice the copy on screen changes to ‘FanSpeed Override’. The override will follow the ‘Schedule Override Time’ set inBasic Settings.Resume Schedule7175Fan Speed Override: Med. LoHomeAway44%Cooling toBACK6570 Return to Table of ContentsEcoNet Smart Thermostat User Guide16
SchedulesMenu80Resume 4%WaterHeatingCoolingto6570BACKTo copy a day’s schedule to another day, tap “Copy Day”, then select theday(s) you wish to copy to, then tap “Paste Day.” You can select “Cancel” tocancel the paste day operation.ScheduleMT80FTWSSResume ScheduleMorning05:30 amDay07:00 amAwayEvening07:30 pmNight10:30 º44%65Copy DayBACKTapping Menu Schedule will present your current schedule. First, pleaseensure the correct date and time settings have been entered under Settings.To edit the schedule for a day, tap the day of the week you want to edit. Tapthe day part (morning, day, evening or night) time and use the up and downarrows to set the desired start time. Next tap the heat set point, cool setpoint and/or fan speed for each day part and use the up and down arrows tochange to your desired settings. Your system will follow your preferred settingsuntil the next day part start time is reached. If Smooth Arrival is enabledunder Basic Settings, your system will start recovery up to 60 minutes early
Return to Table of Contents EcoNet Smart Thermostat User Guide 3 EcoNet Smart Thermostat User Guide The EcoNet Smart Thermostat is an easy-to-use programmable thermostat that provides complete control over your home's smart air and water comfort systems. It's smart enough to alert you when an issue is detected, yet