Transcription
Manuals User Manuals Simplified.Google Nest T3018US Smart Thermostat HD User ManualFebruary 12, 2022February 12, 2022Home » Google Nest » Google Nest T3018US Smart Thermostat HD User ManualContents [ hide1 Google Nest T3018US Smart ThermostatHD2 Product Manual3 Troubleshooting4 FCC5 Documents / Resources5.1 Related Manuals / ResourcesGoogle Nest T3018US Smart Thermostat HDProduct ManualSmart Thermostat HD OverviewSmart Thermostat HD HardwareDisplayThermostatButtonStatus LEDInstallation Precautions
Before installing the Smart Thermostat HD or servicing the HVAC equipment, turn off power to the system.Leave power off until you have finished installing or servicing the HVAC equipment.Shorting the electric terminals at the control on the heating or cooling system is not recommended. Do not test the system this way.When testing the existing system or the new Smart Thermostat HD do not run the cooling system when it is cold outside as this may harm the compressor. Please wait for mildtemperature to test the cooling system.You must follow all local codes and ordinances for wiring the system.This Smart Thermostat HD should only be powered by a listed Class 2 power supply at 24 VAC (C-Wire or wall transformer).An amperage higher than 1 amp to each thermostat terminal may cause damage to the thermostat.Verify that the system is 24 VAC. If the old system is labeled as 120 or 240 volts or has wire nuts, the system is high voltage. Do NOT install this thermostat on a high voltagesystem. Contact a local HVAC professional for help.Questions?Visit: www.alarm.com/supportcenter or contact your service provider.Smart Thermostat HD Installation – ConsiderationsThis Smart Thermostat HD requires 24 VAC power, it does not have the option to be battery powered. This is supplied via a common wire, typically identified as C.The Smart Thermostat HD can adapt for situations where there are not enough wires in the bundle at the install location. For example, if you do not have C-Wire but do have 24VAC available at the HVAC unit, or if you have upgraded your HVAC equipment and now require more control wires. For these scenarios, the Smart Thermostat HD may beinstalled in a way that requires only 2 wires at the wall. For instructions on this install configuration and further information, please find the Installation Guide in the separate PowerPlate box.In the Box / Recommended ToolsSmart Thermostat HD – ThermostatSmart Thermostat HD – DisplayTrim PlateWall Screws x2Drywall Anchors x2Phillips ScrewdriverCameraPencilNeedle nose pliersPower drill – 3/16th inch (#13) drill bitSmart Thermostat HD Installation – LocationIf replacing an old thermostat, the new Smart Thermostat HD can be mounted in its place. If a new location is desired it will be necessary to move the wiring.New installation and relocation should follow the accompanying guidelines to ensure the most accurate temperature reading and ease of use.Mount on an inside wall, approximately 5 ft (1.5m) above the floor in a frequently used room.Do not install in locations near appliances or devices that affect the local temperature such as televisions, lamps, or dryers.Avoid areas that are exposed to large temperature variances, such as: direct sunlight, near an AC unit, above or below auxiliary heat and air vents, and drafts from windowsor exterior doors.Be aware of what is on the other side of the wall where the install is occurring. Do not install on walls adjacent to unheated rooms, stoves, or housing hot water pipes.Exterior walls are also not ideal locations for installationDamp areas will not only affect the humidity reading of the product but could lead to corrosion and shorten the lifespan of the product.Install in a location with good air circulation. Stagnant air will not accurately reflect the rate of temperature change in the room.Avoid areas behind open doors, corners, and alcoves.Wait until construction and painting are finished before installing.Smart Thermostat HD Installation – PreparationIf adding to a z-wave network, power on the Hub or Panel and verify it is communicating.If installing on a z-wave network utilizing smart start scan the QR code found either on the Thermostat or the box.Test existing systemVerify that the heating and/or cooling system is operating properly before you try to install the new Smart Thermostat HD.!CAUTION: Do not test the system by shorting electric terminals.!CAUTION: Do not test the cooling system if it is cold outside, as this may harm the compressor.Turn off power at the HVAC unitTurn all heating and cooling systems off. This can be done at the circuit breaker.!CAUTION: Do not remove the existing thermostat until power has been turned off at the circuit breaker.Remove existing thermostatRemove the cover from the existing thermostat. Do not disconnect the wires yet.Make sure the wires are identified correctly. If you have an unidentified wire, it may be necessary to identify the wire where it connects to the heating or air conditioningequipment.!CAUTION: Wiring can vary for each manufacturer. Identify all wiring before removing it from the existing thermostat.Take a picture of the wires before you detach them from the existing thermostat for future reference.Once all wires are identified and a picture is taken, disconnect all of the wires and remove the existing thermostat. Remember to secure the wires so they do not fall into thewall.Prep wires if neededFollow these guidelines for safe and secure wire connections:Ensure the wires are a proper gauge between 16-24 AWG (1.5 – 0.5 mm2)Make sure wires have exposed straight ends of the appropriate length.!CAUTION: Verify that the system is 24 VAC. If the old system is labeled as 120 or 240 volts or has wire nuts, the system is high voltage. Do not install the thermostat on ahigh voltage system. Contact a local HVAC professional for help.Smart Thermostat HD Installation – Thermostat InstallLevel and mount the Thermostat to the wall with the supplied hardwareIf additional support is necessary, drill holes with a 3/16’’ (#13) drill bit and tap in the drywall anchors.Mount trim plate prior to securing the Thermostat to the wall if required to cover up any marks or holes left from the old thermostat.Insert the used wires into the designated wire terminals
TerminalDescriptionRcCooling PowerRhHeating PowerW2Heat/Aux Stage 2WHeat/Aux Stage 1CCommon wire from transformer for RhZ1Configurable: W3, Humidifier, Dehumidifier, VentZ2Configurable: W3, Humidifier, Dehumidifier, VentYCool/Pump Stage 1Y2Cool/Pump Stage 2GFanOHeat Pump Reversing Valve (Energized in COOL mode)BHeat Pump Reversing Valve (Energized in HEAT mode).!IMPORTANT If you only have one R wire, insert it into Rh.!CAUTION Do not insert more than one wire into a wire terminal as this will damage the wire terminal.!CAUTION If you only have one R wire, there is no need to physically jump Rh and Rc, the thermostat will internally jump the two.o Once all wires are inserted into the wire terminals, return power to the HVAC system.This will supply 24 VAC power to the ThermostatCheck the Status LED, which will indicate the Thermostat has power.If the Status LED is off, it indicates the Thermostat does not have 24 VAC powerVisually verify both Rh and C are securely inserted into the appropriately labeled terminals.Verify the HVAC system has power, this may be identified at the unit.Verify the circuit breaker was appropriately turned back on.Smart Thermostat HD Installation – Display InstallConnect the Display to the ThermostatOnce attached the Display will turn onIf the Display does not power on after 30 seconds, verify 24 VAC power is appropriately supplied to the Thermostat from the HVAC system.Smart Thermostat HD Installation – SetupFollow the onscreen setup wizard to setup the Smart Thermostat HD and connect it to a z-wave network.!NOTE Questions during setup? Please find the on screen help sections identified by a ? at each setup step for more information on each part of the setup.Post Installation – Test!CAUTION: Do not test the AC during cold weather. Wait for mild weather to fully test the system.After successfully installing and setting up your new Smart Thermostat HD, please test the Smart Thermostat HD and HVAC system.If the Smart Thermostat HD will control a heating system, test the heat by changing the mode to HEAT, and adjusting the setpoint to be higher than the current room temperature.Verify the heating system turns on and that the room is starting to warm up.If the Smart Thermostat HD will control a cooling system, test the cool by changing the mode to COOL and adjusting the setpoint to be lower than the current room temperature.Verify the cooling system turns on and that the room is starting to cool down.Post Installation – Further ConfigurationWhile the default settings will be appropriate in most cases, you also have the option to change all configuration settings via the Display. These configurations can be found:! CAUTION: Be careful when changing advanced configuration settings. These configuration settings should only be changed by those familiar with heating and cooling systems’parameters. Contact your local HVAC professional for help.TroubleshootingProblemCausesHeating or Cooling does not turn on when thesetpoint is above or below the roomtemperature.·Change the setpoint to 2 degrees beyondTo prevent damaging the compressor, the Smart the current setpoint and wait 5 minutes, at whichThermostat HD inserts a delay when cycling the point the system should turn on.compressor. This delay is only a few minutes·If this does not work, contact your locallong.HVAC professional.Heat pump is “cooling when it should beheating” or “heating when it should be cooling”.TipsSome heat pumps use the O terminal, while·Try physically swapping the O or B wire toothers use the B terminal for their reversingthe opposite. To do this first turn of power to thevalve. Your heat pump may be the opposite typeHVAC system at yourfrom howyour thermostat is wired.circuit breaker, then
take off the display of the Smart Thermostat HD, hold down theterminal to remove the wire, remove the wire, hold down theopposite terminal, insert the wire fully, place the display of theSmart Thermostat HD back on the backplate, and return power tyour HVAC system.·If this does not fix the problem contact your local HVACprofessional for help.·o INSERT STEPSHow do I include the Smart Thermostat HD in a Z-Wave network orexclude it from a Z- Wave network?·The on-screen menu will assist you in adding or removingthe Smart Thermostat HD to/from a Z-Wave network.·My wiring has changed and I need to re- configure thethermostat.How do I reconfigure my Smart Thermostat HD?·If you would like to reconfigure the Smart Thermostat HDsettings using the setup wizard navigate to the following menu ause the on-screen instructions:o INSERT STEPS TO GET TO THE RESTART SETUP MENU·I made a mistake during the setup process and want to startOPTIONagain·Can I setup local schedules?To find the Z-Wave settings, please use the following stepThe thermostat is setup prior to installation on a smart homenetwork and schedules are needed.Note: This will NOT remove you from the z- wave network·Schedules can be setup for the Smart Thermostat HD befit is connected to a smarthome network ifnecessary. The setup for these schedules can be foundhere:o INSERT STEPS·We suggest making use of your smart homesupplied schedules as local scheduling is only availablewhen notconnected to your smart home·The Smart Thermostat HD can be reset back to itsfactory settings. This will reset all HVAC settings, rules,and schedules on the Smart Thermostat HD, and it willalso remove the Smart Thermostat HD from the Z-Wavenetwork.·To reset your Smart Thermostat HD to factorysettings, follow the onscreen instructions found here:How do I reset my Smart Thermostat HD to the factorysettings?I am moving or re-setting up my smart home network ando INSERT INSTRUCTIONS TO GET TO THIS OPTIONneed the Smart Thermostat HD reset to it’s factorysettings.·If you are unable to use the Display, the Thermostatmay be reset to factory settings by removing the Displayand pressing and holding the button on the Thermostat for30 seconds. When the button is released the Status LEDwill blink 10 times and then turn solid indicating the SmartThermostat HDhas reset.
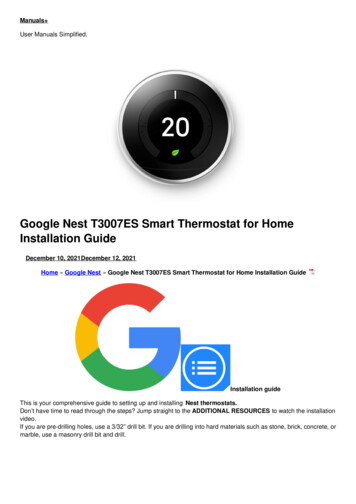
·Note: The Hub or Panel may be unaware that thisprocedure was performed, so it is recommended that youremove the Smart Thermostat HD from the Z-Wave networkbefore performing thisreset.·Tap the screen which should wake up the Displayo Note: If you would like your Display to wake up inresponse to your movement in front of it, please check thesettings in the configuration menu.·The Display is not working.·The Display may not be configured to wake up whenyou approach.·The Display may not be receiving power.Ensure that the Display is poweredo Remove the Display from the Thermostat and make surethe LED on the Thermostat is on, this indicates theThermostat has power and should be able to power theDisplay.oPut the Display back on the Thermostat·!CAUTION: If the Display is broken and cannotcommunicate with theThermostat, or isphysically removed from the Thermostat yourHVAC control will not behave as expected.Please contact your HVAC professional toremedy the situation as soon as possible.FCCThis device complies with part 15 of the FCC rules. Operation is subject to the following two conditions:1. this device may not cause Harmful interference2. this device must accept any interference received, including interference that may cause undesired operation of the device.This equipment has been tested and found to comply with the limits for a Class B digital device, pursuant to part 15 of the FCC Rules. These limits are designed to provide reasonableprotection against harmful interference in a residential installation. This equipment generates, uses and can radiate radio frequency energy and, if not installed and used in accordance withthe instruction, may cause harmful interference to radio communication. However, there is no guarantee that interference will not occur in a particular installation. If this equipment doescause harmful interference to radio or television reception, which can be determined by turning the equipment off and on, the user is encouraged to try to correct the interference by one ormore of the following measures:Reorient or relocate the receiving antenna.Increase the separation between the equipment and receiver.Connect the equipment into an outlet on a circuit different from that to which the receiver is connected.Consult the dealer or an experienced radio/TV technician for help.IC NoticeThis device complies with Industry Canada license-exempt RSS standard(s). Operation is subject to the following two conditions:1. this device may not cause Harmful interference2. this device must accept any interference received, including interference that may cause undesired operation of the device.Radiofrequency radiation exposure information:This equipment complies with radiation exposure limits set forth for an uncontrolled environment. This equipment should be installed and operated with minimum distance of 20 cm betweenthe radiator and the body of any persons, user or bystander in a normal operation mode.Documents / ResourcesGoogle Nest T3018US Smart Thermostat HD [pdf] User ManualB36T40HDRA, 2AC3T-B36T40HDRA, 2AC3TB36T40HDRA, T3018US Smart Thermostat HD, T3018US, Smart Thermostat HD, NET3018USRelated Manuals / ResourcesGoogle Nest T3007ES Smart Thermostat for Home Installation GuideInstallation guide This is your comprehensive guide to setting up and installing Nest thermostats. Don’t have time to Google GA01318-FR Nest Smart Doorbell Cameras User GuideGoogle GA01318-FR Nest Smart Doorbell Cameras User Guide Let’s get started Plug your Google Nest Doorbell into a meross MTS200 Smart Thermostat Instructionsmeross MTS200 Smart Thermostat Note: All voice operation setting temperatures should be between 5 C and 35 C. With Amazon
tado Smart Radiator Thermostat Installation Guidetado Smart Radiator Thermostat Installation Guide Good to know: The valve itself stays intact. So don’t worry, there Manuals ,homeprivacy
If the old system is labeled as 120 or 240 volts or has wire nuts, the system is high voltage. Do not install the thermostat on a high voltage system. Contact a local HVAC professional for help. Smart Thermostat HD Installation - Thermostat Install Level and mount the Thermostat to the wall with the supplied hardware