Transcription
Student Recording in PanoptoThis document will walk you through recording a session in Panopto for your course usinga computer. If you want to record on an iOS device follow this ation/iphone-app-0Preparing to record:1. Make sure your Webcam is installed and working.2. Login to Blackboard with your ULink User ID and PasswordDelphi Center for Teaching & Learning 502.852.8833 louisville.edu/delphi1
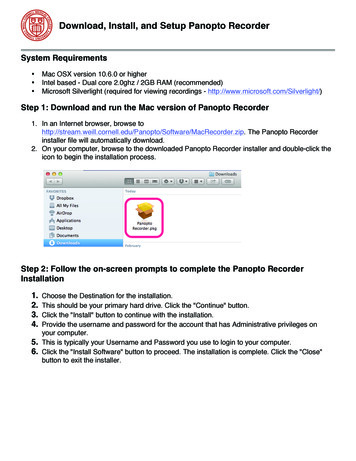
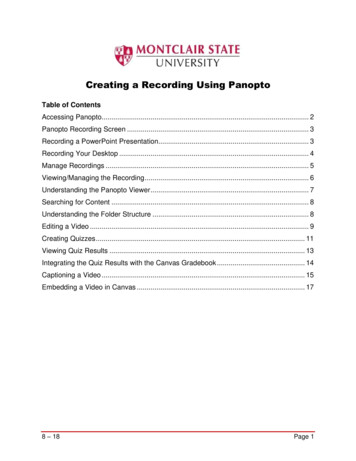
Student Recording in Panopto3. Click into the Course in which you want to record your presentation.4. Click on Panopto recordings (shown above in the red circle) to see the screen belowand click the folder with the course name or assignment name at the top of the page(shown with the highlight).Delphi Center for Teaching & Learning 502.852.8833 louisville.edu/delphi2
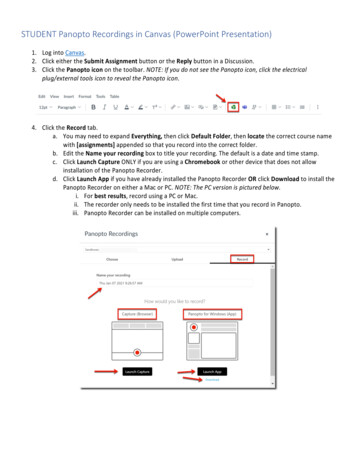
Student Recording in PanoptoThe folder name may be different for eachpresentation or assignment if you havemultiple presentations for each course. If you don’t see the Folder in the top of the page under the words “Sort By” (shown inthe highlight above) follow the steps below first:A – The assignment folder should appear here.B – The arrow to open Panopto to full screen view.Go to the far right of the page and click on the white arrow in the grey box. Shown heremarked with “B”. This will open Panopto in Full screen mode.Delphi Center for Teaching & Learning 502.852.8833 louisville.edu/delphi3
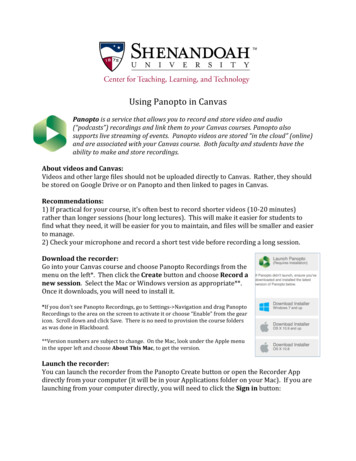
Student Recording in Panopto Look for the “Sign in” button. It may be on the top right corner or in the center of thescreen. Once you click it you should see the image below: Click the second “Sign in”. Once you have done that you can enter your Blackboard loginID and password if asked to do so. Once you have signed in you can scroll back to the right and you should see the folderunder the words “Sort By” as shown in step 4 above.These steps should only need to be done the first time you access Panopto. To do your recording, Click on the folder under “Sort by’ and then click the “Create” buttonas shown in step 5 below.5. Once you have clicked on the folder the name at the top of the screen should change tohave the following [assignments] at the end as shown below.If you don’t see [assignments] as shown above, after youhave logged in to Panopto, your instructor will need tocreate the assignments folder before you can begin.Instructors can contact bbsupport@louisville.edu for moreinformation on this process.The folder name may be different for each assignment if youhave multiple presentations for each course.Delphi Center for Teaching & Learning 502.852.8833 louisville.edu/delphi4
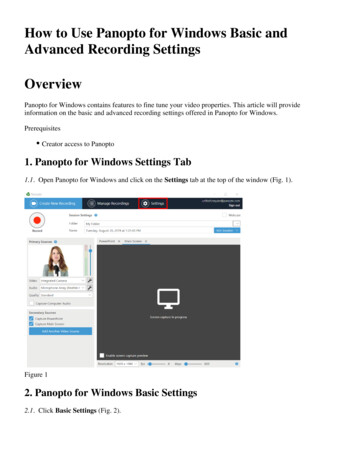
Student Recording in Panopto6. Click the “Create” button and choose “Record a new session” to begin.7. If you have not downloaded the Panopto Recorder to the computer you are usingyou can do so on the screen below.You can click “Download Panopto” to get the recorder and install it on yourcomputer. The download only needs to be done once on a computer that you plan torecord sessions with in the future.Delphi Center for Teaching & Learning 502.852.8833 louisville.edu/delphi5
Student Recording in Panopto8. If you have the recorder downloaded, you can click the “Open Panopto” buttonlaunch the recorder.The first time you open the recorder it willdisplay the box to the left. If you check thebox at the bottom (highlighted in Yellow) toremember your choice it will not displayagain.To proceed click “Open Link” to show therecorder.Recording in Panopto:9. The Create New Recording Tab opens. Now you can set the options for yourrecording.Delphi Center for Teaching & Learning 502.852.8833 louisville.edu/delphi6
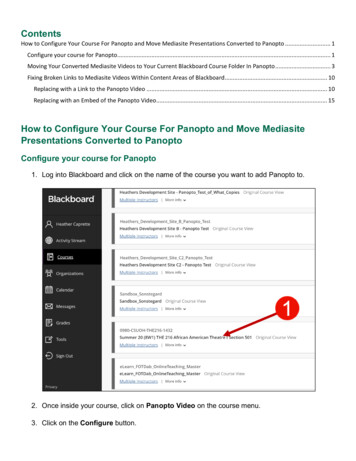
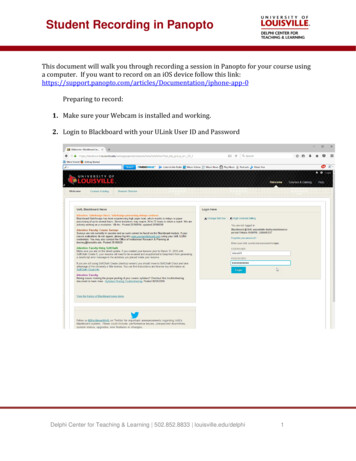
Student Recording in PanoptoNote: Make sure that Capture PowerPoint is selected under Secondary Sources seenin the Red Box above!10. Use the Video drop-down menu to select your webcam. Once selected, you will see apreview of the webcam. Select None if you do not want to record from the webcam.11. Use the Audio drop-down menu to select the correct microphone. Test the microphoneby speaking and watching the audio level indicator change. Use the slider to the right toadjust levels up or down as necessary. Levels that are too high will result in distortion.Levels that are too low will make it difficult for others to hear you. Select None if you donot want to record any sound.12. Set Quality to Standard for most presentations especially if the video is just anindividual speaking. Select Ultra for higher quality if are giving a demonstration speechand want a sharper picture (this will take longer to upload and process).13. See the chart below for recommended settings for different types of projects.The steps for recording in Panopto vary depending on the type of presentation you wish tocreate. These are the instructions for recording using a PowerPoint presentation.Begin Recording (with a PowerPoint presentation)1. Make sure PowerPoint is not running on your computer.2. Click on the PowerPoint tab in the Panopto Recorder.3. Click Open a Presentation button. A dialog box will open and you can select yourPowerPoint file.4. Click Open when you are ready to start.Delphi Center for Teaching & Learning 502.852.8833 louisville.edu/delphi7
Student Recording in Panopto5. PowerPoint will start with your presentation in full-screen. Once it comes up wait about1 second and begin. If you need to pause, press F9. To resume your recording hit F9 again.6. When you are done, click F10 to stop.Once you see the screen above click “Upload” to begin the process of placing yourpresentation on the server. If you are not happy with your presentation, you can choosedelete and record again to start over.7. Click the Esc key to exit the full-screen view of the presentation and then exitPowerPoint.8. Switch back to the Panopto Recorder screen. Panopto will switch to the Recording Statustab and we will upload the recording in the next section.Delphi Center for Teaching & Learning 502.852.8833 louisville.edu/delphi8
Student Recording in PanoptoUploading and ProcessingThere may be several groups of recordings in the Recording Status screen. Your recordingshould be at the top of the Offline Recordings section.The Panopto Recorder will begin uploading your presentation to the server for processing.This time will vary depending on the length of your recording, your Internet speed, andhow busy the Panopto server is. Panopto will send you an e-mail when the recording isready.7. When processing is complete, you may click on the View link next to the recording nameto view it from the Panopto website. You do not have to wait for the recording to beprocessed before starting a new recording.Delphi Center for Teaching & Learning 502.852.8833 louisville.edu/delphi9
how busy the Panopto server is. Panopto will send you an e-mail when the recording is ready. 7. When processing is complete, you may click on the View link next to the recording name to view it from the Panopto website. You do not have to wait for the recording to be processed before starting a new recording.