Transcription
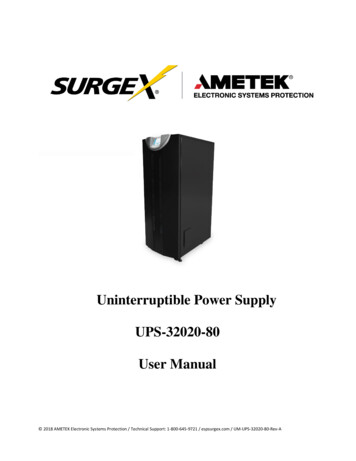
Uninterruptible Power SupplyUPS-32020-80User Manual 2018 AMETEK Electronic Systems Protection / Technical Support: 1-800-645-9721 / espsurgex.com / UM-UPS-32020-80-Rev-A
Table of Contents1. Introduction and SafetyImportant Safety Instructions4Note to Users62. InstallationUPS Unpacking Instructions8UPS Installation10Clearance Guide11Wiring Guide12UPS Connector Terminals and Lug locations133. Product SpecificationsUPS-32020-80 Product Specifications174. OperationUPS Operational Overview19UPS Operation: Normal Mode19UPS Operation: Battery Mode20UPS Operation: Bypass Mode21UPS Operation: Emergency Bypass22UPS Operation: Manual Maintenance Bypass Mode23Touch Screen Description, Calibration, Using the Touch Screen24Touch Screen Descriptions (Monitoring)25UPS Startup Sequence26UPS Shutdown Sequence31UPS Maintenance Bypass Sequence33Monitor Functions41 2018 AMETEK Electronic Systems Protection / Technical Support: 1-800-645-9721 / espsurgex.com2
Control Functions43Touch Screen Menu’s575. MaintenanceUPS Maintenance75Battery Maintenance76Battery Replacement776. Service and TroubleshootingAlarm Severity Definitions85Alarms Messages867. DrawingsUPS Outline Drawings90Block Diagram (UPS External Battery Cabinet)91Block Diagram (UPS Input Transformer Cabinet)92Block Diagram (UPS Output Transformer Cabinet)93Block Diagram (UPS Input/Output Transformer)94Block Diagram (UPS 3 Breaker MBS)95Block Diagram (UPS 3 Breaker MBS Input Step-Down Transformer)96Block Diagram (UPS 3 Breaker MBS Output Isolation Transformer)97Block Diagram (UPS 3 Breaker MBS Input/Output Transformers)98Facility Data Planning Guide 2018 AMETEK Electronic Systems Protection / Technical Support: 1-800-645-9721 / espsurgex.com1003
1. Introduction and Safety****IMPORTANT SAFETY INSTRUCTIONS********SAVE THESEINSTRUCTIONS****This manual contains important instructions to be followed during installation and maintenance of theUPS and batteries.Please read all instructions before installing or operating the described equipment andPLEASE SAVE THIS MANUAL FOR FUTURE REFERENCE!SPECIAL SYMBOLS: The following are examples of symbols used on the UPS, or within this manual toalert you to important information. Please familiarize yourself with these symbols.Risk of Electric Shock- observe the warnings associated with the risk of electricalshock.CAUTION: HOT SURFACE – Do not touch! Risk of burn hazard.CAUTION: REFER TO OPERATOR’S MANUAL—refer to operator’smanual foradditional information, such as specificoperating and/or maintenance instructions. 2018 AMETEK Electronic Systems Protection / Technical Support: 1-800-645-9721 / espsurgex.com4
Do Not Discard--this equipment utilizes components that contain lead and must bedisposed of properly. For more information, contact your local recycling/refuse or hazardous wastecenter.Do Not Discard-- never discard Waste Electrical or Electronic Equipment(WEEE) in the trash. For proper disposal contact your local recycling/refuse or hazardous waste center.Information of Special Note--Specific handling or operational instructions mayapply.Phase--This is the electrical symbol for the word “phase”.Recycle—equipment or components are made of recyclable material, pleasecontact your local recycling center for proper disposal. 2018 AMETEK Electronic Systems Protection / Technical Support: 1-800-645-9721 / espsurgex.com5
NOTE TO USERSTo ensure correct operation of the UPS, please read this instruction manual carefully. Pleasekeep this manual handy for future reference.This UPS has dangerously high voltages on both its Input and outputconnections. Contact with these voltages maybe life threatening. Please follow the operating instructionscarefully. Please give close attention to the warnings in this manual and thoseposted on the UPS. There are no user serviceable parts inside the UPS.Disassembly and/ormaintenance should only be done by authorized personnel.IMPORTANT INFORMATION FOR USERS OF THISUNINTERRUPTIBLE POWER SUPPLY1.Before operating the UPS or connecting any load equipment, please ensure the UPSis connected to a properly grounded electrical supply.2.This UPS has dangerously high voltages on both its input and output connections.Contact with these voltages may be life threatening.3.Please do not disassemble the covers. There is a risk of electric shock.4.In an emergency, immediately turn off the circuit breaker for the circuit supplying power to the UPS.Also immediately turn off the battery circuit breaker.5.This UPS has two power sources. One is the circuit supplying the UPS with input power. The other is theUPS battery. Prior to any maintenance, both of these power sources must be disconnected to ensure thatthe UPS is de-energized. If only the input power is disconnected, the UPS can still operate from thebattery, and hazardous voltages may still exist.6.To prevent damage or a safety hazard, keep the UPS away from open flame and any other devices thatmay cause sparks.7.Do not open or damage individual battery cases as spillage of caustic electrolyte may occur resultingin danger to life, safety, and the environment.8.The charging characteristics of UPS batteries vary by both brand and type. For this reason, replacementbatteries should be of the same brand and type as those specified by the manufacturer. Using batteriesother than the brand and type specified by the manufacturer may affect the performance of the UPS.Before installing batteries of different brand or type, please consult with the manufacturer.9.The UPS has an internal EMI filter for purposes of enhancing electromagnetic compatibility with theinput mains supply. This filter produces leakage current to earth on the input mains. When selecting acircuit breaker for the branch circuit 2018 AMETEK Electronic Systems Protection / Technical Support: 1-800-645-9721 / espsurgex.com6
supplying power to the UPS, ensure that the breaker selected is not an ELCB type circuit breaker thatdetects earth leakage current.10.Please contact the manufacturer or an authorized distributor for any assistance with troubleshooting.11.The UPS should only be serviced or maintained by a factory authorized service technician.12.This UPS meets FCC Class A electromagnetic compatibility requirements.13.Depleted batteries must be disposed of in a proper manner. Contact your local recycling orhazardous waste center or the UPS manufacturer for instructions concerning proper disposal.LIFE CRITICAL APPLICATIONSWhile SURGEX believes it designs and manufactures very reliable Products, many of thevendors that SURGEX sources components from do not recommend or endorse the use oftheir Products in life critical applications. By extension, SURGEX must adhere to the samebusiness policy and does not recommend the use of our Products in life critical applications.DisclaimerSURGEX Products are not designed, intended, authorized, tested, or UL Listed for use insystems intended to support or sustain life, or for any other application in which the failure of aSURGEX Product could create a situation where personal injury or death may occur. ShouldBuyer purchase or use SURGEX Products for any such unintended or unauthorized application,Buyer shall indemnify and hold SURGEX and its officers, employees, subsidiaries, affiliatesand distributors harmless against all claims, costs, damages and expenses, and reasonableattorney fees arising out of, directly or indirectly, any claim or personal injury or deathassociated with such unintended or unauthorized use, even if such claim alleges that SURGEXwas negligent regarding the design or manufacture of the part. 2018 AMETEK Electronic Systems Protection / Technical Support: 1-800-645-9721 / espsurgex.com7
2.InstallationUPS Unpacking InstructionsThe SURGEX UPS-32020-80 comes packed in heavy cardboard with foamdividers on a heavy wooden pallet. The unit is bolted to the skid with two metal brackets. Awooden ramp is stored vertically in front of the UPS. This ramp is used to move the UPS off ofits shipping pallet.Note: SURGEX encourages the end user to retain all shipping materialsuntil the UPS has been inspected, installed and verified for proper operation.The SURGEX UPS-32020-80 UPS utilizes internal batteries which are pre-assembled inindividual trays and shipped separately from the UPS. These trays come completely wired andready for connection to the internal battery harness of the UPS. A quick visual inspection isrequested to determine if any connections were unseated during the shipping process.Unpacking the UPS requires a 19mm wrench or socket. To remove the UPS from the packingmaterials:1. Visually inspect the unit for any signs of transit damage (Fig. 2-1). Remove and retain allassociated paperwork (packing list, user’s manual etc.) that is affixed to the top of theunit. Remove the cardboard lid from the top of the container.2. Remove any fasteners from the lower edge of the cardboard container.3. With the help of an assistant, carefully lift the heavy cardboard container straight up untilit is clear of the UPS. (Fig. 2-2)4. Remove the foam dividers. (Fig. 2-3)5. Lift the ramp clear of the alignment pin, and place it sloping downward at the front of theUPS, using the pin to hold the back of the ramp in place.6. Remove the protective plastic cover from the UPS.7. The UPS is attached to the shipping pallet with two shipping brackets—one on each sideof the UPS. Using an adjustable wrench or 19mm socket, remove the three bolts thatattach the bracket to the UPS. If your location has a Seismic requirement, please contactfactory for Seismic installation instructions. (Fig. 2-4)8. The UPS has two leveling feet. Be sure to check that the levelers are up against thebottom of the UPS to ensure it rolls freely on the ramp. 2018 AMETEK Electronic Systems Protection / Technical Support: 1-800-645-9721 / espsurgex.com8
9. With the help of an assistant, carefully roll the UPS off the pallet and down the ramp tothe floor of your facility. If the floor at your desired UPS location is uneven, the levelersmay be used to steady the UPS, once it is in place.Please do not install batteries in the UPS. Batteries should be installed ONLYby factory authorized personnel once the UPS is in its final location, and at the time ofinitial startup.Fig. 2-1Fig. 2-2Fig. 2-3Shippingbracketbolts (3per side)UPSLevelerFig. 2-4 2018 AMETEK Electronic Systems Protection / Technical Support: 1-800-645-9721 / espsurgex.com9
UPS InstallationThe installation of this UPS should be performed only byqualified personnel who are familiar with UPS and battery systems andthe required precautions necessary for safe and proper installation.Unauthorized and /or unqualified personnel should not attempt to installor service this equipment. Any damage resulting from installation orservice performed by unauthorized/unqualified personnel, or noncompliance with any pertinent local codes will void the warranty ofthis equipment.Maximum operating ambient temperature is 40 CStorage (non-operating) ambient temperature range is -20 C to 60 CPlease consult the Facility Data Planning Guide for floor loading and unit cooling characteristics.The levelers are not designed to support the weight of the entire unit, they are to be used whenthe floor is not entirely level.CAUTION: Please confirm that the AC Input switch and the Battery Disconnectswitch are in the “Off” position, and the Manual Maintenance Bypass is in the “Normal”position, before making any connections to this UPS.The SURGEX UPS-32020-80 requires a 208V three phase, four wire ( ground) input forproper operation. Input over current protection and the output disconnect are to beprovided by the user. The Facility Data Planning Guide is available as a guideline to assist withthe installation of the UPS. This document however, is not intended as a substitute or tosupersede any regional or local electrical codes. In the event of questions or controversyregarding the installation of this equipment, the local Authority Having Jurisdiction (AHJ)should always be consulted and will have the ultimate final approval over the installation. 2018 AMETEK Electronic Systems Protection / Technical Support: 1-800-645-9721 / espsurgex.com10
SURGEX UPS-32020-80 Clearance GuideLocationMinimum Clearance (Inches)Top (Above) of CabinetFront of CabinetRear of CabinetSides of Cabinet3636126**Matching peripheral cabinets are considered to be part of the UPS system, so the 6”spacing should be taken from the outside edge of the peripheral cabinet.12 Inches6 InchesSURGEXUPS-32020-80UPS6 InchesFront of UPS36 InchesMinimum Clearance Guidelines 2018 AMETEK Electronic Systems Protection / Technical Support: 1-800-645-9721 / espsurgex.com11
The following steps refer to bottom feed installations only.Once the UPS has been properly unpacked (see page 9) and placed in its installation location,the leveling feet must be lowered. These levelers are located in the front of the unit below thedoor.SURGEX recommends the following overcurrent device (provided by customer) to be used asthe electrical supply (input) to the UPS-32020-80 UPS:UPS Model(kVA)20ExternalOvercurrentProtection*70A* To be provided by customerRecommendedWire Size#4 AWGTerminal WireRange(Min. – Max.)#16 to # 0AWG**TighteningTorque(Min. – Max.)2.8 Nm (min) /3.0 Nm (max)** 75 C min. rated CU conductors onlyThe terminals for input and output connections to the UPS are accessed by opening the hingedfront door of the UPS (Fig.2.6) Firmly grab the left hand side of the door and pull outward. Themagnetic keepers will release and the door will open exposing the flat front of the UPS (Fig.2.7). 2018 AMETEK Electronic Systems Protection / Technical Support: 1-800-645-9721 / espsurgex.com12
Fig. 2-6Fig. 2-7UPS – front view with door openUPS-front viewOnce opened, the connection terminals can be accessed by removing the screws holding theterminal safety cover in place (Fig 2.8). This cover is located just below the three rotatinghandles used for the operation of the UPS. (Their operation is described elsewhere in thismanual)Fig. 2-8UPS-front view with door opened and terminal safety cover removed 2018 AMETEK Electronic Systems Protection / Technical Support: 1-800-645-9721 / espsurgex.com13
The terminals to accommodate the input and output conductors are laid out as follows (Fig. 2.9):AC InputMaintenance BypassONNORMALBattery DisconnectONBYPASSOFFOFFAC MAIN INPUTTB1L1L2L3UPS OUTPUTTB2NT1T2T3TB3NPos.Batt.Neut.Neg.Fig. 2-9As shown above, the input (LINE or “L” designated terminals) conductors are connected to the(L-R) first four terminals. This UPS will not operate without an incoming neutral conductor. Therequired input phase rotation is ABC. The output (LOAD or “T” designated terminals)conductors are connected to the (L-R) next four terminals. In all cases the conductors shouldenter the enclosure from the bottom and enter the lugs or terminals from the bottom. Allconductors entering this terminal area must be kept to the left of the barrier separating terminalTB2 from TB3.The grounding locations are marked with the following symbols:Protected Earth (Input) 2018 AMETEK Electronic Systems Protection / Technical Support: 1-800-645-9721 / espsurgex.comEarth (Output)14
Top side of terminalTo Internal UPS wiringBottom side of Terminal To customer wiring20kVA TerminalCare should be taken when installing these conductors so as to not confuse theinput (LINE) and output (LOAD) phase conductors. Keeping in mind this UPS requires an inputneutral for proper operation. Once all conductors are properly landed and sufficiently tightenedto their respective torque specs, the terminal safety cover may be reinstalled. 2018 AMETEK Electronic Systems Protection / Technical Support: 1-800-645-9721 / espsurgex.com15
Terminal safety cover must be installed prior to operation of the UPS.SURGEX recommends a disconnecting means with the following overcurrent ratings(provided by customer) to be used as the electrical supply (output) from the UPS-32020-80 UPSto the critical load:UPS mendedWire Size#4 AWGTerminal WireRange(Min. – Max.)TighteningTorque(Min. – Max.)#16 to # 0AWG**Gnd. (Allmodels)* To be provided by customer#6 AWG#6 -2/0 AWG**120 In-lbs.** 75 C min. rated CU conductors only 2018 AMETEK Electronic Systems Protection / Technical Support: 1-800-645-9721 / espsurgex.com16
3.Product SpecificationsSURGEX UPS-32020-80 SpecificationsApplicable Standards:UL1778 and CSA 22.2IEC, 62040 UPS StandardISO 9001 Quality Assurance ProgramEMI compatibility: FCC Title 47 Part 15,Subpart BIEEE C62, 41-1991OSHPD Special Seismic Certification # OSP-0336-10ModelUPS-32020-80Power Rating (kVA):20Capacity(kW):18Frequency:50/60HzSystem Input (Converter):Operating Input Voltage(Nominal 15% / -15%)Frequency RangeInput Current THDInput Power FactorBattery VoltageConverter Walk-in Time208VAC (operating window 177to 239VAC)3 Phase 5 wire /- 5Hz 1 % @ 100% load, 2 % @ 50 % load.99 @ 100% load, .98 minimum @ 50% load432VDC Nominal (36 batteries x 12V)20 SecondsSystem Input (Bypass):Nominal Input VoltageInput Synchronization Voltage RangeInput Frequency Tracking RangeOutput Fault Clearing208VAC, 3Phase 4 Wire /- 10% of Nominal /- 3 HZ400% for 10s, 1000% for ½ cycle 2018 AMETEK Electronic Systems Protection / Technical Support: 1-800-645-9721 / espsurgex.com17
System Output:Nominal Output VoltageStatic Voltage RegulationOutput Frequency(Inverter Synchronous)Output Frequency Slew RateFrequency RegulationOutput Voltage Harmonic DistortionOutput Overload CapacityVoltage Transient Response208VAC 3 Phase 4 Wire /- 2%60Hz (tracks frequency of static bypass source) /- .2, .5, 1 and 2Hz (user settable) /- 1 Hz per second60Hz /- .01% (free running)Less than 1% (linear load0Less than 2% with a crest factor of 2.5 to 1125% for 10min., OR 150% for 60 seconds /- 2% for a 100% step loadEnvironmental:Efficiency (100% load)Operating Ambient TemperatureStorage Temp. (non-operating)Relative Humidity (non-condensing)Acoustical Noise levelHeat Dissipation ( @ 208v input)DC to AC 94% AC to AC 92%0 to 40 C (no derating required)-20 to 60 C (without batteries)Recommended: 30% to 90%Maximum: 5% to 95% 54dba @ 1 meter20kVA 7.60 kBTU / Hr. 2018 AMETEK Electronic Systems Protection / Technical Support: 1-800-645-9721 / espsurgex.com18
4.OperationUPS Operational Overview:The SURGEX UPS-32020-80 UPS is a continuous-duty, solid state, transformerless, 208V threephase 4 wire true online double conversion system, which provides uninterruptible power tocritical loads. The SURGEX UPS-32020-80 UPS maintains power to the critical load duringcommercial electrical power brownout, blackout, overvoltage, undervoltage, and out-of-tolerancefrequency conditions.The basic system consists of a rectifier, battery, and inverter, which are complemented by staticbypass and manual maintenance bypass switches.UPS Operation: Normal ModeWith the AC supply present, the rectifier transforms the AC input into DC, raising the DC to asuitable level to supply the inverter and to charge the batteries.The inverter transforms the DC bus voltage into AC, providing a sine wave AC output, stabilizedin voltage and frequency, to the critical load.Manual Maint.BypassStatic BypassSwitchCUS TOMERSUPP taticSwitchInverterBatteryUPS Cabinet 2018 AMETEK Electronic Systems Protection / Technical Support: 1-800-645-9721 / espsurgex.com19
UPS Operation: Battery ModeIn the event of an AC input failure, the batteries provide the power necessary to supply theinverter. The inverter continues functioning as in normal mode, supplying AC power to thecritical load.Manual Maint.BypassStatic UPS Cabinet 2018 AMETEK Electronic Systems Protection / Technical Support: 1-800-645-9721 / espsurgex.com20
UPS Operation: Bypass ModeThe UPS comes with a static bypass switch which provides an alternate current path to thecritical load. This transfer will not affect the supply of output power to the critical load, but if apower outage occurs while in this mode, the critical load will not be maintained. This bypasscircuit can be enacted in two ways:Normal BypassThis circuit may be enacted manually by use of the “stop” button.Note: The rectifier will continue to charge the batteries when in this state.Manual Maint.BypassStatic UPS Cabinet 2018 AMETEK Electronic Systems Protection / Technical Support: 1-800-645-9721 / espsurgex.com21
Emergency Bypass:If an abnormal condition occurs the output to the critical load will be automatically transferred tobypass mode through the use of the static bypass switch.Manual Maint.BypassStatic UPS Cabinet 2018 AMETEK Electronic Systems Protection / Technical Support: 1-800-645-9721 / espsurgex.com22
UPS Operation: Manual Maintenance Bypass ModeWhen it becomes necessary to perform maintenance checks on the UPS, the critical load neednot be interrupted. This is accomplished by means of a “make-before-break” manualmaintenance bypass switch. This same switch simultaneously isolates the output of the UPS,which will allow the rectifier and inverter to be energized for troubleshooting and repairpurposes, without affecting the critical load.Manual Maint.BypassStatic BypassSwitchCUSTOMERSUPPLYCRITICALLOADAC terBatteryUPS Cabinet 2018 AMETEK Electronic Systems Protection / Technical Support: 1-800-645-9721 / espsurgex.com23
THE TOUCH SCREENThe SURGEX UPS-32020-80 UPS utilizes a state of the art full color (262K colors) TFT LCD5.7” (diagonal measure) touch screen as its primary user interface. This powerful tool allows theuser to observe and control all operations of the UPS by moving through a series of menuscreens. The operational state of the UPS is represented in a one line format, using color changesto depict the actual current state.Touch Screen CalibrationUpon screen initialization, you may be asked to calibrate the touch screen. Simply touch the plussign ( ) as it appears in different locations on the display. It is important to be directly in frontof the screen during this process. Any deflective angle, however slight, will affect the accuracyof the display and subsequently the overall functionality of the UPS itself. This process may bemanually initiated at any time by touching anywhere on the display continuously for 10seconds.Using the UPS displayThe main user interface for this UPS is the touch screen display. The Home symbol in the upperleft corner returns the user to the home screen from anywhere in the menu. The “back” button,will take the user to the previous screen. At the very bottom of the display (left corner) a symbolwill describe the state of the UPS (INV, BYP, or BAT), plus a user information alert, and at theright is a time stamp of the current date and time. From time to time you may notice the word“Reading” appears next to the user information alert symbol. This indicates that the display is inthe process of refreshing live data. The user should wait for this to disappear to observe the mostup-to-date data. 2018 AMETEK Electronic Systems Protection / Technical Support: 1-800-645-9721 / espsurgex.com24
#1#3#2#4#5#6#7#8#9#11#10#13#12Description1HOME Button2UPS Model Size (HOME SCREEN ONLY)3Title Bar4Individual screen #, or in the case of the HOME screen only, the Firmware Revision Level5User information text area6Power flow diagram7User information text8External Battery cabinet (optional)—icon appears only when UPS is programmed for the ExternalBattery Cabinet option9Action buttons10Scroll for hidden action buttons11State of UPS12User information alert- when touched takes user to the relevant informational screen13Date and Time 2018 AMETEK Electronic Systems Protection / Technical Support: 1-800-645-9721 / espsurgex.com25
The following start-up sequence refers ONLY to the operation of this UPS AFTERit has been initially started by a Factory Authorized Service Representative. If your UPS has nothad this original service performed, DO NOT PROCEED. INITIAL START-UP BY NONAUTHORIZED PERSONNEL WILL VOID YOUR WARRANTY!UPS User’s Start-up Sequence:The SURGEX UPS-32020-80 UPS utilizes a hinged front door to access its three primaryswitches. These switches are described as (L-R): AC Input which will disconnect the UPS fromthe AC source, the Manual Maintenance Bypass which will seamlessly transfer the critical loadto an alternative current path allowing the UPS to be serviced, and the Battery Disconnectwhich directly connects the battery string(s) to the DC bus. 2018 AMETEK Electronic Systems Protection / Technical Support: 1-800-645-9721 / espsurgex.com26
Cooling Fans(Hot Swappable)CommunicationInterface BoardBatteryChamberCoverManual Maint.Bypass SwitchAC InputSwitchBatteryDisconnectConnectionTerminal coverFig. 4-6The UPS will NOT start unless the Manual Maintenance Bypass Switch is in the“normal” position (Assuming the UPS has not been placed in “BYPASS” mode for servicingpurposes. See page 38). The Battery Disconnect will be in the tripped /off position prior to UPSstartup, and MUST NOT be closed until instructed to do so.Step 1: Close the AC Input Switch. This will supply power to the UPS and cause the initializingscreen to become illuminated (Fig. 4-7).This screen should be visible for approximately 15-20 seconds, and should transition into thestart-up bypass screen (Fig 4-8 & 4-9). 2018 AMETEK Electronic Systems Protection / Technical Support: 1-800-645-9721 / espsurgex.com27
Fig. 4-7Fig. 4-8Fig. 4-9Fig. 4-10Fig.4-11Step 2: The UPS will pre-charge the rectifier and start to energize the DC bus. Once the bus isfully charged, the unit will alarm to let the user know that the batteries are disconnected and the 2018 AMETEK Electronic Systems Protection / Technical Support: 1-800-645-9721 / espsurgex.com28
battery breaker may now be closed (Fig. 4-10 & 4-11). The UPS “on Bypass” alarm state willremain until the unit is started.Fig. 4-12Fig. 4-13Step 3: The UPS may now be started by pressing the “start” button at the bottom of this screen(Fig.4-12).Step 4: The START/STOP screen (Fig. 4-13) will now appear. To actually execute the startsequence the “start” action button must be pressed AND dragged to the larger gray square to theright.Fig. 4-14The UPS will initialize and execute the start function to turn on the inverter (Fig. 4-14). 2018 AMETEK Electronic Systems Protection / Technical Support: 1-800-645-9721 / espsurgex.com29
Upon successful completion of the internal control checks, the inverter will turn on and the “UPSon Bypass” alarm will disappear. The title bar will turn from red (meaning alarm present) toplain white (Fig. 4-15).Fig. 4-15The bypass path has now changed from green to gray and the main power path is now green.The battery section is now green and input, output, and battery charge information has appearedin columns above the power path. Also, the words “normal operation” will appear below thepower path.To return to the “Home” screen from any other screen, simply press the home icon in the upperleft corner. Pressing the “back” button on the bottom of various screens will take you to theprevious screen only. 2018 AMETEK Electronic Systems Protection / Technical Support: 1-800-645-9721 / espsurgex.com30
UPS Shutdown:If it becomes necessary to completely turn off your UPS, please follow these simple steps:Fig. 4-16Step 1: Perform a sequential shutdown of your applied load. Once there is no critical load, theUPS may be transferred to its static bypass state by pressing the “stop” button at the bottom ofthe Home screen (Fig. 4-16).Fig. 4-17Step 2: Drag and drop the red “stop” action square to the larger gray square to the right. TheUPS will transfer to static Bypass mode (Fig. 4-17). 2018 AMETEK Electronic Systems Protection / Technical Support: 1-800-645-9721 / espsurgex.com31
Battery DisconnectONOFFFig. 4-18Fig. 4-19Fig. 4-20Step 3: Open the battery disconnect switch (Fig. 4-18) which is behind the hinged front door atthe lower right side. An audible alarm will sound when the breaker is open. This alerts the user tothe state of the battery breaker (Fig. 4-19 & 4-20).AC InputONOFFFig. 4-21 2018 AMETEK Electronic Systems Protection / Technical Support: 1-800-645-9721 / espsurgex.com32
Step 5: Open the AC Input breaker of the UPS (Fig. 4-21). The UPS will shut down. As anadditional precaution, the AC supply feeding this UPS may now be de-energized.Maintenance Bypass ModeThe SURGEX UPS-32020-80 UPS is supplied with a make-before-break maintenance bypassswitch as a standard feature. This switch allows the user to transfer the UPS to an alternatecurrent path for service or troubleshooting, without affecting the applied load. If it becomesnecessary to utilize this function, please follow these steps:Fig. 4-22Fig. 4-23 2018 AMETEK Electronic Systems Protection / Technical Support: 1-800-645-9721 / espsurgex.comFig. 4-2433
Step 1: Transfer the UPS to Static Bypass mode by pressing the “stop” button at the bottom ofthe “Home” screen (Fig. 4-22). Drag and drop the red “stop” action square to the gray square atthe right (Fig. 4-23). The inverter will now be offline. An alarm will alert the user to the fact theUPS is now in bypass mode and the critical load is no longer battery protected (Fig. 4-24 & 425).Fig. 4-25Battery DisconnectONOFFFig. 4-26Fig. 4-27 2018 AMETEK Electronic Systems Protection / Technical Support: 1-800-645-9721 / espsurgex.com34
Step 2: Once the offline state is confirmed via touchscreen, the B
Wiring Guide 12 UPS Connector Terminals and Lug locations 13 3. Product Specifications . UPS Operation: Manual Maintenance Bypass Mode 23 Touch Screen Description, Calibration, Using the Touch Screen 24 . Block Diagram (UPS External Battery Cabinet) 91 Block Diagram (UPS Input Transformer Cabinet) 92 .