Transcription
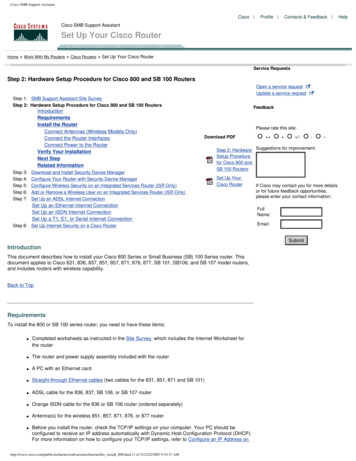
Cisco SMB Support AssistantCisco Profile Contacts & Feedback Cisco SMB Support AssistantSet Up Your Cisco RouterHome Work With My Routers Cisco Routers Set Up Your Cisco RouterService RequestsStep 2: Hardware Setup Procedure for Cisco 800 and SB 100 RoutersOpen a service requestUpdate a service requestStep 1: SMB Support Assistant Site SurveyStep 2: Hardware Setup Procedure for Cisco 800 and SB 100 RoutersIntroductionRequirementsInstall the RouterConnect Antennas (Wireless Models Only)Connect the Router InterfacesConnect Power to the RouterVerify Your InstallationNext StepRelated InformationStep 3:Step 4:Step 5:Step 6:Step 7:FeedbackPlease rate this site:Download PDFDownload and Install Security Device ManagerConfigure Your Router with Security Device ManagerConfigure Wireless Security on an Integrated Services Router (ISR Only)Add or Remove a Wireless User on an Integrated Services Router (ISR Only)Set Up an ADSL Internet Connection /-Set Up YourCisco RouterStep 8: Set Up Internet Security on a Cisco RouterIf Cisco may contact you for more detailsor for future feedback opportunities,please enter your contact information:FullName:Email:SubmitIntroductionThis document describes how to install your Cisco 800 Series or Small Business (SB) 100 Series router. Thisdocument applies to Cisco 831, 836, 837, 851, 857, 871, 876, 877, SB 101, SB106, and SB 107 model routers,and includes routers with wireless capability.Back to TopRequirementsTo install the 800 or SB 100 series router, you need to have these items:Completed worksheets as instructed in the Site Survey, which includes the Internet Worksheet forthe router The router and power supply assembly included with the router A PC with an Ethernet card Straight-through Ethernet cables (two cables for the 831, 851, 871 and SB 101) ADSL cable for the 836, 837, SB 106, or SB 107 router Orange ISDN cable for the 836 or SB 106 router (ordered separately) Antenna(s) for the wireless 851, 857, 871, 876, or 877 router Before you install the router, check the TCP/IP settings on your computer. Your PC should beconfigured to receive an IP address automatically with Dynamic Host Configuration Protocol (DHCP).For more information on how to configure your TCP/IP settings, refer to Configure an IP Address s/internet/hw install 800.html (1 of 5)12/22/2005 9:19:37 AM--Step 2: Hardware Suggestions for improvement:Setup Procedurefor Cisco 800 andSB 100 RoutersSet Up an Ethernet Internet ConnectionSet Up an ISDN Internet ConnectionSet Up a T1, E1, or Serial Internet Connection -Help
Cisco SMB Support AssistantYour PC.Back to TopInstall the RouterTo install the router, follow these steps:Connect Antennas (Wireless Models Only)Cisco wireless routers use 2.4-GHz antennas to connect to provide a wireless signal to the network. Cisco 850series wireless routers use one antenna, and Cisco 870 series wireless routers use two antennas.If you have a wireless router, follow these steps to connect antennas:1. Attach the antenna to the connector on the back of the router and tighten the connector hand-tight.2. After you connect the antenna to the back of the router, orient the antenna so that it is straight up.Connect the Router InterfacesSelect the necessary cables to connect the router to a PC, broadband modem, or ADSL. For more informationabout cables, refer to Cable Descriptions.1. Connect the router to the PC with the straight-through Ethernet cable as shown in the illustration.Connect one end of the Ethernet cable to port 4 on the built-in Ethernet switch.Caution: Always connect the Ethernet cable to the yellow Ethernet port on the router. If youconnect the cable to a WAN port, you may damage the router.2. Connect the other end of the cable to the RJ-45 port on the Ethernet card installed in the PC.3. Connect additional cables according to your router model: For the 831, 851, 871, and SB 101, connect the second Ethernet cable between theInternet port of the router and an available port on an installed DSL or cable modem. Turnon the broadband modem if it is not already on.For the 836, 876, and SB 106, connect the lavender ADSL cable between the ADSL portof the router and the telephone wall jack or ADSL splitter, and connect the orange ISDNcable between the ISDN port of the router and the Network Termination (NT1) box orADSL splitter.Note: The ADSL port is labeled ADSLoISDN on the 836, 876, and SB 106 routers. For the 837, 857, 877, and SB 107, connect the lavender ADSL cable between the /us/internet/hw install 800.html (2 of 5)12/22/2005 9:19:37 AM
Cisco SMB Support Assistantport of the router and a telephone wall jack. If the ADSL line is also used for voicecommunication, you can connect the router to an ADSL splitter to prevent disruption ofdata communication.Note: The ADSL port is labeled ADSLoPOTS on the 857 and 877 routers.Connect Power to the RouterNote: Before you connect the router to its power source, read the Regulatory Compliance and SafetyInformation for the 800 Series Routers or Regulatory Compliance and Safety Information for Cisco SB 100Series Routers document that came with your router.Follow these steps to connect the router to the AC adapter:1. Check the power switch of the router and make sure it is turned off. Connect one end of the powersupply cable to the input jack of the router.You can use the power latch included in your accessory kit to prevent the power adapter plug fromdisconnecting from the router. Attach the power latch to the cable near the power plug and push ittoward the plug until it sits inside the latch. Connect the plug to the input jack and hook the latches tothe holes on either side of the jack until the plug is secure.2. Connect the other end of the power supply cable to the desktop power adapter.3. Plug the power cord of the desktop power adapter into an electrical outlet.4. Turn the power switch on. The green OK LED on the front panel of the router lights up when youconnect the router to a power source. The router is now ready for use.Back to TopVerify Your InstallationTo verify your installation, check for normal LED activity, as described in this table. All lights are green whenactivity is normal. If you do not see normal LED activity, contact the SMB Technical Assistance Center (SMBTAC) for assistance.LEDLabelMeaningOKNoneLit when power is supplied to the router.1, CDInternet,ADSLLit when the router detects status and connects to the digitalsubscriber line access multiplexer (DSLAM) successfully.RXDInternet,ADSLBlinks when a port on the Internet port receives network a/en/us/internet/hw install 800.html (3 of 5)12/22/2005 9:19:37 AM
Cisco SMB Support AssistantTXDInternet,ADSLBlinks when a port on the Internet port sends network traffic.ISDN 1, LineISDNLit when ISDN D channel connects successfully.ISDN CH1,B1ISDNLit when ISDN B1 channel connects successfully. Blinks whenthe B1 channel receives or sends data.ISDN CH2,B2ISDNLit when ISDN B2 channel connects successfully. Blinks whenthe B2 channel receives or sends data.1, 2, 3 or 4Ethernet,EthernetLAN,ComputersLit when the LAN port is physically connected to a server, PC,or s when a port on the built-in Ethernet switch receivesnetwork traffic.TXDEthernet,EthernetLAN,ComputersBlinks when a port on the built-in Ethernet switch sendsnetwork traffic.PPPNoneLit when one or more PPPoE or PPPoA client sessions arerunning.VPNNoneLit when one or more VPN sessions are active.OKWLANLit solid green when at least one wireless client is associated.Blinks if no client is associated. Solid green if at least one clientis associated.DATAWLANBlinks if there is traffic on the wireless LAN. Off if there is notraffic.Back to TopNext StepYou have completed hardware installation and are ready to configure your router with Security Device Manager(SDM). SDM is a configuration tool that allows you to configure LAN and WAN interfaces, routing, NetworkAddress Translation (NAT), firewalls, VPNs, and other features on your router.For further instructions, refer to Configure Your Router with Security Device Manager.Note: If you have an ASA Security Appliance in your network, refer to Configure Your Router with SecurityDevice Manager for ASA.Back to TopRelated mbsa/en/us/internet/hw install 800.html (4 of 5)12/22/2005 9:19:37 AM
Cisco SMB Support Assistant Site SurveyCable DescriptionsConfigure Your Router with Security Device Manager 1992-2005 Cisco Systems, Inc. All rights reserved. Terms and Conditions, Privacy Statement, Cookie Policy and Trademarks of Cisco Systems, /us/internet/hw install 800.html (5 of 5)12/22/2005 9:19:37 AM
Cisco SMB Support AssistantCisco Profile Contacts & Feedback Cisco SMB Support AssistantSet Up Your Cisco RouterHome Work With My Routers Cisco Routers Set Up Your Cisco RouterService RequestsStep 2: Hardware Setup Procedure for Cisco 1700 Series RoutersOpen a service requestUpdate a service requestStep 1: SMB Support Assistant Site SurveyStep 2: Hardware Setup Procedure for Cisco 1700 Series RoutersIntroductionRequirementsInstall the RouterConnect Power to the RouterConnect the Router to a PCVerify Your InstallationNext StepRelated InformationStep 3:Step 4:Step 5:Step 6:Step 7:Download and Install Security Device ManagerConfigure Your Router with Security Device ManagerConfigure Wireless Security on an Integrated Services Router (ISR Only)Add or Remove a Wireless User on an Integrated Services Router (ISR Only)Set Up an ADSL Internet ConnectionFeedbackPlease rate this site:Download PDF /-Set Up YourCisco RouterIf Cisco may contact you for more detailsor for future feedback opportunities,please enter your contact information:FullName:Step 8: Set Up Internet Security on a Cisco RouterEmail:IntroductionThis document describes how to install your Cisco 1700 series router. The Cisco 1700 series routers have eitherfixed or modular configurations that provide these features: One to four WAN Interface Cards (WIC) or a combination of WIC and Voice Interface Cards (VIC) Fast Ethernet LAN portThe Cisco WICs support Ethernet, ADSL, ISDN, T1/E1, and serial connections for WAN connectivity.Back to TopRequirementsTo install the 1700 series router, you need to have these items:Completed worksheets as instructed in the Site Survey, which includes the Internet Worksheet forthe router The router and power supply assembly (you must use the power supply that shipped with the router) Access to local AC power A PC with an Ethernet card A crossover Ethernet cableBack to us/internet/hw install 1700.html (1 of 3)12/22/2005 9:24:02 AM--Step 2: Hardware Suggestions for improvement:Setup Procedurefor Cisco 1700Series RoutersSet Up an Ethernet Internet ConnectionSet Up an ISDN Internet ConnectionSet Up a T1, E1, or Serial Internet Connection -SubmitHelp
Cisco SMB Support AssistantInstall the RouterBefore you install your 1700 series router, read the Regulatory Compliance and Safety Information for Cisco1700 Routers document that came with your router. As advised in this document, the 1700 series router shouldbe connected to a reliable earth ground when in use.You can install the 1700 series router on a desktop or flat surface. Position the router where you have access toboth front and back panels.Connect Power to the RouterFollow these steps to connect power to the router.1. Connect the attached power supply cord to the power socket (labeled 5, 12, -12 VDC) on the backpanel of the router.2. Connect the separate power cord to the power socket on the power supply.3. Connect the other end of the power cord to a standard AC power outlet.4. Press the power switch to the on ( ) position.5. To confirm that the router has power, verify that the PWR LED on the front panel is on. The OK lightblinks until the router has completed its self-test, and then the light stays on.Connect the Router to a PCTo configure the router, you must connect the router to a PC with a crossover Ethernet cable. Follow thesesteps:1. Connect one end of the Ethernet cable to the 10/100BaseT Fast Ethernet port on the router.Caution: Always connect the Ethernet cable to the yellow Ethernet port on the router. If youconnect the cable to the wrong port, you may damage your router.2. Connect the other end of the cable to the RJ-45 port on the Ethernet card installed in the PC.Back to TopVerify Your InstallationTo verify your installation, check for normal LED activity, as described in this table. All lights are green whenactivity is normal. If you do not see normal LED activity, contact the SMB Technical Assistance Center (SMBTAC) for mbsa/en/us/internet/hw install 1700.html (2 of 3)12/22/2005 9:24:02 AM
Cisco SMB Support AssistantLEDPWRPanelFrontMeaningOn when power is being supplied to the router.On when the router software is loaded and functional.This LED blinks when the router runs a power-on self test (POST) orwhen it loads operating system software (which may take 3 to 5minutes). If the LED blinks continuously, the router may beexperiencing a problem.OKFrontLNKBackOn when the router is correctly connected to the Ethernet networkthrough the 10/100 ETHERNET port.ETH ACTFrontBlinks when there is network traffic on the local Ethernet LAN.WIC0 ACTand WIC1ACTFrontOn solid or blinking when there is data traffic on the correspondingWIC port.WIC0 OK andWIC1 OKBackOn when a WIC is correctly installed in the corresponding WIC slot.Back to TopNext StepYou have completed hardware installation and are ready to configure your router with Security Device Manager(SDM). SDM is a configuration tool that allows you to configure LAN and WAN interfaces, routing, NetworkAddress Translation (NAT), firewalls, VPNs, and other features on your router.For further instructions, refer to Configure Your Router with Security Device Manager.Note: If you have an ASA Security Appliance in your network, refer to Configure Your Router with SecurityDevice Manager for ASA.Back to TopRelated Information Site SurveyCable DescriptionsConfigure Your Router with Security Device Manager 1992-2005 Cisco Systems, Inc. All rights reserved. Terms and Conditions, Privacy Statement, Cookie Policy and Trademarks of Cisco Systems, /us/internet/hw install 1700.html (3 of 3)12/22/2005 9:24:02 AM
Cisco SMB Support AssistantCisco Profile Contacts & Feedback Cisco SMB Support AssistantSet Up Your Cisco RouterHome Work With My Routers Cisco Routers Set Up Your Cisco RouterService RequestsStep 2: Hardware Setup Procedure for Cisco 1800 Series RouterOpen a service requestUpdate a service requestStep 1: SMB Support Assistant Site SurveyStep 2: Hardware Setup Procedure for Cisco 1800 Series RoutersIntroductionRequirementsInstall the RouterReview Safety InformationSet Up the ChassisConnect Wireless AntennasConnect Power to the RouterConnect the Router to a PCVerify Your InstallationNext StepRelated InformationStep 3:Step 4:Step 5:Step 6:Step 7:Download and Install Security Device ManagerConfigure Your Router with Security Device ManagerConfigure Wireless Security on an Integrated Services Router (ISR Only)Add or Remove a Wireless User on an Integrated Services Router (ISR Only)Set Up an ADSL Internet ConnectionFeedbackPlease rate this site: /----Suggestions for improvement:Step 2: HardwareSetup Procedurefor Cisco 1800Series RouterSet Up YourCisco RouterSet Up an Ethernet Internet ConnectionSet Up an ISDN Internet ConnectionSet Up a T1, E1, or Serial Internet ConnectionStep 8: Set Up Internet Security on a Cisco RouterIntroductionThis document describes how to install your Cisco 1800 series router. The 1800 series includes modular andfixed-configuration routers that offer high-speed data, security, and voice sa/en/us/internet/hw install 1800.html (1 of 5)12/22/2005 9:23:21 AM Download PDFIf Cisco may contact you for more detailsor for future feedback opportunities,please enter your contact information:FullName:Email:SubmitHelp
Cisco SMB Support AssistantBack to TopRequirementsTo install the 1800 series router, you need to have these items: Completed worksheets as instructed in the Site Survey, which includes the Internet Worksheet for therouter The router and power cord Access to local AC power A PC with an Ethernet card A crossover Ethernet cableBack to TopInstall the RouterFollow these steps to install your 1800 series router:Review Safety InformationBefore you install your router, read the regulatory compliance and safety information for your router: Regulatory Compliance and Safety Information for Cisco 1800 Integrated Services Routers Regulatory Compliance and Safety Information for Cisco 1840 RoutersAs advised in this document, the router should be connected to a reliable earth ground when in use.Set Up the ChassisIf you want to install the router on a desktop or shelf, follow these steps:1. Place the router upside-down on a smooth, flat a/en/us/internet/hw install 1800.html (2 of 5)12/22/2005 9:23:21 AM
Cisco SMB Support Assistant2. Peel the rubber feet from the black adhesive strip and attach them to the four corners of the bottom ofthe chassis.3. Place the router top-side up on a flat, smooth, secure surface. Position the router where you haveaccess to both front and back panels.Caution: Do not place anything on top of the router that weighs more than 10 pounds (4.5 kg).Excessive weight on top could damage the chassis.Connect Wireless AntennasIf your router has the wireless LAN option, follow these steps to connect the antennas:1. Screw the antenna connectors in a clockwise direction onto the connectors on the back panel of therouter.2. After you have attached the antennas, you must orient them. For best radio performance, orient theantennas so that they are perpendicular to the ground.Connect Power to the RouterFollow these steps to connect power to the router:1. Connect the power cord to the power socket on the back panel of the router.2. Connect the other end of the power cord to a standard AC power outlet.3. Press the power switch to the on ( ) position.4. To confirm that the router has power, verify that the Power LED on the front panel is on. The Activitylight blinks slowly until the router has finished the boot process.Connect the Router to a PCTo configure the router, you must connect the router to a PC with a crossover Ethernet cable. Follow these en/us/internet/hw install 1800.html (3 of 5)12/22/2005 9:23:21 AM
Cisco SMB Support Assistant1. Connect one end of the Ethernet cable to the 10/100 BaseT Fast Ethernet port on the router.Caution: Always connect the Ethernet cable to the yellow Ethernet port on the router. If youconnect the cable to the wrong port, you may damage your router.2. Connect the other end of the Ethernet cable to the RJ-45 port on the Ethernet card installed in the PC.Back to TopVerify Your InstallationTo verify your installation, check for normal LED activity, as described in this table. All lights are green whenactivity is normal. If you do not see normal LED activity, contact the SMB Technical Assistance Center (SMBTAC) for assistance.LEDPanelMeaning On when the system is operates normally.SYS PWRFrontSYS ACTFrontBlinks to indicate network or system activity.CFBackOn when flash memory is busy. Do not remove theCompactFlash memory card when this light is on.FDXBackOn indicates full-duplex operation. Off indicates half-duplexoperation.100BackOn indicates a 100-Mbps link. Off indicates a 10-Mbps link. Blinks slowly when the system is booting or in theROM a/en/us/internet/hw install 1800.html (4 of 5)12/22/2005 9:23:21 AM
Cisco SMB Support AssistantLNK (FE 0/0)BackOn when the router is correctly connected to a local Ethernetnetwork through Ethernet port 0.LNK (FE 0/1)BackOn when the router is correctly connected to a local Ethernetnetwork through Ethernet port 1.Back to TopNext StepYou have completed hardware installation and are ready to configure your router using Security Device Manager(SDM). SDM is a configuration tool that allows you to configure LAN and WAN interfaces, routing, NetworkAddress Translation (NAT), firewalls, VPNs, and other features on your router.For further instructions, refer to Configure Your Router with Security Device Manager.Note: If you have an ASA Security Appliance in your network, refer to Configure Your Router with Security DeviceManager for ASA.Back to TopRelated Information Site SurveyCable DescriptionsConfigure Your Router with Security Device Manager 1992-2005 Cisco Systems, Inc. All rights reserved. Terms and Conditions, Privacy Statement, Cookie Policy and Trademarks of Cisco Systems, /us/internet/hw install 1800.html (5 of 5)12/22/2005 9:23:21 AM
Cisco SMB Support AssistantCisco Profile Contacts & Feedback Cisco SMB Support AssistantSet Up Your Cisco RouterHome Work With My Routers Cisco Routers Set Up Your Cisco RouterService RequestsStep 2: Hardware Setup Procedure for Cisco 2600 Series RoutersOpen a service requestUpdate a service requestStep 1: SMB Support Assistant Site SurveyStep 2: Hardware Setup Procedure for Cisco 2600 Series RoutersIntroductionRequirementsInstall the RouterSet Up the ChassisConnect Power to the RouterConnect the Router to a PCVerify Your InstallationNext StepRelated InformationStep 3:Step 4:Step 5:Step 6:Step 7:Download and Install Security Device ManagerConfigure Your Router with Security Device ManagerConfigure Wireless Security on an Integrated Services Router (ISR Only)Add or Remove a Wireless User on an Integrated Service Router (ISR Only)Set Up an ADSL Internet ConnectionFeedbackPlease rate this site:Download PDF /-Set Up YourCisco RouterStep 8: Set Up Internet Security on a Cisco RouterIf Cisco may contact you for more detailsor for future feedback opportunities,please enter your contact information:FullName:Email:SubmitIntroductionThis document describes how to install your Cisco 2600 series router. The Cisco 2600 series features modularaccess routers that support Ethernet, Fast Ethernet, Token Ring, and mixed LAN environments. The 2600routers are either single rack-unit (1RU) or two rack-units (2RU) high.Back to TopRequirementsTo install the 2600 series router, you need to have these items:Completed worksheets as instructed in the Site Survey, which includes the Internet Worksheet forthe router The router and power cord Access to local AC power A PC with an Ethernet card A crossover Ethernet cableBack to us/internet/hw install 2600.html (1 of 4)12/22/2005 9:22:26 AM--Step 2: Hardware Suggestions for improvement:Setup Procedurefor Cisco 2600Series RoutersSet Up an Ethernet Internet ConnectionSet Up an ISDN Internet ConnectionSet Up a T1, E1, or Serial Internet Connection -Help
Cisco SMB Support AssistantInstall the RouterThe Cisco 2600 series router is rack-mountable, but the router can also be set up on a desktop or flat surface.These setup instructions describe the desktop installation.Before you install your 2600 series router, read the Cisco 2600 Series Regulatory Compliance and SafetyInformation document that came with your router. As advised in this document, the 2600 series router should beconnected to a reliable earth ground when in use.Set Up the ChassisThese instructions describe how to set up the chassis on a desktop.1. Place the router upside-down on a smooth, flat surface.2. Peel the rubber feet from the black adhesive strip and attach them to the five round, recessed areason the bottom of the chassis.3. Place the router top-side up on a flat, smooth, secure surface. Position the router where you haveaccess to both front and back panels.Caution: Do not place anything on top of the router that weighs more than 10 pounds (4.5kg). Excessive weight on top could damage the chassis.Connect Power to the RouterFollow these steps to connect power to the router:1. Connect the power cord to the power socket on the back panel of the router.2. Connect the other end of the power cord to a standard AC power outlet.3. Press the power switch to the on ( ) position.4. To confirm that the router has power, verify that the Power LED on the front panel is on. The Activitylight blinks slowly until the router has finished the boot process.Connect the Router to a PCTo configure the router, you must connect the router to a PC with a crossover Ethernet cable. Follow thesesteps:1. Connect one end of the Ethernet cable to the 10/100 BaseT Fast Ethernet port on the router.Caution: Always connect the Ethernet cable to the yellow Ethernet port on the router. If youconnect the cable to the wrong port, you may damage your /en/us/internet/hw install 2600.html (2 of 4)12/22/2005 9:22:26 AM
Cisco SMB Support Assistant2. Connect the other end of the Ethernet cable to the RJ-45 port on the Ethernet card installed in thePC.Back to TopVerify Your InstallationTo verify your installation, check for normal LED activity, as described in this table. All lights are green whenactivity is normal. If you do not see normal LED activity, contact the SMB Technical Assistance Center (SMBTAC) for assistance.Router TypeLEDPOWERMeaningOn when power is supplied to the router. RPSOn when the redundant power supply (RPS)is installed and operating normally. Off when RPS is not installed. Blinks when RPS has failed. Blinks slowly when system is booting. Blinks to indicate network or system activity.1-RU Chassis HeightACTIVITYPWROn when power is supplied to the router. 2-RU Chassis HeightSYS/RPSACTOn when the redundant power supply (RPS)is installed and operating normally. Blinks rapidly when system is booting. Blinks slowly when RPS has failed.Blinks to indicate network or system activity.Back to TopNext StepYou have completed hardware installation and are ready to configure your router using Security DeviceManager (SDM). SDM is a configuration tool that allows you to configure LAN and WAN interfaces, routing,Network Address Translation (NAT), firewalls, VPNs, and other features on your router.For further instructions, refer to Configure Your Router with Security Device a/en/us/internet/hw install 2600.html (3 of 4)12/22/2005 9:22:26 AM
Cisco SMB Support AssistantNote: If you have an ASA Security Appliance in your network, refer to Configure Your Router with SecurityDevice Manager for ASA.Back to TopRelated Information Site SurveyCable DescriptionsConfigure Your Router with Security Device Manager 1992-2005 Cisco Systems, Inc. All rights reserved. Terms and Conditions, Privacy Statement, Cookie Policy and Trademarks of Cisco Systems, /us/internet/hw install 2600.html (4 of 4)12/22/2005 9:22:26 AM
Cisco SMB Support AssistantCisco Profile Contacts & Feedback Cisco SMB Support AssistantSet Up Your Cisco RouterHome Work With My Routers Cisco Routers Set Up Your Cisco RouterService RequestsStep 2: Hardware Setup Procedure for Cisco 2800 Series RoutersOpen a service requestUpdate a service requestStep 1: SMB Support Assistant Site SurveyStep 2: Hardware Setup Procedure for Cisco 2800 Series RoutersIntroductionRequirementsInstall the RouterReview Safety InformationSet Up the ChassisConnect Power to the RouterConnect the Router to a PCVerify Your InstallationNext StepRelated InformationStep 3:Step 4:Step 5:Step 6:Step 7:Download and Install Security Device ManagerConfigure Your Router with Security Device ManagerConfigure Wireless Security on an Integrated Services Router (ISR Only)Add or Remove a Wireless User on an Integrated Services Router (ISR Only)Set Up an ADSL Internet ConnectionFeedbackPlease rate this site:Download PDF /-Suggestions for improvement:Set Up YourCisco RouterIf Cisco may contact you for more detailsor for future feedback opportunities,please enter your contact information:FullName:Email:Step 8: Set Up Internet Security on a Cisco RouterSubmitIntroductionThis document describes how to install your Cisco 2800 series router. The Cisco 2800 series features integratedservice routers (ISR) that offer high-speed data, security, and voice features.Back to TopRequirementsTo install the 2800 series router, you need to have these items:Completed worksheets as instructed in the Site Survey, which includes the Internet Worksheet forthe router The router and power cord Access to local AC power A PC with an Ethernet card A crossover Ethernet cableBack to us/internet/hw install 2800.html (1 of 3)12/22/2005 9:21:31 AM--Step 2: HardwareSetup Procedurefor Cisco 2800Series RoutersSet Up an Ethernet Internet ConnectionSet Up an ISDN Internet ConnectionSet Up a T1, E1, or Serial Internet Connection -Help
Cisco SMB Support AssistantInstall the RouterFollow these steps to install your 2800 series router:Review Safety InformationBefore you install your router, read the Cisco 2800 Series Regulatory Compliance and Safety Information.As advised in this document, the router should be connected to a reliable earth ground when in use.Set Up the ChassisIf you want to install the router on a desktop or shelf, follow these steps:1. Place the router upside-down on a smooth, flat surface.2. Peel the rubber feet from the black adhesive strip and attach them to the four corners of the bottomof the chassis.3.
Cisco SMB Support Assistant Cisco Profile Contacts & Feedback Help Cisco SMB Support Assistant Set Up Your Cisco Router Home Work With My Routers Cisco Routers Set Up Your Cisco Router Step 2: Hardware Setup Procedure for Cisco 800 and SB 100 Routers

