Transcription
ElectricalStarter PackUser GuideUPDATED ON 10/26/2018PlanSwiftAuthored by: Dave Hansen1
Table of ContentsOverview . 3Purchasing and Installation . 4Purchasing Plugins. 4Installation and Uninstallation . 4Features. 5How To . 6How to: Add Your Own Electrical Symbol Icons . 6How to: Copy and Paste an Assembly . 8How to: Copy and Paste Parts . 13How to: Drag and Drop Parts . 18FAQ . 20Compendium . 21Electrical Starter Pack Templates . 21Electrical Assemblies . 21Electrical Parts . 51Electrical Symbols. 54Electrical Starter Pack Lists. 58Boxes . 58Conduit . 59Connectors . 60Covers . 61Lighting . 62A/V and Communication . 62Motorized and HVAC . 63Plaster Rings . 63Power Distribution . 64Receptacles . 64Switches . 65Wire . 66Complete Symbol List . 67Conduit Fittings . 682
OverviewThis guide will teach you how to properly use the tools and features found within theElectrical Starter Pack. It is designed for use with PlanSwift Takeoff and EstimatingSoftware. This guide is not meant to be a step-by-step “walk through” document,although it can be used as a reference for getting the work done. If you encountertechnical difficulty, consult this guide (including the FAQ section of this user manual) orcontact the technical support department at:PlanSwift Technical Supportsupport@PlanSwift.com1-888-752-6794 ext. 2PlanSwift also offers additional training. For training options, contact the trainingdepartment at:PlanSwift Training Departmenttraining@PlanSwift.com1-888-752-6794 ext. 43
Purchasing and InstallationPurchasing PluginsIf you need to purchase PlanSwift or a plugin product, contact the Sales Department at:PlanSwift Salessales@PlanSwift.com1-888-752-6794 Ext. 1Installation and UninstallationInstalling and uninstalling starter packs is simple. For installing them, click on theImport Plugin Package icon (arrow 1 in Figure 1) from the PlanSwift Main Ribbon-barPlugin tab (arrow 3 of Figure 1) and follow the prompts from there. For uninstalling,click on the Uninstall Plugin (arrow 2 in Figure 1) and follow those prompts.Figure 14
FeaturesThe Electrical Starter Pack includes Electrical Assemblies, Electrical Parts, andElectrical Symbols found in the Templates tab of PlanSwift (Figure 2, arrows 1, 2, and3). This starter pack has an additional feature that allows you to add your ownelectrical symbols. Note that the Electrical Symbols tab is not visible after the plugin isinstalled until you click on the down-arrow (arrow 4) and select the Electrical Symbolstab (arrow 5) to be visible. The assemblies, parts, symbols, and lists of them (on theLists tab) are listed in the Compendium at the end of this guide. The templates are alsovisible in the Templates sidebar window (arrow 6), where they may be used to initiatetakeoffs. With these Electrical Starter Pack assemblies and parts, PlanSwift users caneasily customize assemblies and parts for later use.Figure 2Starter Packs contain a large library of prebuilt templates, parts and assemblies.Modifying the library of parts and assemblies for any Starter Pack allows users theability to customize their Templates to their specific needs. Users will save countlesshours of setup by utilizing a Starter Pack as their starting point for building customparts and assemblies. The instructions below will guide new users through the basics ofmodifying parts and assemblies. We highly recommend purchasing a training packagefor accelerated learning and faster customization.5
How ToHow to: Add Your Own Electrical Symbol IconsAdding an electrical symbol icon requires you to copy an existing template item, pasteit as a new template item, rename it, assign a new icon to it, and then add it to theComplete Symbol List under the Lists tab.To create a new symbol icon, click on the Templates window (see Figure 2)Click on the Electrical Symbols tab. See Features for how to unhide this tab.Click to select any template item from the list on the Electrical Symbols tab.Click on Copy on the Templates tab ribbon-bar.Click on the Paste button to paste the copy right below the original.Right-click (or double-click) on the name to open the Properties window.Double-clicking in the Symbol Icon field opens a window, allowing you to browseand select a new symbol (we recommend using .PNG images).8. You must give the newly created template item a unique Name.1.2.3.4.5.6.7.Figure 26
9. Click on the Lists tab (Figure 3) on the Main ribbon-bar menu.10. Click on Complete Symbol List under the Electrical folder. The main windowdisplays the names of electrical symbols.11. Click in this window, scroll to the bottom (optional), and add the name of thenew symbol icon you created. (Adding your new names to the bottom allowsyou to track your changes to the list.)Figure 37
How to: Copy and Paste an AssemblyThe purpose of copying and pasting an assembly is to allow the user to copy and thenmodify the assembly for later use. As an example, you may want two differentassemblies: one might include a part, and another might have an alternative part ornot include that part at all. By copying one assembly and then modifying and renamingthe copy (for easy identification), you can have two different assemblies available,allowing for easier and faster takeoffs. Figure 4 shows the Templates Tab (arrow 1)and the Area Takeoff Item Example 1 assembly (arrow 2). If you want to add anotherassembly but with no Material 3, then you would click on the assembly you want tocopy (arrow 2), click on Copy (arrow 3), and then click on Paste (arrow 4).Figure 48
Figure 5 shows the original (arrow 1) and new Area Takeoff Item Example 1 assembly(arrow 2). To delete the Material 3 (arrow 3) from the newly created Area TakeoffItem Example 1 assembly (arrow 2), click on Material 3 (arrow 3), click on Delete(arrow 4), and click on OK in the popup window to confirm the deletion.Figure 59
Figure 6 now shows the two assemblies, one with (arrow 1) and one without (arrow 2)the Material 3 item. You can now change the description of the duplicated AreaTakeoff Item Example 1 (arrow 3) without the Material 3 item by double-clicking theduplicate Area Takeoff Item Example 1 (arrow 3).Figure 610
This opens the Properties – [Area Takeoff Item Example 1] window (Figure 7) whereyou can change the assembly’s name to something like Area Takeoff Item Example 1—No Material 3 to make it easier to identify.Figure 7Click on Ok in the Properties window after you have entered the name. Figure 8 showsthe new name.Figure 811
To perform a takeoff with the Area Takeoff Item Example 1—No Material 3 assembly,go to the takeoff page, click on the green Record Button (see the arrow in Figure 9) inthe Templates sidebar window, and then proceed to do your takeoff.Figure 9DisclaimerAny modifications that a user makes to a Starter Pack should always be testedand verified by that user to ensure quantities and calculations are accurate.PlanSwift cannot verify the accuracy of modifications made to templates, partsand assemblies by the user.12
How to: Copy and Paste PartsDisclaimerCopying and pasting parts is handled similarly to copying and pasting an assembly. If,for instance, you want to move Material 6 in Area Takeoff Item Example 2 to AreaTakeoff Item Example 1, click on Material 6 (Figure 10, arrow 1), then click on copy(arrow 2).Figure 1013
There are now two ways to paste the part. The first is to paste it at the samehierarchical level of a selected item, and the second is to paste it as a sub-item of aselected item. Figure 11 shows the Paste button. Clicking on the top half of the buttonpastes the part at the same hierarchical level of a selected item. Clicking on the dropdown half of the button, then selecting As Sub-Item pastes the part as a sub-item ofthe selected item.Figure 11Click on Area Takeoff Item Example 1, then click on the top part of Paste. As shown inFigure 12, Material 6 gets pasted at the same hierarchical level as Area Takeoff ItemExample 1.Figure 1214
If you had selected the lower part of the Paste button, then Material 6 would be a subitem of Area Takeoff Item Example 1. Figure 13 shows Material 6 as a sub-item.Figure 13Another way to adjust the hierarchy of an item, such as Material 6, is to use the MainRibbon bar arrow Adjust keys (Figure 14).Figure 14The left and right Adjust arrows move the item left and right (up or down) in thehierarchy, and the up and down Adjust arrows keys moves the item higher and lowerin the list of items.15
A shortcut to the Copy and Paste and Past as Sub-Item selections is available with aright-click menu. Figure 15 shows the Copy, Paste, and Paste As Sub-Item options onthe right-click menu when Material 6 is right-clicked on.Figure 15Double-clicking on Material 6 allows you to change the name of the item and alterother properties of the item (Figure 16). To change the name of Material 6, doubleclick on the Material 6 name, type the new name, and click on Ok.Figure 1616
Figure 17 shows Material 6 renamed to Material 6A.Figure 17DisclaimerDisclaimerAny modifications that a user makes to a Starter Pack should always be tested andverified by that user to ensure quantities and calculations are accurate. PlanSwiftcannot verify the accuracy of modifications made to templates, parts and assembliesby the user.17
How to: Drag and Drop PartsParts may be dragged and dropped from one assembly to another assembly. If, forinstance, you want to drag the Material 8 item from Area Takeoff Item Example 2 upto Area Takeoff Item Example 1, click on Material 8 and drag it up to just belowMaterial 6A (see Figure 18) and release the mouse button.Figure 18Notice that dragging the part this way moves the part from the Example 2 assembly tothe Example 1 assembly, not leaving behind a copy.18
The Templates sidebar window is a summarized view of everything in the TemplatesTab. It is designed for easily dragging and dropping parts and for quickly launchingtakeoff templates and assemblies.Parts may be dragged over from the Templates sidebar window into the TemplatesTab window; note that dragging any part from the Templates sidebar window makes acopy of it. If, for instance, you want a Material 7 item added to Area Takeoff ItemExample 1 as a sub-item, simply drag the Material 7 from the right Templates sidebarwindow over on top of Area Takeoff Item Example 1 label and release the mousebutton. (Figure 19).Figure 19Figure 19 shows the Material 7 item in place after it was dropped on top of AreaTakeoff Item Example 1. In addition, the Properties – [Material 7] windowautomatically opens, allowing the user to change any properties for Material 7. Clickon Ok to close the Properties – [Material 7] window.19
DisclaimerAny modifications that a user makes to a Starter Pack should always be testedand verified by that user to ensure quantities and calculations are accurate.PlanSwift cannot verify the accuracy of modifications made to templates, partsand assemblies by the user.FAQQuestion: I’ve read this user guide, and I still have questions. What do I do?Answer: PlanSwift recommends that you purchase a training package. We highlyrecommend new users purchase a training package, because training iscustomized to each user. We offer one-on-one training and classroom training.Contact training@PlanSwift.com or at 1-888-752-6794 Ext. 6.Question: Does the Starter Pack include everything a contractor will need to generatean estimate?Answer: No. A Starter Pack is a tool to get you started toward creating acomplete estimate. For example, the Starter Pack does not include industrypricing for materials and labor. However, you can supply prices for materials andlabor on the assemblies and labor included in the Starter Pack.Question: Do I have to input all the pricing for all my parts?Answer: Inputting pricing is optional. You can use the Starter Pack to generatequantities that you can then send to your supplier, who can then provide youcurrent pricing. Inputting pricing on your own is optional. If your industry’spricing is not subject to frequent changes, you may want to consider inputtingyour pricing in PlanSwift.20
CompendiumElectrical Starter Pack TemplatesElectrical Assemblies21
Electrical Assemblies -- Continued22
Electrical Assemblies -- Continued23
Electrical Assemblies -- Continued24
Electrical Assemblies -- Continued25
Electrical Assemblies -- Continued26
Electrical Assemblies -- Continued27
Electrical Assemblies -- Continued28
Electrical Assemblies -- Continued29
Electrical Assemblies -- Continued30
Electrical Assemblies -- Continued31
Electrical Assemblies -- Continued32
Electrical Assemblies -- Continued33
Electrical Assemblies -- Continued34
Electrical Assemblies -- Continued35
Electrical Assemblies -- Continued36
Electrical Assemblies -- Continued37
Electrical Assemblies -- Continued38
Electrical Assemblies -- Continued39
Electrical Assemblies -- Continued40
Electrical Assemblies -- Continued41
Electrical Assemblies -- Continued42
Electrical Assemblies -- Continued43
Electrical Assemblies -- Continued44
Electrical Assemblies -- Continued45
Electrical Assemblies -- Continued46
Electrical Assemblies -- Continued47
Electrical Assemblies -- Continued48
Electrical Assemblies -- Continued49
Electrical Assemblies -- Continued50
Electrical Parts51
Electrical Parts – Continued52
Electrical Parts – Continued53
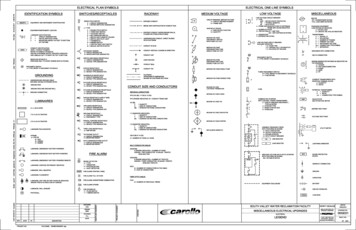
Electrical Symbols54
Electrical Symbols – Continued55
Electrical Symbols – Continued56
Electrical Symbols – Continued57
Electrical Starter Pack ListsBoxes58
Conduit59
Connectors60
CoversFire Alarm61
LightingA/V and Communication62
Motorized and HVACPlaster Rings63
Power DistributionReceptacles64
Switches65
Wire66
Complete Symbol List67
Conduit Fittings68
Oct 26, 2018 · Electrical Starter Pack. It is designed for use with PlanSwift Takeoff and Estimating Software. This guide is not meant to be a step -by-step “walk through” document, although it can be used as a reference for getting the work done. If you encounter technical difficulty, consult this g
