Transcription
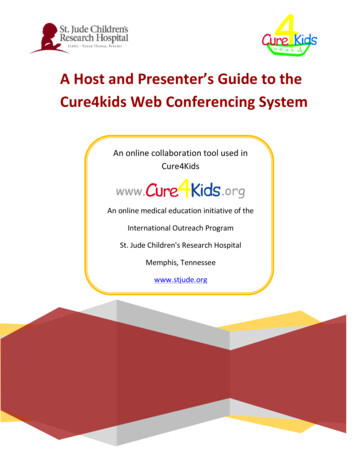
A Host and Presenter’s Guide to theCure4kids Web Conferencing SystemAn online collaboration tool used inCure4KidsAn online medical education initiative of theInternational Outreach ProgramSt. Jude Children's Research HospitalMemphis, Tennesseewww.stjude.org26 August 2009
This document contains instructions for using the Cure4Kids Web conferencing system. Ouronline Web conferencing application is Adobe Connect Pro provided by a third party service.This User’s Guide was updated June 2011 and is intended for users of Cure4Kids.org.If you have questions or need assistance, please contact Cure4Kids Live Events Help at:help@cure4kids.orgTable of ContentsI. Requirements . 4II. Create Meetings . 5III. Inside a Meeting Room. 5IV. Meeting Roles and Permissions . 6A. Host . 7B. Presenter. 7C. Registered Participant or Invited Participants . 7V. Manage Audio within Meetings . 8A. Start Meeting Audio. 8B. Enable Microphone for Participants Using Computers . 8C. Enable audio for specific Participants . 10D. Disable audio for a specific Participant . 10E. Allow Only One Speaker to Use the Microphone at a Time . 11VI. Broadcast Your Voice Using VoIP . 12A. Adjust the Quality of the Audio . 12B. Temporarily stop broadcasting audio . 13C. Adjust or Mute Audio Volume . 14D. Activate the Microphone . 15E. Mute the Microphone . 16VII. View or Change an Attendee’s Role . 17A. Change a Participant’s Role . 17A Host and Presenter’s Guide to the Cure4Kids Web Conferencing SystemLast updated June 20112
B. Automatically Promote Participants to Presenters . 18C. Assign Enhanced Participant Rights . 18D. Remove an Attendee from a Meeting . 20VIII. Chat in Meetings . 21A. Send a Chat Message . 21B. Clear Messages from a Chat Pod . 23IX. Share Your Screen . 24A. Screen Sharing Options. 24B. Content you can Share . 25C. Share Your Screen (Host or Presenter) . 25D. Stop Sharing a Screen . 26E. Give Participants Privileges to Share (Request Screen Share) . 27F. Share Control of Your Screen . 28G. Request Control of a Shared Screen . 28H. Release control of a shared screen . 29I. Change the View of a Shared Screen . 29J. Preview your Shared Screen . 30K. To Share a Presentation or a Document . 31L. Presentation: Advance the Slides. . 33M. Stop Sharing a Presentation . 33N. Turn Off Display Synchronization for Documents . 34X. Video in Meetings . 34A. Enable Webcam . 34B. Share Webcam . . 35C. Stop Webcam . 36XI. Record a Meeting . 37A. Start Recording a Meeting . 37B. Stop Recording a Meeting . 38A Host and Presenter’s Guide to the Cure4Kids Web Conferencing SystemLast updated June 20113
I. RequirementsTo participate in a Cure4Kids Web meeting you must have: Microphone Speakers or headphones properl y plugged in to your computer Browser (Internet Explorer, Firefox, Safari, or Chrome) Flash Player 10 or higher installed Broadband Internet connectionYour capabilities in a meeting depend on your assigned role and permissions.Before the meeting, test your computer connection and software at this /support/meeting test.htmIf your computer passes the first three steps, your system has met the technical requirementsand is ready to join the web conference.Be sure to accept the Adobe Connect Add-in required for the Hosts and Presenters to sharethe screen.If your system does not pass the test, follow the suggestions that are given then perform thetest again by pressing [Test Again].A Host and Presenter’s Guide to the Cure4Kids Web Conferencing SystemLast updated June 20114
II. Create MeetingsCreate the event in your Cure4Kids working group and send the invitation.Please see how to create an event in the Cure4kids Working group guide located in the Grouptab of Cure4Kids.org.III. Inside a Meeting RoomContent in a meeting room is displayed in pods. Pods are panels that contain various types ofmedia such as a list of meeting attendees, notes, live chat, files, and video.A second display area is the Presenter Only area. The Presenter Only area is only visible toHosts and Presenters, not to the Participants.Hosts and Presenters can use the Presenter Only area to prepare content to be shared withParticipants or to view confidential content.PodsA Host and Presenter’s Guide to the Cure4Kids Web Conferencing SystemLast updated June 20115
Meeting options differ for different types of users:The menu bar for Meeting Hosts:The menu bar for meeting Participants and Presenters:IV. Meeting Roles and PermissionsYour role determines your permissions for sharing, broadcasting, and other activities in anAdobe Connect meeting. There are three roles for meeting room attendees: Host, Presenter,and Participant. Icons in the Attendees pod display each person’s role and if they areconnecting from a mobile device.The creator of a meeting is designated Host by default. The Host can specify each attendee’srole, including selecting other attendees to be Hosts for the meeting.A Host and Presenter’s Guide to the Cure4Kids Web Conferencing SystemLast updated June 20116
Permissions for each role are as follows:A. HostHas the most privileges; able to organize and facilitate the meeting.Can change the layout and position of pods.Configures the meeting and invites the members.Add and share the content of the library, e.g. PPT or PPTX files, PDF documents,JPEG images, flash (SWF, FLV), MP3 and MP4.Can promote Participants to Host or Presenter.Starts and stops the broadcasting audio in the meeting room.Records the entire meeting or session.B. PresenterShare some privileges like the Host.Add and share the content of the library, e.g. PPT or PPTX files, PDF documents,JPEG images, flash (SWF, FLV), MP3 and MP4.Share their screen with all attendees, chat, and broadcast live audio and video.Answer questions in the Questions pod or Chat pod.Mute and un-mute audio broadcasts on their computer. Presenters cannot mute themeeting for other attendees.C. Registered Participantor Invited ParticipantsView the content that the Presenter is sharing.Hear and see the Presenter’s audio and video broadcast.Use text chat.Mute and un-mute audio broadcasts on their computer. They cannot mute otherparticipants’ computers.A Host and Presenter’s Guide to the Cure4Kids Web Conferencing SystemLast updated June 20117
V. Manage Audio within MeetingsA. Start Meeting AudioFrom the Audio menu, choose Start Meeting AudioB. Enable Microphone for Participants Using ComputersBy default, only Hosts and Presenters can broadcast audio using their microphones.However, Hosts can enable Participants to broadcast audio by doing any of the following:1. To enable audio for all Participants, choose Audio Microphone Rights ForParticipants. Theicon displays for all Participants in the Attendees pod.2. Specify how you want the attendees to join the audio conference during the meeting.You can specify one or more of the following:By Computer Speakers and MicrophoneChoose this option if you want attendees to join the audio conference using theircomputer speaker and microphone (VoIP).All users can hear the meeting audio using their computer speakers.To enable Participants to speak, select Enable Microphone Rights forParticipants.A Host and Presenter’s Guide to the Cure4Kids Web Conferencing SystemLast updated June 20118
By PhoneChoose this option if you want attendees to join the audio conference viatelephone.Users can dial in to the audio conference or receive a call from the meeting.To allow attendees who are using computer audio to interact with attendees usingphone audio, select Start Broadcasting Telephony.3. Click Start.A Host and Presenter’s Guide to the Cure4Kids Web Conferencing SystemLast updated June 20119
C. Enable audio for specific ParticipantsSelect one or more Participants in the Attendees pod. Then choose any of the following fromthe pop-up menu:Enable AudioMake HostMake PresenterWhen audio is enabled, theicon displays next to the Participant in the Attendees pod.D. Disable audio for a specific ParticipantUsing the same pop-up menu, Hosts can later disable audio for specific attendees to reducebackground noise.Select one or more Participants in the Attendees pod. Then choose any of the followingfrom the pop-up menu:Disable AudioA Host and Presenter’s Guide to the Cure4Kids Web Conferencing SystemLast updated June 201110
E. Allow Only One Speaker to Use the Microphone at a TimeFor the Host to prevent overlapping conversations among Participants:Choose Audio Enable Single Speaker Mode.In Single Speaker Mode, an asterisk will appear next to the microphone iconmenu bar.in the topWhen one speaker clicks their microphone icon, speaking is automatically disabled for otherusers until the current speaker clicks theicon again. This will give an opportunity forothers to speak.A Host and Presenter’s Guide to the Cure4Kids Web Conferencing SystemLast updated June 201111
VI. Broadcast Your Voice Using VoIPAllow Participants to communicate via microphone and the speakers connected to theircomputers.A. Adjust the Quality of the AudioOptimize your audio with the Audio Setup Wizard, located under the Meeting button on thetop menu.1. Select Meeting Audio Setup Wizard.2. First choose Install the Add-in then click the Audio Setup Wizard again to adjustthe audio.A Host and Presenter’s Guide to the Cure4Kids Web Conferencing SystemLast updated June 201112
3. The Wizard will guide you through four steps to test your speakers, select yourmicrophone, and optimize the audio.If this is your first time using Adobe Connect or you are on a new computer, you mayreceive a Flash Player Settings window. Click [Allow] to access webcam andmicrophone.B. Temporarily stop broadcasting audioDuring longer meeting breaks, Hosts may want to stop broadcasting audio. To stopbroadcasting audio:1. Choose Audio Stop Meeting Audio.To resume, choose Audio Start Audio Broadcast.Note: Hosts can stop a broadcast for all attendees, but not for a specific Participant.A Host and Presenter’s Guide to the Cure4Kids Web Conferencing SystemLast updated June 201113
C. Adjust or Mute Audio VolumeEach Participant can customize audio volume on their system.In the top menu bar, select any of the following from the speakermenu:Mute My SpeakersEntirely disables or enables audio. Click the speaker icon to quickly toggle thisoption.Mute Conference Audio OnlyMutes all audio except the audio playing in the Share and Video Telephony pods.Adjust Speaker VolumeDisplays a slider that attendees can drag to customize their volume.A Host and Presenter’s Guide to the Cure4Kids Web Conferencing SystemLast updated June 201114
D. Activate the Microphone1. Click the microphone button in the top menu bar.If you receive a Flash Player Settings window, click [Allow] to access the microphone.Note that the microphone button changes to green color when your microphone is active.As you speak, sound waves appear in the button icon to indicate audio level.2. (Recommendation) To the right of the microphone button, click the menu buttonand choose Adjust Mic Volume if you are too loud or soft.When an attendee is broadcasting audio, the microphone iconname in the Attendees pod.,is displayed next to theirA Host and Presenter’s Guide to the Cure4Kids Web Conferencing SystemLast updated June 201115
E. Mute the MicrophoneA Host or the Presenter may ask the Participants to mute their microphone.Click the microphone button once to mute or click the down arrowand select Mute myMicrophone. Muting is necessary when there is background noise, talking on the phone,coughing, etc.The button now appears like thiswhen the microphone is muted.A Host and Presenter’s Guide to the Cure4Kids Web Conferencing SystemLast updated June 201116
VII. View or Change an Attendee’s RoleA Host can change the role of any Participant in the Attendees pod by adding or removingpermissions as needed.About attendee namesWithin a group of Hosts, Presenters, and Participants, all attendee names are organizedalphabetically with icons next to their names that indicate their role in the meeting.A. Change a Participant’s RoleAs a Host, you can remove your own permissions to demote yourself to a Presenter orParticipant. When you demote yourself, participants with other roles will see a change in howthe meeting room is displayed.To change permissions and a Participant role in the meeting:In the Attendees pod, select one or more Participants (Shift-click to select multiple names).Do either of the following:ooClick and drag the participants name to a different role.Hover over the participants name and when the pop-up menu displays, selectMake Host, Presenter, or Participant.Drag Participants to differentroles.A Host and Presenter’s Guide to the Cure4Kids Web Conferencing SystemLast updated June 201117
B. Automatically Promote Participants to PresentersIf all Participants in a meeting will be presenting, promote all of them to presenter byclicking the following:Choose Meeting Manage Access & Entry Auto-Promote Participants to Presenters.C. Assign Enhanced Participant RightsHosts can change the rights of Participants to give them control over selected pods.This enhances a Participant’s rights without promoting the Participant to the Presenter orHost role.1. In the Attendees pod, select the name of one or more Participants.2. In the upper-right corner of the pod, click the menu iconA Host and Presenter’s Guide to the Cure4Kids Web Conferencing SystemLast updated June 2011.18
3. Select Attendee Options Enhanced Participant Rights.4. In the dialog box, select the pods that you want the Participant to control.A Host and Presenter’s Guide to the Cure4Kids Web Conferencing SystemLast updated June 201119
D. Remove an Attendee from a MeetingIn some occasions there are administrative meetings that areconfidential/private. In case there is a participant in the room that was notinvited to be at the meeting, you may ask him/her nicel y to leave. If noresponse, then do the following:1. In the Attendees pod, select the attendees you want to remove.2. In the upper-right corner of the pod, click the menu icon.3. Select Remove Selected User.A Host and Presenter’s Guide to the Cure4Kids Web Conferencing SystemLast updated June 201120
VIII. Chat in MeetingsUse the Chat pod to communicate with other participants during a meeting.If you have a question and do not want to disturb the meeting flow, you can send a chatmessage to another meeting participant.As a Presenter, you can use more than one Chat pod simultaneously.Chat pods can display content to either everyone or only Presenters. To only display to aPresenter, chat in the Presenter Only area.A. Send a Chat MessageUse the Chat pod to compose a chat message and address it to a specific Participant, to allPresenters at the meeting, or to all Participants.1. By default, everyone will see your chat message. To limit the recipients of yourmessage, click the menu icon in the upper-right corner of the Chat pod. ChooseStart Chat With, and then select the names of Hosts, Presenters, or specificParticipant.Type yourmessagehereClick here tosend themessageA Host and Presenter’s Guide to the Cure4Kids Web Conferencing SystemLast updated June 201121
2. Click the text box in the Chat pod.3. Enter your message.4. Then either click Send Messageto the right of the text box or press Enter orReturn to display your chat message in the Chat pod.Your name, the addressee name, and your message appear in the Chat pod.A Host and Presenter’s Guide to the Cure4Kids Web Conferencing SystemLast updated June 201122
B. Clear Messages from a Chat PodWhen an empty Chat pod is required in a meeting, a Host or Presenter can clear all messagesfor all attendees:In the upper-right corner of the Chat pod, click the menu icon.Select Clear Chat.A Host and Presenter’s Guide to the Cure4Kids Web Conferencing SystemLast updated June 201123
IX. Share Your ScreenHost or Presenters can share windows, applications, or their entire desktop to all participantsduring a meeting.When you share anything on your computer screen, actions you take in the shared region arevisible to all Participants in the meeting.Participants follow the progress of your cursor as you move it across your screen.Tip: Hosts can show their cursors without sharing their screens. Choose Meeting Preferences, and select a Host Cursors option.The region or regions that you share must be visible on your desktop to be visible in theShare pod to other Participants. Overlapping windows on the desktop appear as a bluecrosshatched pattern in the Share pod.A. Screen Sharing OptionsDesktop Sharing (or Secure Desktop Sharing)Shares the contents of your desktop.If you have more than one monitor connected to your computer, a desktop appearsfor each monitor.Choose the desktop that you want to share.The Desktop option allows you to share authorized contents on your desktop.Windows SharingShares one or more authorized windows that are open and running on yourcomputer.Choose the window or windows that you want to share.Applications SharingShares an authorized application and all its related windows that are open andrunning on your computer.Choose the application or applications that you want to share.A Host and Presenter’s Guide to the Cure4Kids Web Conferencing SystemLast updated June 201124
B. Content you can ShareSelected items on your computer screen, including one or more open windows, one ormore open applications, or the entire desktop.A document, such as a presentation, Adobe PDF file, FLV file, a JPEG, or other fileformat.A whiteboard with a variety of writing and drawing tools. You can share a stand-alonewhiteboard, or a whiteboard overlay that appears on top of other shared content.Except for PDFs, all documents shared in the Share pod can be viewed but not downloadedby attendees. To enable attendees to download non-PDF documents, a host or presenter mustinstead use the File Share pod.C. Share Your Screen (Host or Presenter)When you share your screen a pod will open for all meeting participants to see.1. Do one of the following to open a Share pod:Choose Layouts Sharing.Choose Pods Share Add New Share.2. Click the pop-up menu in the center of the Share pod, and select Share MyScreen.Note: If the Share Pod is empty, then your permissions are only set to Participantand you do not have permission to share.A Host and Presenter’s Guide to the Cure4Kids Web Conferencing SystemLast updated June 201125
3. Chose the options to share: Desktop, Windows, or Application.Check the window application to share, and then click the Share button.Chose theoption toshare, thenclick onShareD. Stop Sharing a ScreenTo stop Sharing, just click in Stop Sharing in the Adobe Connect pod sharingA Host and Presenter’s Guide to the Cure4Kids Web Conferencing SystemLast updated June 201126
E. Give Participants Privileges to Share (Request Screen Share)Select the name of the Participant from the list in the Assistants pod. A pop-up window willappear. Select Request Screen Share.An alert will display on the Participant’s screen that says “Begin Sharing Desktop?”.The Participant will then need to click Start and choose a sharing option: Windows, Screen,or Application.A Host and Presenter’s Guide to the Cure4Kids Web Conferencing SystemLast updated June 201127
F. Share Control of Your ScreenWhile screen sharing, you can pass control of the shared desktop, window, or application toanother Host or Presenter. To share control:1. Start sharing your screen.2. A Host or Presenter can click Request Control on the top title bar of the Sharepod.3. You will see a request message in the upper-right corner of the meeting roomwindow. Select either:ooAccept to grant control of your screen.Decline to deny control of your screen.G. Request Control of a Shared ScreenHosts and Presenters can request control of the screen, but the request must be granted.Control cannot be taken without permission.Click the Request Control on the top title bar of the Share pod.If the request is accepted, a message informs you that you have been granted control of theshared screen. You can now take control of the shared screen. Click OKThe Request Control button will change to a Release Control button.A Host and Presenter’s Guide to the Cure4Kids Web Conferencing SystemLast updated June 201128
H. Release control of a shared screenTo stop controlling the shared screen, click the Release Control button in the Share podcontrol menu or in the notification window. This returns control of the shared screen to theoriginal Host or Presenter.I. Change the View of a Shared ScreenIf you are viewing a screen shared by another Presenter, you can scale the screen to fitentirely within the Share pod or zoom in for a clearer image.In the upper-right corner of the Share pod, click thethen select either Scale To Fit or Zoom In.button; choose Change View, andA Host and Presenter’s Guide to the Cure4Kids Web Conferencing SystemLast updated June 201129
J. Preview your Shared ScreenTo ensure you are sharing your window, application, or desktop clearly to the meetingParticipants, a preview window displays while you are sharing so you may view exactlywhat the other Participants see in their Share pod.To see the preview window, click the menu iconupper-right corner of the Share pod., and select Preview Screen in theA Host and Presenter’s Guide to the Cure4Kids Web Conferencing SystemLast updated June 201130
K. To Share a Presentation or a DocumentAs a Host or Presenter, you can share the following file types from the Content Library oryour computer: PPT, PPTX, Adobe PDF, SWF, FLV, JPEG, and MP3.The Content library is where all presentations or files are saved in the Adobe Connect server.1. Click on Share Document.A Host and Presenter’s Guide to the Cure4Kids Web Conferencing SystemLast updated June 201131
2. A window appears that displays “Select Document to Share.”Click on Browse my Computer and find your saved presentation, document, or fileon your computer.Select the file and click Open, then OK at the Select Document to Share window.A Host and Presenter’s Guide to the Cure4Kids Web Conferencing SystemLast updated June 201132
L. Presentation: Advance the Slides.To advance the slides or to go to a previous slide, click the left or right arrows.M. Stop Sharing a PresentationTo stop sharing, select Stop Sharing.A Host and Presenter’s Guide to the Cure4Kids Web Conferencing SystemLast updated June 201133
N. Turn Off Display Synchronization for DocumentsBy default, Adobe Connect synchronizes shared documents so that Participants see the framethat the Presenter sees. A Host or Presenter can select Sync to turn off synchronization andallow Participants to move through presentations or documents at their own pace.To turn off synchronization:Controls for presentation playback appear at the bottom of the Share pod.With content loaded in the Share pod, select Sync in the lower-right corner to disablesynchronization.X. Video in MeetingsBy default, only Hosts and Presenters can broadcast video. However, Hosts can enableParticipants to broadcast.A. Enable Webcam1. To enable video for all Participants, click the menu button to the right of the videowebcam button, and choose Enable Video for Participants.2. To enable video for specific Participants, select one or more names in the Attendees pod.Then choose any of the following from the pop-up menu: Enable Video, Make Host, orMake Presenter.A Host and Presenter’s Guide to the Cure4Kids Web Conferencing SystemLast updated June 201134
B. Share Webcam VideoHosts, Presenters, and Participants with webcam video permissions can simultaneously sharevideo from webcams connected to their computers.If you have rights to share the webcam, you will see the webcam icon in the top menu bar.1. Click Start My Webcam in the top menu bar or Video podIn the Video pod, a preview image appears so you can adjust camera position. If youwant to use a different connected camera, select it from the Video pod menu .2. Click Start Sharing to broadcast your video to all Participants.A Host and Presenter’s Guide to the Cure4Kids Web Conferencing SystemLast updated June 201135
C. Stop Webcam1. To pause or stop video, hover the mouse over the Video pod, and click the Pause orStop icons.Click here to stopwebcamClick here toPauseWhen video is paused, the last image broadcast from your camera remains static in theVideo pod until you click Play to resume broadcasting.When video is stopped, the broadcast image disappears entirely.Note: Hosts can pause or stop any participant video at any time during the meeting.2. Another option to stop sharing your webcam is to sel
Adobe Connect meeting. There are three roles for meeting room attendees: Host, Presenter, and Participant. Icons in the Attendees pod display each person's role and if they are connecting from a mobile device. The creator of a meeting is designated Host by default. The Host can specify each attendee's


