Transcription
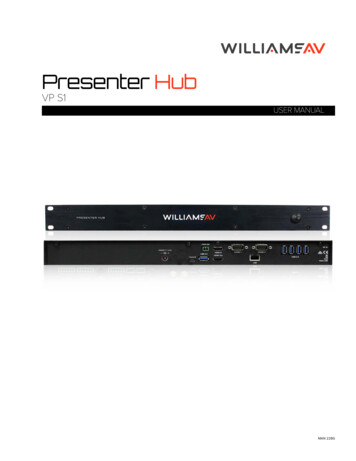
Audio Presenter HUBAudio and Presentation SystemUSER MANUALMAN 232F
Audio Presenter HubTable of ContentsSafety Warnings and Instructions. 6Maintenance and Recycling Instructions.7Overview.8Introduction . 8This Manual. 8Presentation System. 8Save, Print, and Share Images. 8Annotation. 8Audio.10HD Bluetooth .10Features.10General Installation.11Controller.11Bluetooth Wireless Access Point (B-WAP).11Connecting the Video Source and Outputs.12Connecting Devices.12Power On.13Audio Connections.14Line Level Source (Phoenix style connectors).14Connecting Speakers.15Bluetooth Audio.15Dante Devices.15Controllers/Markers Overview.16Remote Controllers. 17App for Phones and Tablets. 17From Your Browser.18Toolbar.18Clear All Marking.18Erase Tool.18Drawing Tools.18Line Size.18Line Color .18White Board.19HDMI.19USB Camera.19Streaming Input.19Previous Slide.192
Audio Presenter HubNext Slide.19Record.19Menu System.19Overview.19Using the Menu System. 20Menu Basics. 20Menu Conventions. 20Making menu selections.21Setting Default User Settings.21System Information.21System Info.21Scheduling Restarts.22Detecting and Assigning Devices.22Serial Port Settings.22Manual Serial Port Assignment.23Viewing a USB Device Type.24Manually Assigning a USB Device. 26Integrating the Audio Presenter HUB with Other Systems. 26Setting COMM Port Parameters. 27Preparing Video Sources and Outputs.27Setting Video Output. 27EDID. 28Video Source Options. 28Default Video Source. 29Picture-In-Picture (PIP) Setup. 29Networking (TCP/IP, TFTP, SMB). 30Network Setup. 30Configure TFTP Settings.31Configure Windows Share (SMB) Settings.32Security PIN.33Bluetooth Features.33Connecting your Personal Device.34Disconnecting your Personal Device.34Streaming Content.34Airplay from IOS Devices.34Using Chromecast from a Google Chrome Web Browser:.34Streaming to Meeting Software or Screen Sharing Tools.35Calibrating and Configuring Touch Screens.35Calibrating Touch Screen Controllers.353
Audio Presenter HubTouch Screen Command Areas.39Customizing Markers and Pointers. 40Customizing the Color Palette.40Selecting Colors for a Presentation.40Selecting a Brightness Level.41Zap Icon Toggle.42Using Markers.42Overview.42Assigning Marker Colors.42Entering the Marking Mode.44Drawing.44Selecting Pointers.44Creating a Pointer.45Turning the Active Pointer On/Off.45Typing Text Labels.46Displaying the Date/Time.46Clearing All Markers.46Undoing a Marker. 47Erasing Markers. 47Using The Chalkboard.48Saving and Storing Images.48Overview.48Capture Options.49Freezing Video. 50Setting the Destination for Saved Files. 50Setting the Verify Option. 50Saving Images. 50Retrieving Images.51Printing Images.52Printer Setup.52Print an image.53Verifying Saved or Printed Images.53Updating the Audio Presenter HUB. 53Adjusting Settings from the Browser.54Streaming Menu.54Audio Menu.55Network Settings. 56Printer Settings. 56Image File. 574
Audio Presenter HubVideo Menu. 57System Settings. 58Connecting Personal Devices. 58Glossary. 58Troubleshooting Guide.61Appendix.62Quick Reference for Keyboard.62Quick Reference for Touch Screens and Whiteboards.64Symbol Font Chart.65Map Font Chart. 66RS-232 (COMM Port) Pinout and Commands. 67Alternative Designs. 67Outside copyright information for software included with the Audio Presenter HUB. 67Specifications.74Regulatory Statements.74United States - FCC. 74Canada IC. 74Japanese Regulatory Standards.74Limited Warranty.755
Audio Presenter HubSafety Warnings and InstructionsWARNING!TO REDUCE THE RISK OF FIRE OR ELECTRIC SHOCK, DO NOT EXPOSE THIS APPLIANCE TO RAIN ORMOISTURE.CAUTION!TO REDUCE THE RISK OF ELECTRIC SHOCK, DO NOT REMOVE COVER. NO USER-SERVICEABLE PARTS INSIDE.REFER SERVICING TO QUALIFIED SERVICE PERSONNEL.POWER CORD NOTICE FOR INTERNATIONAL OPERATION - Please call Williams AV Customer Service at 800.328.6190to order the appropriate power cord for the country of use.Important Safety Instructions:1. Read these instructions2. Keep these instructions3. Heed all warnings4. Follow all instructions5. Do not use this apparatus near water.6. Clean only with dry cloth.7. Do not block any ventilation openings. Install in accordance with the manufacturer’s instructions.8. Do not install near any heat sources such as radiators, heat registers, stoves, or other apparatus (includingamplifiers) that produce heat.9. Do not defeat the safety purpose of the polarized or grounding-type plug. A polarized plug has two blades withone wider than the other. A grounding type plug has two blades and a third grounding prong. The wide blade orthe third prong is provided for your safety. If the provided plug does not fit into your outlet, consult an electricianfor replacement of the obsolete outlet.10. Protect the power cord from being walked on or pinched particularly at plugs, convenience receptacles, and thepoint where they exit from the apparatus.11. Only use attachments/accessories specified by the manufacturer.12. Unplug this apparatus during lightning storms or when unused for long periods of time.13. Refer all servicing to qualified service personnel.14. The apparatus shall not be exposed to liquids.15. Carts and Stands - The appliance should be used only with a cart or stand that is recommended by themanufacturer. An appliance and cart combination should be moved with care. Quick stops, excessive force anduneven surfaces may cause the appliance and cart combination to overturn.16. Power Sources - The appliance should be connected to a power supply only of the type described in theoperating instructions or as marked on the appliance.17. Object and Liquid Entry - Care should be taken so that objects do not fall and liquids are not spilled into theenclosure through the openings.18. Servicing - The user should not attempt to service the appliance beyond that described in the operatinginstructions. All other servicing should be referred to qualified service personnel.6
Audio Presenter HubPrecautions:1. Power – WARNING, BEFORE TURNING ON THE POWER FOR THE FIRST TIME, READ THE FOLLOWING SECTIONCAREFULLY. The unit is designed for use only with the line cord of the region in which it will be operated.2. Voltage Label (Rear Panel) – A label located at the rear panel power connection indicates the DC power input forthe unit. The label will read 24VDC. Note: use the Williams AV TFP 059 power supply for this unit.3. Do Not Plug in the HDMI input, output, Comm 1, Comm 2, Ethernet, or USB connections while the power switch isswitched to the ON position.4. Do Not Touch any part of the Audio Presenter HUB with wet hands. Do not handle any part of system, includingthe power cord, when your hands are wet or damp. If water or any other liquid enters the Audio Presenter HUB orAudio Presenter HUB ‘s location, take the device to qualified service personnel for inspection.5. Place all components of the Audio Presenter HUB in a well ventilated location. Take special care to provideplenty of ventilation on all sides of the system components, especially when it is placed in a small location, suchas a rack. If ventilation is blocked, the system may over heat and malfunction.6. Do not expose the Audio Presenter HUB to direct sun light or heating units as the system’s internal componentstemperature may rise and shorten the life of the components. Avoid damp and dusty places.7. Care – From time to time you should wipe off the front and side panels and the cabinet with a soft cloth. Do notuse rough material, thinners, alcohol or other chemical solvents or cloths since this may damage the finish orremove the panel graphics.Maintenance and Recycling InstructionsHelp Williams AV protect the environment. Please take the time to dispose of your equipment properly.Product Recycling:Please do NOT dispose of your equipment in the household trash. Take the equipment to a electronicsrecycling center.Servicing or attempting to service this device will void the warrantyRefer servicing to qualified personnel. Servicing is required when the system has been damaged in any way: if liquidhas been spilled or objects have fallen into the unit, if the unit has been exposed to moisture, if the unit does notoperate normally, or if the unit has been dropped.Do not block any ventilation openings. Install in accordance with manufacturer’s instructions.Do not install near any heat sources such as radiators, heat registers, stoves, or other apparatus that produces heat.Use only attachments/accessories specified by the manufacturer.Unplug the transmitter during lightning storms or when unused for long periods of time.Be advised that different operating voltages require the use of different types of line cord and attachment plugs.Check the voltage in your area and use the correct type.Use only the power supply provided by Williams AV. Other power supplies may have similar specifications, butmay not be equivalent in emissions ratings, in-rush current, etc. Use of an unapproved power supply may leave thedevice partially or completely inoperable, and will void the warranty.This apparatus has been designed with class-1 construction and must be connected to a main socket outlet with aprotective ground connection (the third grounding prong).Protect the power cord from being walked on or pinched, particularly at plugs, receptacles, and near the power jackon the transmitter.The MAINS plug or an appliance coupler is used as the disconnect device, so the disconnect device should remainreadily operable.7
Audio Presenter HubOverviewIntroductionThe Audio Presenter HUB (VP S2) is a professional, hardware-based video processor, designed so that users candisplay and share content from an smartphone or tablet, as well as from multiple video and computer sourcesconnected directly to the Audio Presenter HUB. This model also has the ability to change settings, switch videosources, and annotate from remote computers, tablets, and smartphones.This ManualThis manual provides instructions for configuring your Audio Presenter HUB, using the built in system menu, creatingannotations, providing video
an Apple app, an Android app, a browser interface, and a touch screen GUI from the Audio Presenter HUB itself. It is also possible to control Audio Presenter HUB with Crestron, or AMX type room control system. All of the Audio Presenter HUB user interfaces have the same look and feel. Whether you are using your PC, iPhone or other device,