Transcription
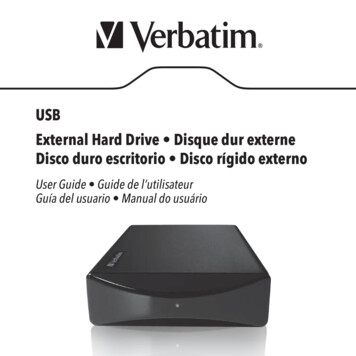
USBExternal Hard Drive Disque dur externeDisco duro escritorio Disco rígido externoUser Guide Guide de l’utilisateurGuía del usuario Manual do usuário
ContentsIntroduction. 2Controls, Connectors and Indicators. 2Front Panel Area. 2Rear Panel Area. 2About the Hard Drive. . 3Locating the Drive on Your Desk. 4Nero BackItUp Software. . 4Connecting To Your Computer. 4Disconnecting Your Hard Drive. 5For Windows Users. 5For Mac OS Users. 5Getting Help. 6Limited Warranty Terms. . 6Rights. 9FCC Compliance. 9
IndiceIntroduction. 10Contrôles, connecteurs et indicateurs. 10Section du panneau avant. 10Section du panneau arrière. . 10Quelques mots sur le disque dur. 11Trouver le périphérique sur votre bureau. 12Logiciel Nero BackItUp. 12Brancher le périphérique. 12Débrancher le périphérique. 13Pour les utilisateurs Windows. 13Pour les utilisateurs Mac OS. . 14Aide. . 14Conditions de garantie limitée. 15Droits. . 17Conformité FCC. 17
ÍndiceIntroducción. . 18Controles, conectores e indicadores. 18Área del panel frontal. 18Área del panel trasero. 18Acerca del disco duro. 19Ubicación de la unidad Drive en su escritorio. 20Software Nero BackItUp. . 20Conexión de disco duro. 20Desconexión de disco duro. . 21Para usuarios de Windows. 21Para usuarios de Mac OS. 22Ayuda. . 22Términos de la garantía limitada. 22Derechos. 25Cumplimiento de FCC. 25
ÍndiceIntrodução. . 26Controles, conectores e indicadores. 26Área do painel frontal. 26Área do painel traseiro. 26Sobre o disco rígido. 27Posicionamento do drive sobre a mesa. . 28Software Nero BackItUp. . 28Conexão disco. 28Desconexão do disco. 29Para usuários do Windows. . 29Para usuários do Mac OS. 30Ajuda. 30Termos da garantia limitada. 30Direitos. 33Conformidade com a FCC. 33
IntroductionBefore you begin to use the drive there are a few important things to learn about your newproduct.Controls, Connectors and IndicatorsFirst familiarize yourself with the features of the unit.Front Panel AreaThe front panel contains only the Activating LED, as illustrated below. The green LED willcome on to indicate the power-on state. The LED will flash during data access.Rear Panel AreaAlong the rear panel you will find the ON/OFF button and the interface connectors. Referto the figure below.1. ON/OFF button. Once the AC Adapter has been properly connected to the driveand an AC outlet, you can press the ON/OFF button to power on the drive. To turn off2
123the drive, press the ON/OFF button again.2. DC Input Connector. Connect the DC cable of your included AC Adapter to the DCInput Connector.3. USB Connector. Use this connector to attach the drive to your computer via USB.About the Hard DriveThe hard drive comes pre-formatted in FAT32 format. This format allows for operation witheither Windows or Mac OS.Note: Capacity dependent on model. 1 MB 1,000,000 bytes/1 GB 1,000,000,000bytes/1 TB 1,000,000,000,000 bytes. Some capacity used for pre-loaded software,formatting and other functions, and thus is not available for data storage. As a result,and due to differing calculation methods, your operating systems may report as fewermegabytes/gigabytes/terabytes.3
Locating the Drive on Your DeskPlace the drive on a sturdy desk or table that is free from clutter that could block airflowaround the unit. The drive is designed to lie flat on its rubber feet, or may stand upright. Ineither orientation take care not to block any air vents.Nero BackItUp SoftwareNero BackItUp back up software is included on the hard drive. Double click the Nero folderon the drive and then double click the setupx file to start installation. The Nero Installationwindow will appear. Follow the set up wizard to install the software.Connecting To Your ComputerConnecting your drive to a computer is extremely simple. Follow the steps below.1. Connect the included AC Adapter to the drive, and then to a wall outlet.2. Next press the ON/OFF button on the back of the drive.3. Finally, connect the data cable. Connect the included USB cable from the USB port onthe drive to an available USB port on your computer.4. The hard drive will mount automatically, and a new icon will appear in My Computer(Windows) or a new icon will appear on the desktop (Mac).If you are using a USB 1.1 port on your Windows computer, the following cautionary notemay appear on your display: Hi-Speed USB Device plugged into non-Hi-Speed USB hub.This does not indicate a problem because the drive is compatible with both USB 1.1 andUSB 2.0 ports. Simply close the message and proceed. However, in this case the drive willoperate only at USB 1.1 speeds.4
Disconnecting Your Hard DriveYour external hard drive is hot-swappable. It can be connected and disconnected withoutrestarting your computer. To disconnect your drive at any time, perform the following steps.You can also disconnect your hard drive at any time while your computer is powered off.Note: Please be careful to follow the correct procedure when disconnectingyour unit. Simply unplugging the unit without first following the instructionsbelow may result in damage to your unit and/or loss of data.For Windows Users:1. If you have files located on your drive open in any applications, close them.2. Click the Unplug or Eject Hardware button in the System Tray.3. Select your drive from the menu that appears.4. After a moment, Windows will display a message that your hardware can be safelyremoved.For Mac OS Users:1. If you have files located on your drive open in any applications, close them.2. Locate the icon for your drive on the desktop, and drag it to the trash.5
Getting HelpIf you are experiencing difficulty installing or using your Verbatim product, please visit themain Technical Support website at www.verbatim.com/support.Limited Warranty TermsThe Verbatim Americas, LLC warranty obligations for this hardware product are limited tothe terms set forth below:Verbatim warrants its products to be free of defects in material and workmanship undernormal use and service for a period of 3 years from the date of purchase. Verbatim’s soleobligation with respect to claims of non-conformance made within the warranty perioddescribed above shall be, at its option, to repair or replace any item of Equipment thatVerbatim, in its sole discretion, determines to be defective, subject to the procedure setforth below.Verbatim’s warranty obligations hereunder are expressly conditioned upon (i.) theProducts being properly installed, used and maintained at all times by Customer;(ii.) the Products not being subject to unusual mechanical stress or unusual electrical orenvironmental conditions or other acts of God; (iii.) the Products not being subjected tomisuse, accident or any unauthorized installation/deinstallation by Customer or other thirdparty; (iv.) the Products not being altered or modified in an unauthorized manner, unlessapproved in writing or otherwise performed by Verbatim and (v.) Customer promptlyinstalling all Product revisions that have been released for such Products by Verbatimthroughout the warranty term. Verbatim does not warrant that the Products will operate inany specific combination that may be selected for use by Customer or that the operationof the Products will be uninterrupted or error free, or that all non-conformance or defects6
will be remedied. Additionally, Verbatim shall have no warranty obligations for any failureof the Products to conform to the applicable product specifications resulting from thecombination of any Product(s) with hardware and/or software not supplied by Verbatim.If it is determined that any Product(s) reported as defective or non-conforming byCustomer during the warranty period is not defective or non-conforming, Verbatim may, atits option, charge Customer for any labor provided and expenses incurred by Verbatim inconnection with such determination, at Verbatim’s then current rates.Verbatim is not liable for any damage to or loss of any programs, data, or other informationstored on any media contained within the Verbatim hardware product, or any nonVerbatim product or part not covered by this warranty. Recovery or reinstallation ofprograms, data or other information is not covered under this Limited Warranty.Verbatim shall not be responsible for unauthorized sale or misrepresentation byunauthorized third party resellers. Verbatim warranties are not transferable withownership. Products purchased by auction, yard sale, flea market or purchased as demounits may not be covered under Verbatim’s warranty.THE WARRANTIES OF VERBATIM AND REMEDIES OF CUSTOMER SET FORTH INTHIS SECTION ARE EXCLUSIVE AND ARE GIVEN BY VERBATIM AND ACCEPTED BYCUSTOMER IN LIEU OF ANY AND ALL OTHER WARRANTIES, WHETHER EXPRESSED ORIMPLIED, INCLUDING WITHOUT LIMITATION, ALL WARRANTIES OF MERCHANTABILITYAND FITNESS FOR A PARTICULAR PURPOSE, ALL SUCH OTHER WARRANTIES BEINGHEREBY EXPRESSLY AND UNEQUIVOCALLY DISCLAIMED BY VERBATIM AND WAIVED BYCUSTOMER TO THE EXTENT ALLOWED BY LAW (AND TO THE EXTENT NOT WAIVABLEBY LAW, ARE LIMITED TO THE TERM OF THE EXPRESS WARRANTY SET FORTH HEREIN).VERBATIM IS NOT RESPONSIBLE FOR DIRECT, SPECIAL, INCIDENTAL ORCONSEQUENTIAL DAMAGES RESULTING FROM ANY BREACH OF WARRANTY ORCONDITION, INCLUDING ANY COSTS OF RECOVERING OR REPRODUCING ANY7
PROGRAM OR DATA STORED IN OR USED WITH THE VERBATIM PRODUCT. VERBATIMSPECIFICALLY DOES NOT REPRESENT THAT IT WILL BE ABLE TO REPAIR ANY PRODUCTUNDER THIS LIMITED WARRANTY OR MAKE A PRODUCT EXCHANGE WITHOUT RISKTO OR LOSS OF PROGRAMS OR DATA. THIS WARRANTY GIVES YOU SPECIFIC LEGALRIGHTS, AND YOU MAY ALSO HAVE OTHER RIGHTS WHICH VARY FROM STATE TOSTATE. FOR EXAMPLE, SOME STATES DO NOT ALLOW LIMITATIONS ON HOW LONG ANIMPLIED WARRANTY LASTS, OR THE EXCLUSION OR LIMITATION OF INCIDENTAL ORCONSEQUENTIAL DAMAGES, SO THESE RESTRICTIONS MAY NOT APPLY TO YOU.Return Procedure:The Customer shall obtain a Return Merchandise Authorization (RMA) number fromVerbatim prior to returning any Equipment to Verbatim under this warranty by contactingTechnical Support (see www.verbatim.com/support). The Customer shall prepay shippingcharges for Equipment returned to Verbatim for warranty service, and Verbatim shallpay freight charges for the return of the Equipment to the Customer, excluding customsduties or taxes, if any. All returns require a dated original proof of purchase and aletter explaining the problem. Before you deliver your product for warranty service itis your responsibility to backup all data, including all software programs. You will beresponsible for reinstalling all data. Data recovery is not included in the warranty serviceand Verbatim is not responsible for data that may be lost or damaged during transit or arepair. Verbatim will not be responsible for items returned without an RMA or improperlypackaged. Replacement Equipment shall be new or like new in performance and shallbe warranted for the remaining duration of the warranty term of the non-conformingEquipment. All replaced Equipment shall become the property of Verbatim. Any claims ofdefects not made within the warranty period shall be deemed waived by Customer.8
RightsCopyright 2009 Verbatim Americas, LLC. All rights reserved. All other brands andproduct names referenced herein are property of their respective owners.FCC ComplianceThis equipment has been tested and found to comply with the limits for a ClassB digital device, pursuant to Part 15 of the FCC Rules. These limits are designedto provide reasonable protection against harmful interference in a residentialinstallation. This equipment generates, uses and can radiate radio frequencyenergy and, if not installed and used in accordance with the instructions, may causeharmful interference to radio communications. However, there is no guarantee thatinterference will not occur in a particular installation. If this equipment does causeharmful interference to radio or television reception, which can be determinedby turning the equipment off and on, the user is encouraged to try to correct theinterference by one or more of the following measures: Reorient or relocate the receiving antenna. Increase the separation between the equipment and receiver. Connect the equipment into an outlet on a circuit different from thatto which the receiver is connected. Consult the dealer or an experienced radio/TV technician for help.9
IntroductionAvant de commencer à utiliser le périphérique, vous devez apprendre certains élémentsimportants au sujet de votre nouveau produit.Contrôles, connecteurs et indicateursFamiliarisez-vous d’abord avec les fonctions de l’appareil.Section du panneau avantLe panneau avant comprend seulement la touche LED de déclenchement, comme illustréci-dessous. La DEL verte pour indiquer l’état d’alimentation. Elle clignotera durant l’accèsaux données.Section du panneau arrièreVous verrez le long du panneau arrière le touche ON/OFF (MARCHE/ARRÊT) et lesconnecteurs d’interface. Reportez-vous à la figure ci-dessous.1. Touche ON/OFF (MARCHE/ARRÊT). Après avoir branché correctement l’adaptateur c.a.au périphérique et dans une prise c.a., vous pouvez appuyer sur la touche ON/OFF10
123(MARCHE/ARRÊT) pour allumer le disque. Pour éteindre le périphérique, réappuyez surla touche ON/OFF (MARCHE/ARRÊT).2. Connecteur d’entrée c.c. Branchez le câble c.c. de votre adaptateur c.a. (inclus) auconnecteur d’entrée c.c.3. Connecteur USB. Utilisez ce connecteur pour brancher le périphérique à votre ordinateur par USB.Quelques mots sur le disque durLe disque dur est fourni préformaté au format FAT32. Ce format permet de fonctionner soitsous Windows soit sous Mac OS.Remarque : 1 Mo 1,000,000 octets/1 Go 1,000,000,000 octets/1 TB 1,000,000,000,000 octets. Une certaine capacité est utilisée pour le logicielpréchargé, le formatage et d’autres fonctions et n’est donc pas disponible pourle stockage de données. Pour cette raison et à cause de différentes méthodesde calcul, votre système d’exploitation pourrait rapporter une capacité commemoins de mégaoctets/gigaoctets/téraoctets.11
Trouver le périphérique sur votre bureauPlacez le périphérique sur un bureau ou une table solide où l’air peut circuler librementautour de l’appareil. Le périphérique est conçu pour reposer à plat sur ses pieds decaoutchouc ou être placé à la verticale au moyen. Dans un cas comme dans l’autre, vousdevez vous assurer de ne pas obstruer les évents d’aération.Logiciel Nero BackItUpLe logiciel Nero BackItUp est inclus sur le disque dur. Double-cliquez sur le dossier Nerodu disque, puis double-cliquez sur le fichier setupx pour démarrer l’installation. La fenêtreNero Installation (Installation de Nero) s’affiche. Suivez l’assistant de configuration pourinstaller le logiciel.Brancher le périphériqueLe branchement de votre périphérique à un ordinateur est extrêmement simple. Suivez lesétapes ci-dessous.1. Branchez l’adaptateur c.a. inclus au périphérique, puis à une prise murale au moyen ducordon d’alimentation inclus.2. Ensuite, appuyez sur la touche ON/OFF (MARCHE/ARRÊT) à l’avant du périphérique.3. Enfin, branchez le câble de données. Branchez le câble USB inclus du port USB sur lepériphérique à un port USB disponible de votre ordinateur.4. Le périphérique sera détecté automatiquement et une nouvelle icône apparaîtra dansMy Computer (Mon ordinateur) (Windows) ou une nouvelle icône apparaîtra sur lebureau (Mac).Selon le système d’exploitation de votre ordinateur et le type d’interface que vous utilisez,les notes suivantes spéciales pourraient s’appliquer : Si vous utilisez un port USB 1.1 de12
votre ordinateur Windows, la note d’avertissement suivante apparaîtra à l’écran :Hi-Speed USB Device plugged into non-Hi-Speed USB hub (Périphérique USBhaute vitesse branché dans un noyau USB non haute vitesse). Ceci n’indique pas unproblème, parce que le périphérique est compatible avec les ports USB 1.1 et USB 2.0.Fermez simplement le message et continuez. Dans ce cas, le périphérique fonctionneraseulement aux vitesses USB 1.1.Débrancher le périphériqueVotre périphérique est « remplaçable à chaud » : il peut être branché et débranché sansque vous deviez redémarrer votre ordinateur. Pour débrancher votre périphérique en touttemps, exécutez simplement les étapes suivantes. Vous pouvez aussi débrancher votredisque dur en tout temps avec votre ordinateur hors tension.Remarque : assurez-vous de bien suivre la procédure en débranchant votreappareil. Débrancher simplement l’appareil sans suivre d’abord les instructionsci-dessous pourrait provoquer des dommages à votre appareil et/ou des pertesde données.Pour les utilisateurs Windows :1. Si vous avez des dossiers ouverts sur votre disque dans l’une ou l’autre application,fermez-les.2. Cliquez sur le bouton Unplug (Débrancher) ou Eject Hardware (Éjecter le matériel)dans la zone de notification.13
3. Sélectionnez votre périphérique dans le menu qui apparaît.4. Après un moment, Windows affichera un message indiquant que votre matériel peutêtre retiré en toute sécurité.Pour les utilisateurs Mac OS :1. Si vous avez des dossiers ouverts sur votre disque dans l’une ou l’autre application,fermez-les.2. Trouvez l’icône de votre appareil sur le bureau et faites-la glisser jusqu’à la poubelleAideSi vous éprouvez des difficultés à installer ou utiliser votre produit Verbatim, visitez le siteWeb de soutien technique principal à www.verbatim.com/support.Conditions de garantie limitéeLes obligations de garantie de la société Verbatim pour ce matériel se limitent auxconditions indiquées ci-dessous :Verbatim garantit son produit contre tout défaut de matériel ou de fabrication dans desconditions normales d’utilisation et d’entretien pendant une période de trois (3) ans àpartir de la date d’achat. La seule obligation de Verbatim relativement aux réclamationsde non-conformité pendant la période de garantie décrite plus haut sera, à sa discrétion,de réparer ou de remplacer tout article d’équipement que Verbatim, à sa seule discrétion,considérera comme étant défectueux.Le client devra obtenir un numéro d’autorisation de retour de marchandise (ReturnMerchandise Authorization - RMA) de Verbatim avant de retourner tout équipement àVerbatim aux termes de la présente garantie en communiquant avec le soutien technique14
(voir www.verbatim.com/support). Le client devra acquitter les frais d’expédition del’équipement retourné à Verbatim pour le service de garantie, et Verbatim acquittera lesfrais de transport pour le retour de l’équipement au client, excluant les frais de douaneou les taxes, s’il y a lieu. Tous les retours devront être accompagnés d’une preuved’achat originale datée et d’une lettre décrivant la nature du problème rencontré. Avantd’expédier votre produit pour un service de garantie, vous êtes responsable de réaliserune sauvegarde de toutes les données, y compris les programmes logiciels. Vous serezresponsable de réinstaller la totalité des données. La récupération de données n’est pasincluse dans le service de garantie et Verbatim n’est pas responsable des données quipourraient être perdues ou endommagées durant le transport ou une réparation. Verbatimdécline toute responsabilité dans le cas d’articles retournés sans RMA ou mal emballés.L’équipement de remplacement sera neuf ou comme neuf au niveau de la performanceet sera garanti pendant le reste de la période de garantie de l’équipement non conforme.Tout équipement remplacé deviendra la propriété de Verbatim. Toutes les réclamationsde défauts non présentées durant la période de garantie seront considérées commeabandonnées.Les obligations de garantie de Verbatim aux termes de la présente section dépendentexpressément du respect des conditions qui suivent : (i.) les produits doivent être installés,utilisés et entretenus correctement en tout temps par le client; (ii.) les produits nedoivent pas être soumis à des contraintes mécaniques inhabituelles ou à des conditionsenvironnementales ou électriques inhabituelles ou à d’autres forces majeures; (iii.) lesproduits ne doivent pas être soumis à une mauvaise utilisation, à un accident ou à uneinstallation/désinstallation non autorisée par le client ou par un tiers; (iv.) les produitsne doivent pas être modifiés ou altérés d’une manière non autorisée, sauf approbationécrite ou intervention de Verbatim; et (v.) le client doit installer rapidement toutes lesmises à jour de produits publiées pour ces produits par Verbatim pendant la duréede la garantie. Verbatim ne garantit pas que les produits fonctionneront dans toutecombinaison d’utilisation spécifique qui pourrait être choisie par le client ni que lesproduits fonctionneront sans interruption ou sans erreur ni que tous les défauts ou non-15
conformités seront corrigés. En outre, Verbatim n’aura aucune obligation de garantie pourtoute défaillance de produits qui ne se conforment pas aux spécifications de produitsapplicables découlant de la combinaison d’un produit avec un matériel et/ou un logicielnon fourni par Verbatim. S’il est déterminé qu’un produit rapporté comme étant défectueuxou non conforme par le client durant la période de garantie n’est pas défectueux ou nonconforme, Verbatim pourra, à sa discrétion, facturer le client pour tout travail fourni et pourtoutes dépenses encourues par Verbatim par rapport à cette détermination, aux tarifs deVerbatim en vigueur.Verbatim décline toute responsabilité pour tout dommage ou toute perte de programmes,données ou autres renseignements sauvegardés sur tout support dans le matériel Verbatimou tout produit extérieur à Verbatim ou toute pièce non couverte par la présente garantie.La récupération ou la réinstallation des programmes, données ou autres renseignementsn’est pas couverte aux termes de la présente garantie limitée.Verbatim décline toute responsabilité dans le cas d’une vente non autorisée ou d’unereprésentation trompeuse par des tiers revendeurs non autorisés. Les garanties Verbatimne sont pas cessibles avec la propriété. Les produits achetés lors d’encans, ventesdébarras, marchés aux puces ou à titre d’appareils de démonstration peuvent ne pas êtrecouverts aux termes de la présente garantie Verbatim.LES GARANTIES DE VERBATIM ET LES RECOURS DU CLIENT PRÉSENTÉS DANS LAPRÉSENTE SECTION SONT EXCLUSIFS ET SONT OFFERTS PAR VERBATIM ET ACCEPTÉSPAR LE CLIENT EN REMPLACEMENT DE TOUTES GARANTIES, EXPRESSES OUIMPLICITES, Y COMPRIS, MAIS SANS S’Y LIMITER, TOUTES GARANTIES DE QUALITÉMARCHANDE OU D’APTITUDE À UN USAGE PARTICULIER, TOUTES GARANTIES AUTRESDE CE GENRE ÉTANT RÉFUTÉES EXPRESSÉMENT ET SANS ÉQUIVOQUE PAR VERBATIMET ABANDONNÉES PAR LE CLIENT.VERBATIM DÉCLINE TOUTE RESPONSABILITÉ EN CAS DE DOMMAGES DIRECTS,SPÉCIAUX, INDIRECTS OU CONSÉCUTIFS DÉCOULANT D’UNE RUPTURE DE GARANTIEOU DE CONDITION, Y COMPRIS LES FRAIS DE RÉCUPÉRATION OU DE REPRODUCTIONDE TOUT PROGRAMME OU DE TOUTES DONNÉES STOCKÉS DANS OU UTILISÉS AVEC16
LE PRODUIT VERBATIM. VERBATIM NE FAIT PAS SPÉCIFIQUEMENT VALOIR QU’ELLEPOURRA RÉPARER TOUT PRODUIT AUX TERMES DE LA PRÉSENTE GARANTIE LIMITÉE OUÉCHANGER LE PRODUIT SANS RISQUE OU PERTE DE PROGRAMMES OU DE DONNÉESDroitsCopyright 2009 Verbatim Americas, LLC. Tous droits réservés. Toutes les autresmarques et tous les autres noms de produits présentés à titre de référence dans leprésent document sont la propriété de leurs détenteurs respectifs.Conformité FCCCet équipement a été testé et jugé conforme aux limites prévues pour un dispositifnumérique de classe B, conformément à la partie 15 des règles de la FCC. Ces limitessont conçues pour fournir une protection adéquate contre une interférence préjudiciabledans une installation résidentielle. Cet équipement produit, utilise et peut émettre uneradiofréquence et, s’il n’est pas installé et utilisé conformément aux instructions, peutcauser de l’interférence préjudiciable aux communications radio. Il n’existe toutefoisaucune garantie qu’il n’y aura pas d’interférence radio dans une installation particulière.Si cet équipement provoque de l’interférence préjudiciable à la réception de programmesradio ou télévision, ce que l’on peut déterminer en allumant et en éteignant l’équipement,l’utilisateur devra essayer de corriger l’interférence comme suit : Réorienter ou déplacer l’antenne de réception.Augmenter la distance entre l’équipement et le récepteur.Brancher l’équipement dans une prise sur un circuit différent de celui du récepteur.Consulter le concessionnaire ou obtenir de l’aide auprès d’un technicienradio/télévision expérimenté.17
IntroducciónAntes de comenzar a utilizar la unidad hay algunos puntos importantes que debe sabersobre su producto nuevo.Controles, conectores e indicadoresPrimero familiarícese con las características de la unidad.Área del panel frontalEl panel frontal contiene sólo el botón LED que activa, como se ilustra debajo. La luz LEDde color verde se encenderá para indicar el estado de encendido. La luz LED parpadearácuando se acceda a los datos.Área del panel traseroA lo largo del panel trasero encontrará los conectores ON/OFF botón e interfaz. Consultela figura que se encuentra debajo.1. Botón de ON/OFF (ENCENDIDO/APAGADO). Una vez que el adaptador de CA se hayaconectado apropiadamente a la unidad y a un tomacorriente de CA, puede presionarel botón de ON/OFF (ENCENDIDO/APAGADO) para encender la unidad. Para apagar la18
123unidad presione nuevamente el botón de ON/OFF (ENCENDIDO/APAGADO).2. Conector de entrada de CC. Conecte el cable de CC del adaptador de CA incluido en elconector de entrada de CC.3. Conector USB Utilice este conector para conectar la unidad a su computadora con uncable USB.Acerca del disco duroEl disco duro viene preformateado en formato FAT32. Este formato permite su utilizacióncon Windows o Mac OS.Nota: 1 MB 1.000.000 bytes/1 GB 1.000.000.000 bytes/1 TB 1.000.000.000.000bytes. Parte de la capacidad se utiliza para el software previamente cargado,el formato y otras funciones, por lo tanto no está disponible para almacenardatos. Como resultado y debido a los diferentes métodos de cálculo, su sistemaoperativo puede informar una capacidad de menos megabytes/gigabytes/terabytes.19
Ubicación de la u
Nero BackItUp Software Nero BackItUp back up software is included on the hard drive. Double click the Nero folder on the drive and then double click the setupx file to start installation. The Nero Installation window will appear. Follow the set up wizard to install the software. Connecting To Your Computer
